

Creation of task type
The tasks in Deepser as mentioned in the previous article are divided into categories.
In this article, we are going to analyze the procedure necessary to create a new type.
CREATING A TASK TYPOLOGY
To create a type of task, you will need to go to the menu: System->Tools->Task->Task Type.
At this point, the following screen will open:

Now you will need to click on the “Add Type” button.
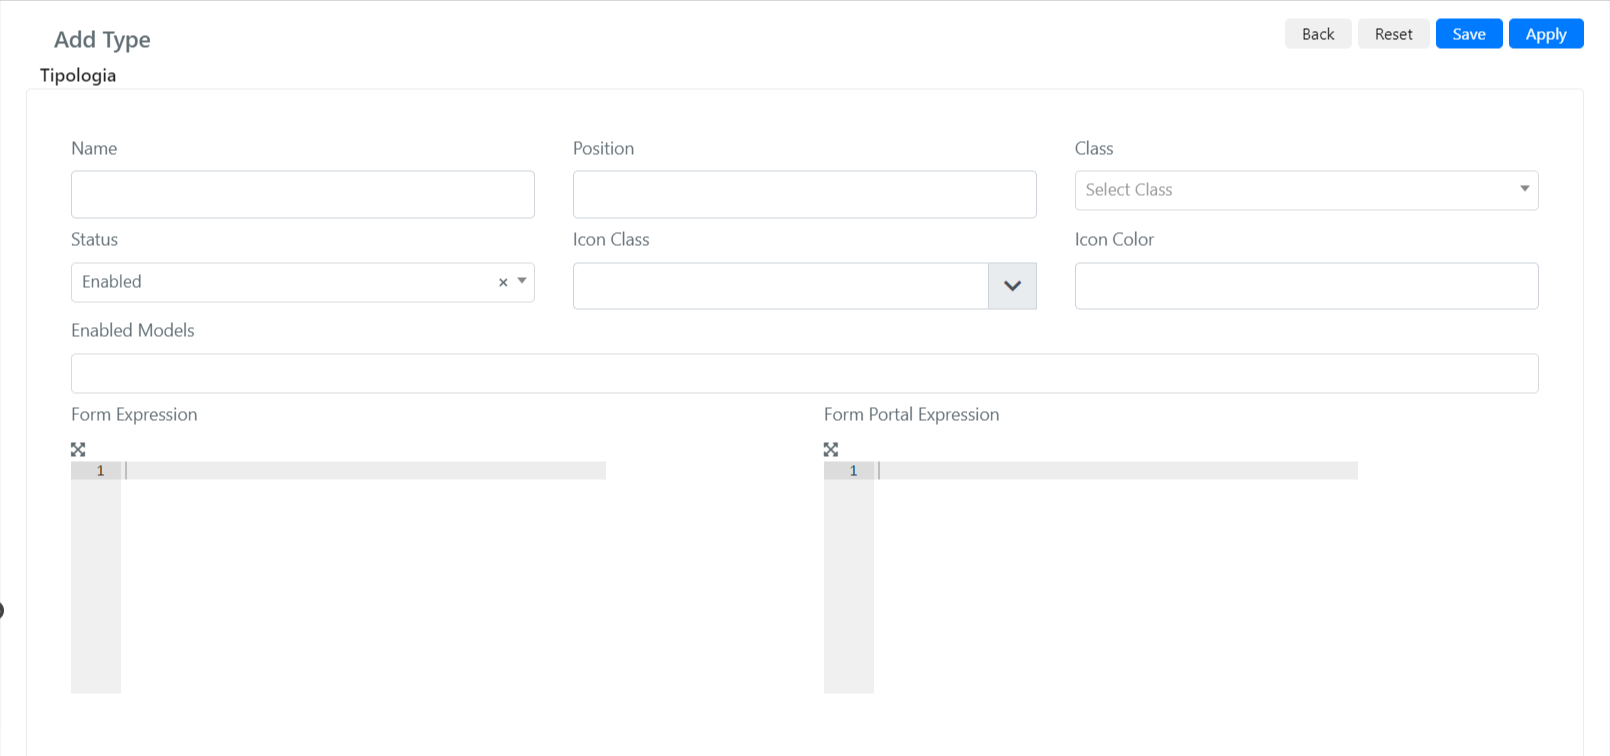
Now the following screen will open:

Below are the fields and their value:
| Field | Description |
| Name | This field represent the name of the task type. |
| Position | This field represent the position that this type will have in the list of tasks. |
| Class | This field represents the class. There are 3 types of tasks: Task, Contact, Phone. For a generic task, we recommend the task class. |
| Status | This field set the status enabled or disabled. |
| Icon Class | This field allows you to define the class icon of this type of task. |
| Icon Color | This field allows you to define the color icon of this type of task. |
| Enabled Models | This field allows you to define on which Deepser entities these tasks will be visible (and associated). |
| Form Expression | This field allows you to define the form that will open when you click the button to create a new task. Note that if this field is empty, the form for creating a new task will also be empty. For the configuration of this field you can refer to the course Developer task available at this link https://docs.deepser.com/courses/deeptask-advanced/lessons/task/topic/form-configuration-of-task-types/ |
| Form Portal Expression | This field allows you to define the form that will open when you click the button to create a new task in the user portal. Note that if this field is empty, the form for creating a new task will also be empty. For the configuration of this field you can refer to the course Developer task available at this link (as above) |
Once you have filled in all the fields, you will need to click on the “Save” or “Apply” button.
Example creating a Task class
In this example, we are going to create a task class.
Use “Font Awesome” for the icon class.
Note that this example will produce a task class without a form expression.
So,the form, that opens when you click the task creation button, will be empty.
To configure the form, please refer to the corresponding guide in the Task Developer course accessible at this address (as above).
To create a type of task you will need to go to the menu: System -> Tools -> Task -> Task Type.
At this point, the following screen will open:

Now you will need to click on the “Add Type” button.
Now the following screen will open:
In the “Name” field, we are going to enter “Demo Task”.
We can leave empty the “Position” field.
Now, let’s configure the “Class” field as “Task”.
Now set in the “Icon Class” field the value “fab fa-centercode”.
In the “icon Color” field, we now enter the desired color, in our case”#7FFFB7″.
Finally, select “Deep Service – Operation” in the “Enabled Modules “field to create task inside the Service Module.
As the last step, we must click on the “Save” or “Apply” button.
At this point, the task class will be saved and will become visible inside tickets.
