Create a Group
Groups in Deepser let you organize users into teams for managing record assignment, visibility, and permissions. This guide explains how to create a new group through the Deepser Backend. Only users with the Administrator role can access the group management menu.
Create a New Group
To create a new group, follow these steps:
- Go to System > Permissions > Groups.
The main groups grid will be displayed.
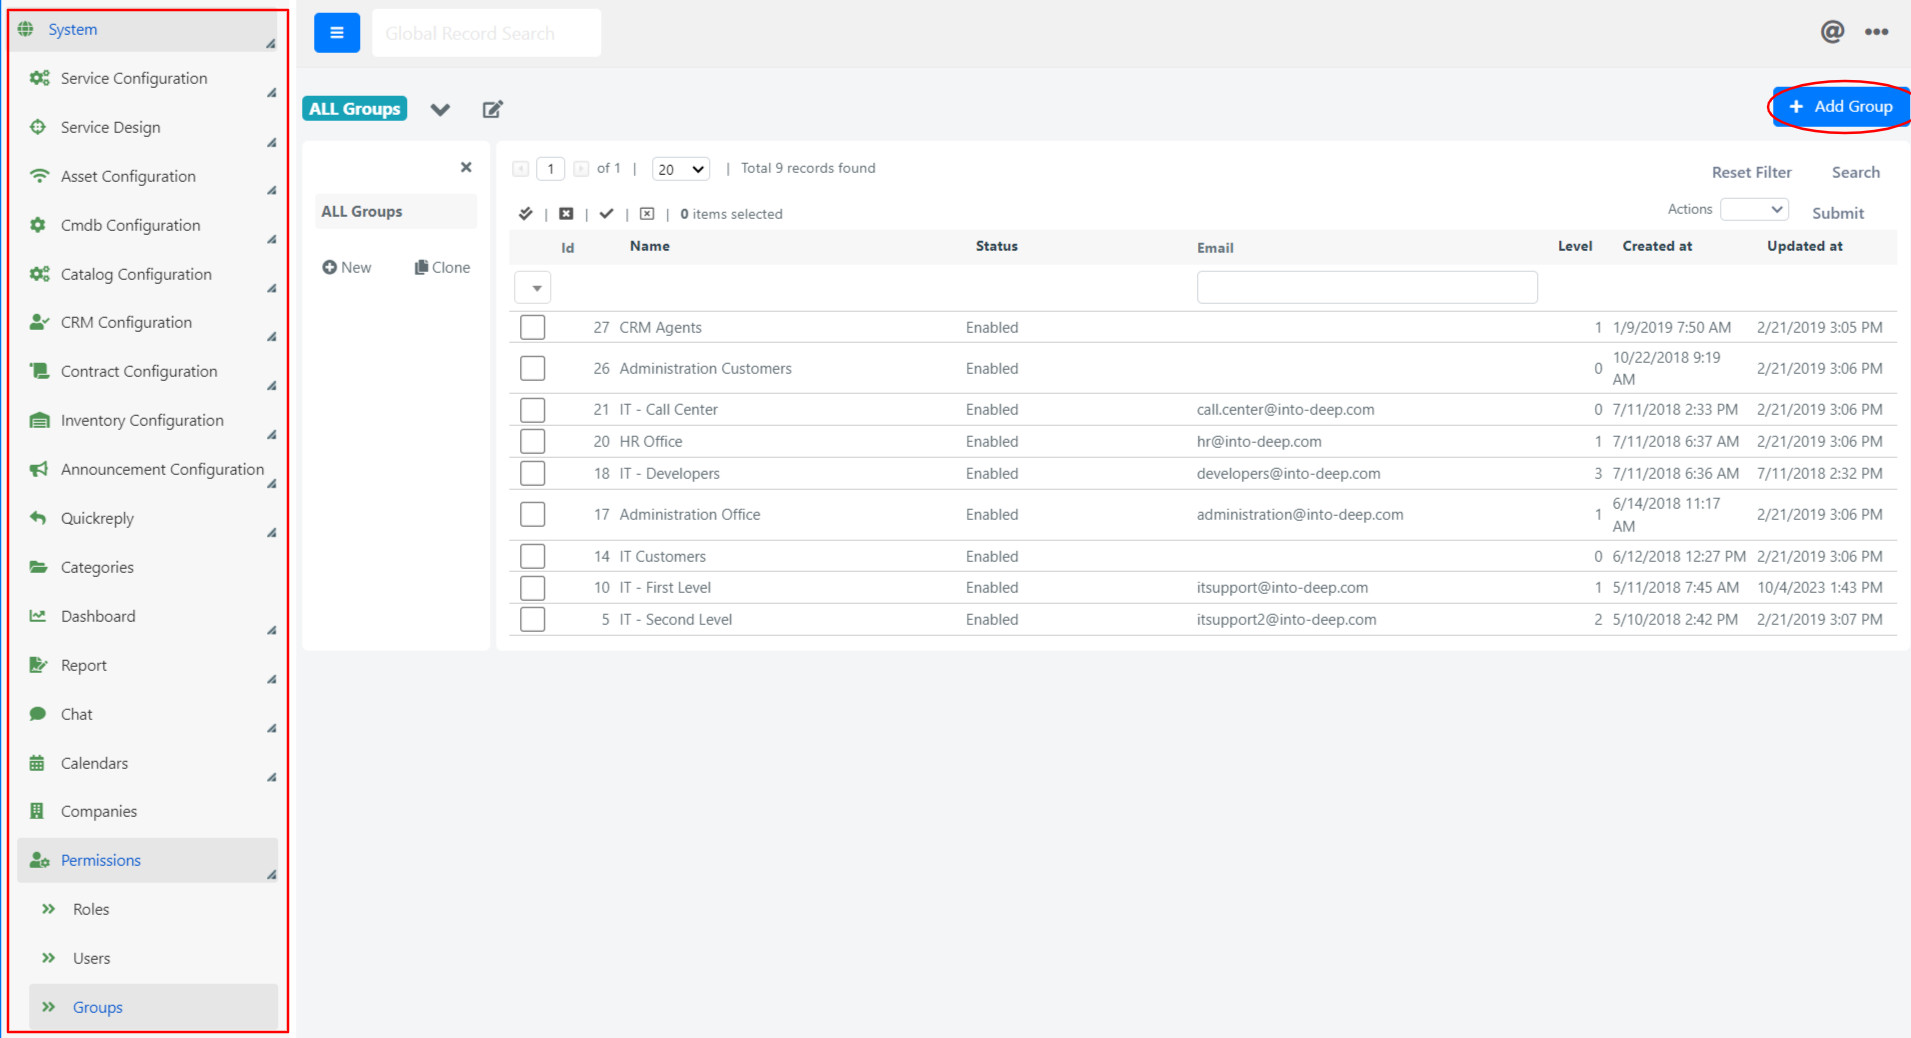
- Click the + Add Group button (top right).
The group creation form will open:
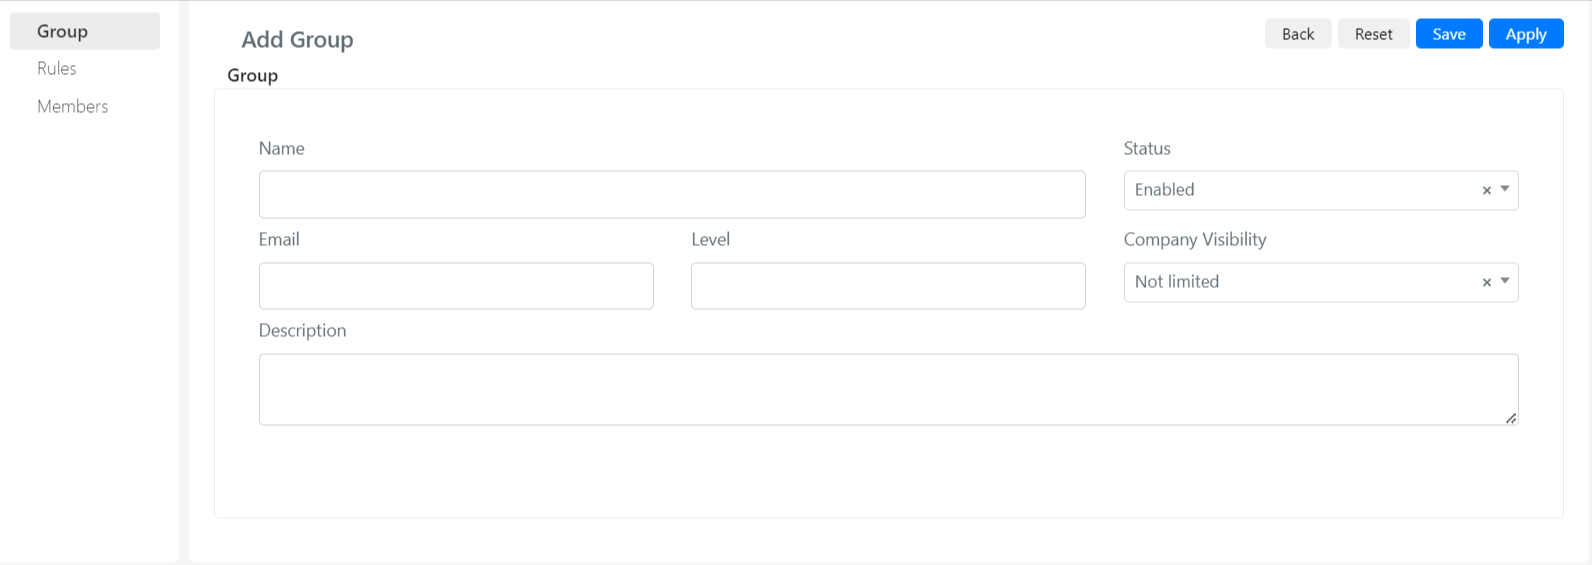
- Fill in the fields described below and click Save or Apply.
Field Descriptions
| Field | Meaning |
|---|---|
| Name | The name of the group, displayed inside the select-boxes and grids in the system. |
| Status | Indicates whether the group is active in the system. |
| The group email (if any), used to send automatic notifications to the email box dedicated to the team. | |
| Level | The level of support of the group. This is a useful number for Service Desk measurements and automation. For example, if you want to measure the working time of all top-level support teams, set level 1 for all top-level support groups in your organization. |
| Company Visibility | When enabled, a user who belongs to this group sees only the data of their company or sub-companies. For users with the "User" type, this field is bypassed because they already see only their own company's data. Note: This field is also present in the individual user form. The system first applies the setting at the user level; if it is not set, it applies the setting at the group level. |
| Description | The description of the group. Use this for internal notes on the configuration or purpose of the group. |
For example, to create a "Level 1 Support" group, enter the name, set the Level to 1, optionally add a group email for notifications, and set the Status to "Active."