Create a New User
A user in Deepser is an individual who interacts with the system, utilizing its features and functionalities. You can create users from the system menu, directly from a Service Operation, or from CRM Contacts.
Create a User from the System Menu
To create a new user in Deepser, follow these steps:
- Go to the menu System > Permissions > Users.
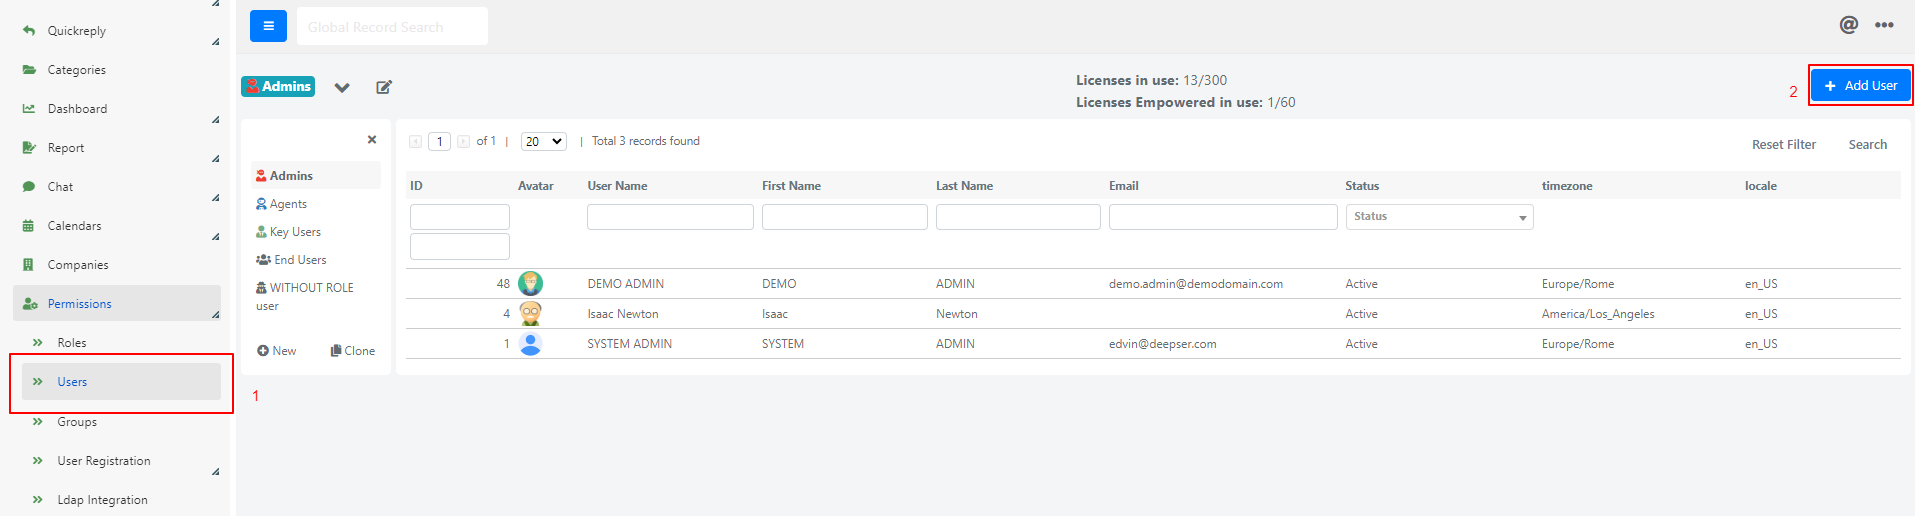
- Click on the Add User button.
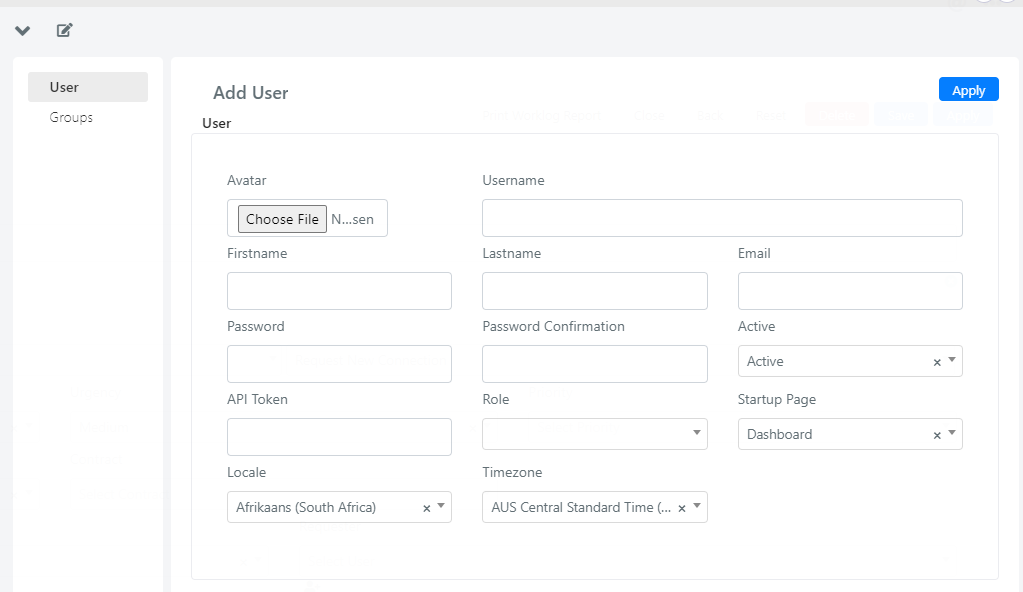
The following screen will open:
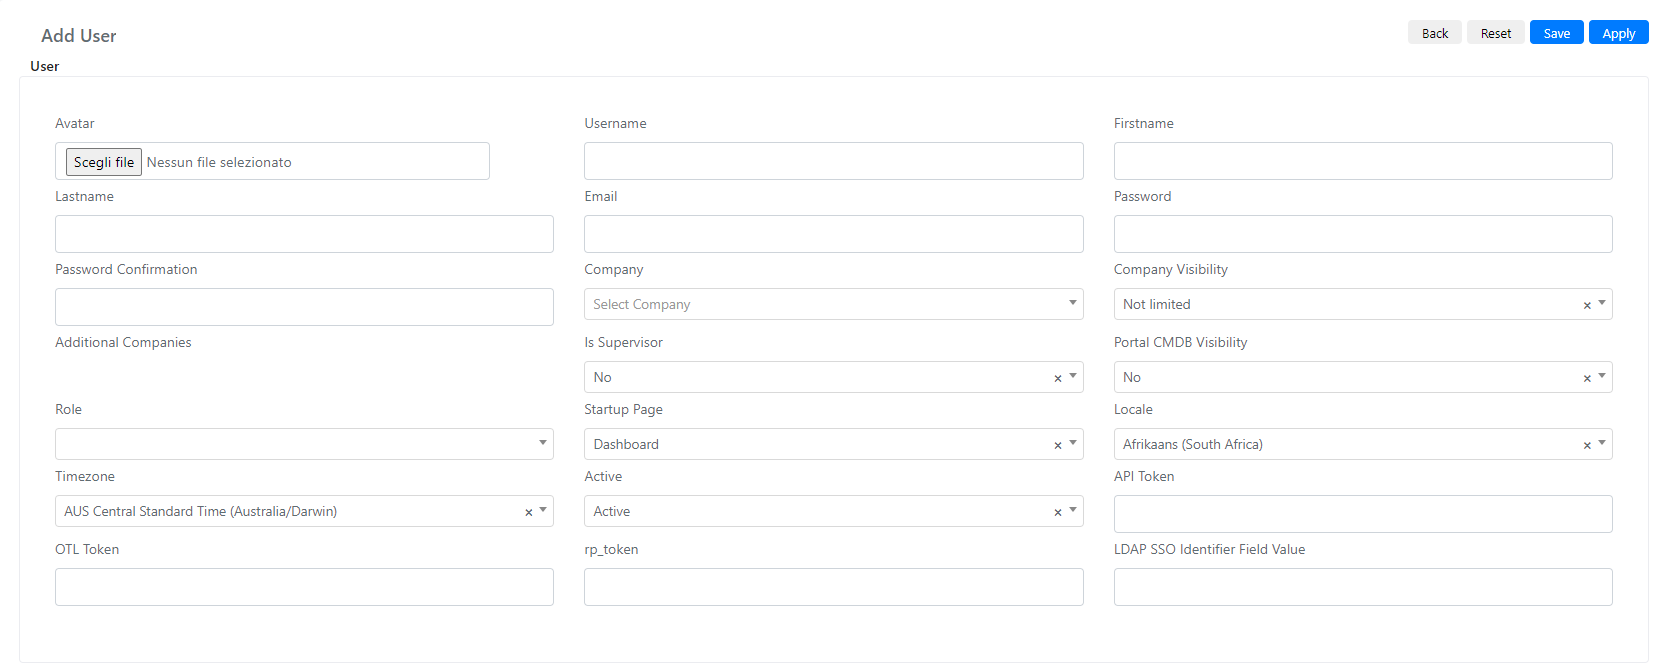
- Fill in the fields described in the table below and click Apply or Save.
| Field | Description |
|---|---|
| Avatar | Profile picture of the user. |
| Username | Username of the user. This is used to log in, is mandatory, and must be unique within Deepser. |
| Firstname | The first name of the user. This is a required field. |
| Lastname | The last name of the user. |
| The email address of the user. | |
| Password | Password of the user. This field always appears blank because the password is not stored in a reversible format. The field remains empty by default even if the user has a password set, except when changing the password. When you modify this field and save, Deepser automatically updates the stored password. |
| Password Confirmation | Confirm the user's password. Like the previous field, this is also empty except when changing the password. |
| Role | The role of the user. Depending on the role, the user will have different visibility across the various parts of the product. For example, the Users role by default sees only the User Portal. For details on roles, see Visibility Management and Roles. |
| Active | Indicates whether the user is authorized to access Deepser. If the value is "Active," the user can log in. If the value is "Inactive," the user cannot access Deepser. |
| Startup Page | The default page to which the user is redirected after logging in. |
| Local | The language in which the user sees the Deepser interface. |
| Timezone | The time zone associated with the user. Set the correct time zone so that Deepser can properly format dates in notifications and date fields. |
| Company | The company the user belongs to. This field is very important because companies are a key element in visibility management. For details, see Companies Overview. |
| Additional Companies | Indicates which other companies' data the user can access. For details, see Additional Companies. This field is selectable only after the user has been saved at least once. |
| Is Supervisor | Indicates whether the user is a company supervisor. A company supervisor can view and modify Service Operations created by users in their company. |
| Company Visibility | Indicates whether the user has limited visibility to company data. |
| Portal CMDB Visibility | Indicates whether the user can see the CMDB in the User Portal. |
| OTL Token | If passed as a parameter (token) in the URL query string, this allows access to Deepser without logging in. Direct access by token is disabled by default for security reasons. The token is valid for a single use and is automatically reset by the system to prevent data theft. |
| rp_token | Used to reset a user's login credentials. This is a system field with no operational use. |
| LDAP SSO Identifier Field Value | A system field used to map the correspondence between AD users and SSO users. |
| API Token | The Bearer Token for accessing the Deepser API (Application Programming Interface). |
| Empowered | Indicates whether the user is an Empowered user. Empowered users are end users who are not limited to seeing only Service Operations for which they are requesters or whose company is the requesting company. |
Add the User Directly to a Group
After you have created the user, you can add them directly to a group:
- Go to the Groups tab and click Add.
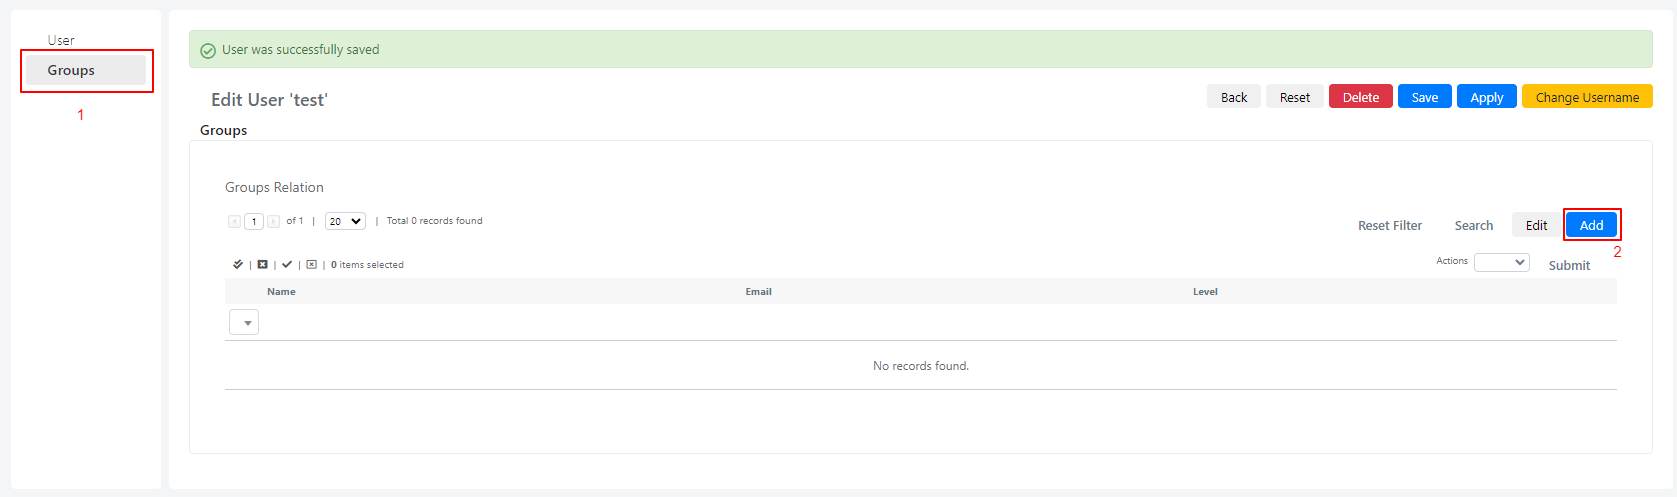
- In the screen that opens, check the group(s) you want the user to be added to, select the Add action, and then click Submit.
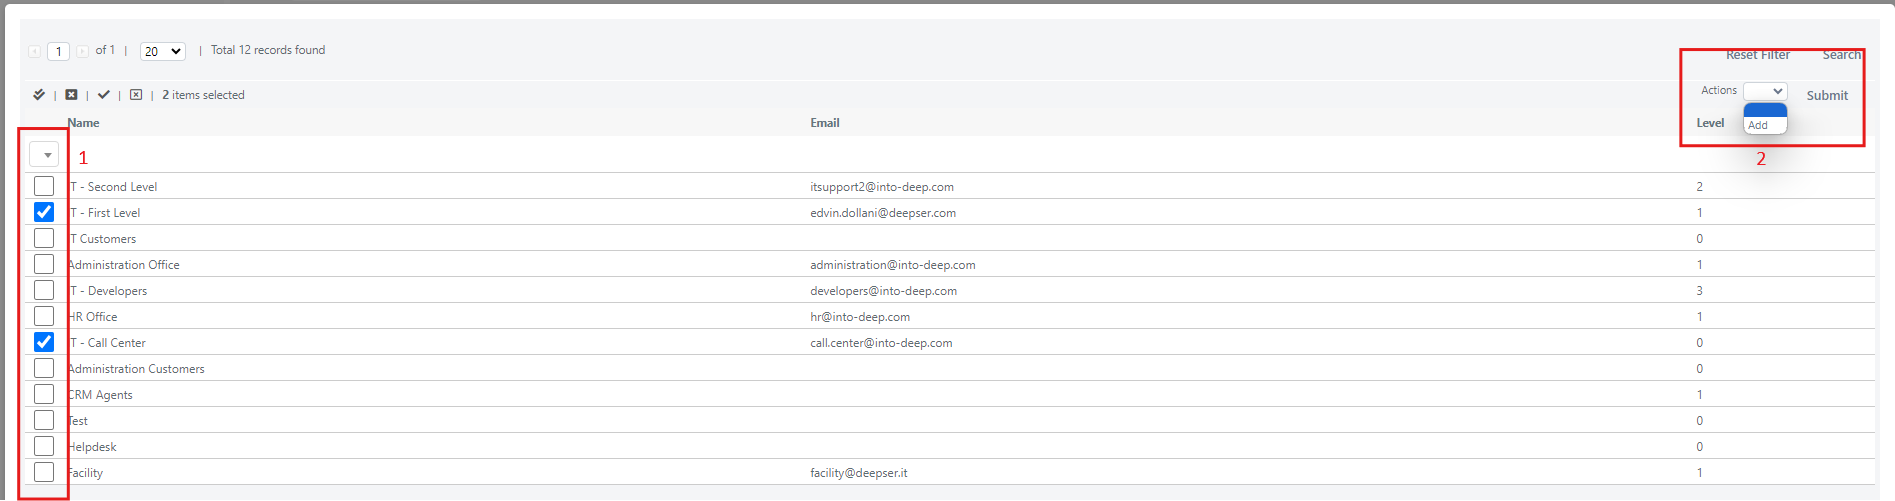
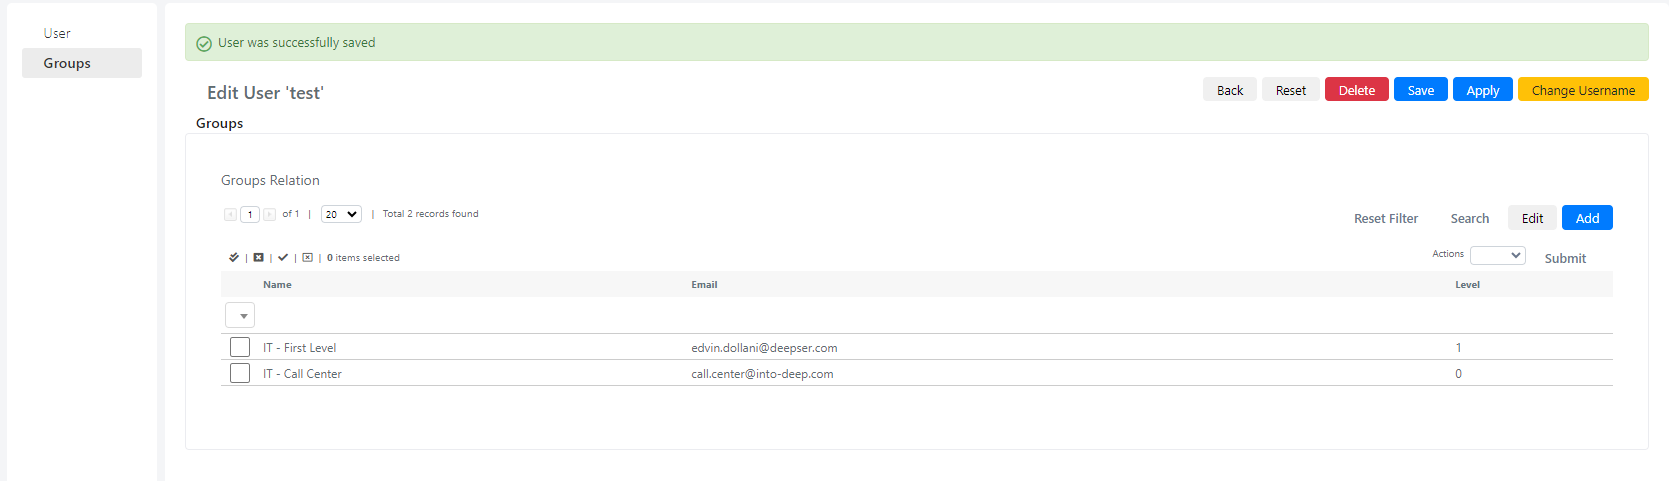
- Close the window. The groups the user belongs to will be shown in the Groups tab.
Create a User from a Service Operation
You can also create a user directly from a Service Operation:
- Go to the Service module and open a Service Operation.
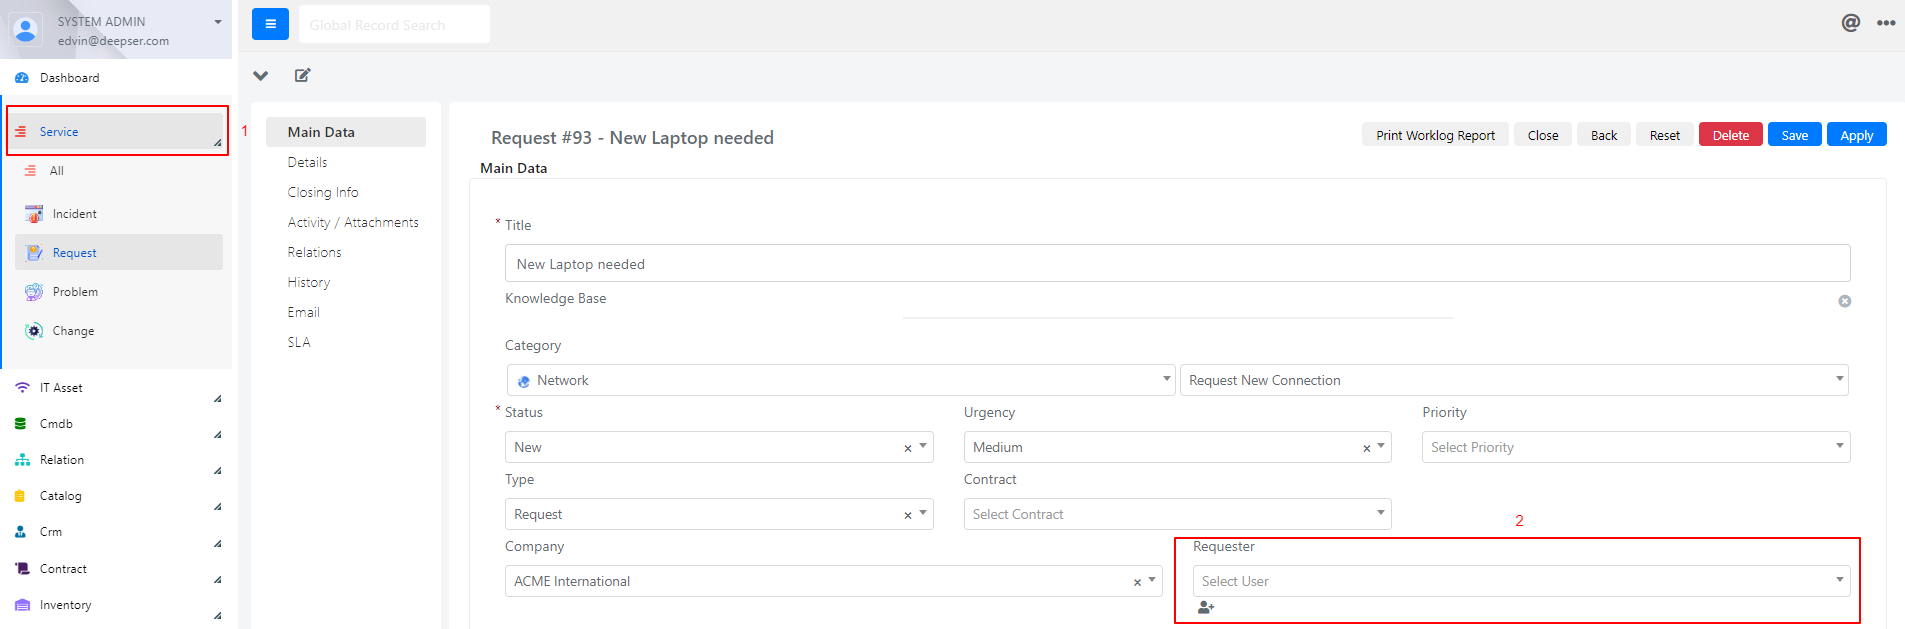
- Click on the user+ icon at the Requester field. A window will pop up where you can fill out the necessary fields explained in the table above.
Another case is when a Service Operation is created with an email but without a user:
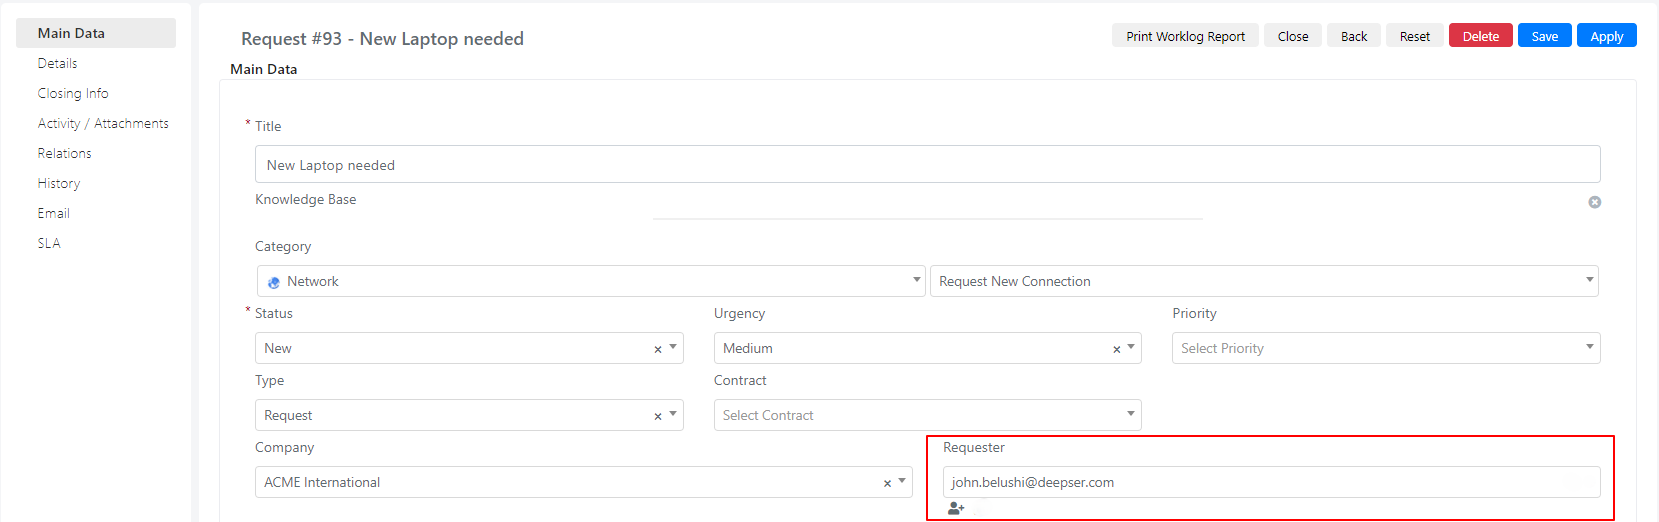
Click on the user+ icon at the Requester field. In the window that pops up, the email field is automatically filled for you, so you just need to complete the remaining fields.
On user creation, the default role is always "Users" (in the "Role" field), which identifies an end user. Remember to change the role according to your needs. See Visibility Management and Roles for available roles.
Create a User from CRM Contacts
To create a user from CRM Contacts, follow these steps:
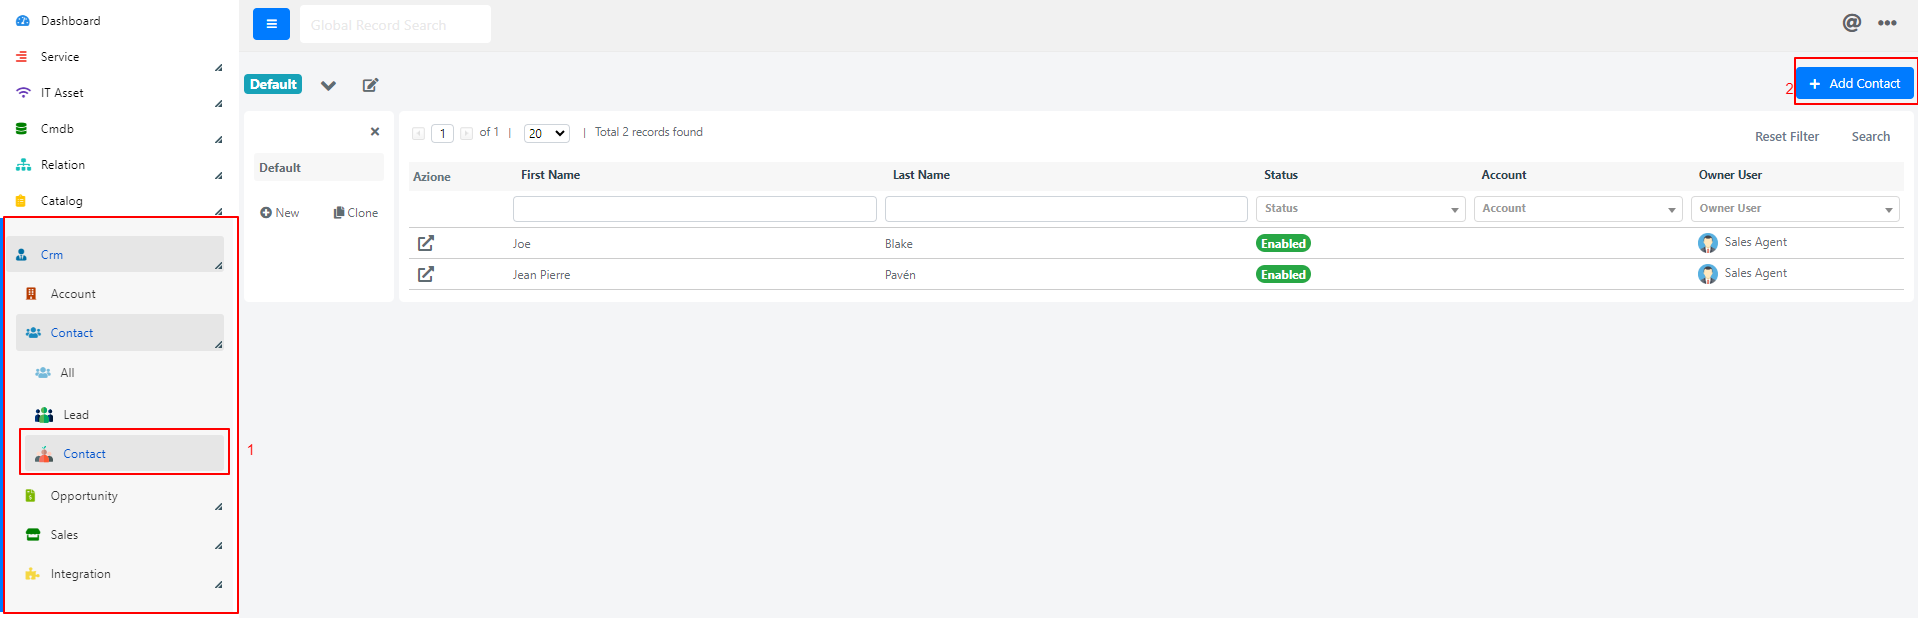
- Go to the CRM module and then Contact. Click on the Add Contact button in the top right of the screen.
- Fill out the Contact Data fields.
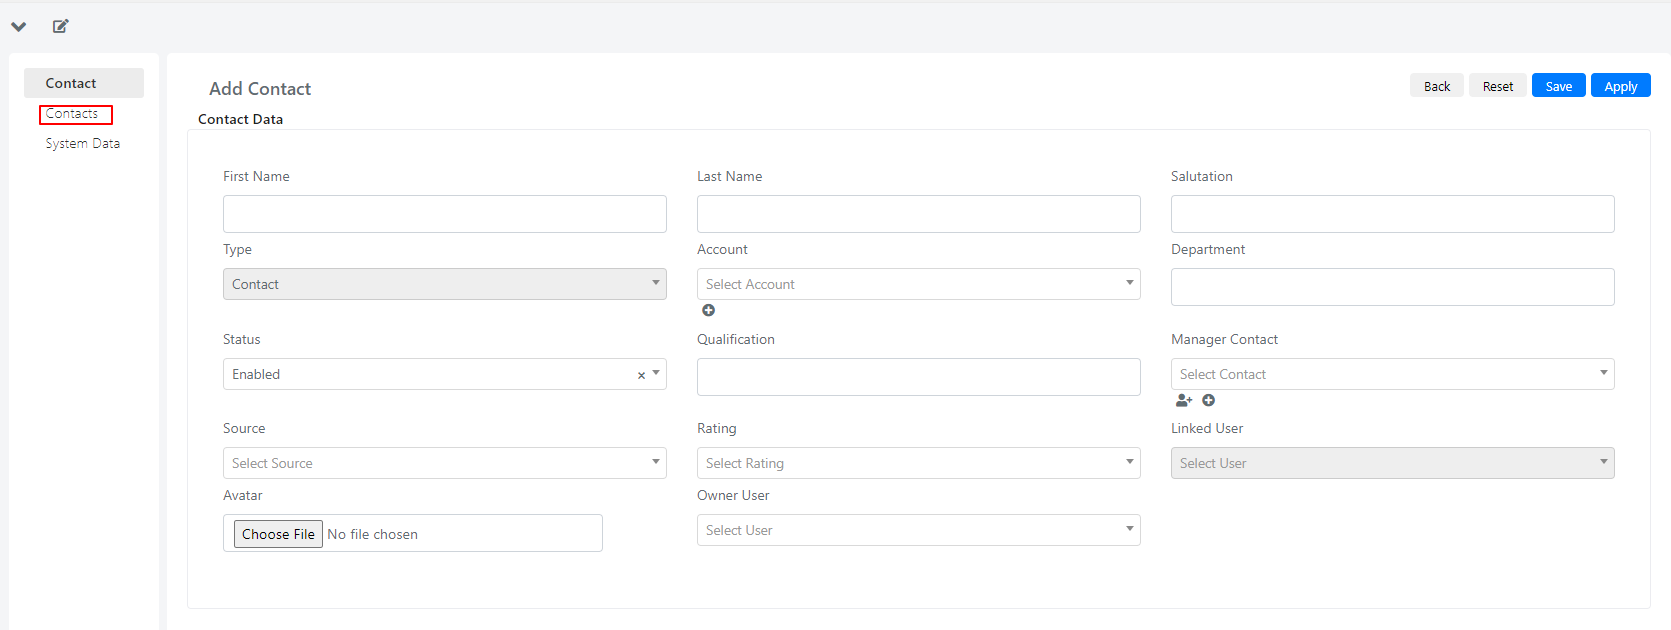
| Field | Description |
|---|---|
| Name | Name of the contact |
| Surname | Surname of the contact |
| Salutation | The greeting used to address the contact (e.g., Mr. or Ms.) |
| State | Enable or disable the account |
| Department | The department to which the contact belongs |
| Qualification | The status of the contact |
| Manager | Specify a contact manager |
| Source | The source from which the lead was generated |
| Rating | Customer satisfaction level |
| Associate user | Associate the contact with a system user in Deepser |
| Task | Task related to the contact |
- Complete the information in the Contacts tab and fill out the fields.
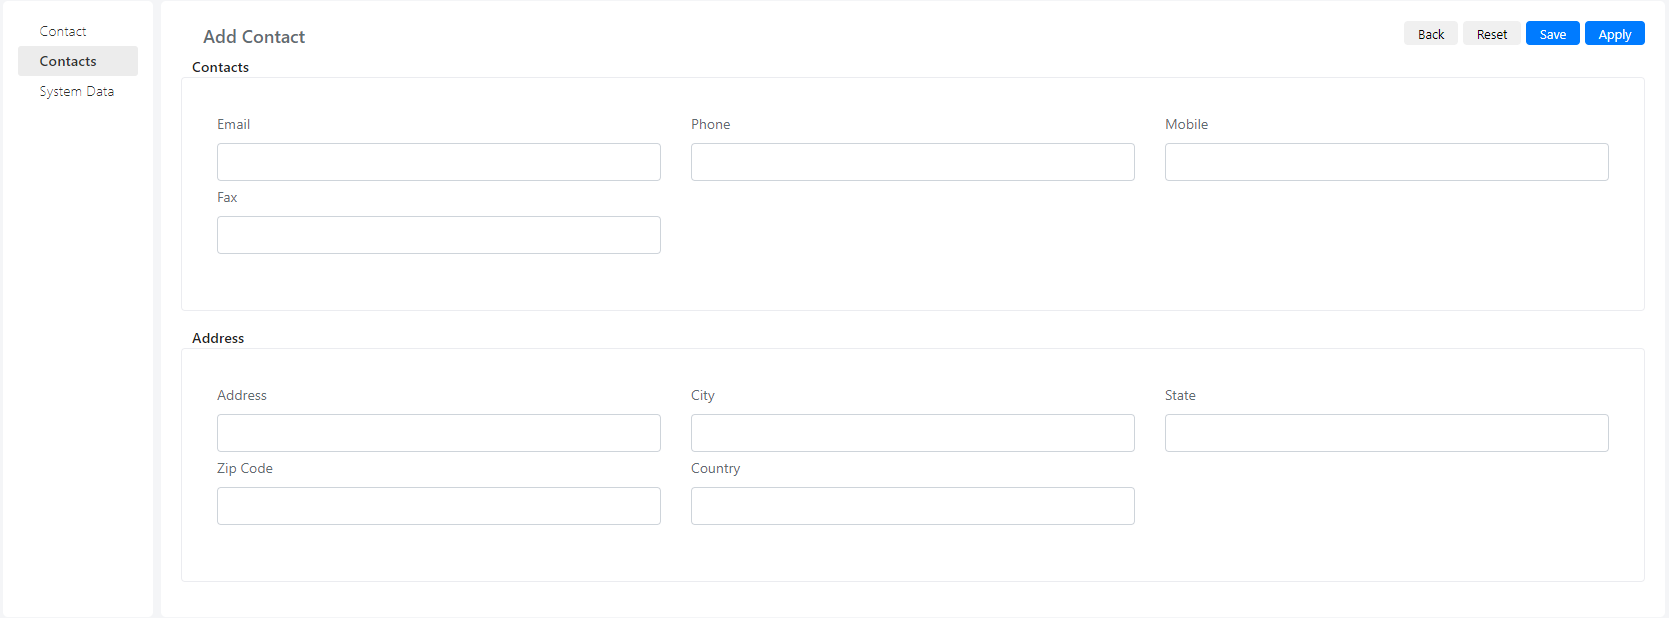
| Field | Description |
|---|---|
| Email of the contact | |
| Telephone | Landline phone number |
| Mobile phone | Mobile phone number |
| Fax | Fax of the contact |
| Address | Address of the contact |
| City | City of the contact |
| Province | Province of the contact |
| CAP | Postal code of the contact |
| State | State |
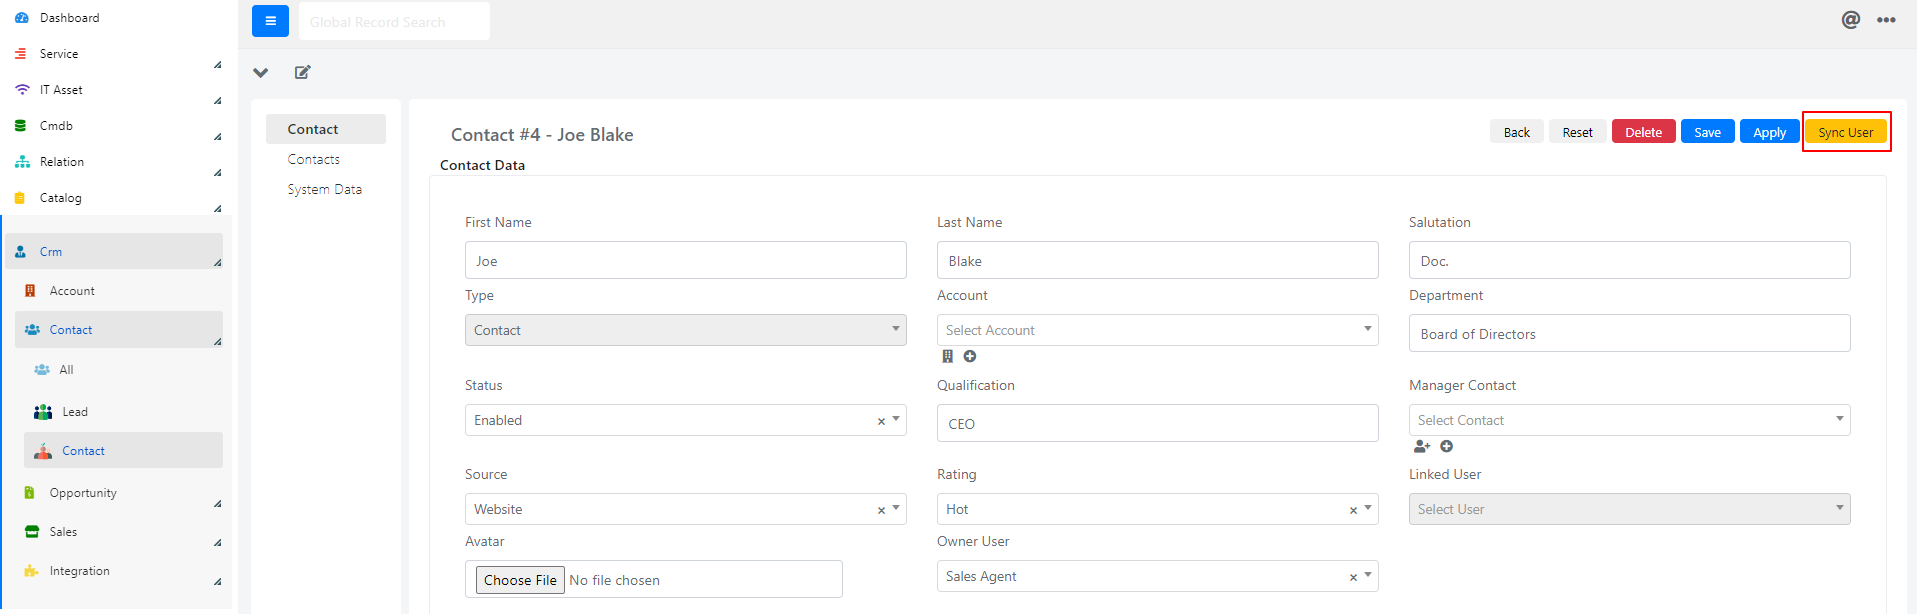
- After saving the newly created contact, go inside the contact and click on Sync User in the top right of the screen to create the corresponding user.