Integrate Outlook Calendar with Deepser
This guide walks you through the complete process of integrating Outlook Calendar with Deepser. You will configure an OAuth client in Deepser, register an application in Azure, and set up calendar synchronization between the two platforms.
Create an OAuth Client in Deepser
- In the Deepser Backend, navigate to System > Tools > OAuth > Client.
- Add a new Client with the following values:
Name: You can choose your custom name
Provider: Azure
Type: Azure App Permission
Then you can proceed with saving.
After saving, Deepser will provide the "Redirect URI" that you need to copy and use for configuration on Azure Admin Portal.

Register an App on Azure
After completing the first step of configuration on Deepser, go to the Azure portal and sign in with your Office 365 account.
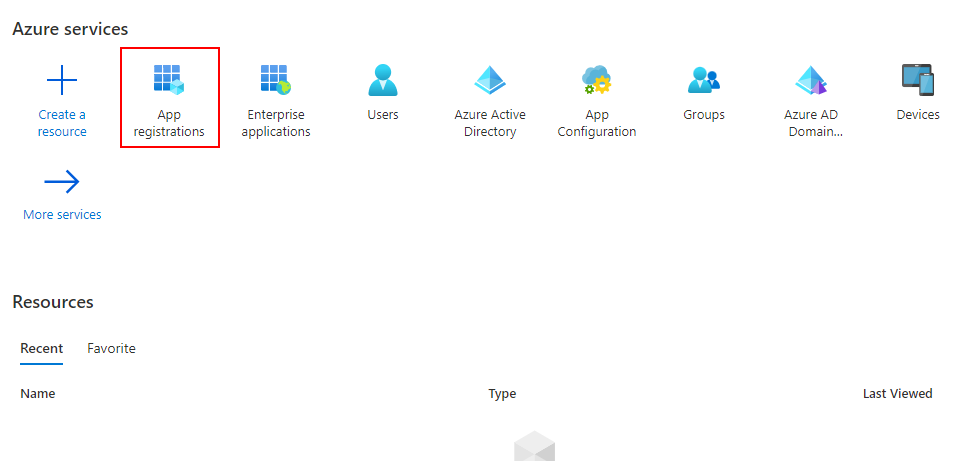
Once logged in, click on App Registrations.
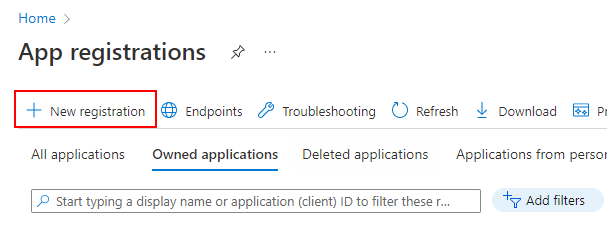
Then click New Registration.
On App Registration, enter the following information:
- Name for the new App,
- Supported Account as "Accounts in any organizational directory (Any Microsoft Entra ID tenant – Multitenant) and personal Microsoft accounts (e.g. Skype, Xbox)"
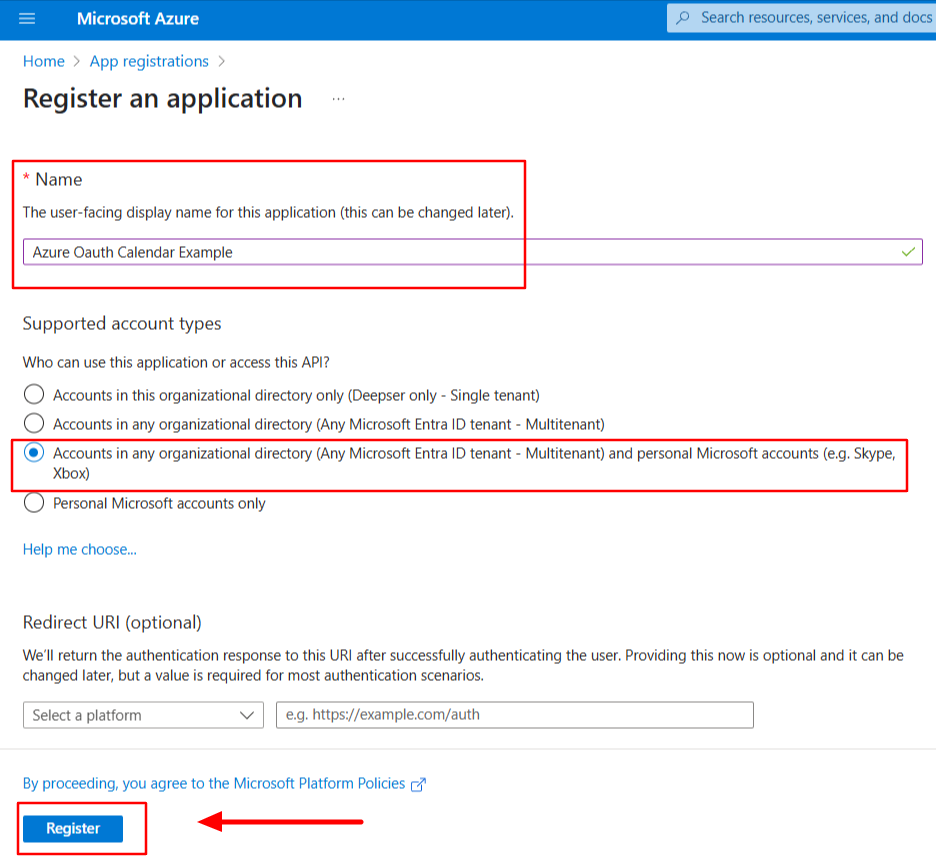
Click the "Register" button to proceed.
App Certificate and Secret
Under "Manage > Certificates & secrets" in the menu, you can create a secret. During the configuration process, you'll need to set its expiration time and copy its value, which will be used later to complete the configuration in Deepser.
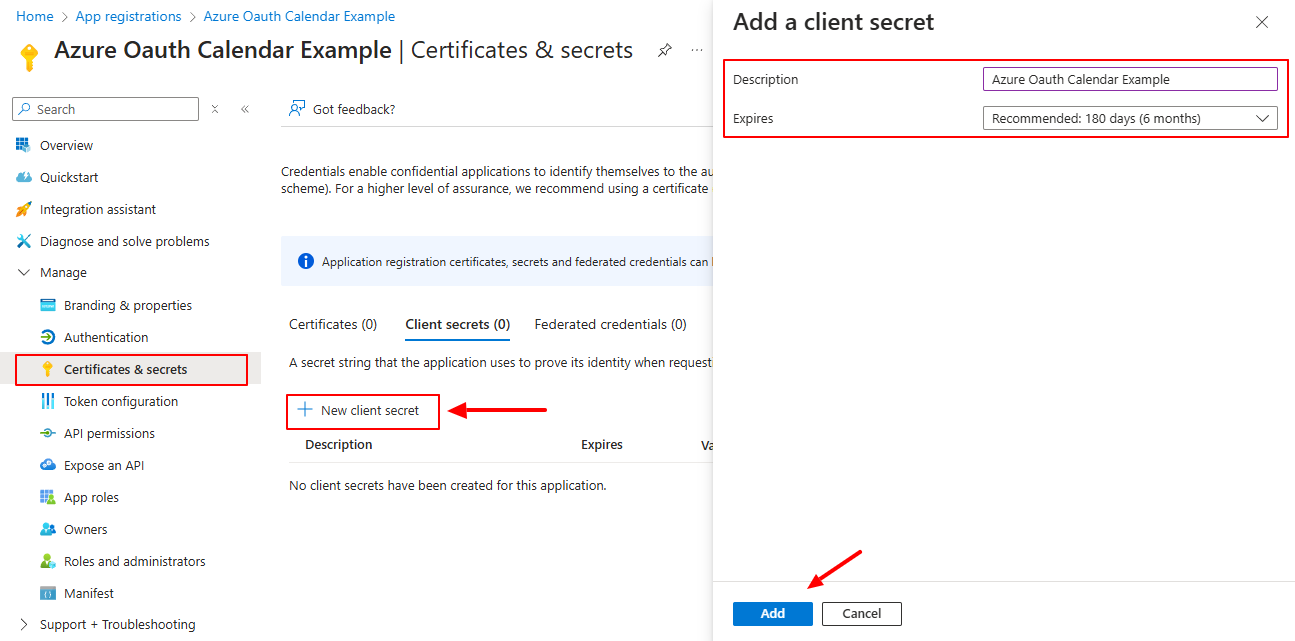
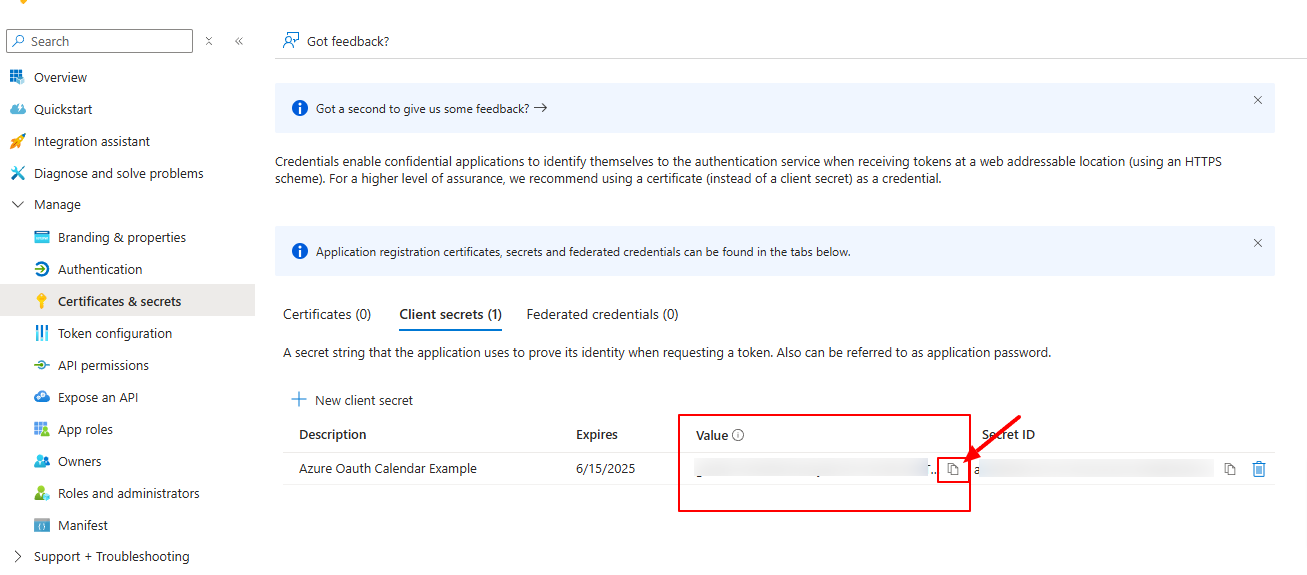
The copied secret value will need to be entered into the "Client Secret" field on the OAuth client record in Deepser:
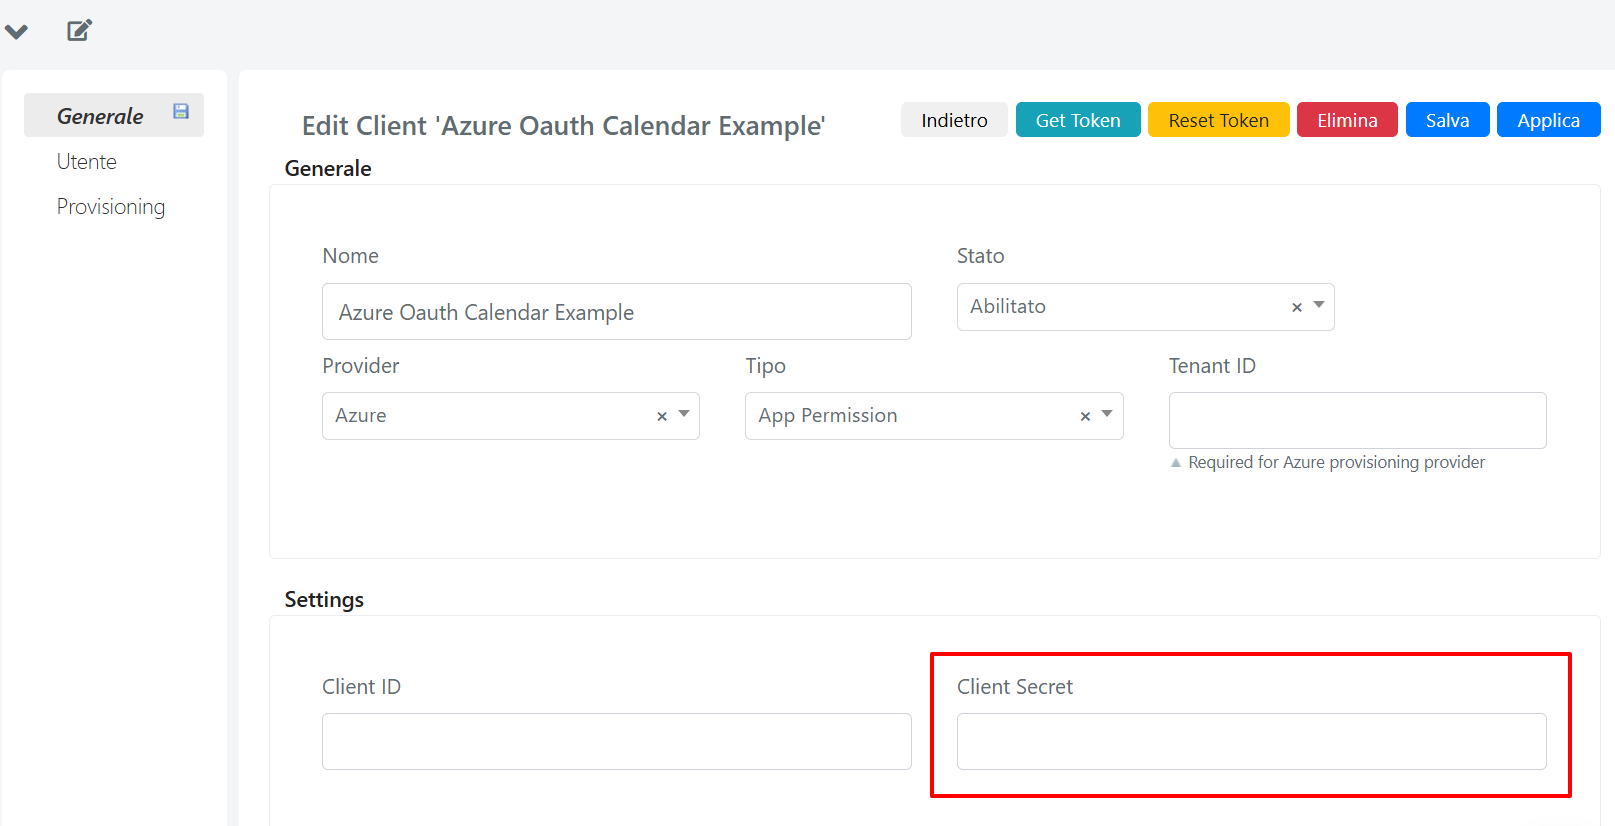
- Be sure to copy the value of the secret, not the Secret ID.
- You must copy the secret value during the creation phase, as you won't be able to access it later (in that case, you would need to recreate it).
- If you set an expiration for the secret, remember to renew it before the expiration date.
App API Permissions
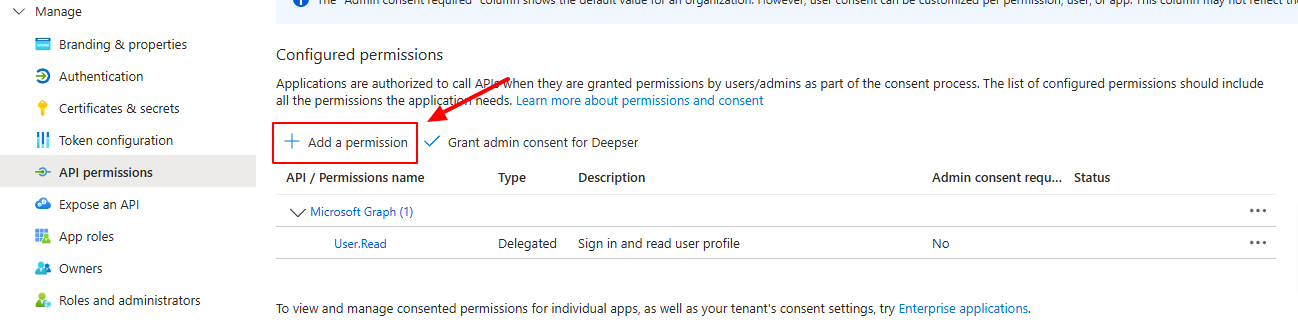
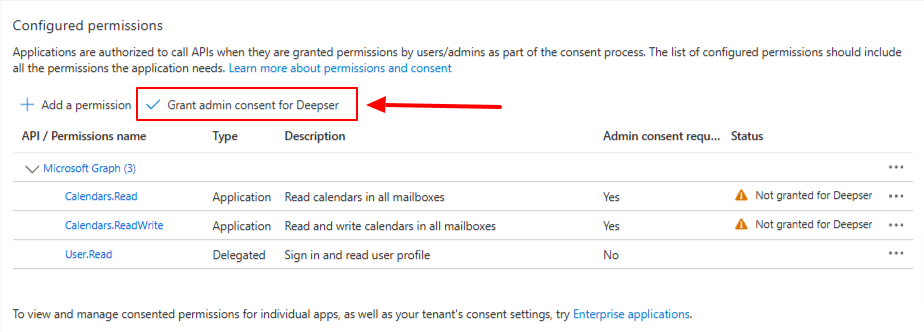
Under "Manage > API permissions" in the menu, you can add the following permissions for Microsoft Graph and then run the "Grant admin consent" action:
- Calendars.Read as Application Permission
- Calendars.ReadWrite as Application Permission
Click on "Add a permission" to open the permission selection prompt:
Then select "Microsoft Graph" as the API permission to use:
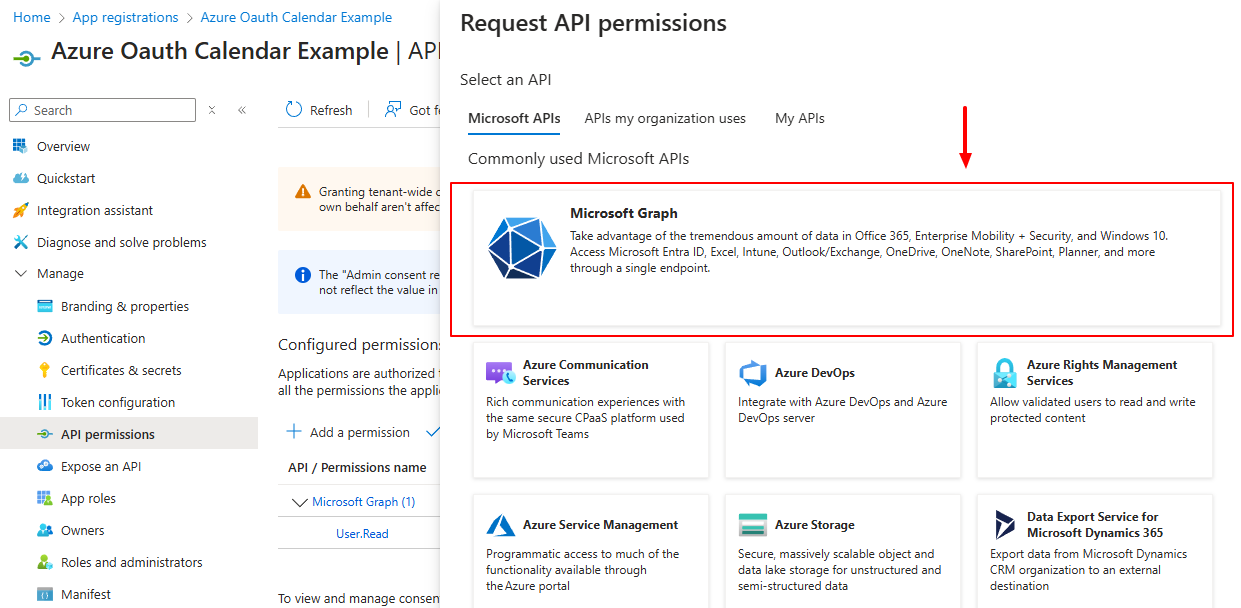
From this screen, you can choose Application permissions and use the search field to find the desired permission to add:
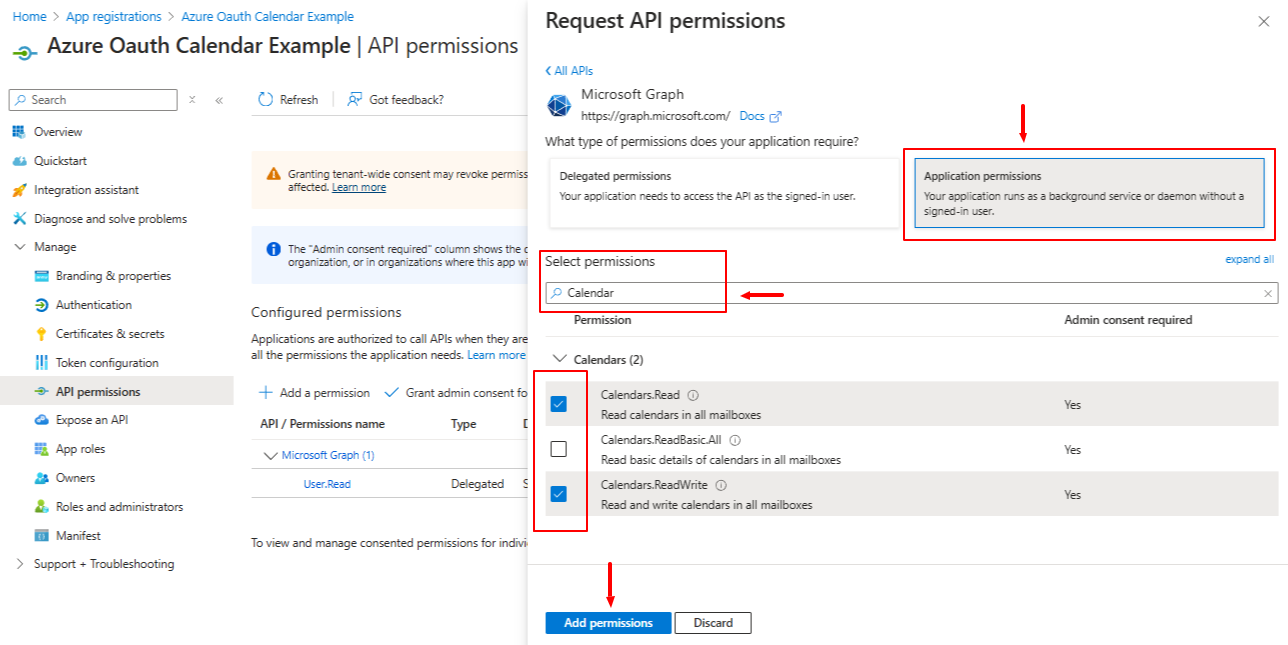
After adding all desired permissions, run the Grant admin consent command:
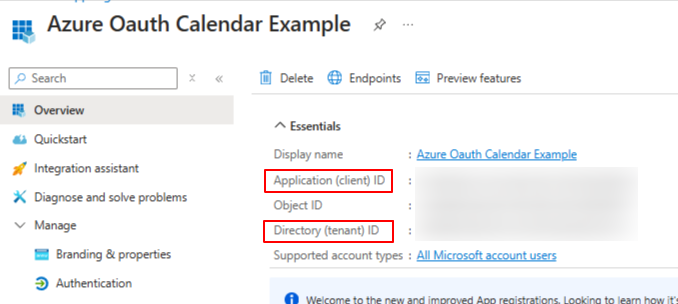
Before going back to the OAuth Client in Deepser and completing the configuration, note down all the Azure information to use in the Deepser OAuth client configuration. Below is a summary of the Azure information to enter in Deepser:
- Secret Value -- Be sure to copy the value of the secret, not the Secret ID. You must copy it during creation, as it will not be accessible later.
- Application (client) ID
- Directory (tenant) ID
Complete OAuth Client Configuration on Deepser
You can now return to the Deepser OAuth Client record to proceed with the completion of configuration.
General Tab
If not already done, configure the "Provider" and "Type" fields as "Azure" and "Azure App Permission" respectively.
Then set the Tenant ID, Client ID, and Client Secret:
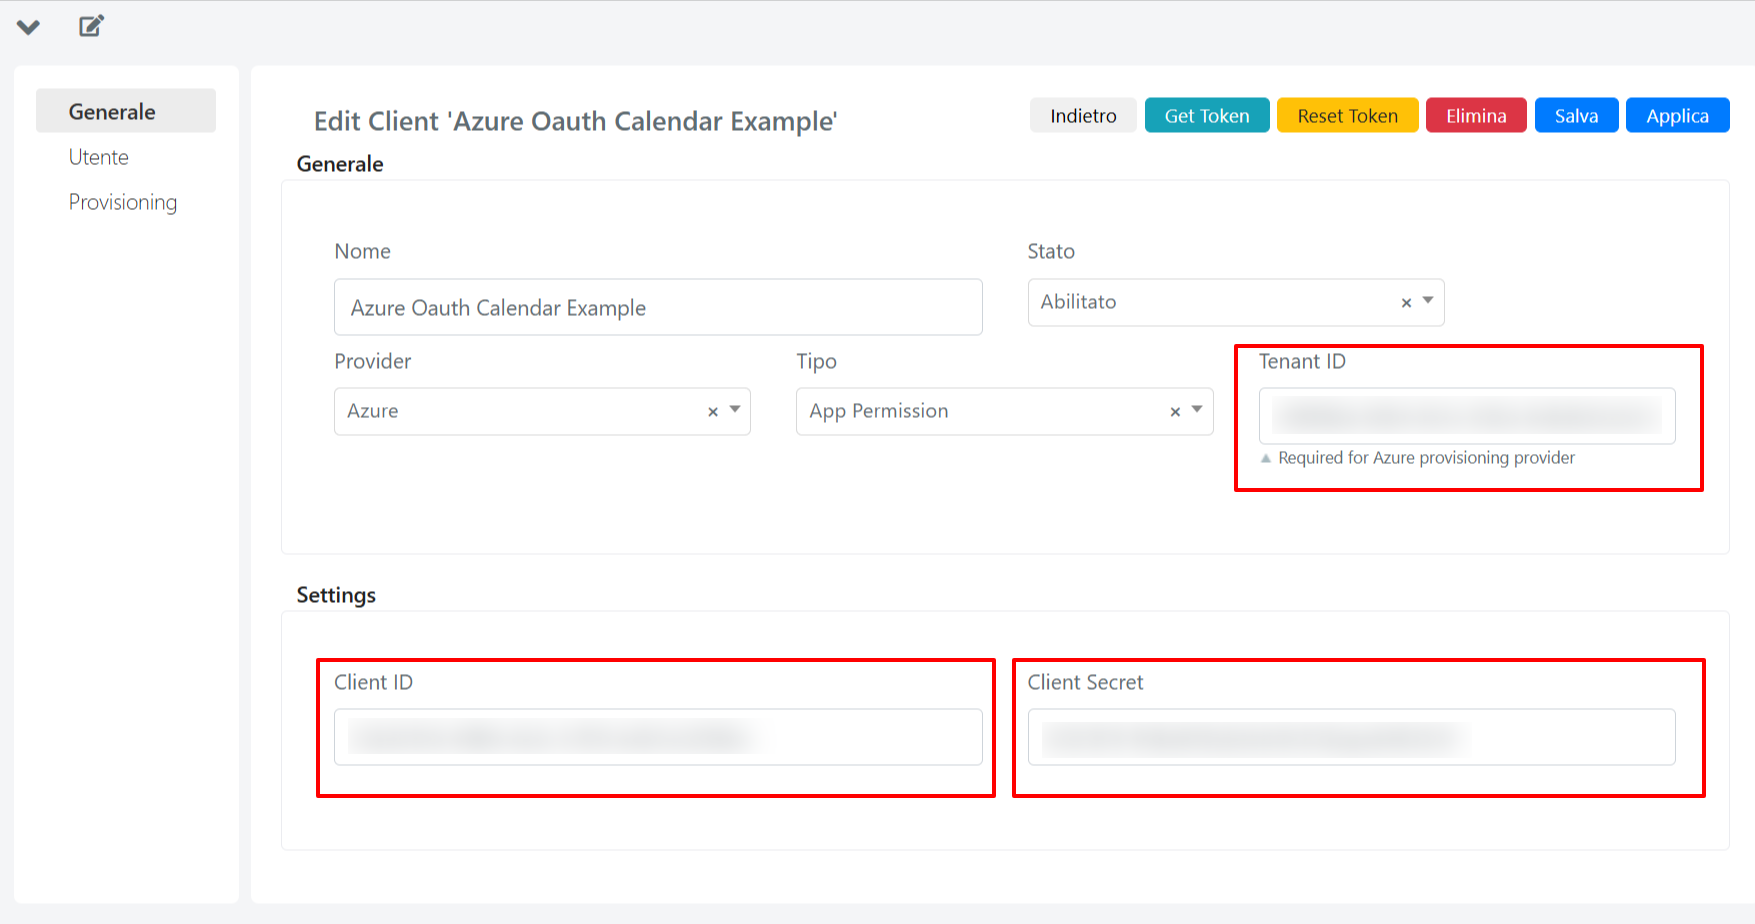
In the "Client ID" field, enter your "Application (client) ID" from Azure.
In the "Client Secret" field, enter your "Secret Value" from Azure.
In the "Tenant ID" field, enter your "Directory (tenant) ID" from Azure.
Calendar Configuration
By configuring an External Calendar, you can sync all desired entities from Deepser to Outlook Calendar. The synchronization works in the following ways:
- Deepser can create events on the Outlook calendar
- Deepser can delete events (only previously synchronized) on the Outlook calendar
- Outlook Calendar can update previously synchronized events on Deepser
In the example below, you configure a sync between tasks of a specified user in Deepser with their calendar on Outlook.
External Source Configuration
An external source is used to link Deepser models, such as Service Operations, activities, or tasks, with external calendars. An admin user can add an external source by navigating to System > Calendars > External > Source.
Below is an example of an "External Source" based on Task synchronization between Deepser and Outlook Calendar:
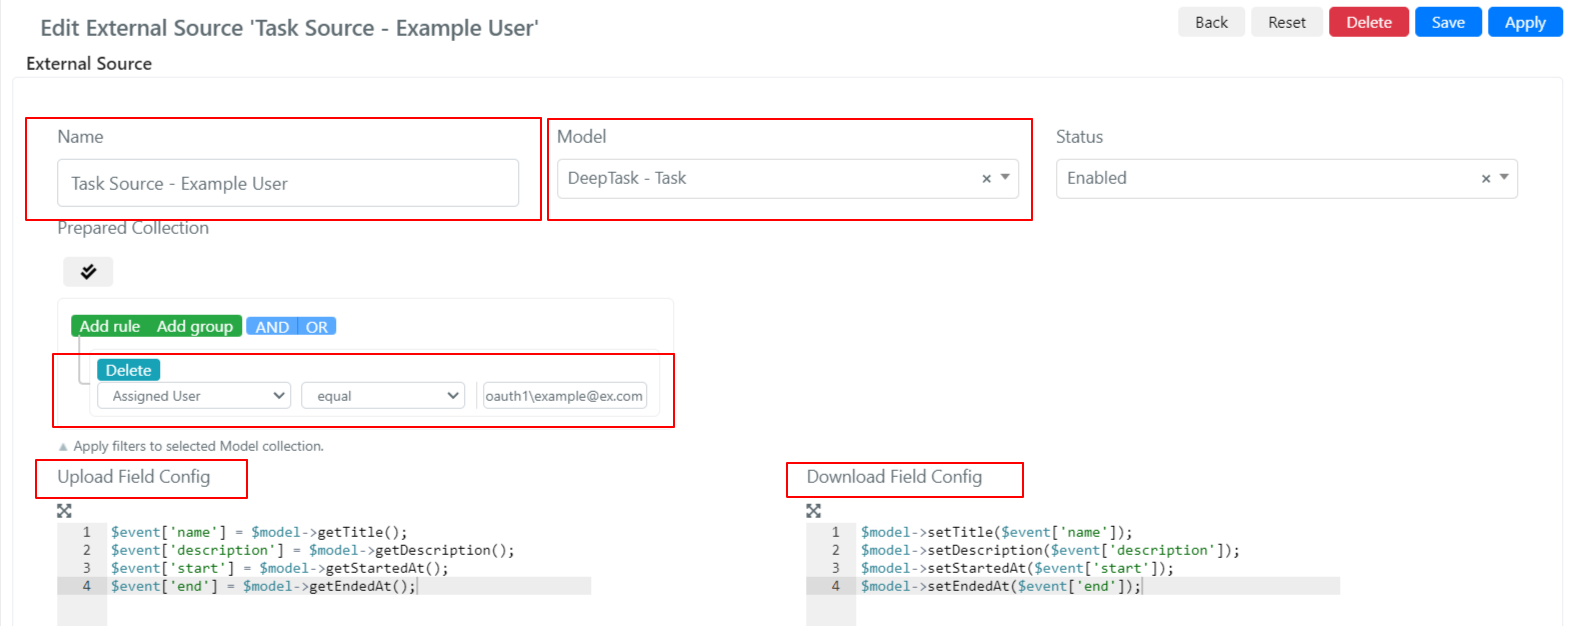
- Name: You can choose your custom name
- Model: Select "DeepTask – Task" as the model.
- Prepared Collection: Filter the tasks you want to sync. In this example, you are configuring an external source to sync all tasks assigned to user "oauth1/[email protected]".
- Upload Field Config:
$event['name'] = $model->getTitle();
$event['description'] = $model->getDescription();
$event['start'] = $model->getStartedAt();
$event['end'] = $model->getEndedAt();
NOTE: With this field, you can map fields to create events on the external calendar.
- Download Field Config:
$model->setTitle($event['name']);
$model->setDescription($event['description']);
$model->setStartedAt($event['start']);
$model->setEndedAt($event['end']);
NOTE: With this field, you can map fields to update tasks on Deepser.
External Calendar Configuration
After completing the External Source configuration, you can proceed with the external calendar configuration for each user.
An admin user can add an External Calendar from System > Calendars > External > Calendar.
Below is an example of an "External Calendar" based on Task synchronization between Deepser and Outlook Calendar for the user "oauth1/[email protected]":
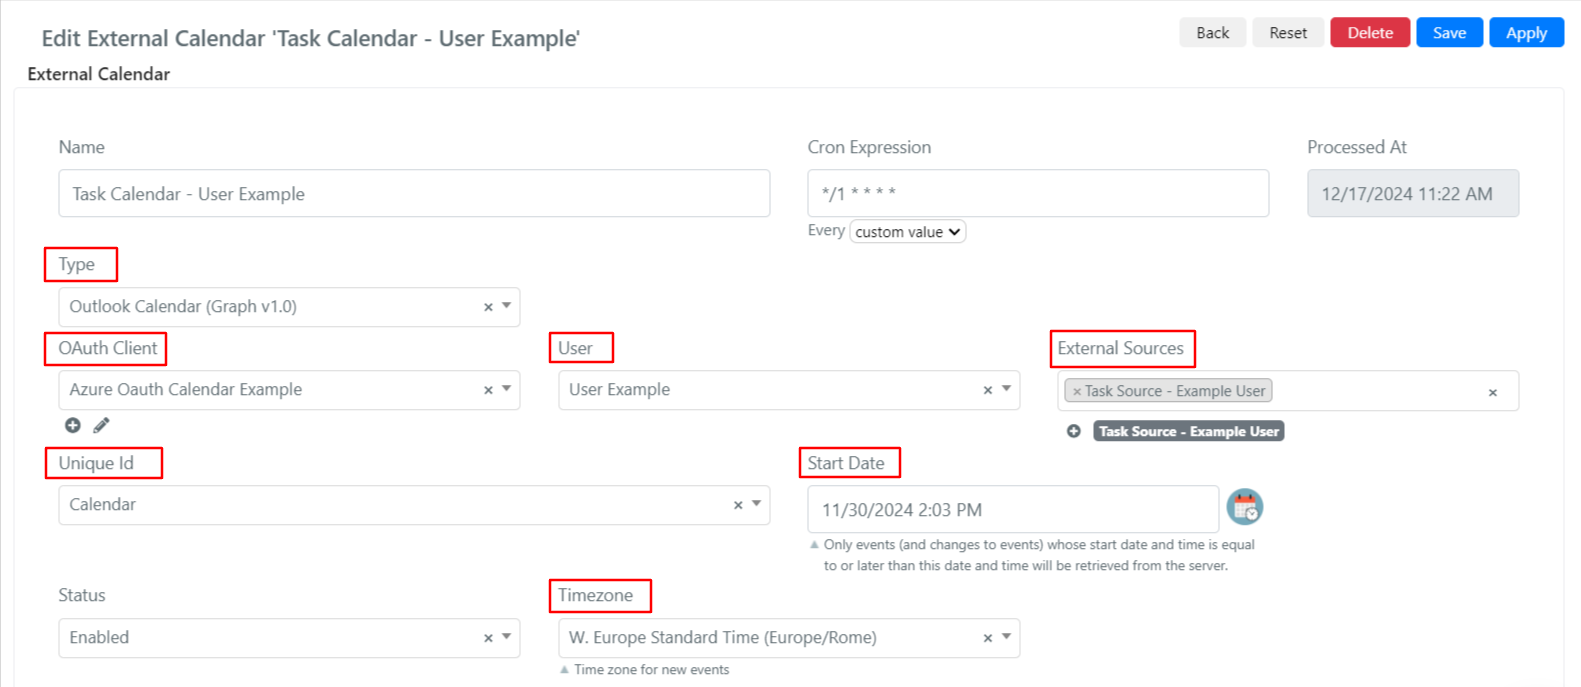
Below are the details of the fields to configure:
- Name: Set your own custom name
- Cron Expression: Set how frequently the synchronization will run (every minute in the example).
- Type: Select "Outlook Calendar (Graph v1.0)" for Outlook calendar sync.
- OAuth Client: Select the previously created OAuth client.
- User: Choose the Outlook user you want to sync.
- External Source: Select the previously created source (tasks filtered by the assigned user).
- Unique Id: Specify the calendar on which you want to sync the tasks.
- Start Date: Only events (and changes to events) with a start date and time equal to or later than this will be retrieved from the server.
- Timezone: Select your current timezone to handle dates consistently between Outlook and Deepser.
The steps described in the "External Source Configuration" and "External Calendar Configuration" sections must be repeated for each user who needs synchronization with the Outlook calendar.
Related Articles
- External Calendar Configuration -- General external calendar setup
- Integrate Google Calendar with Deepser -- Google Calendar integration
- Calendar Usage -- Access configured calendars