Create a CRM Contact
This guide walks you through creating a Contact in the CRM module and explains each field in the standard input form.
Open the Contact Form
- Navigate to CRM > Contacts and select the type of contact you need.
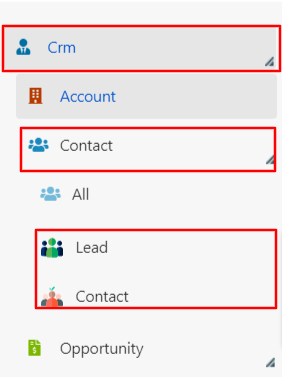
The insertion form consists of two sections:
- Contact: Contains contact details such as name, department, and qualification.
- Contacts: Contains contact information such as phone number, email, and address.
Contact Entry Form Fields
- The following fields will be displayed in the Contact section:
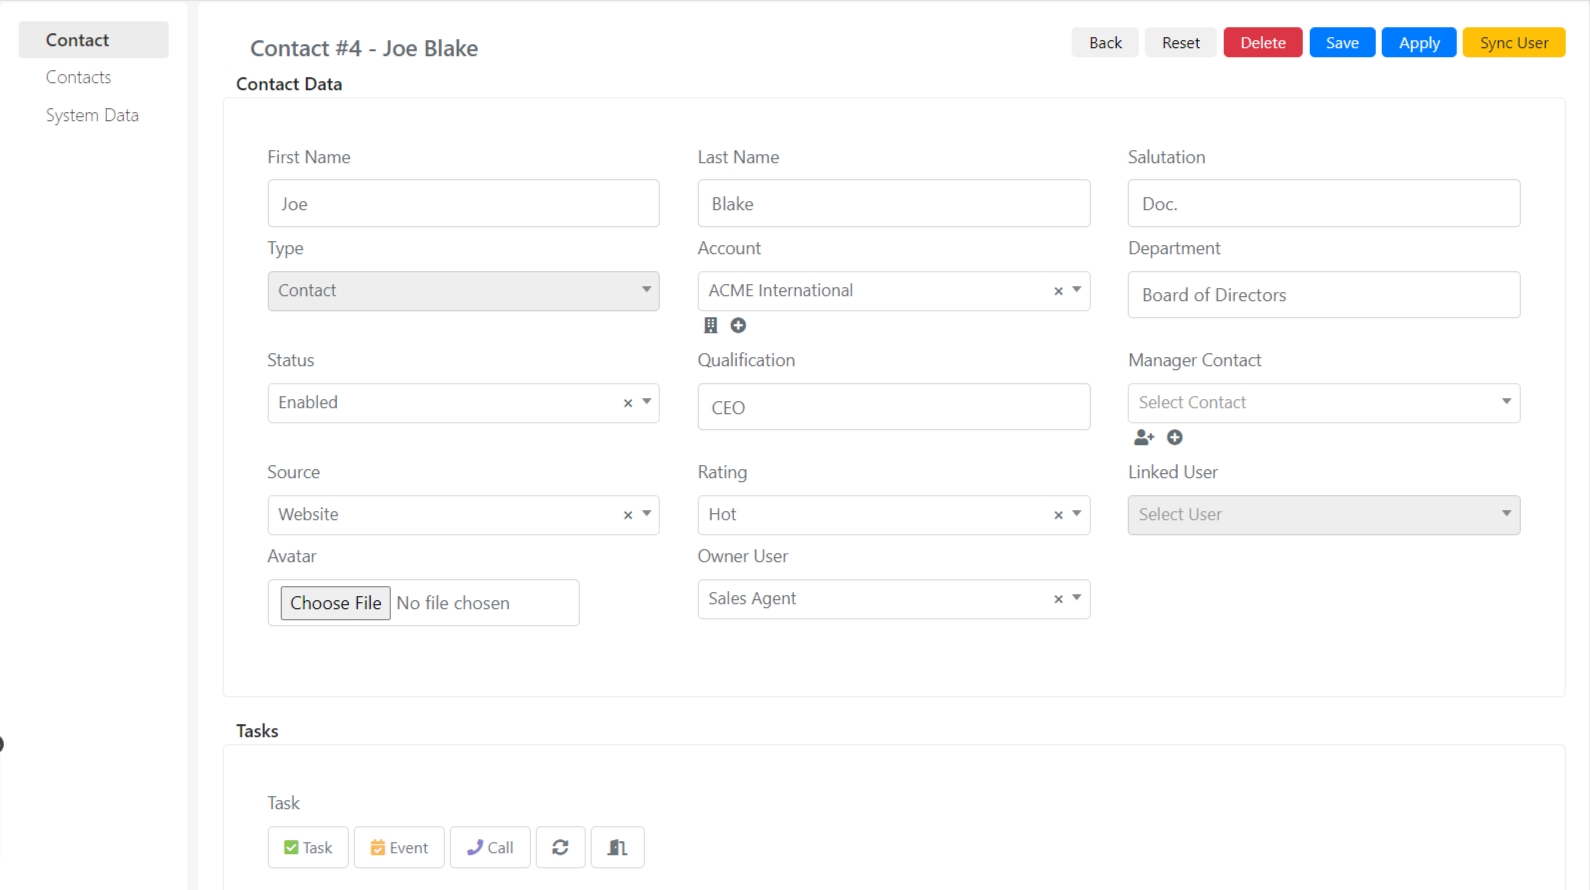
| Field | Description |
|---|---|
| Name | Name of the Contact. |
| Surname | Surname of the Contact. |
| Salutation | Allows you to set the greeting with which to refer to the contact (e.g., Mrs. or Ms.). |
| State | Enable or disable the Contact. |
| Department | The department to which the Contact belongs. |
| Qualification | The status of the Contact. |
| Manager | Allows you to specify a Contact Manager. |
| Source | Indicates the source from which the Lead was generated. |
| Rating | Customer account satisfaction level. |
| Associate user | Allows you to associate the Contact with a system user in Deepser. |
| Task | Task related to the Contact. |
Contacts Tab Fields
- The Contacts tab contains the following fields:
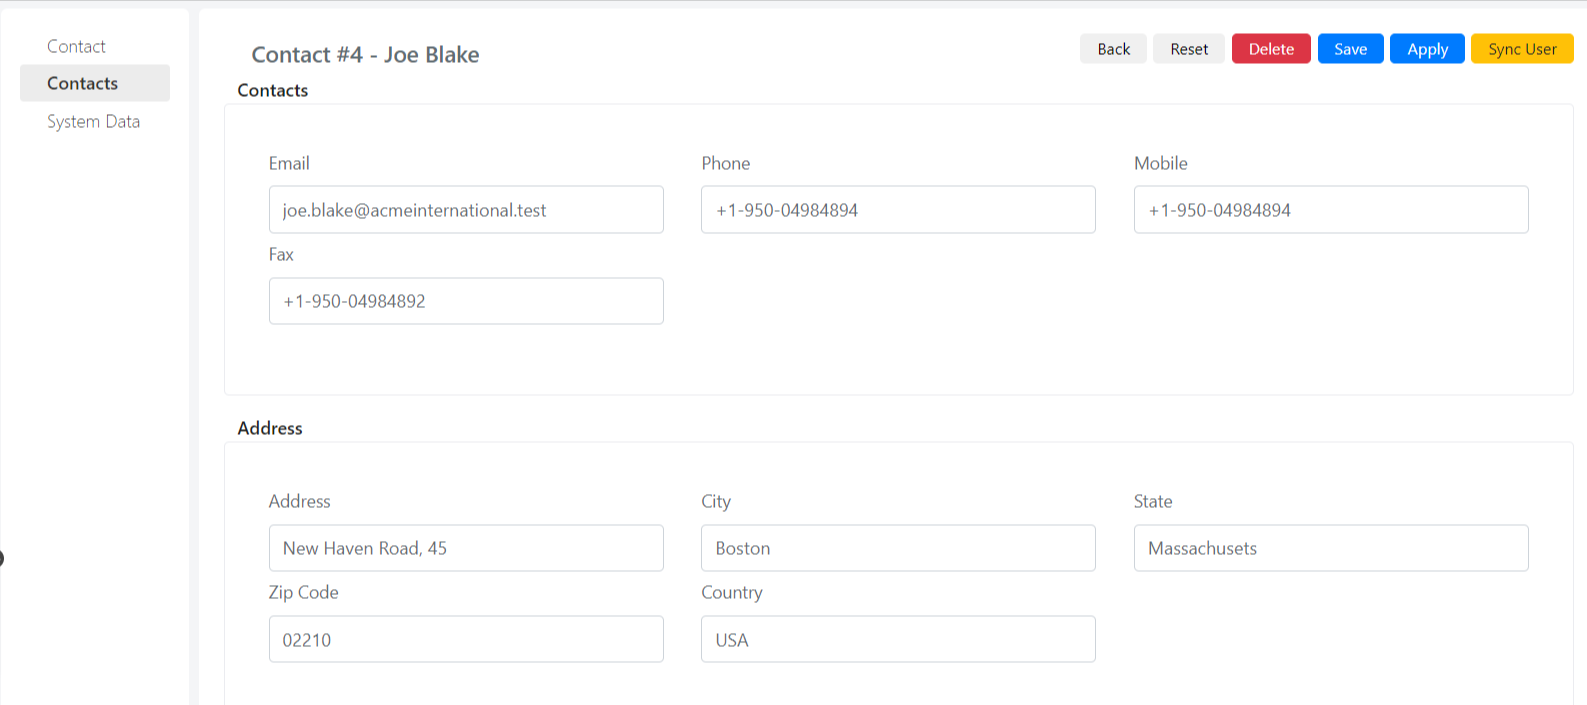
| Field | Description |
|---|---|
| Email of the Contact. | |
| Telephone | Landline phone number. |
| Mobile phone | Mobile phone number. |
| Fax | Fax of the Contact. |
| Address | Address of the Contact. |
| City | City of the Contact. |
| Province | Province of the Contact. |
| CAP | Postal code of the Contact. |
| State | State. |
- Fill in the required fields and click Save to store the new Contact.