Use the Email Webclient
Deepser includes an integrated email webclient that allows Operators to send and manage emails directly from within the platform, centralizing communication and company information management.
Configure the Email Webclient
To activate the email webclient, you first need a configured outgoing mailbox (see Configure an Outgoing Mailbox).
Then enable the mailbox for webclient use. From the "System Data" section of the mailbox configuration, set the Webclient Group and Webclient Model Alias fields:
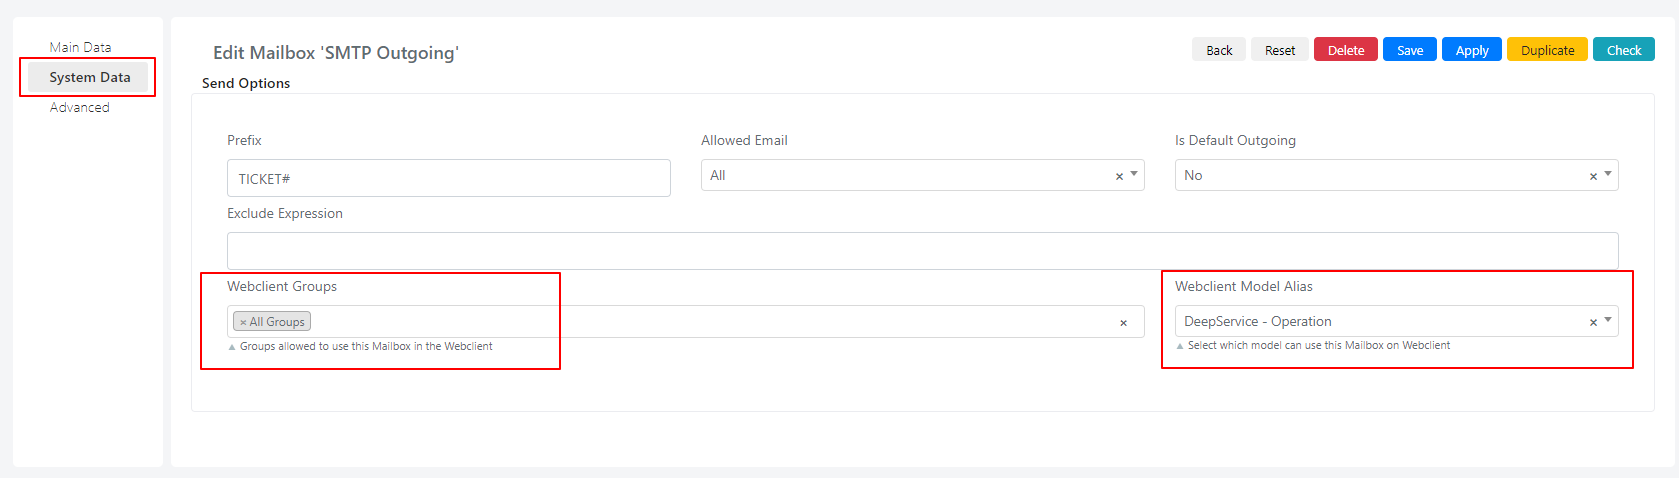
| Field | Description |
|---|---|
| Webclient Group | Enables the email webclient for a specific group (or for all groups). |
| Webclient Model Alias | Enables the email webclient within a specific model. |
Both fields must be set for the mailbox to be available in the webclient.
Send Emails from a Record
The email webclient can be used within any model that has an "Emailwriter" type field in its template. Below is an example on the Service Operations template:
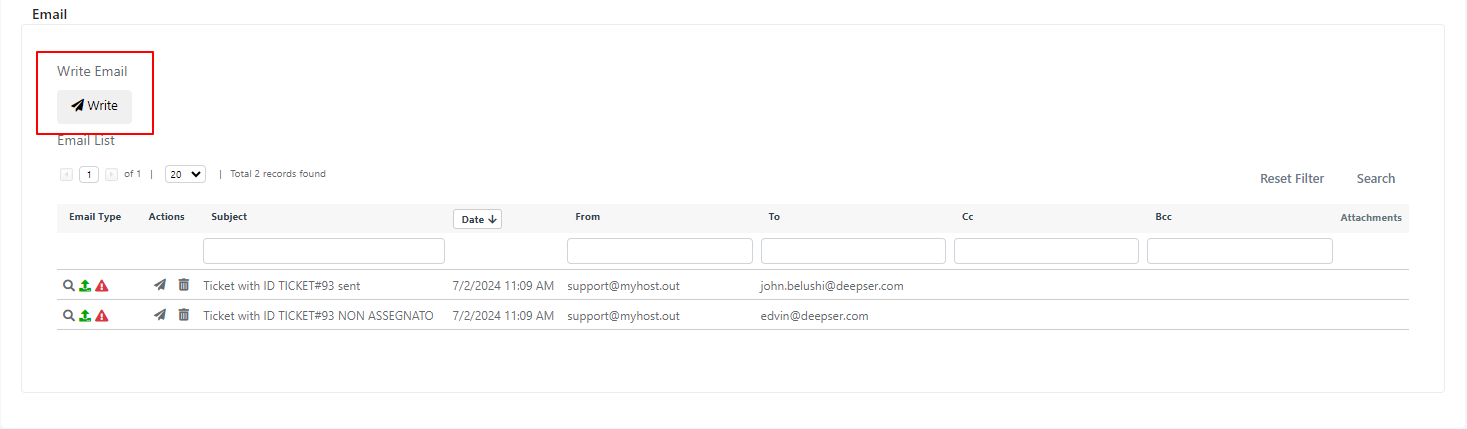
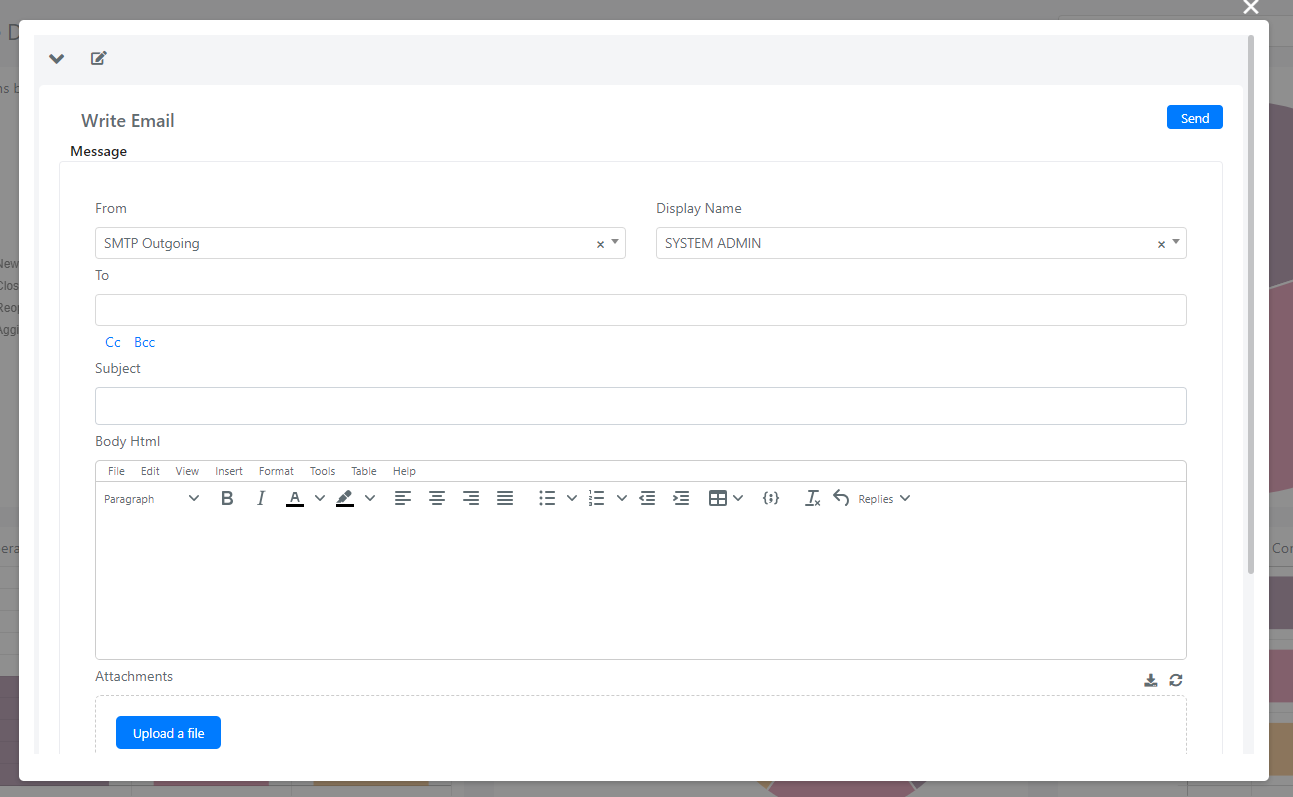
Clicking the button opens the webclient email screen:
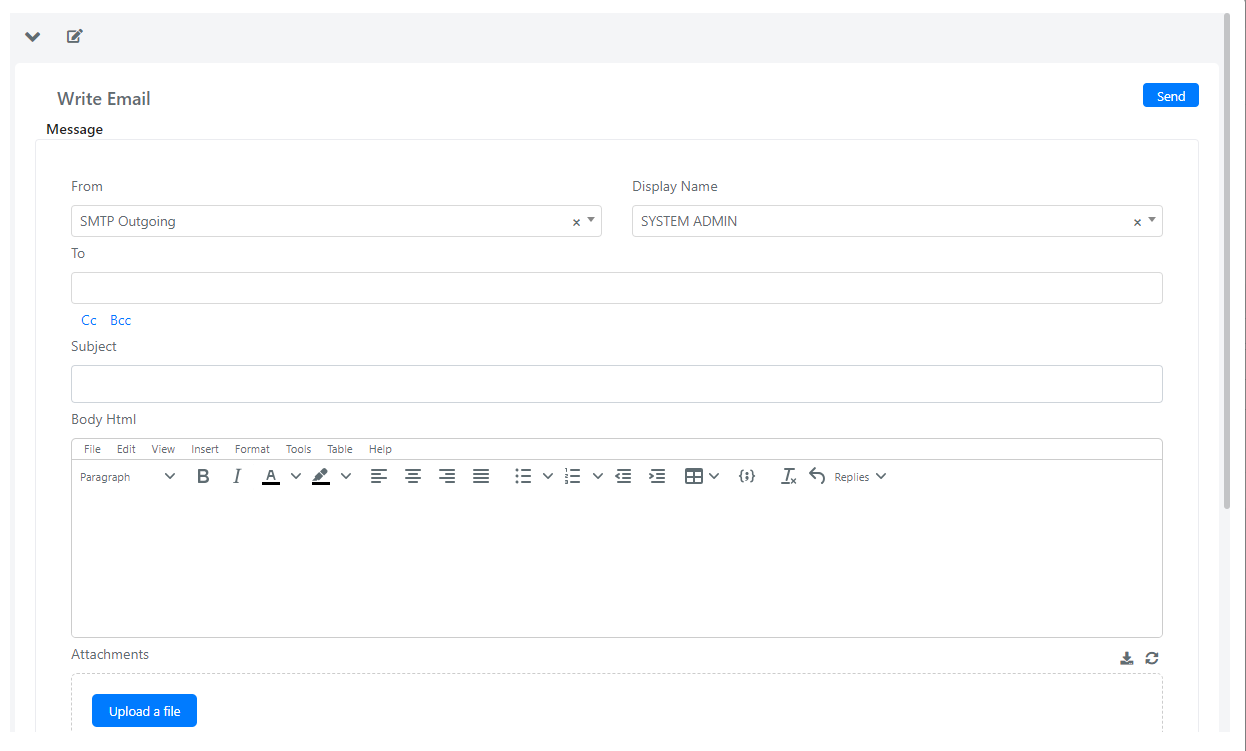
Compose the email and click Send. The available fields are:
| Field | Description |
|---|---|
| From | The mailbox to use. Only webclient-enabled mailboxes are available. |
| Display Name | Pre-populated from the mailbox. Can be modified for this email. |
| To | Recipients -- select registered users/groups or enter new addresses. |
| Cc | CC recipients. |
| Bcc | BCC recipients. |
| Subject | Email subject. |
| Body Html | Message body. |
| Attachments | File attachments. |
| Create Comments | If Yes, the email is saved as a comment on the record. |
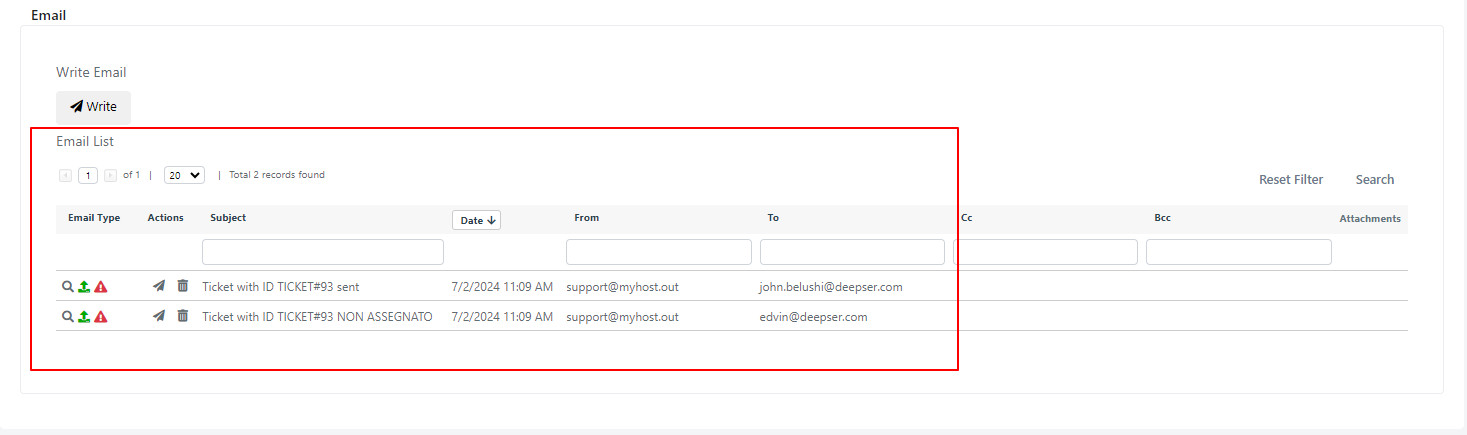
Once sent, the email is linked to the record from which it was sent:
General Email Webclient Access
Click the "@" icon at the top right of the Deepser screen to access the webclient sub-menu:

-
Write: Opens the email sending screen.
-
List: Shows all emails sent through the webclient.

The grid icons are:

- View the email
- Incoming email icon
- Outgoing email icon
- Message not sent icon
- Resend the email
- Reply to the email
- Reply to all
- Forward