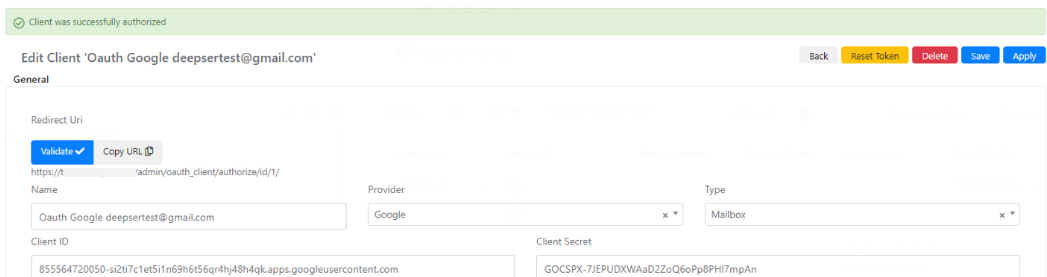
OAuth Clients for Email Integration
Some systems require Deepser to perform authorization before it can use their email services. Deepser allows you to configure multiple OAuth clients to authorize it through the OAuth2 protocol on different providers.
Configuration
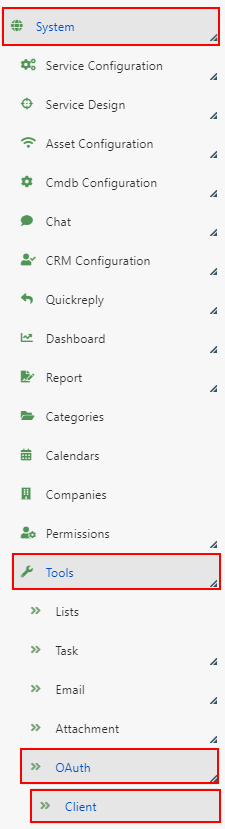
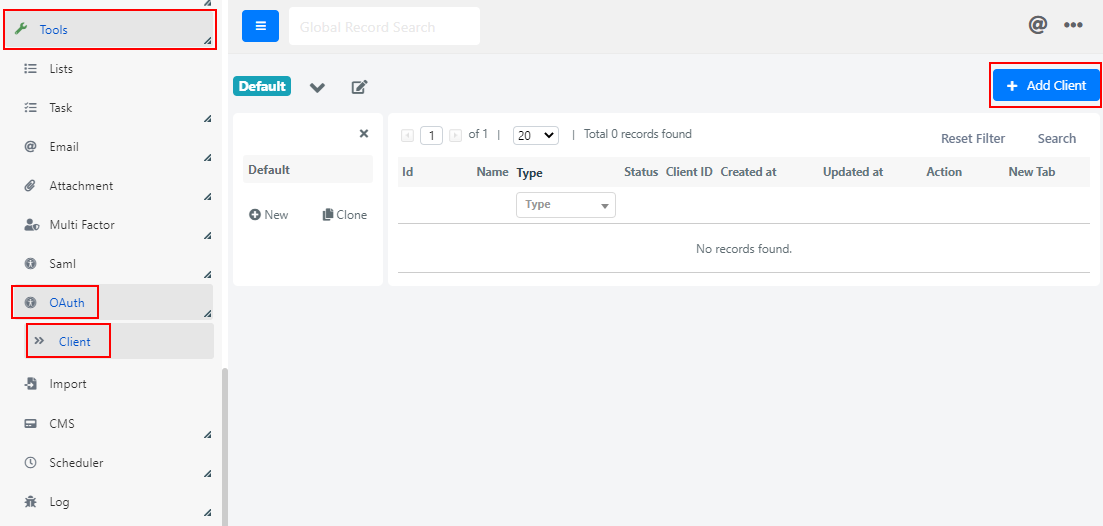
To configure an OAuth client, navigate to System > Tools > OAuth > Client in the Deepser Backend.
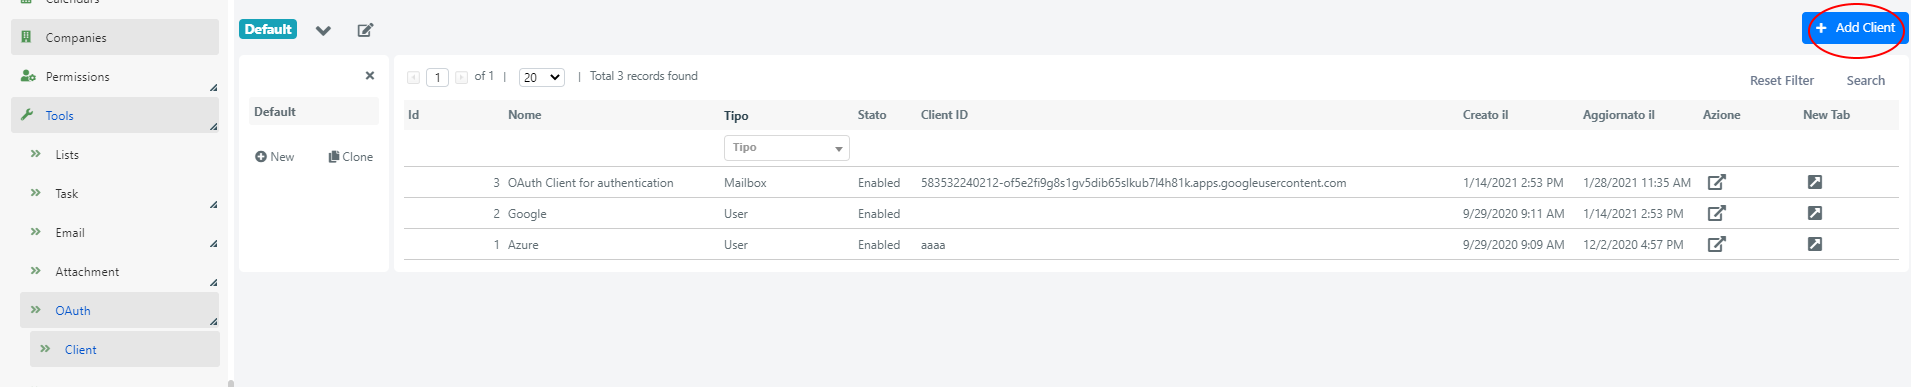
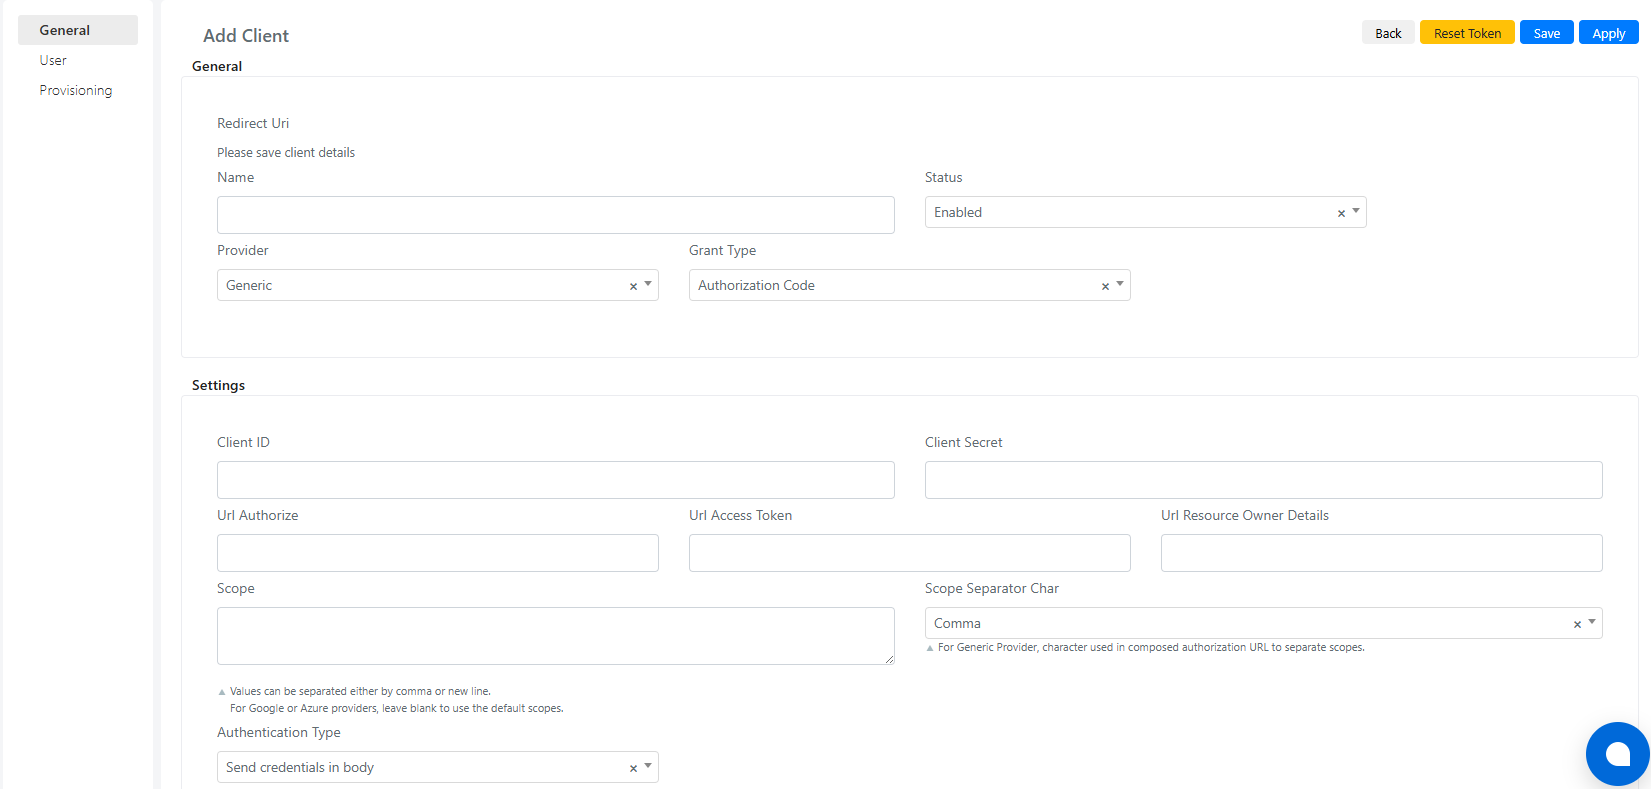
The grid displays all OAuth clients defined in Deepser. Click the + Add Client button to create a new one.
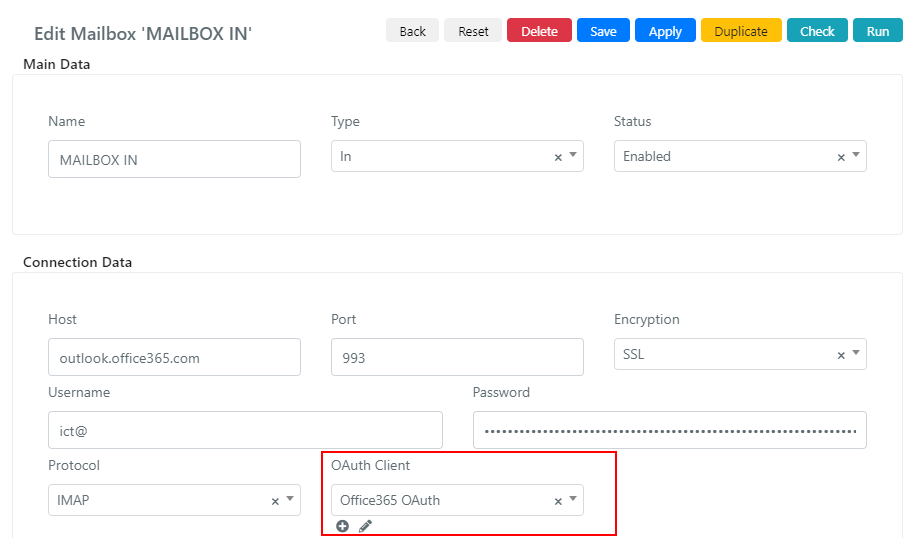
You can also create or edit an OAuth Client directly from a mailbox configuration form. Under the OAuth Client field, click the + icon to create a new client, or click the pencil icon to modify the selected one.

OAuth Client Fields
| Field | Description |
|---|---|
| Redirect Uri | Deepser URL from which requests are sent to the provider. Must be authorized in the provider's admin panel. Appears after the client is saved. |
| Name | Descriptive name displayed in the system. |
| Provider | Google, Azure, or Generic. For Google or Azure, only Client ID, Client Secret, and Status need to be filled. |
| Client ID | Public identifier provided by the provider when a new application is authorized. |
| Client Secret | Secret part of the authentication credentials, provided by the provider. |
| Type | Type of data you want to access/recover. |
| Scope | Scopes the application requires access to. Not needed for Google or Azure. |
| Url Authorize | Base URL for OAuth 2 authentication. Not needed for Google or Azure. |
| Url Access Token | Base URL for requesting the authentication token. Not needed for Google or Azure. |
| Proxy | IP address and port of any proxy in use. Not required for Google or Azure. |
| Verify | Enable or disable SSL check if a proxy is configured. Not needed for Google or Azure. |
| Status | If "Disabled", the client is not active. |
| Scope Separator Char | Character used to separate different scopes. Not needed for Google or Azure. |
| Endpoint User Data | Endpoint for retrieving user data after authentication. Not needed for Google or Azure, or for Mailbox type. |
| Related LDAPs | Any LDAP integrations whose users must be linked. Not needed for Mailbox type. |
| Username Attribute | Attribute describing the user's username. Not needed for Google or Azure, or for Mailbox type. |
| User Fields | Maps user attributes to those retrieved from the endpoint. Not needed for Google or Azure, or for Mailbox type. |
| User Create Expression | PHP code for user creation (e.g., SSO integration). Not needed for Mailbox type. |
| Login Button Caption | Button label for SSO access. Not needed for Mailbox type. |
| Login Button Icon | Icon on the SSO authentication button. Not needed for Mailbox type. |
| Access Token | Contains the serialized access token. Not editable in the form. |
| Original Access Token | Contains the serialized access token. Not editable in the form. |
After saving, click the Validate button to authorize the client with the provider.
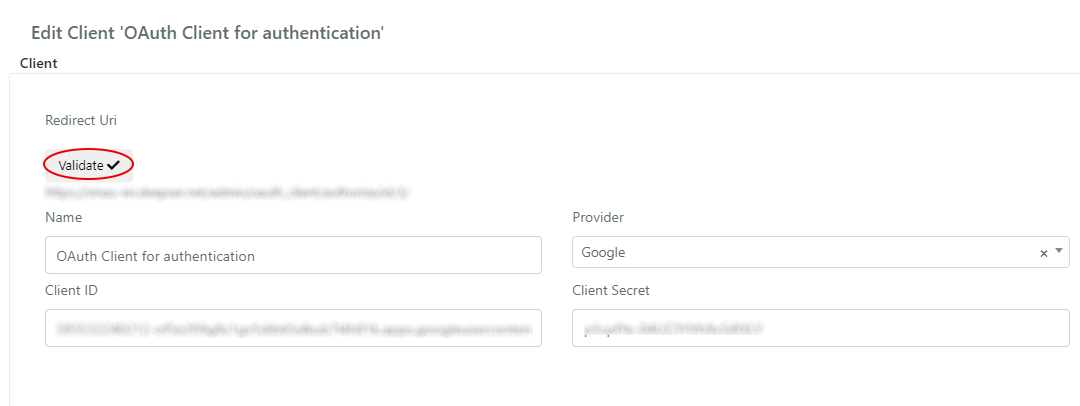
Authenticate with the provider through the form that appears. Once logged in, the client is authorized.
Azure OAuth Client (Legacy Protocol)
This section explains how to set up a new OAuth client using the legacy IMAP/POP3/SMTP protocol to integrate Office 365 with Deepser. For the recommended Graph API approach, see Configure Office 365 Mailbox Integration.
Prerequisites
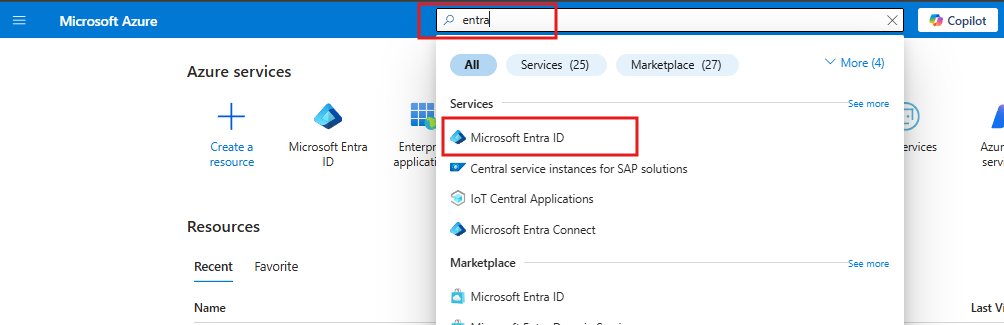
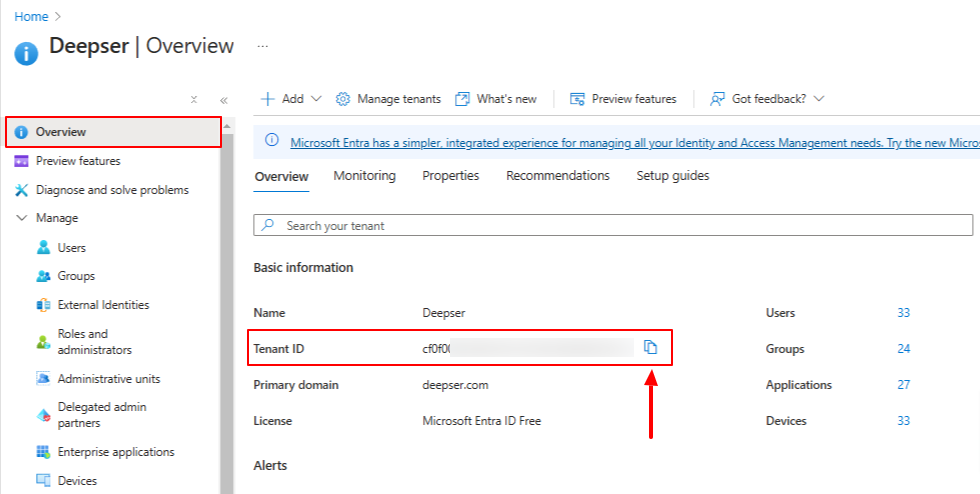
Retrieve your Tenant ID from the Microsoft Entra ID Overview page:
Create the OAuth Client in Deepser
-
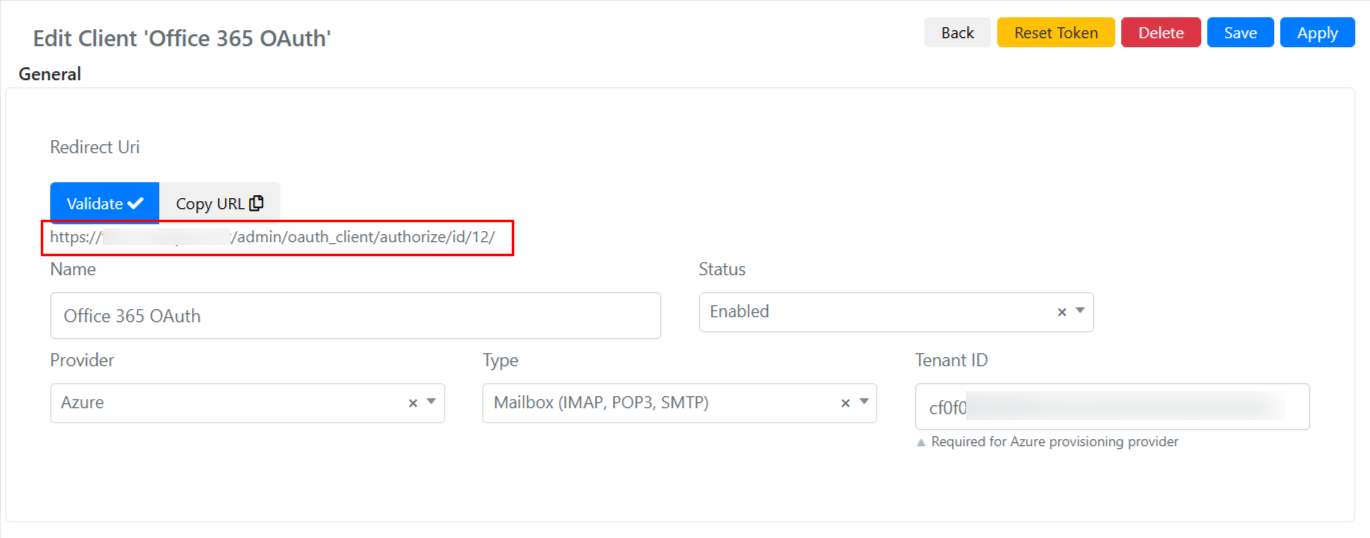
In the Deepser Backend, go to System > Tools > OAuth > Client and click Add Client.
-
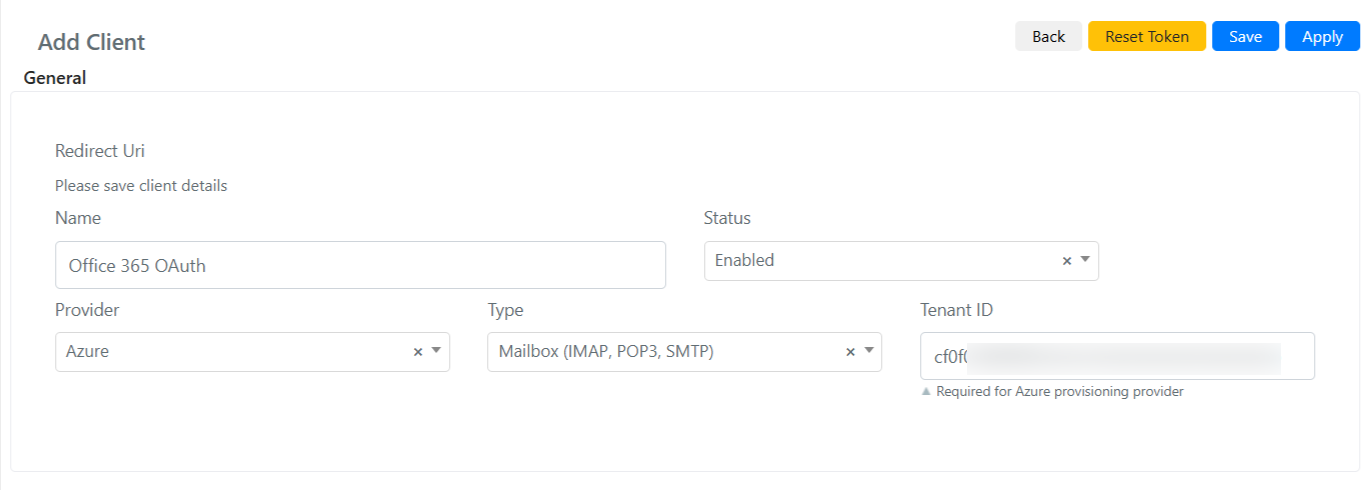
Set:
- Name
- Provider: Azure
- Type: Mailbox (IMAP, POP3, SMTP)
- Tenant ID
-
Click Apply or Save.
-
Once saved, the redirect URI is generated. Copy it for the next step.
Create the App on Azure
-
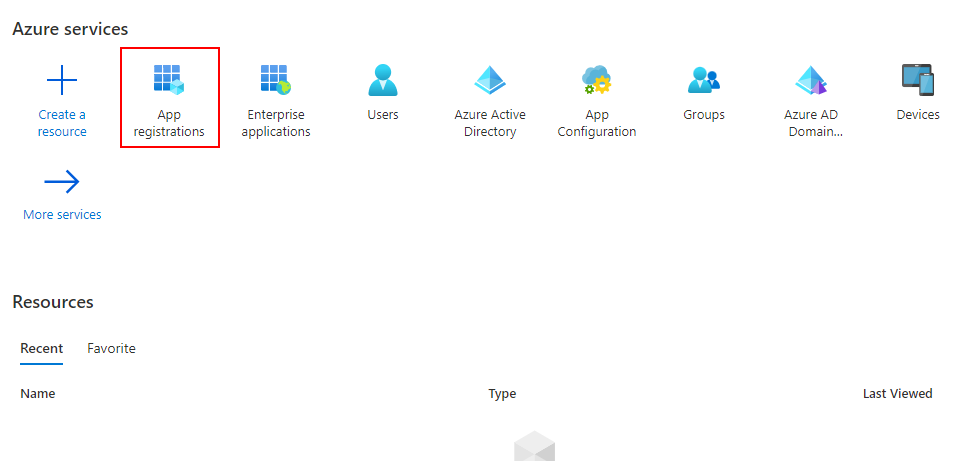
Go to the Azure portal and sign in with your Office 365 account.
-
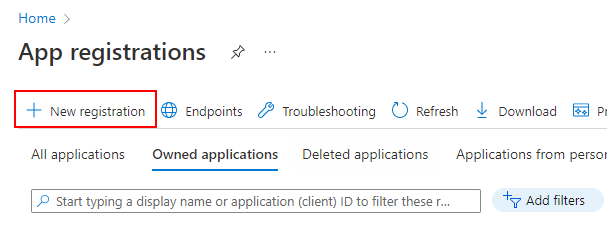
Click on App Registrations, then New Registration.
-
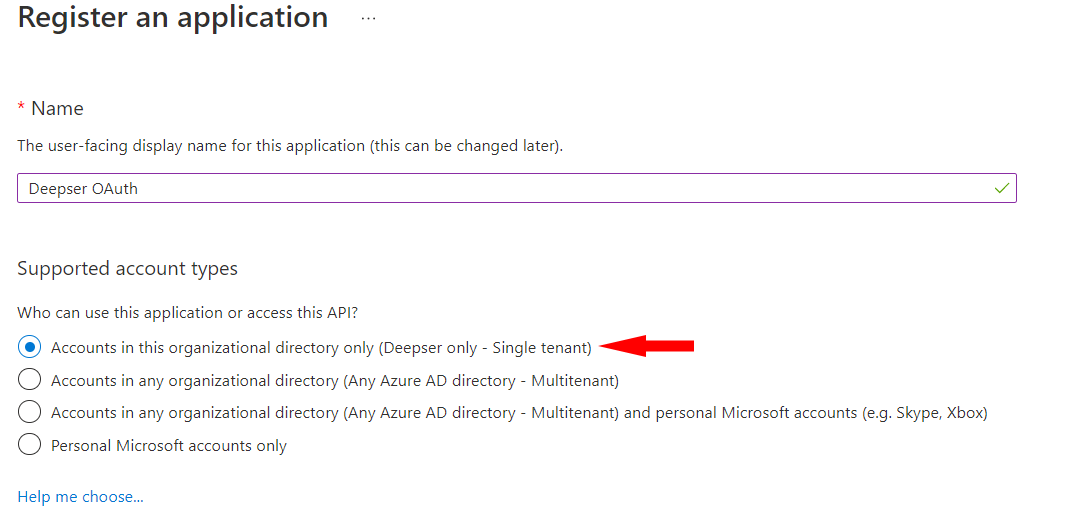
Name the application. Under Supported Account Types, select Single Tenant (first item).
-
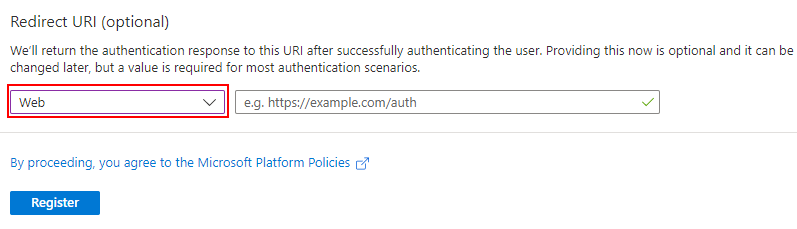
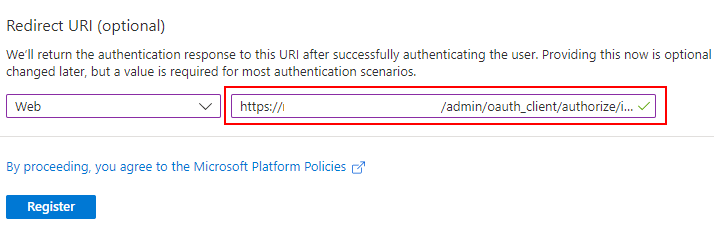
Under Redirect URI, select Web and paste the URI generated by the Deepser OAuth client.
-
Click Register.
Configure the Azure App
-
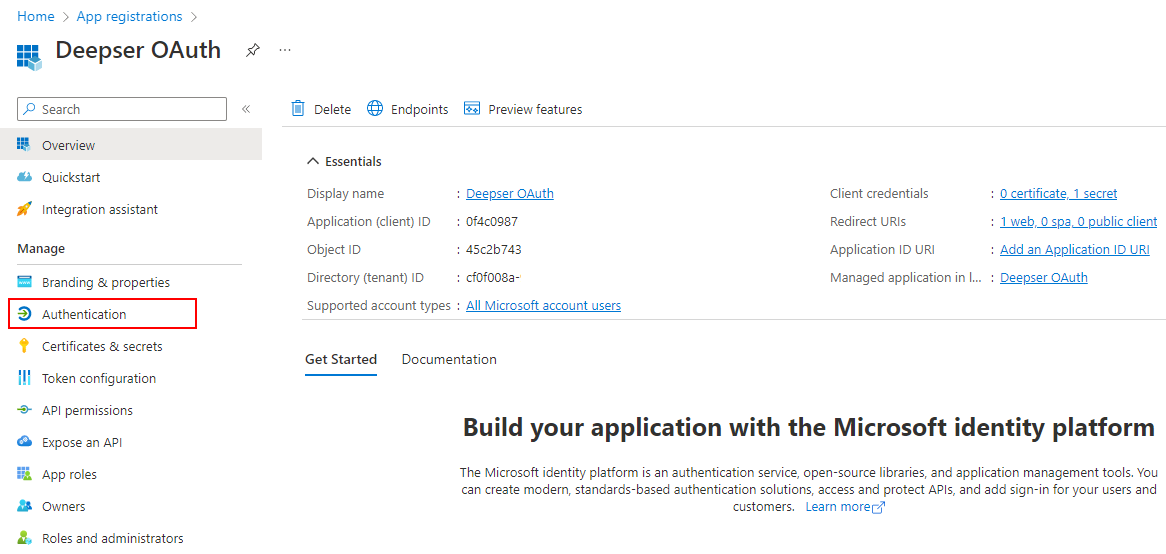
Click Authentication in the left menu.
-
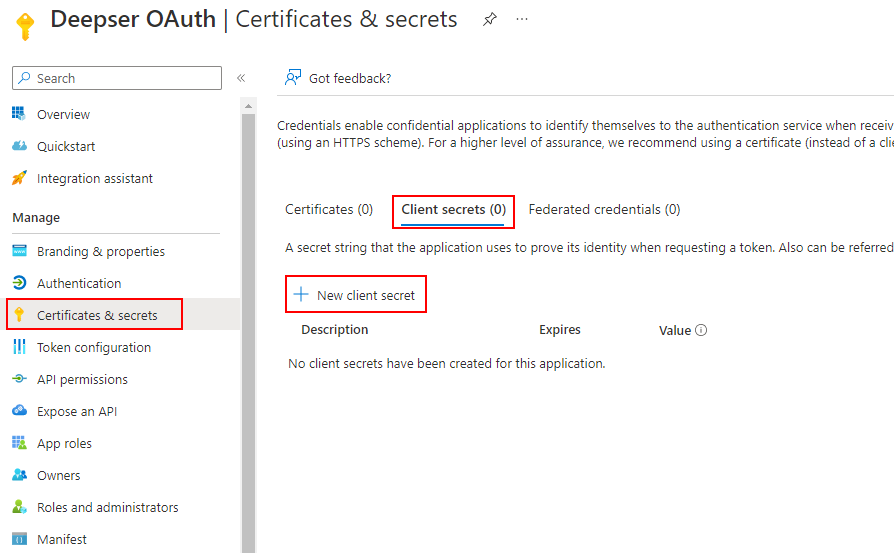
Go to Certificates and Secrets, click Client Secrets tab, and generate a new secret via New Client Secret.
-
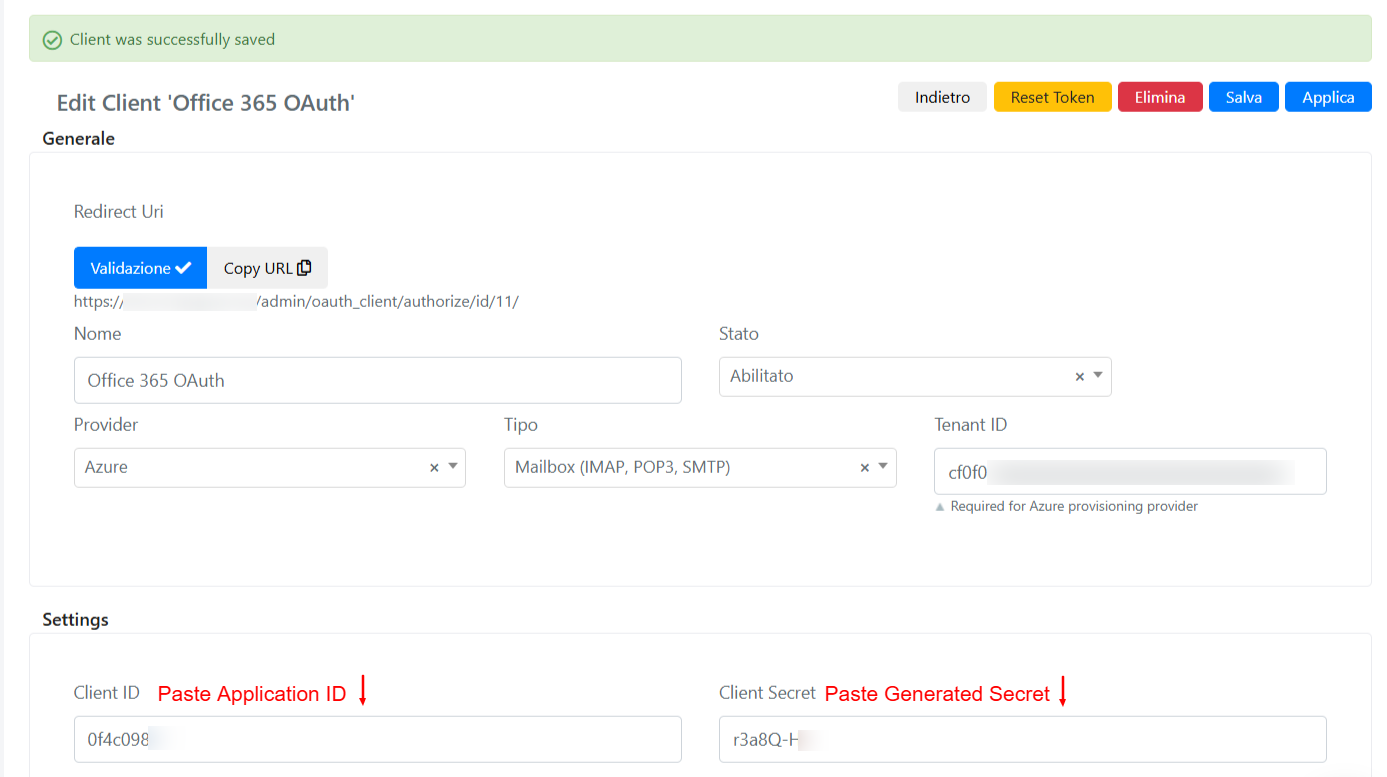
Enter a description and expiration, then click Add. Copy the secret Value and paste it into the Client Secret field of the Deepser OAuth Client.
The Client Secret value is only viewable at the time of generation. After navigating away, it cannot be recovered.
-
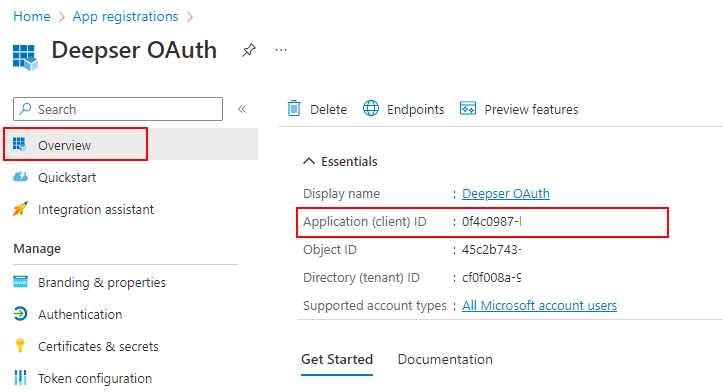
In Deepser, paste the Application ID (from the Azure Overview page) into the Client ID field. Save.
-
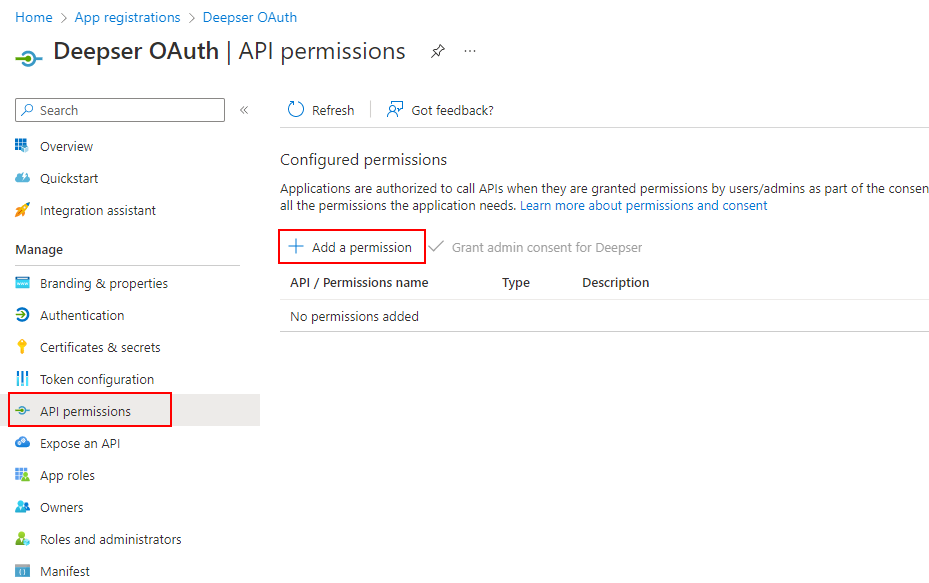
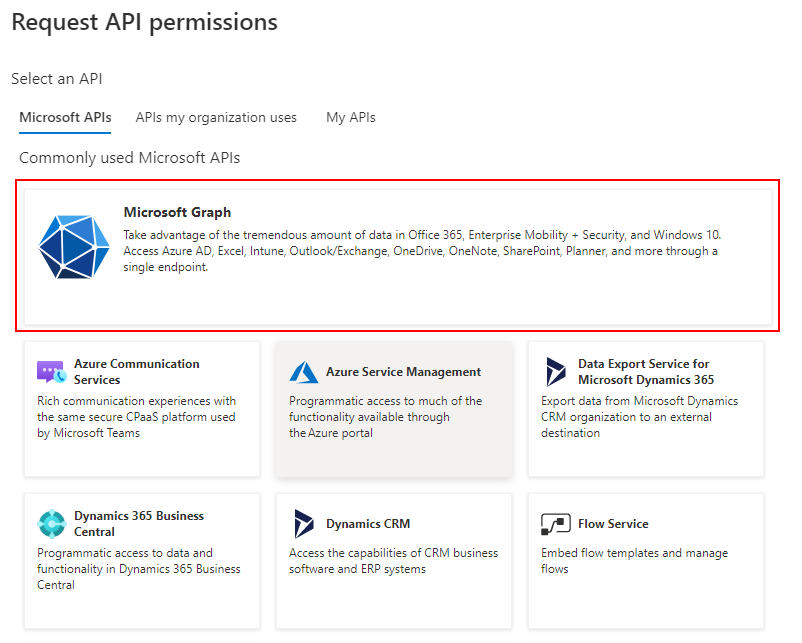
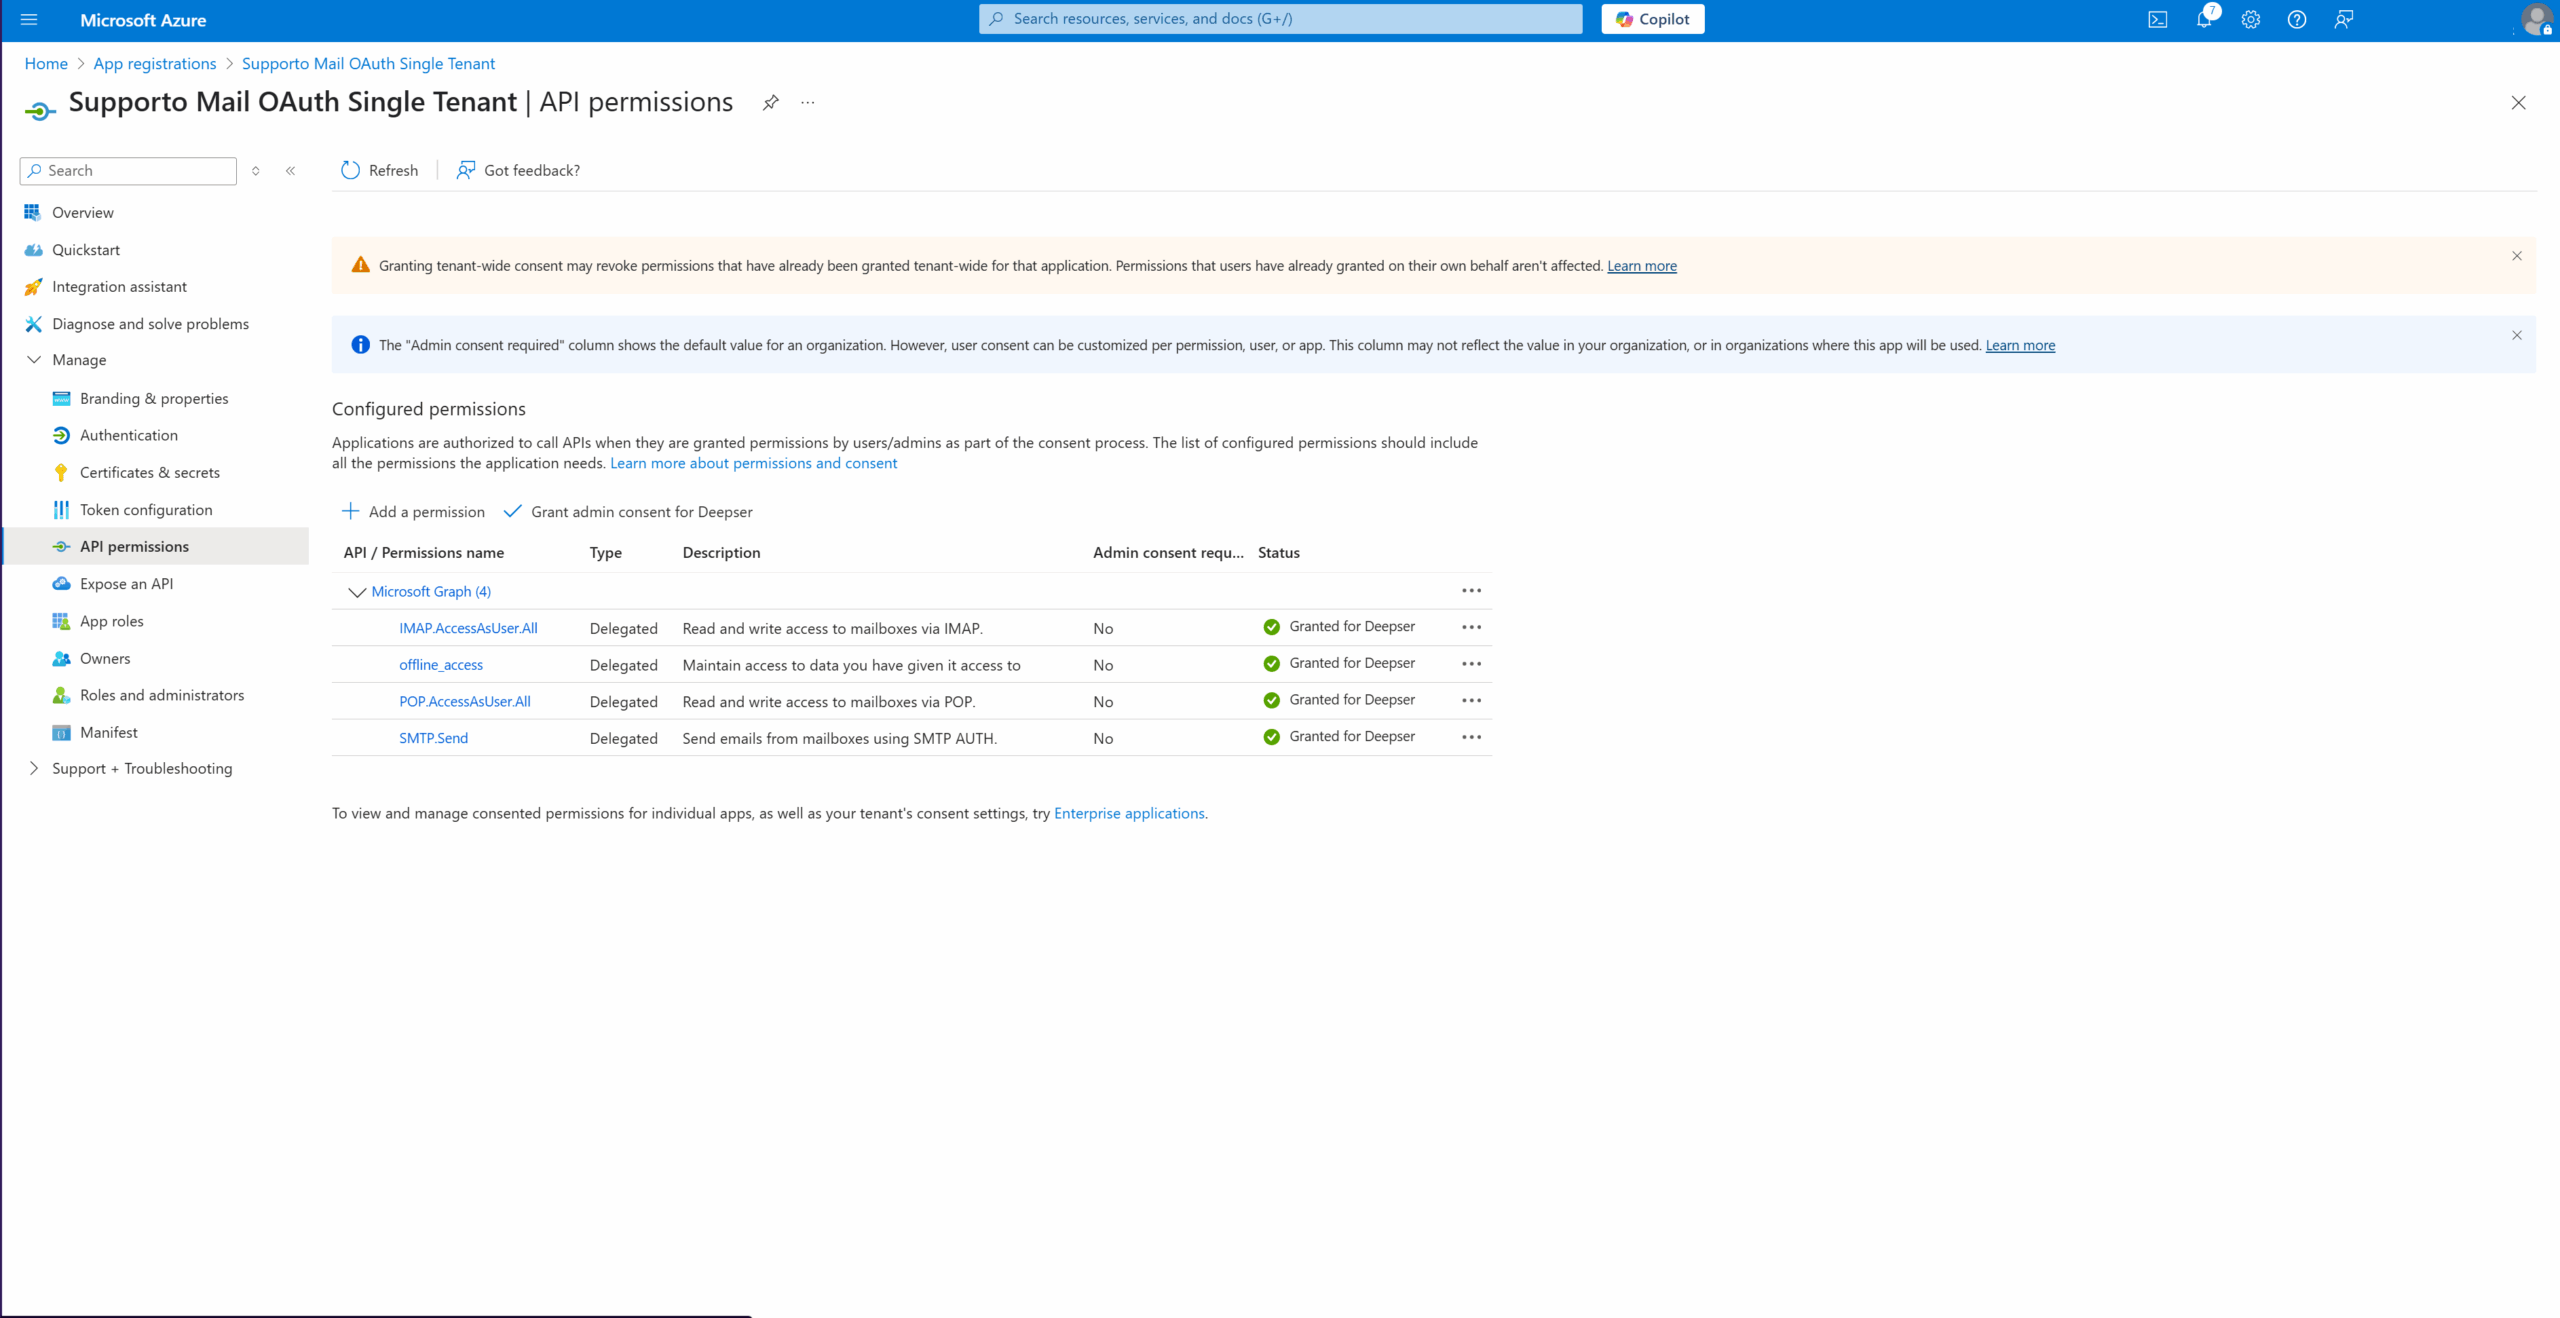
In Azure, go to API Permissions and click Add a permission. Select Microsoft Graph, then Delegated Permissions.
-
Select the following permissions:
- Offline_access
- IMAP.AccessAsUser.All (optional if using POP)
- Pop.AccessAsUser.All (optional if using IMAP)
- SMTP.Send
-
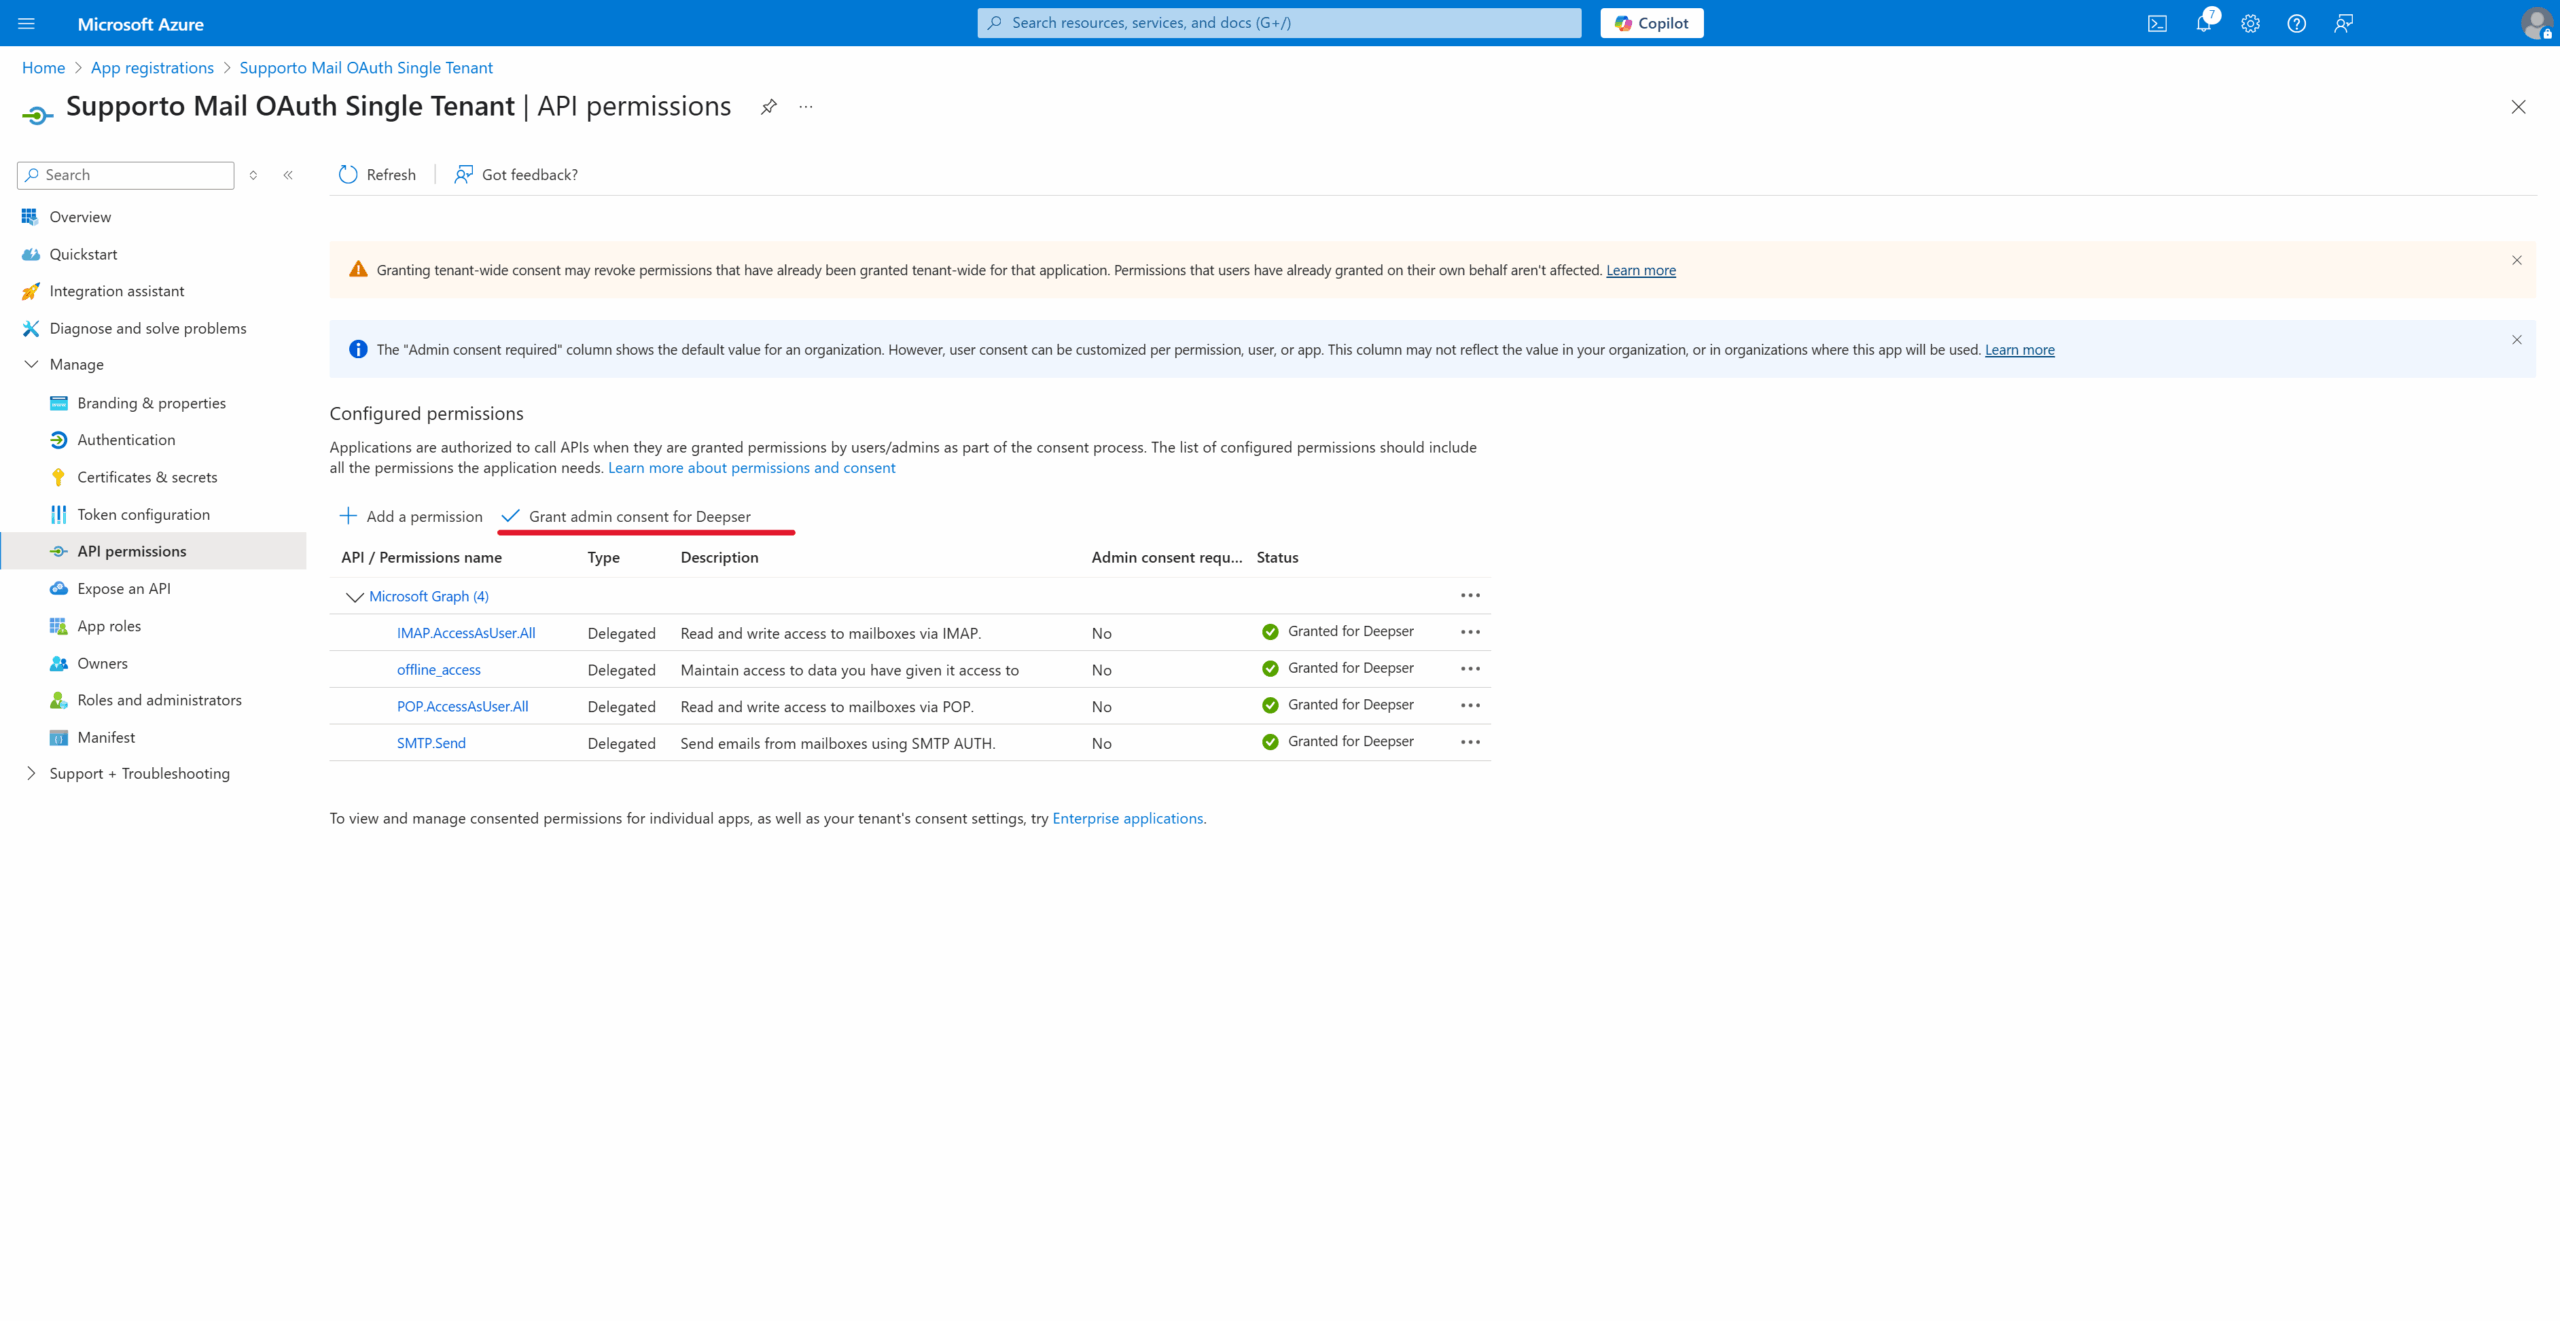
Click Add Permissions, then click Grant Admin Consent for Deepser and confirm.
Validate the OAuth Client
-
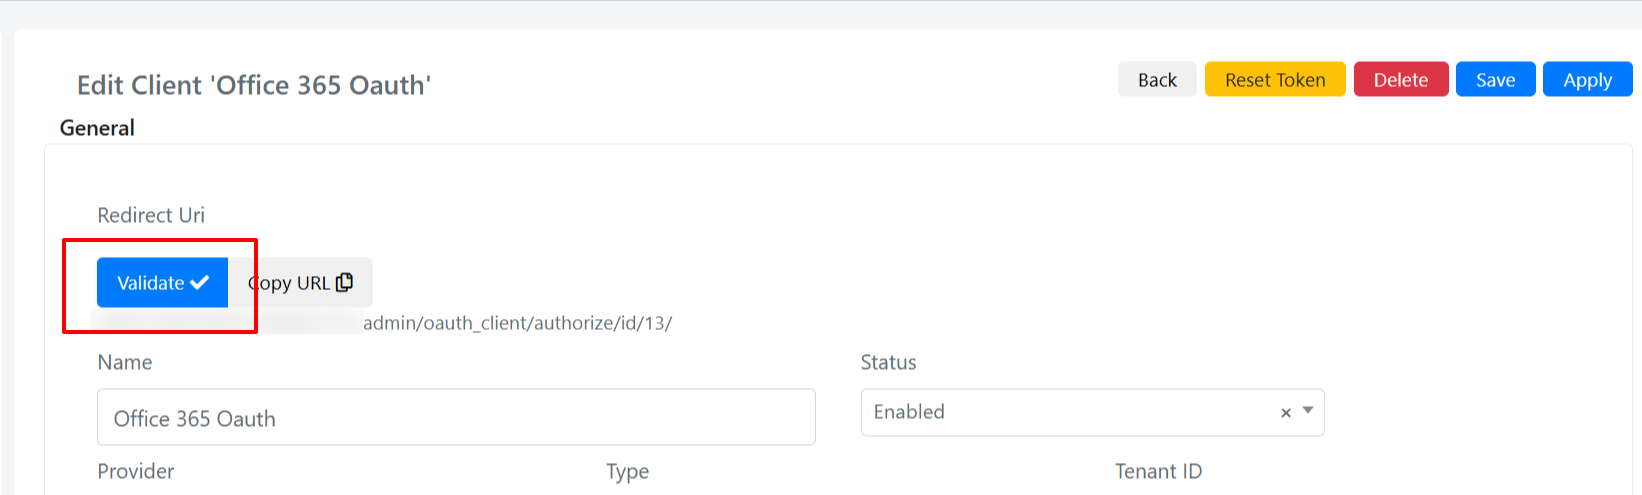
In Deepser, click Validate. Ensure you are signed in with the correct username. Alternatively, click Copy URL and paste it into an Incognito browser window to sign in with a specific account.
The validating user must have an active Office 365 license and access to the mailboxes. Ensure IMAP, POP, and Authenticated SMTP are enabled in the Office 365 admin area user settings. For shared mailboxes, verify that IMAP and POP services are enabled.
-
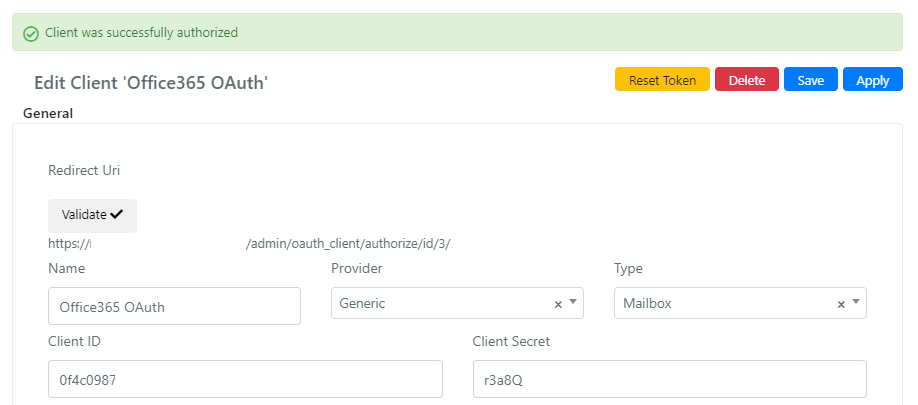
If validation succeeds, a green confirmation message appears.
-
Go to System > Tools > Email > Mailbox and select the incoming mailbox. In the OAuth Client field, select the validated client and save.
-
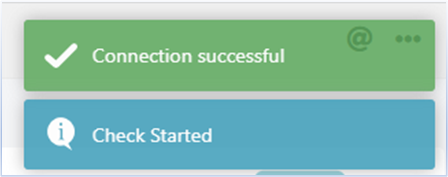
Click Check to verify the mailbox connection. A green "Connection Successful" message confirms correct operation.
Google OAuth Configuration
This section walks you through creating an OAuth client in Deepser for mailbox integration with Google, configuring a Google Cloud project, and validating the connection.
Create a Deepser OAuth Client for Google
-
In the Deepser Backend, navigate to System > Tools > OAuth > Client > Add Client.
-
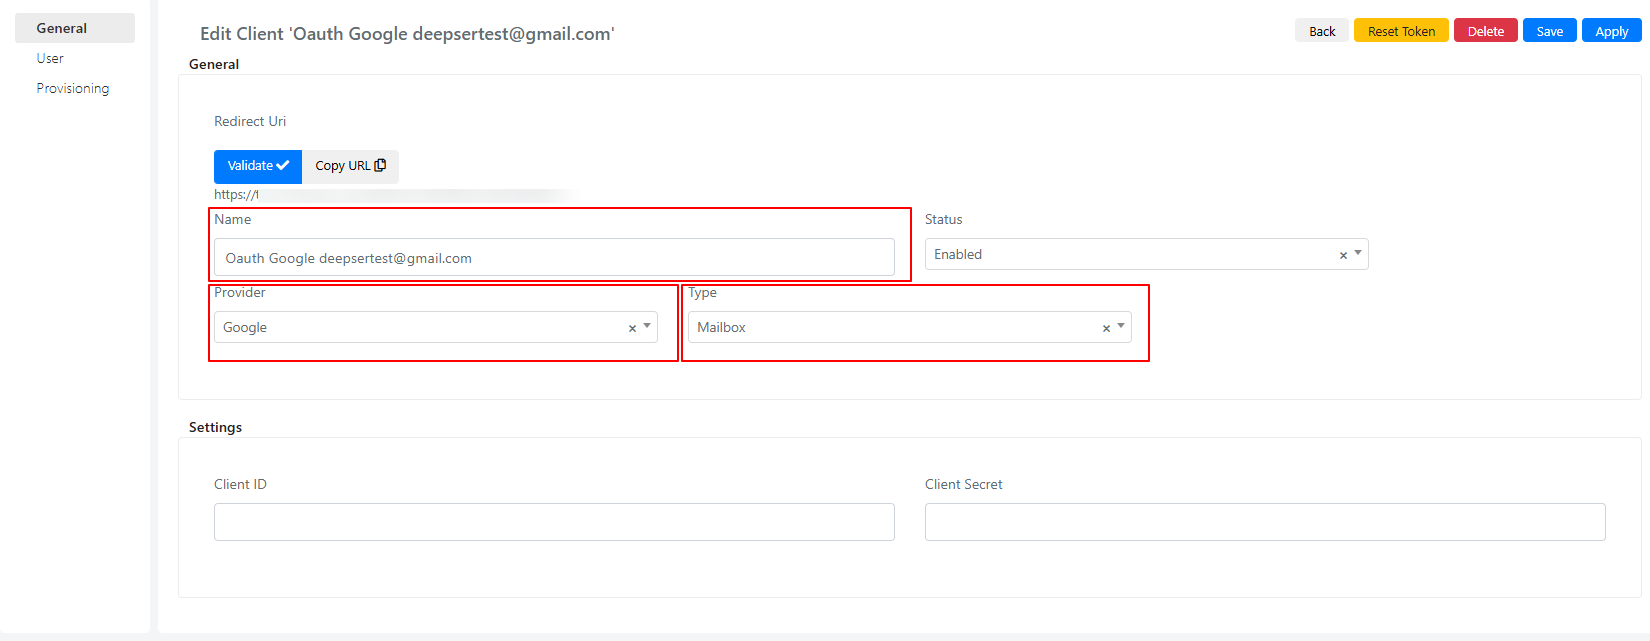
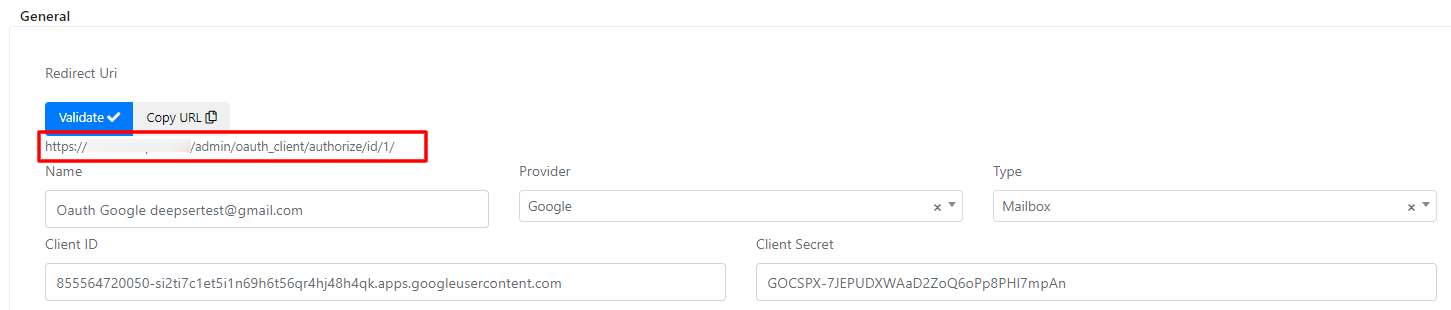
Enter a name, set the type to Mailbox, set the provider to Google, and save.
-
Copy the generated redirect URL.
Configure Google Cloud Project
If your Google project is already set up, skip to Configure OAuth Client ID Credentials.
-
Go to the Google Cloud Platform and log in.
-
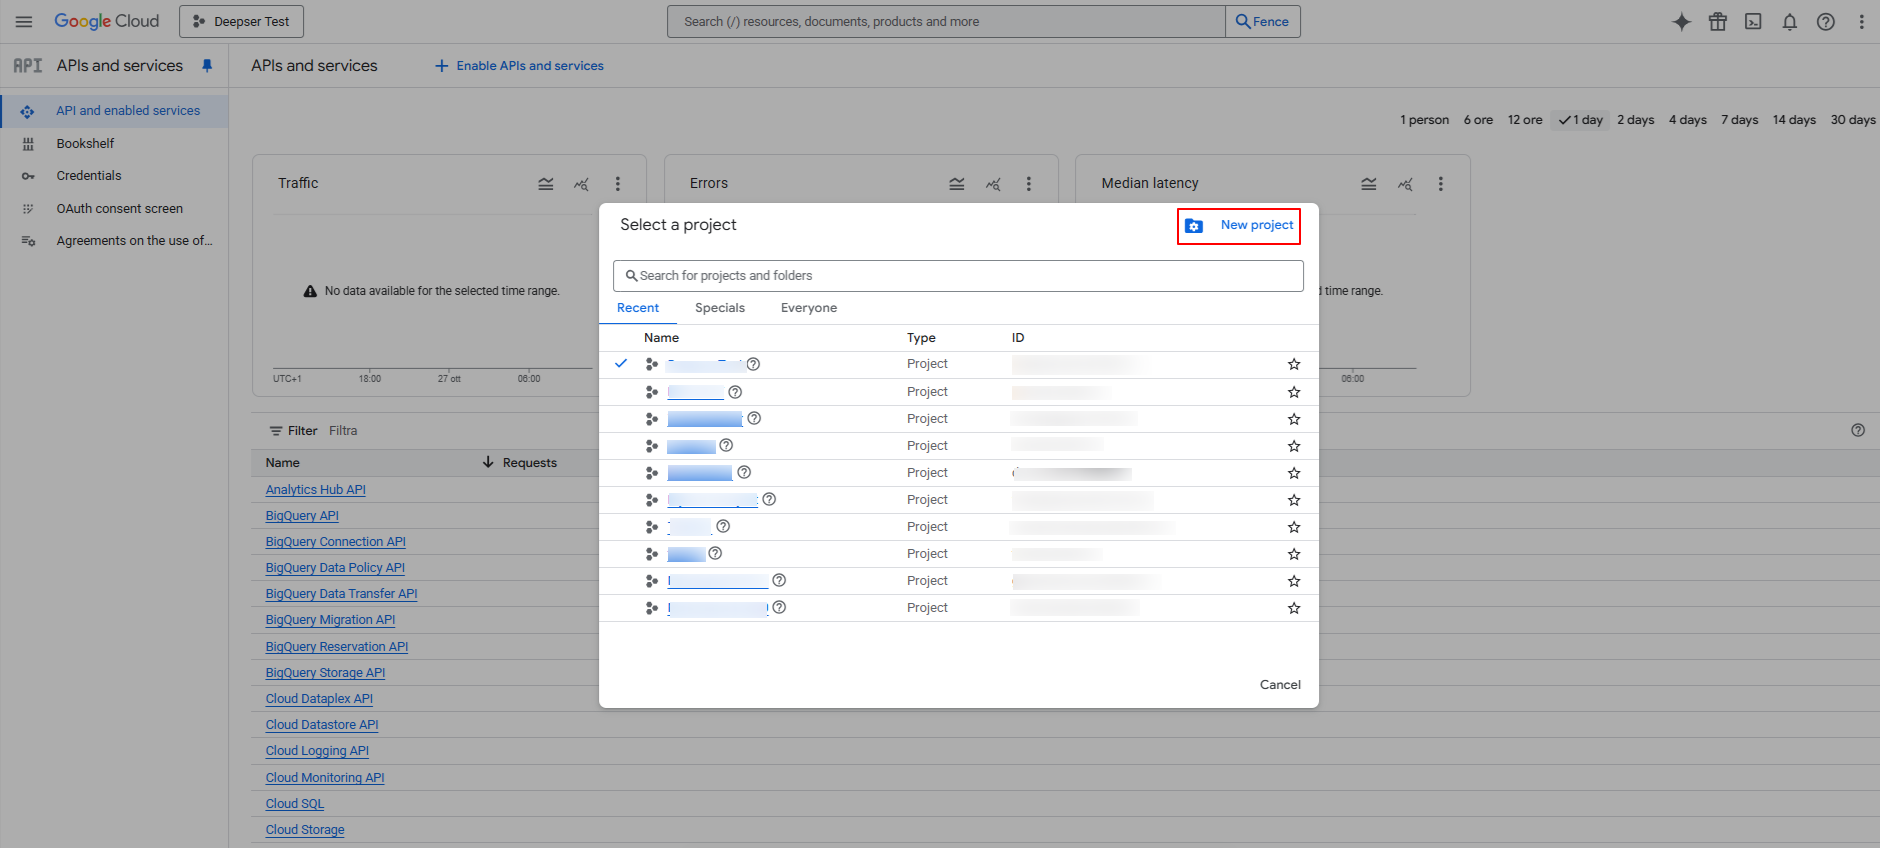
Click on the project menu at the top and create a New Project.

-
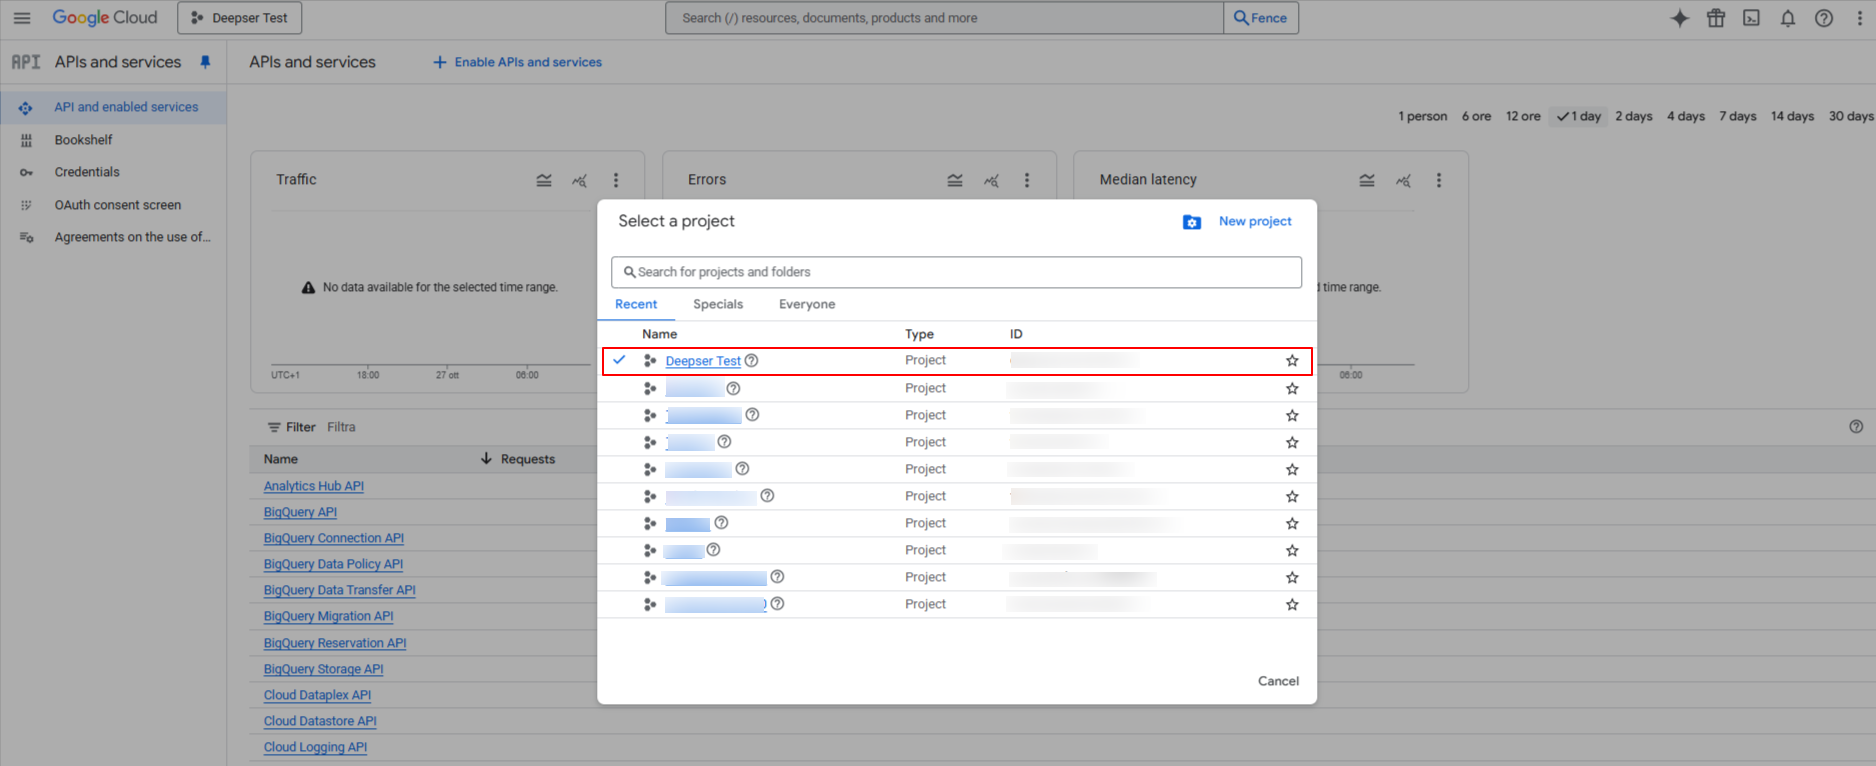
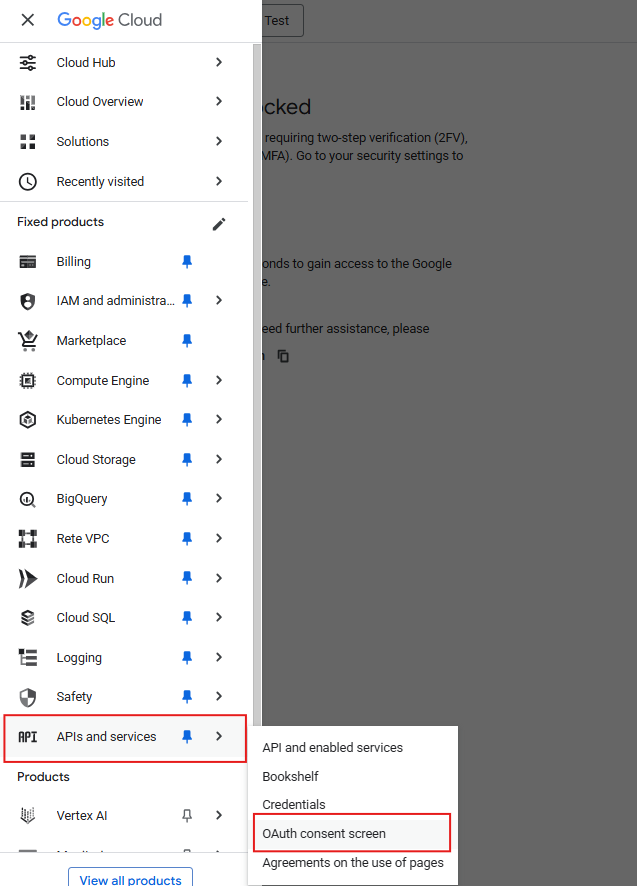
Select the new project, then go to APIs & Services > OAuth Consent Screen.
-
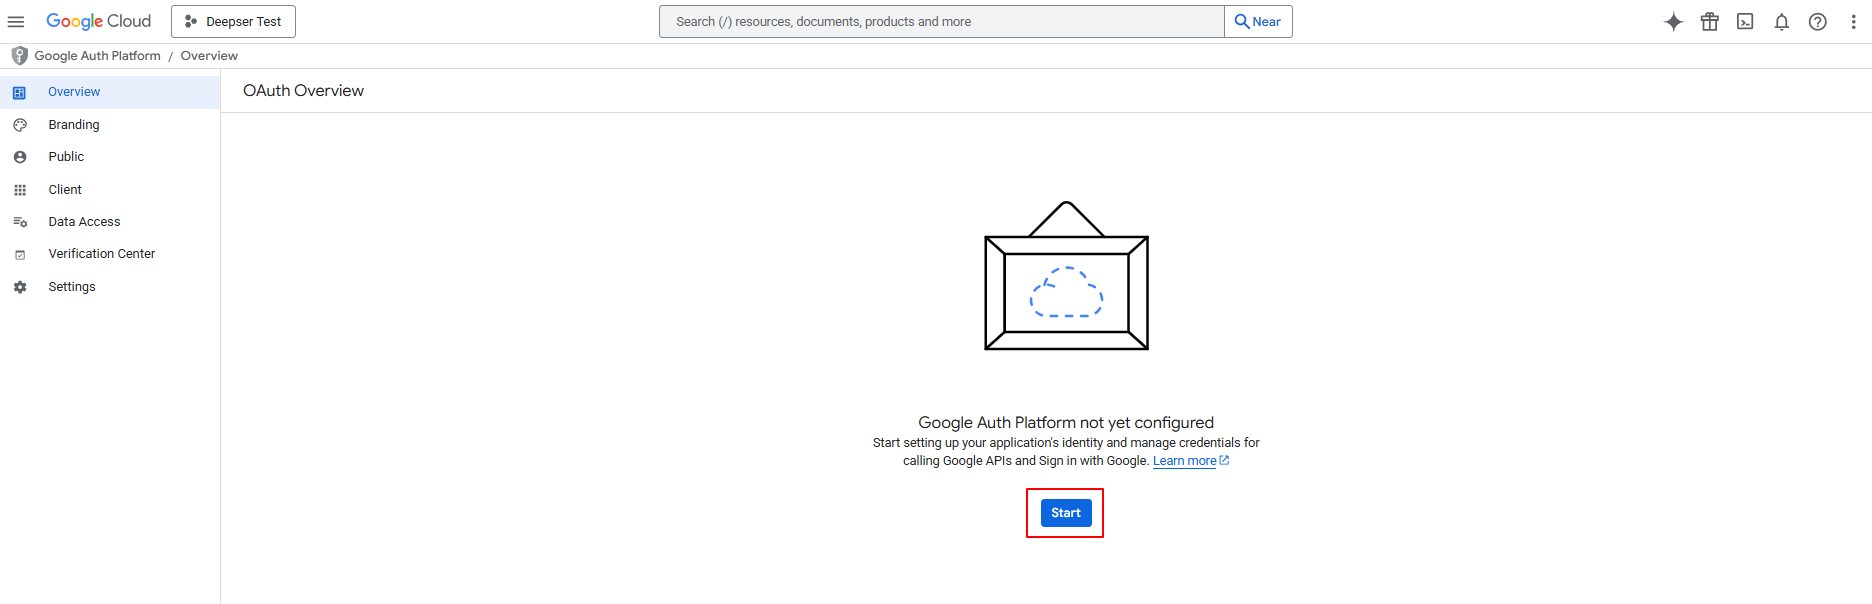
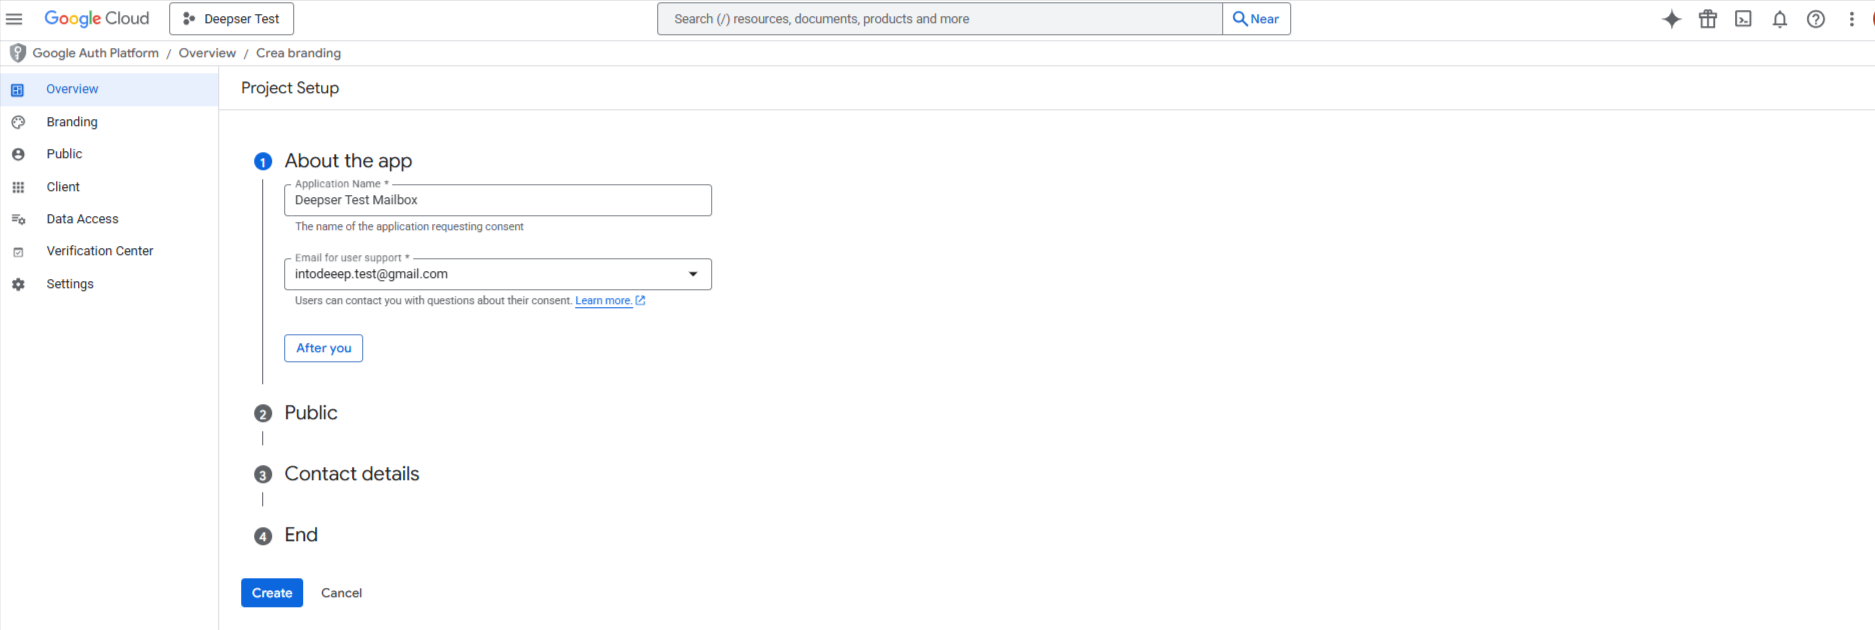
Click Start. Enter a name, the access email in User Support Email and Developer Contact Information, then click Save & Continue.
-
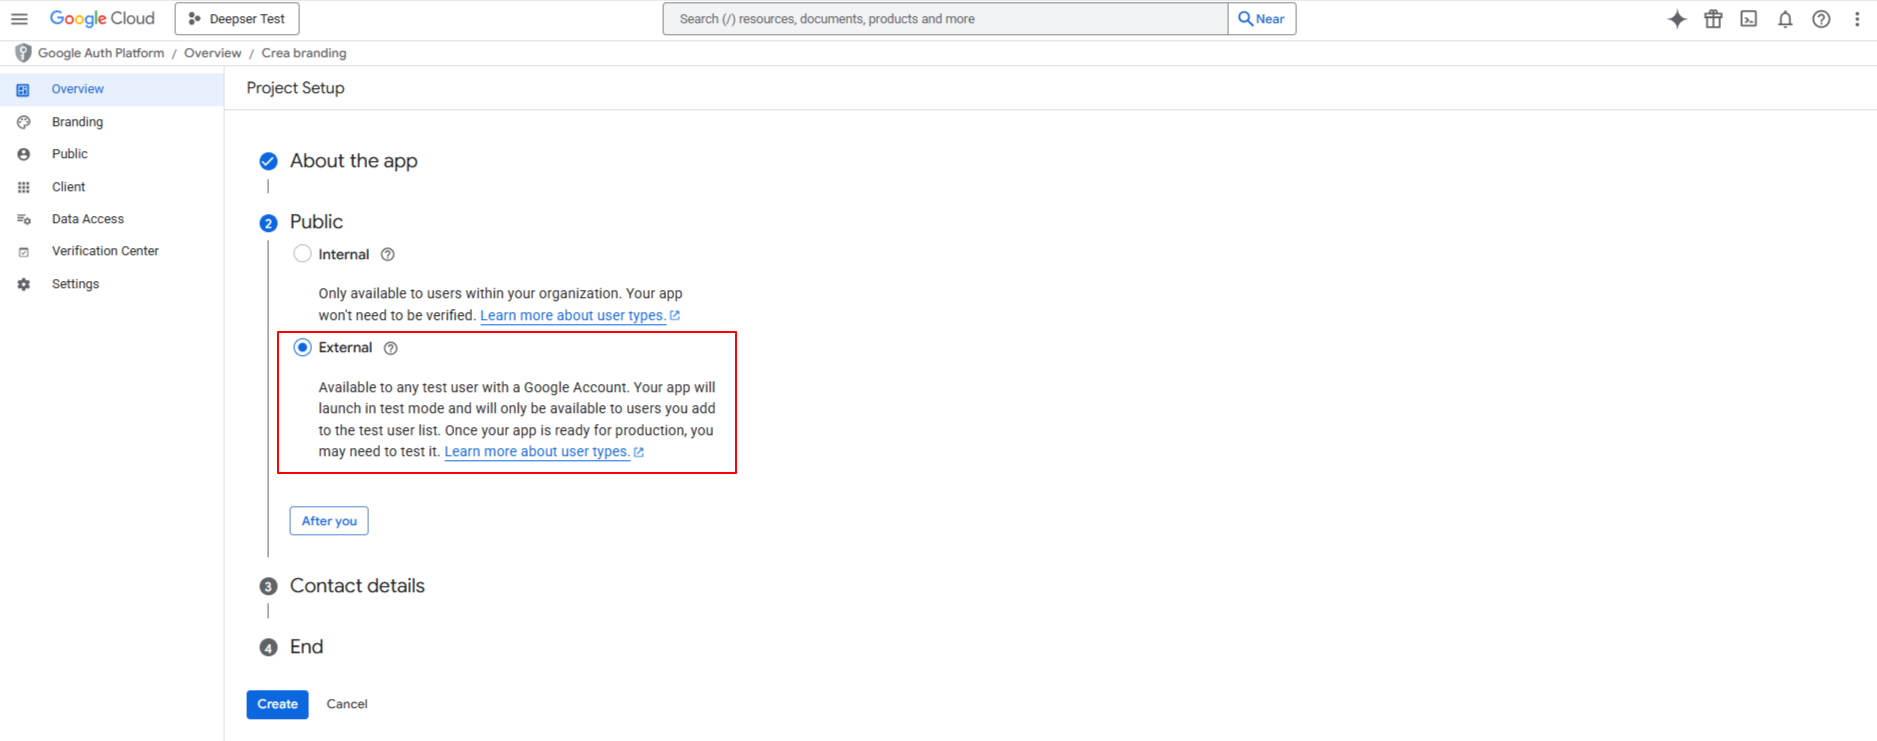
In Public, select External and proceed.
-
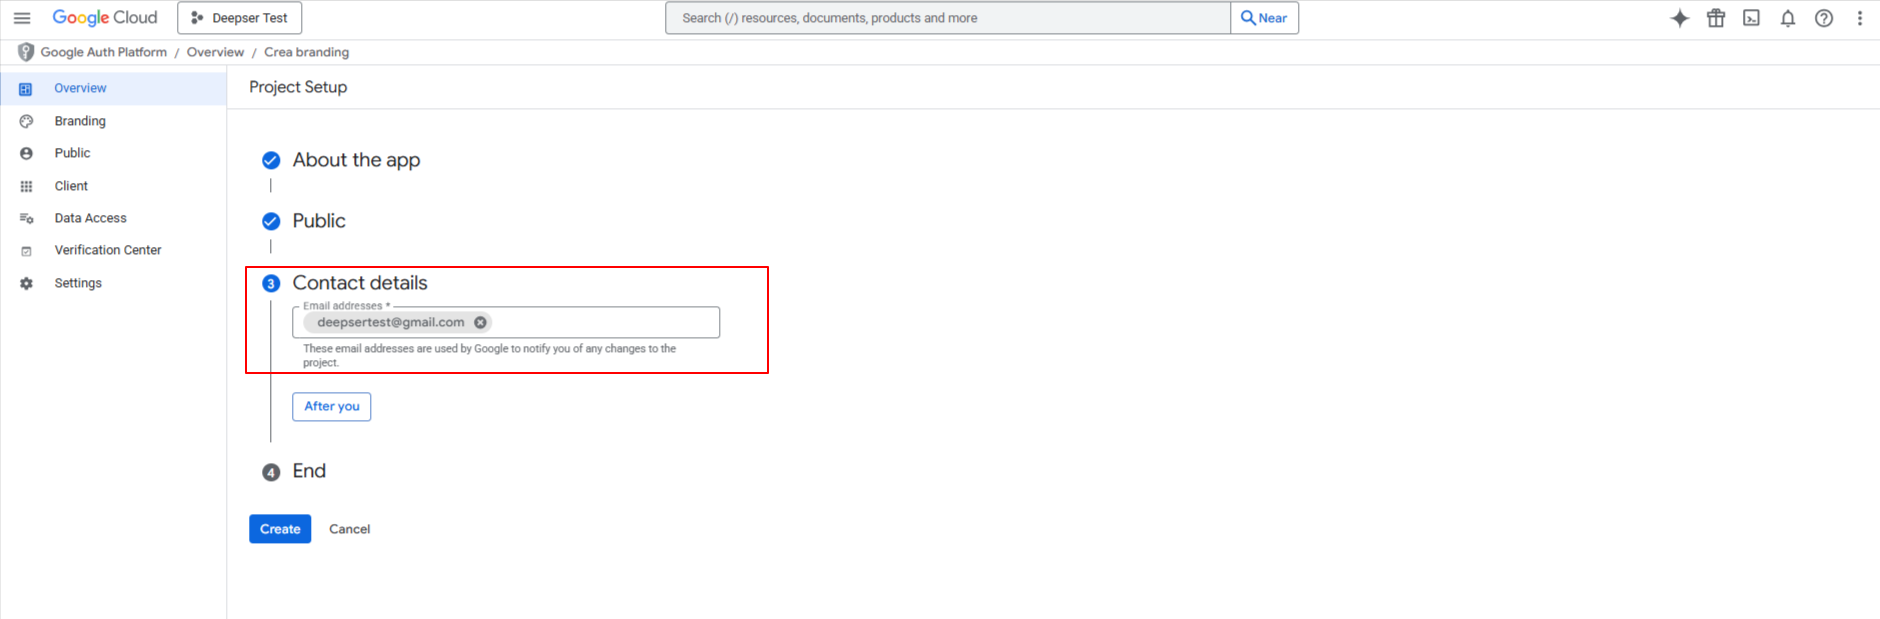
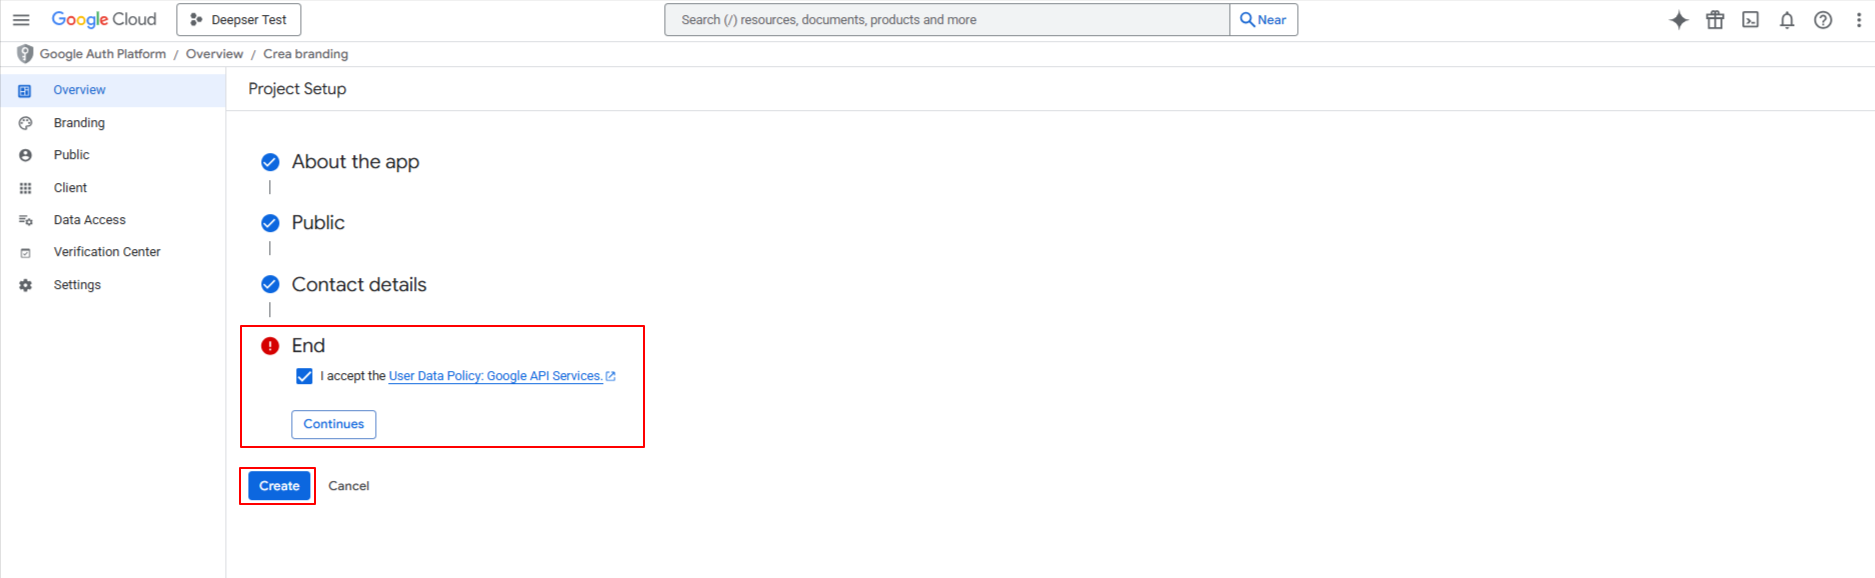
Enter your email in Contact Details, accept the policies, and click Create.
-
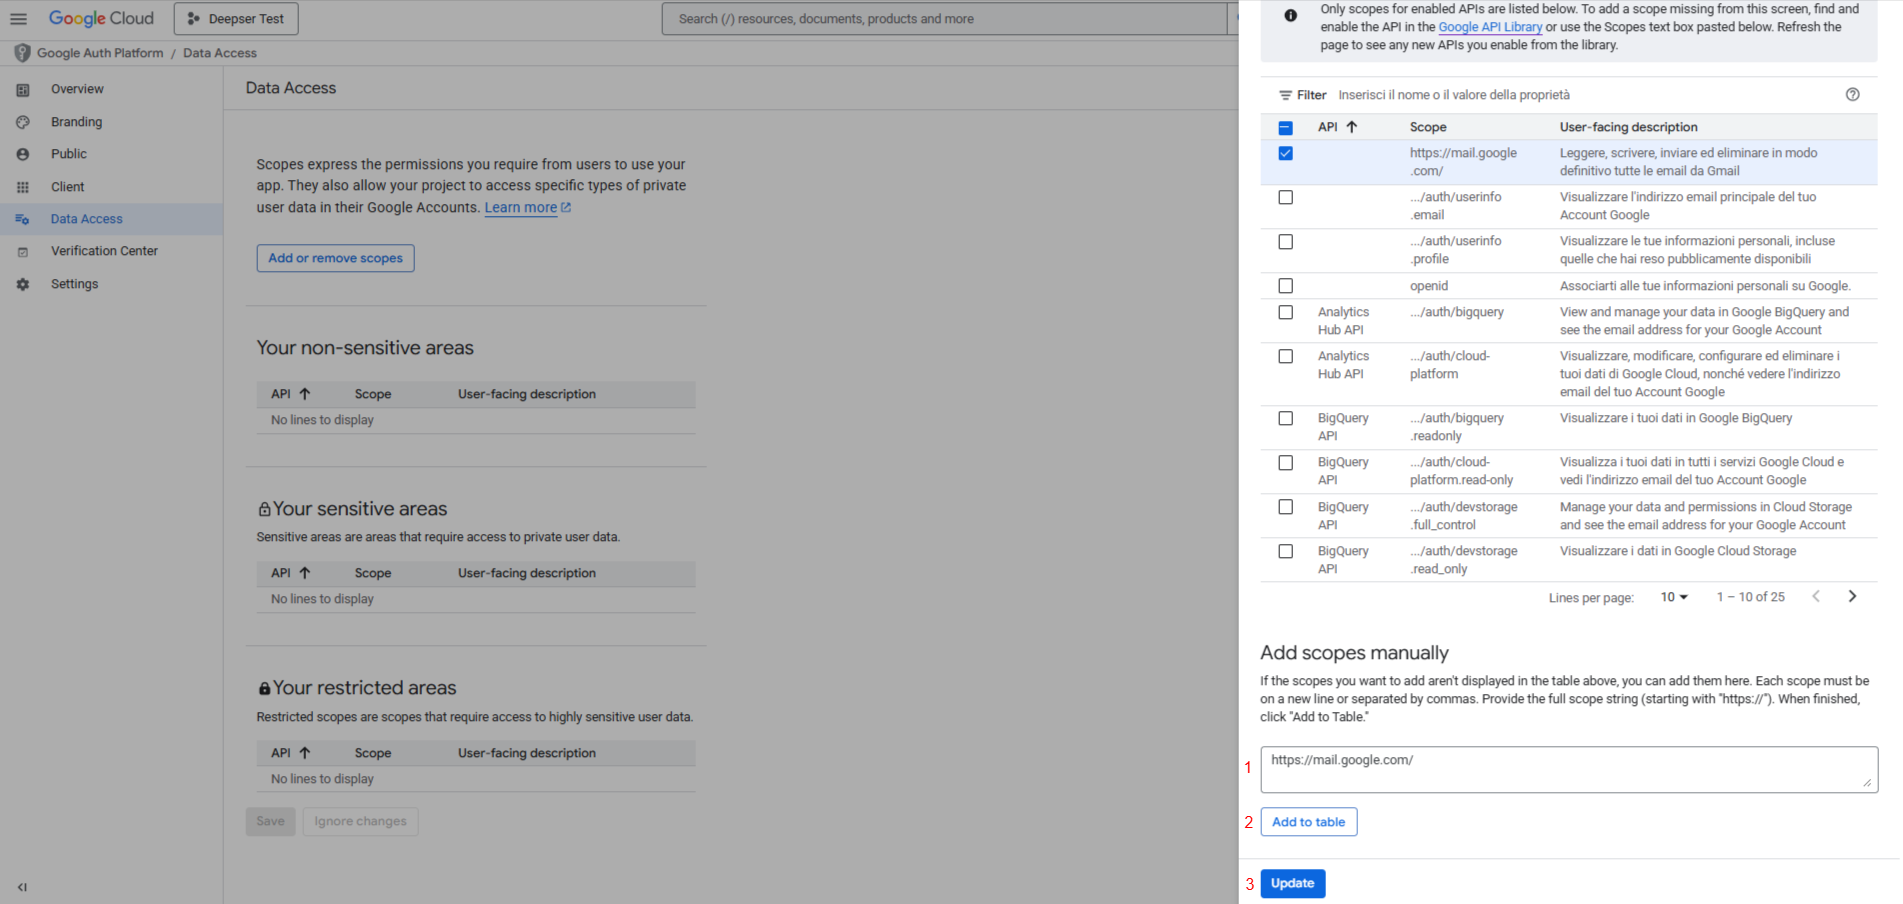
Under Data Access, press Add or Remove Scopes. In the Add Manually section, paste
https://mail.google.com/, click Add to Table, then Update, then Save and Continue.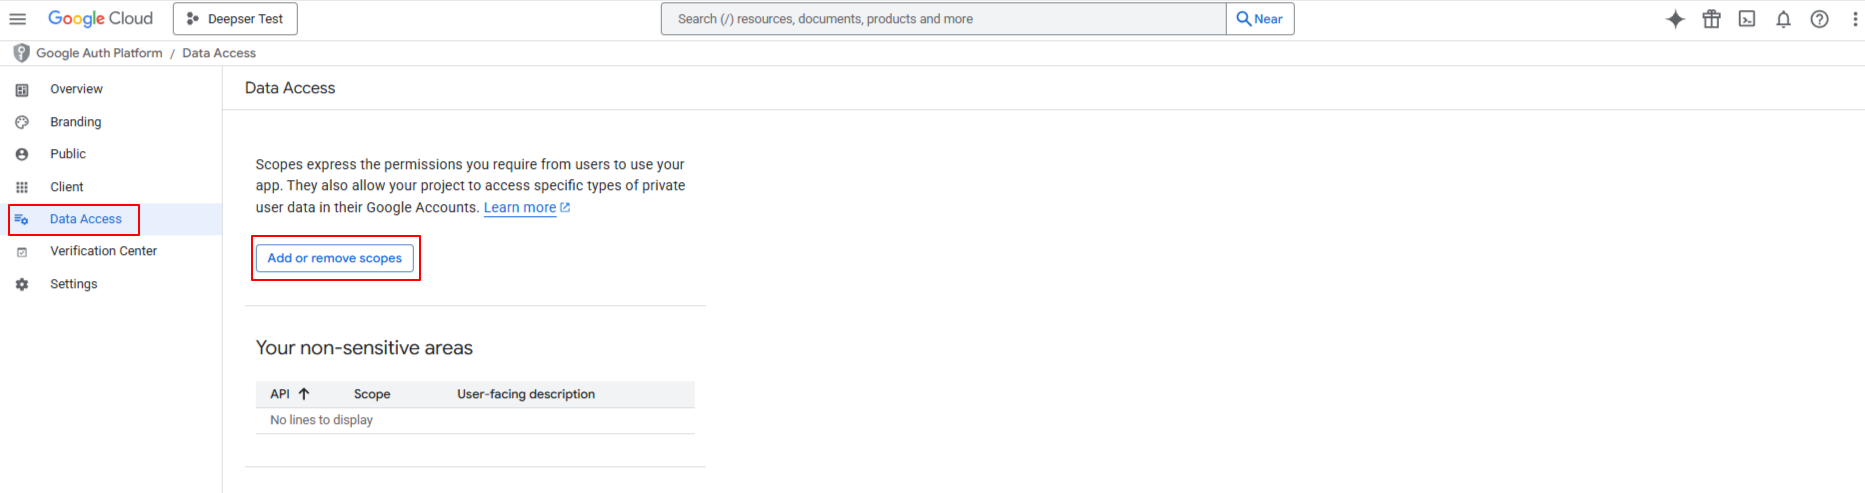
Configure OAuth Client ID Credentials
-
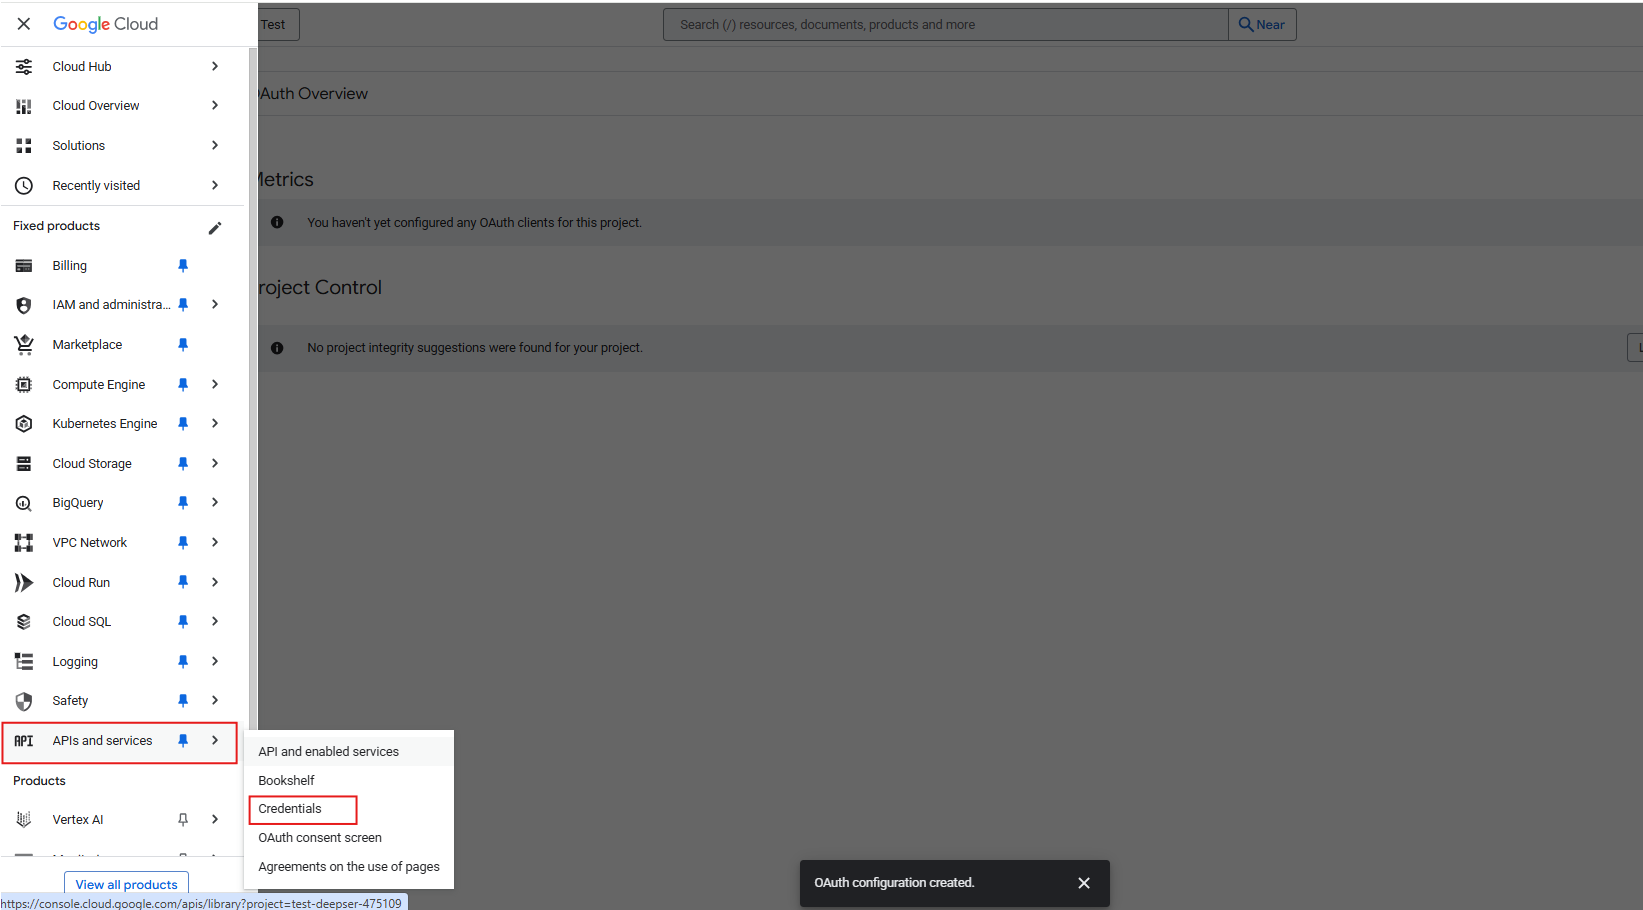
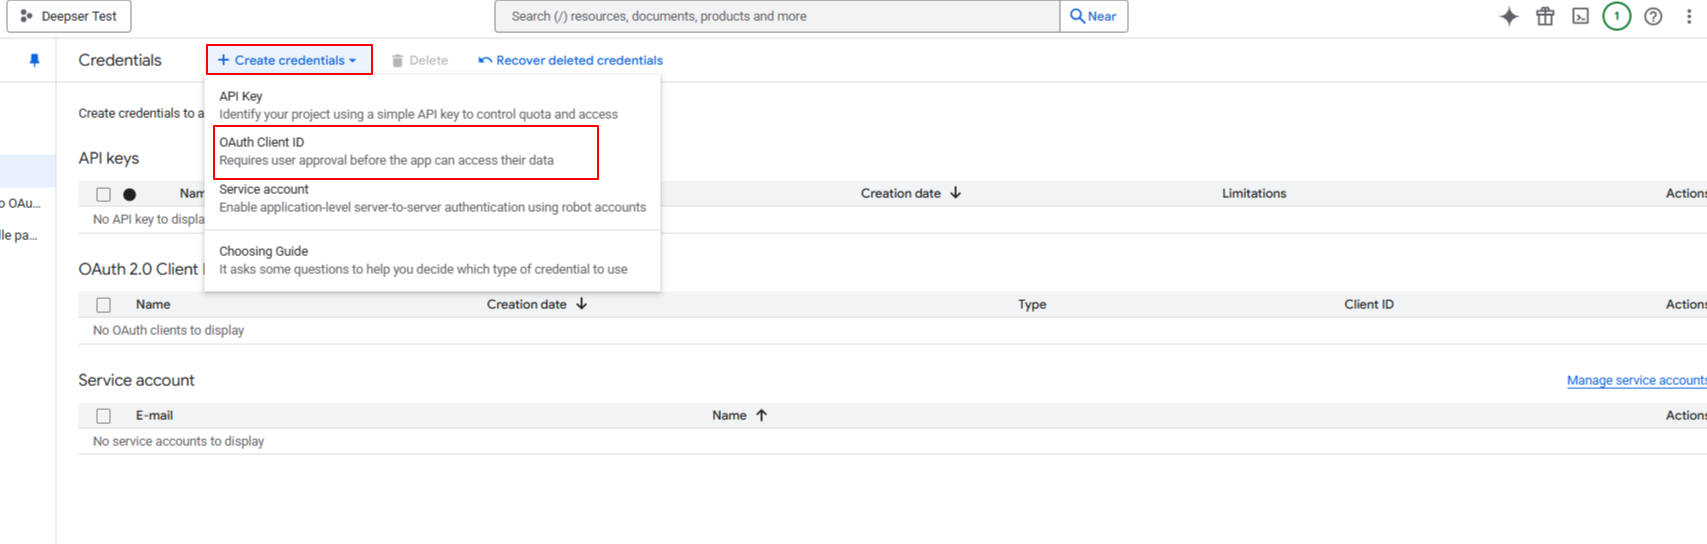
In the Credentials section, click Create Credentials and select OAuth Client ID.
-
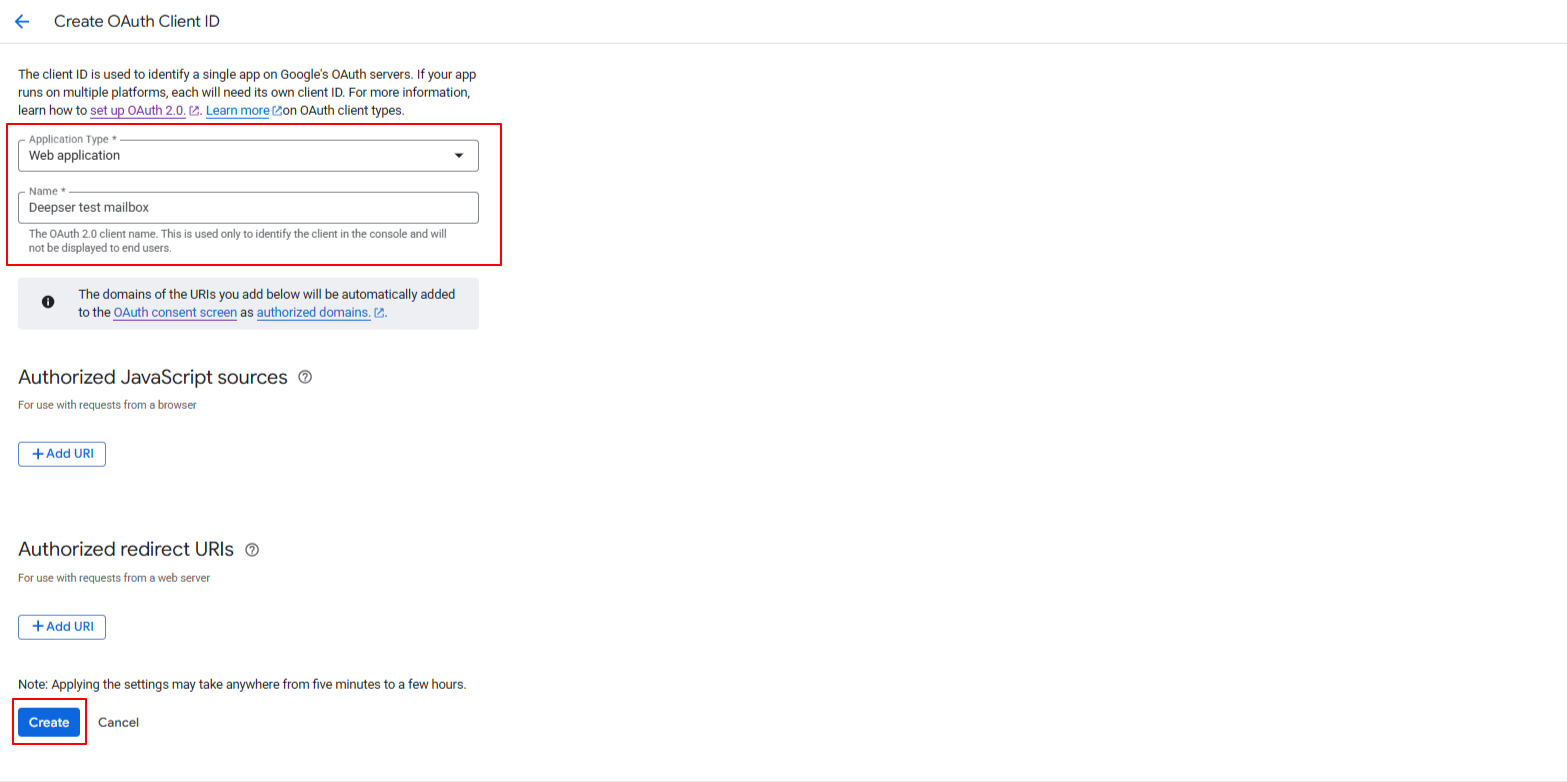
Select Web Application as the type, give it a name, and under Authorized Redirect URIs, paste the URI from the Deepser OAuth client. Click Create.
-
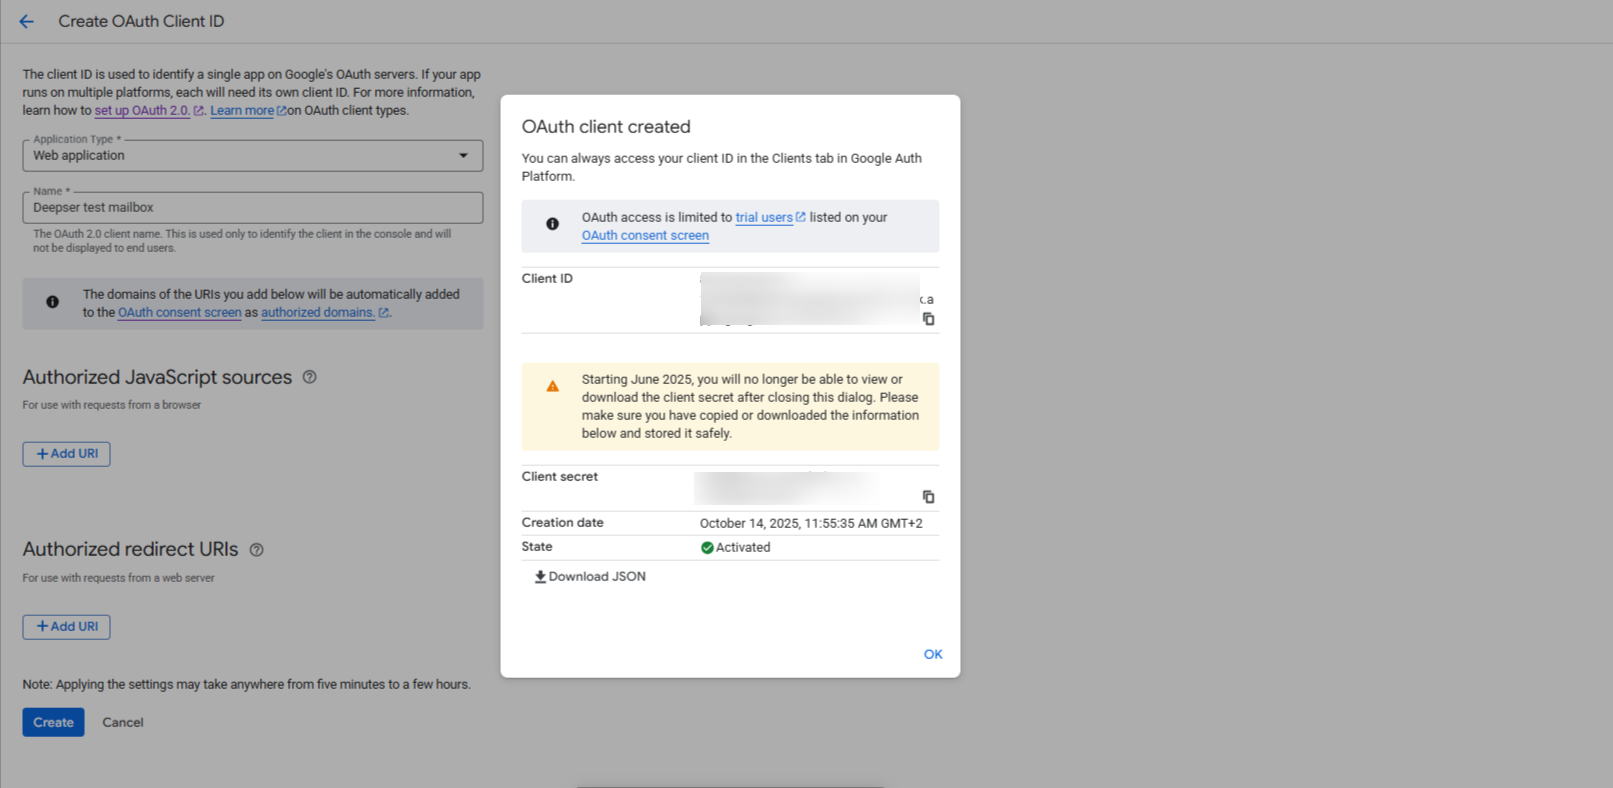
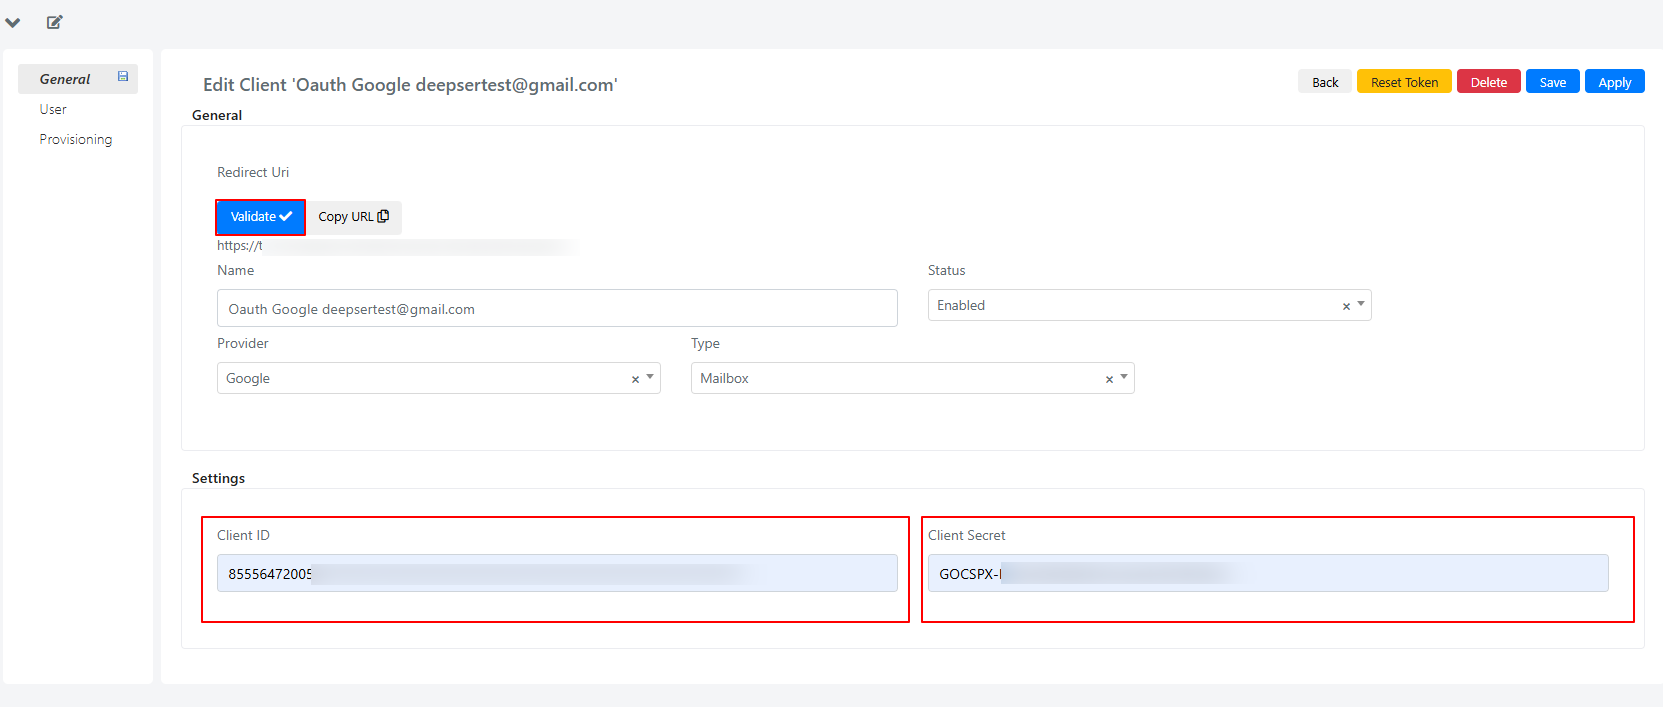
Copy the generated Client ID and Client Secret and enter them into the Deepser OAuth Client.
-
Save and click Validate.
-
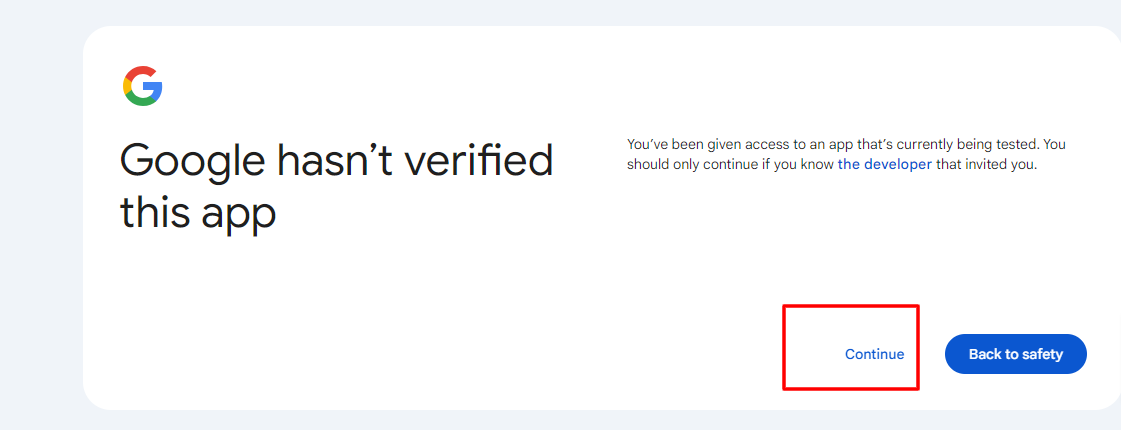
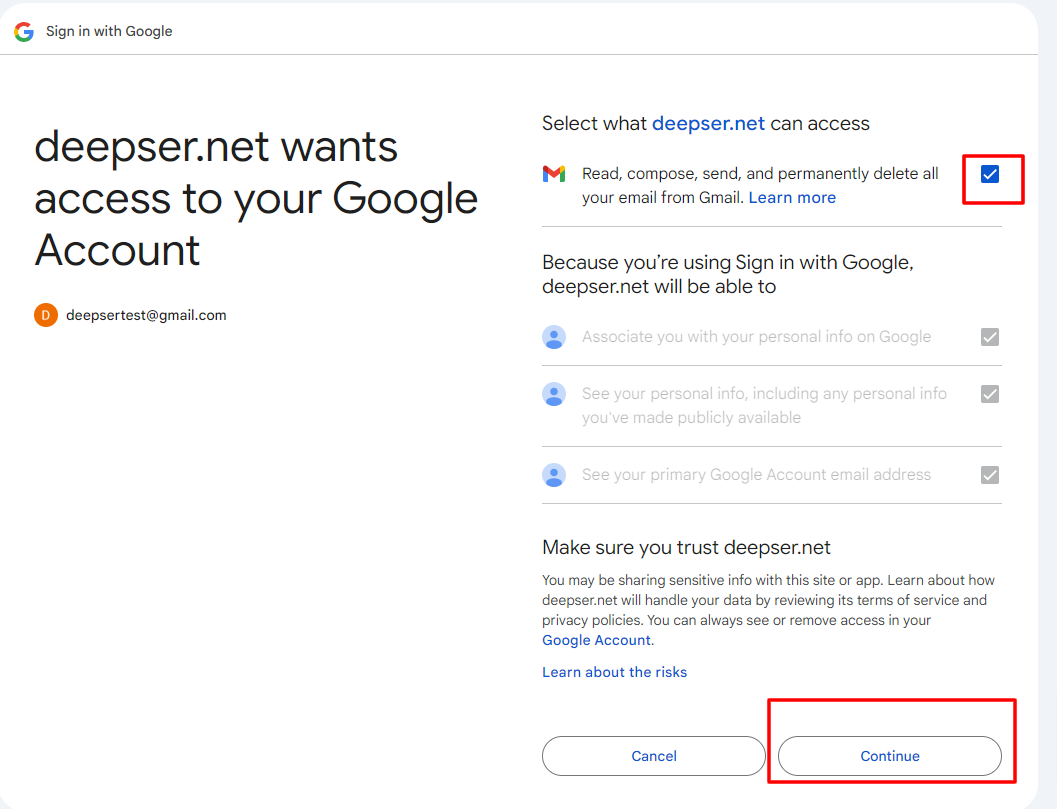
Log in and click Continue. Select the read/write permissions for Google Mail and click Continue.
-
If all steps were completed correctly, the OAuth Client will be validated and active.