Configure Office 365 Mailbox Integration
This guide covers how to configure a mailbox through the integration of Office 365 with Deepser. You need to register the Deepser application on Azure and assign it read and write permissions. The configuration uses Application Permissions, meaning an automated interaction between the two systems.
This procedure applies to both Shared Mailboxes and User Mailboxes.
Deepser/Azure OAuth Client Configuration
Create the App Registration
The first step is to register the application on Microsoft Azure.
-
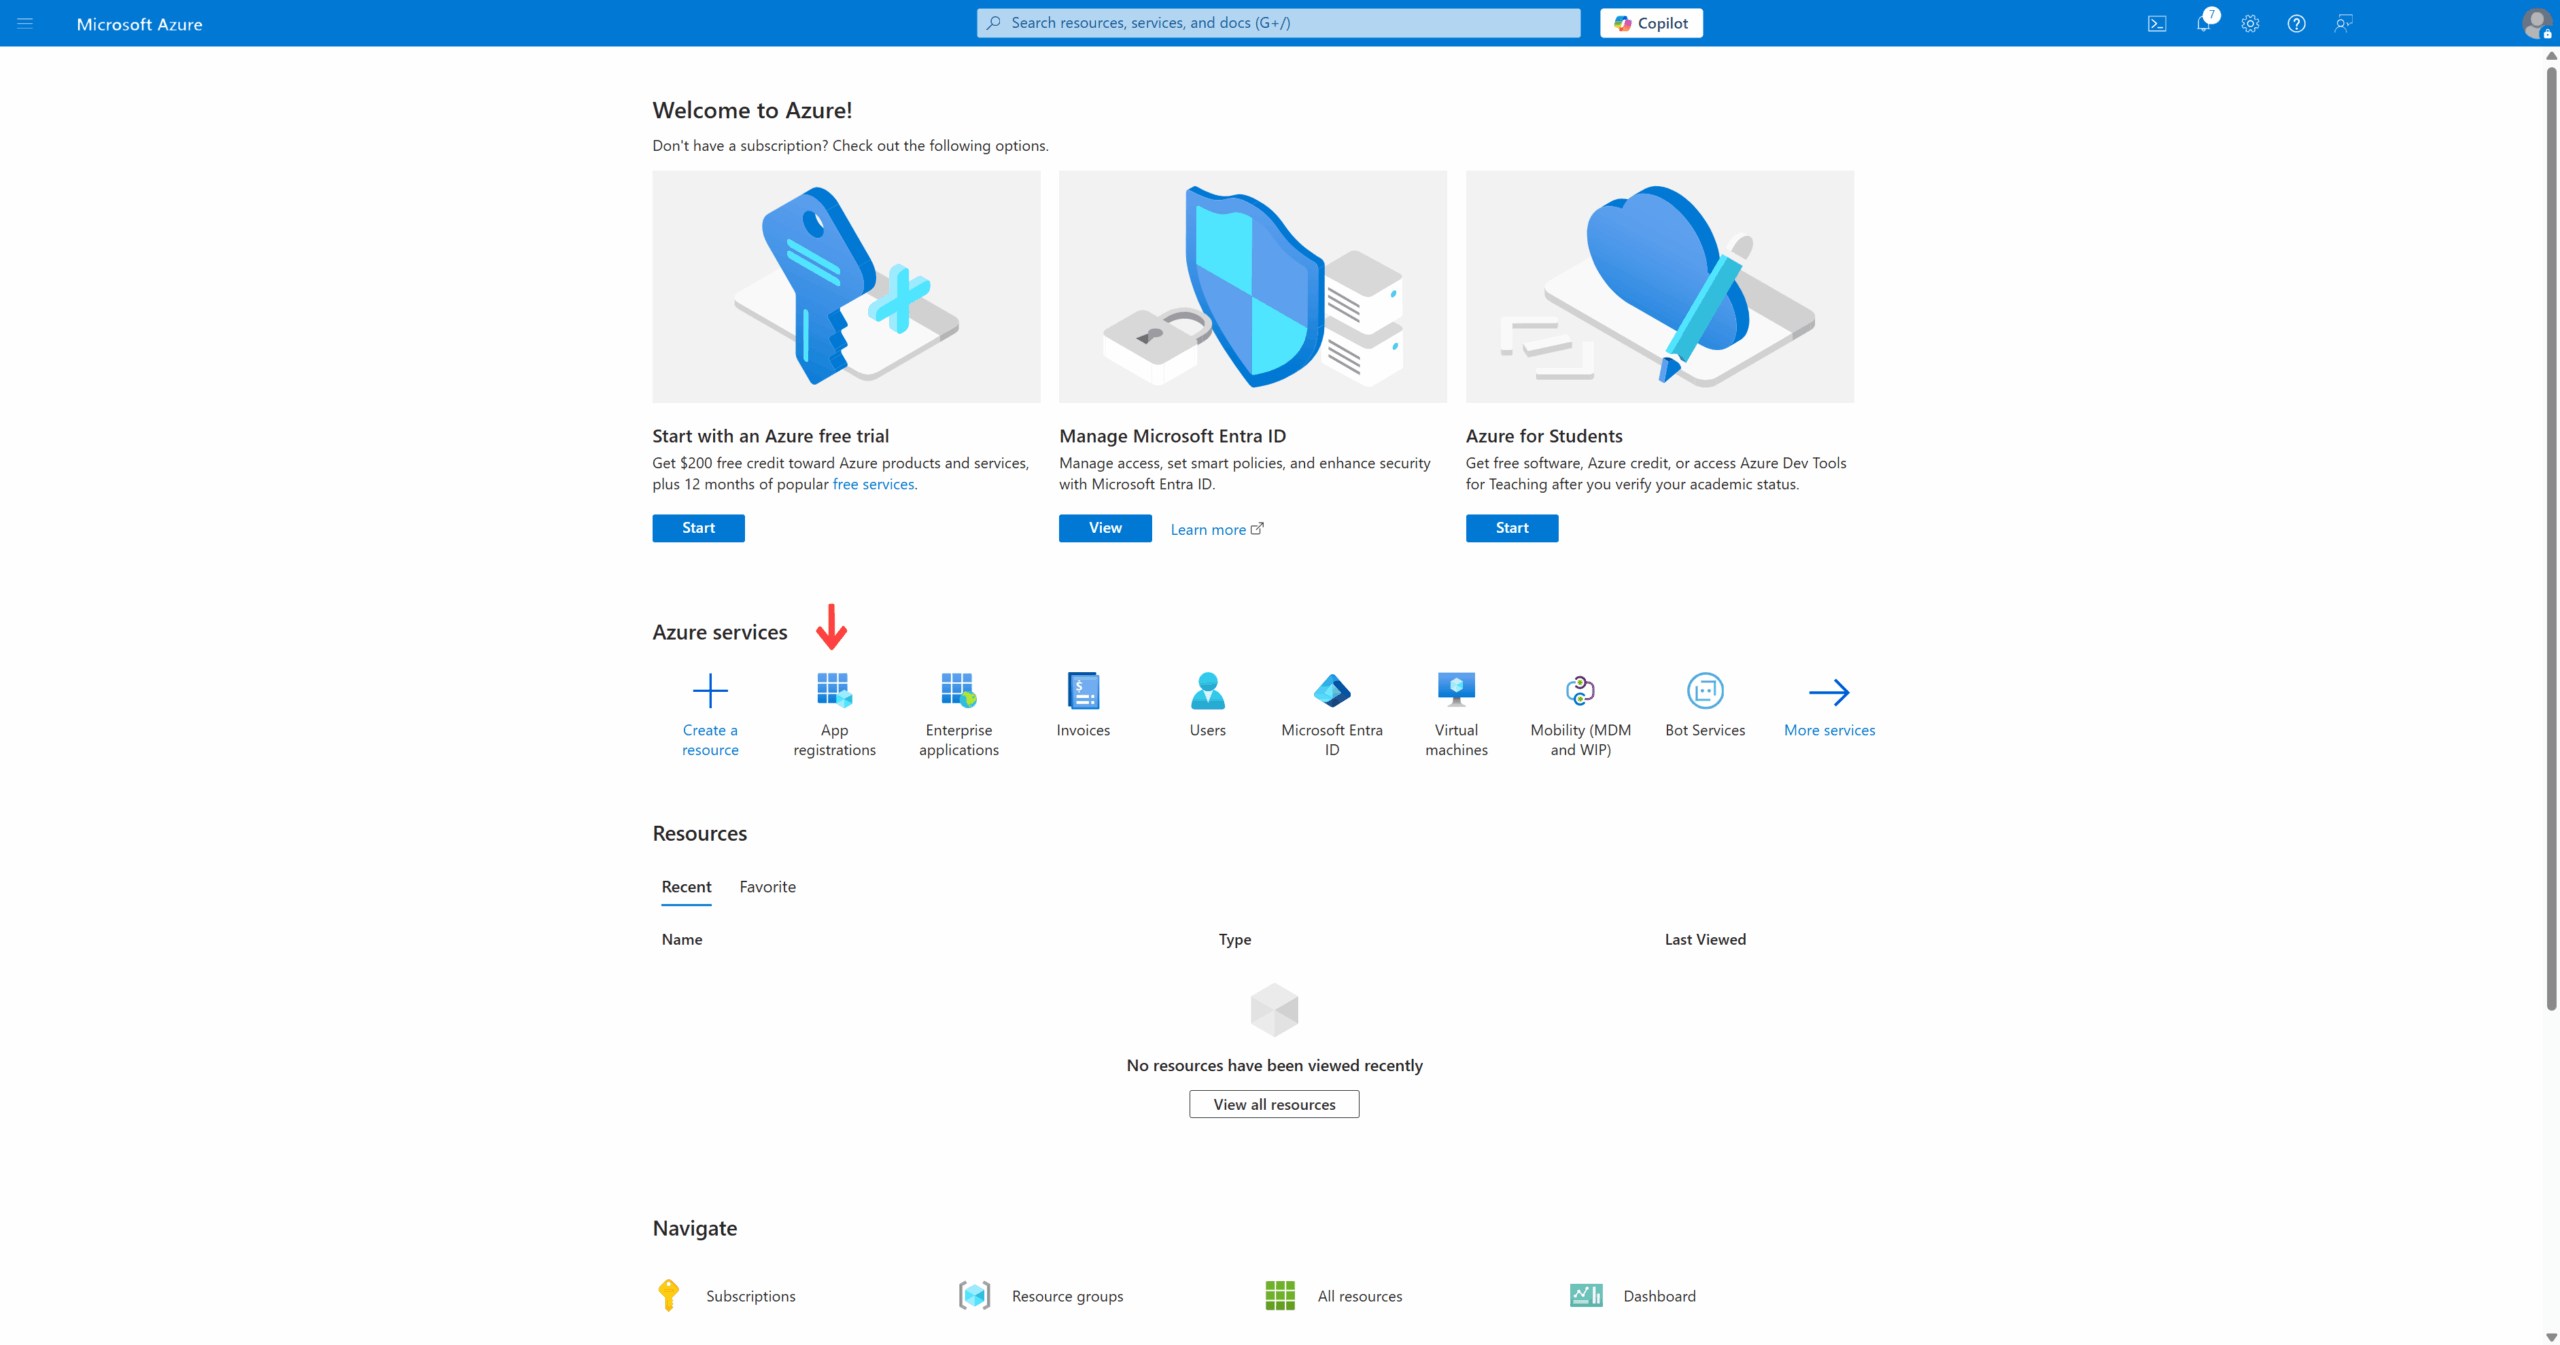
Log in to Azure and select the "App Registrations" section.
-
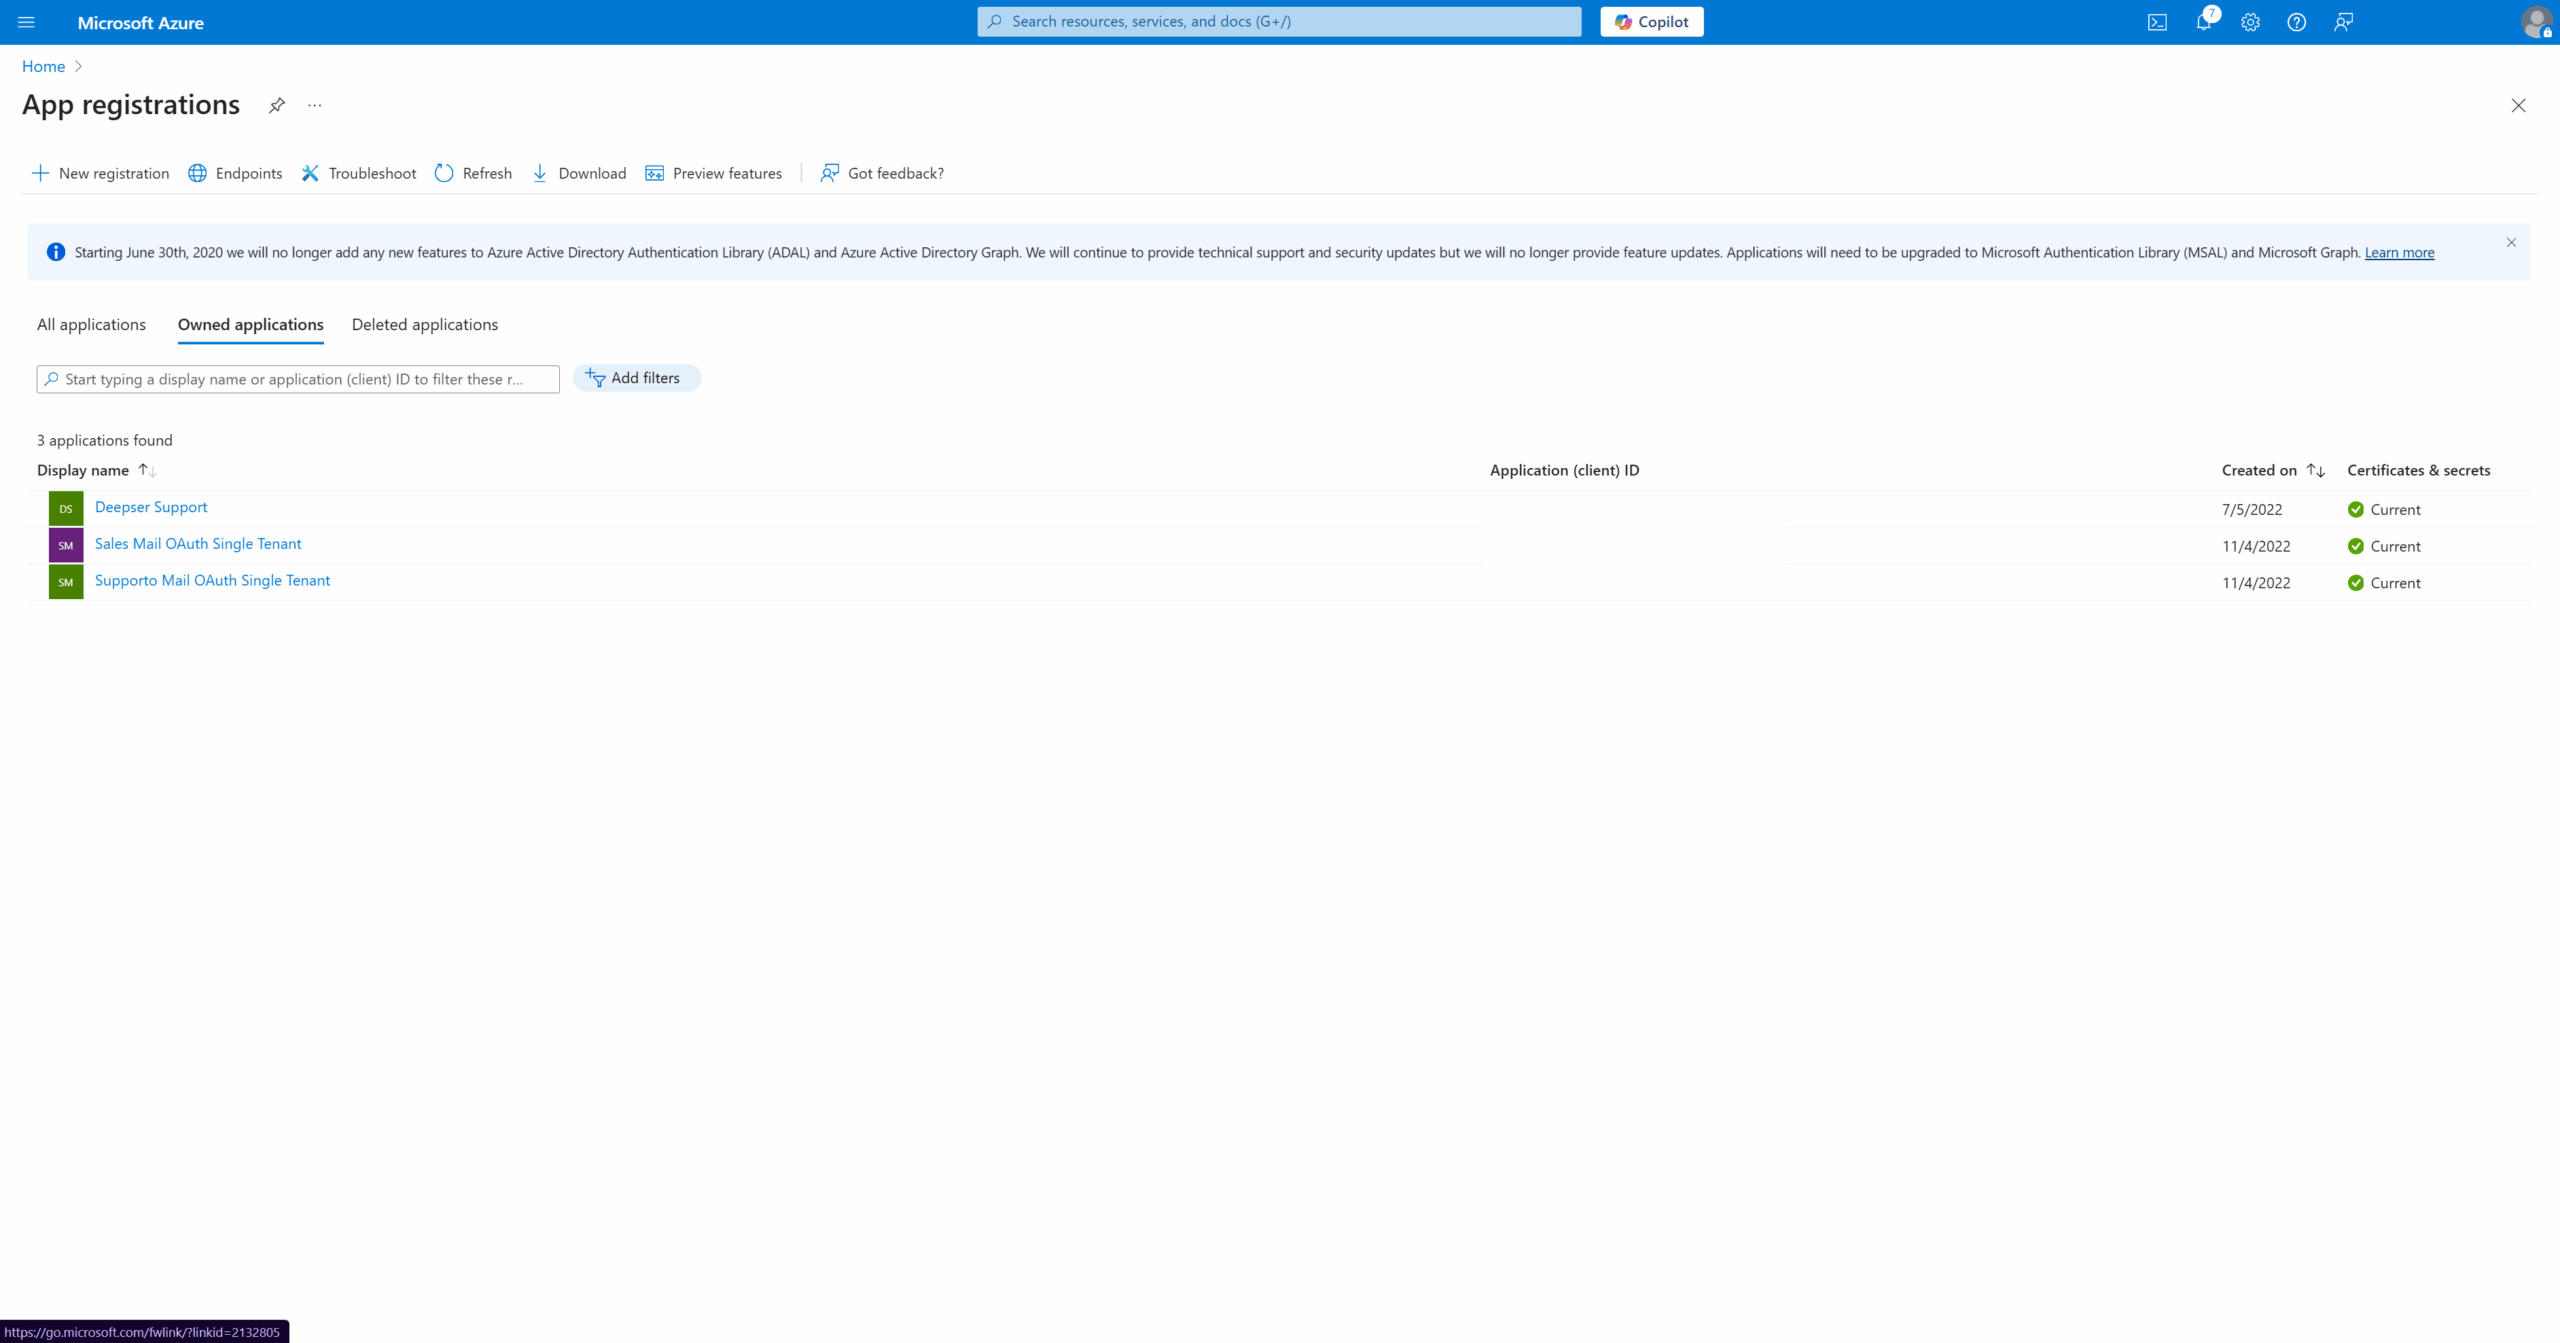
Click on "New registration".
-
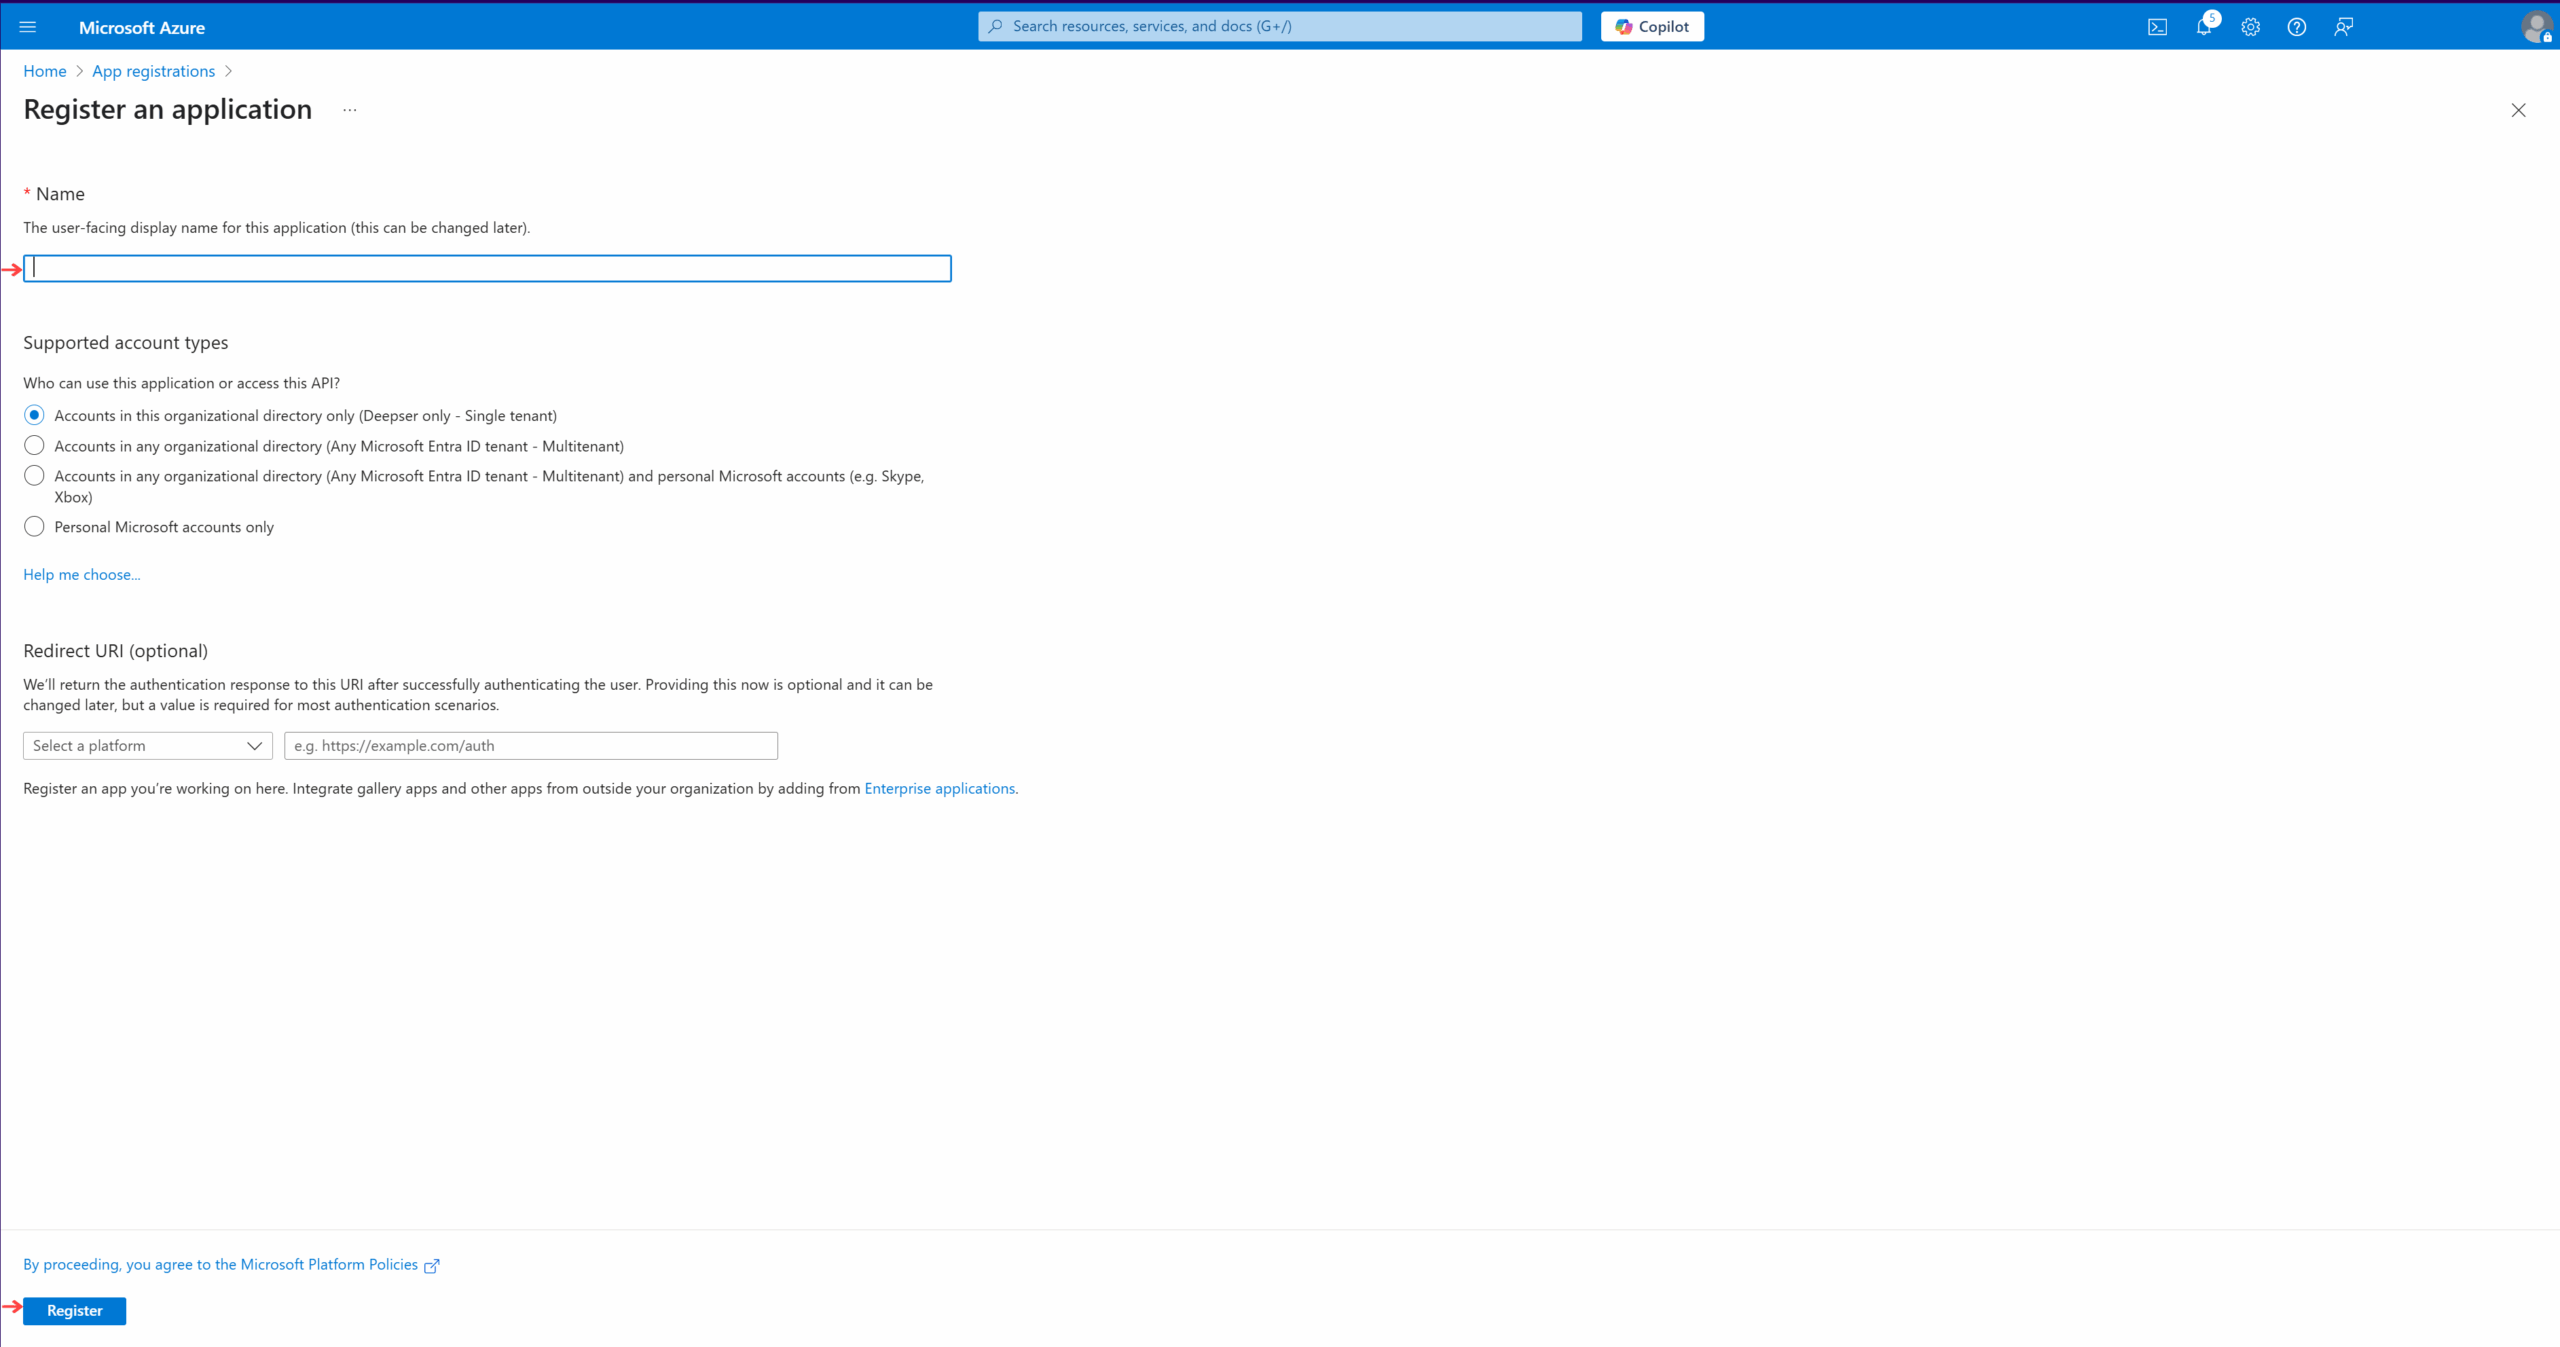
Enter a name for the application and click "Register".
-
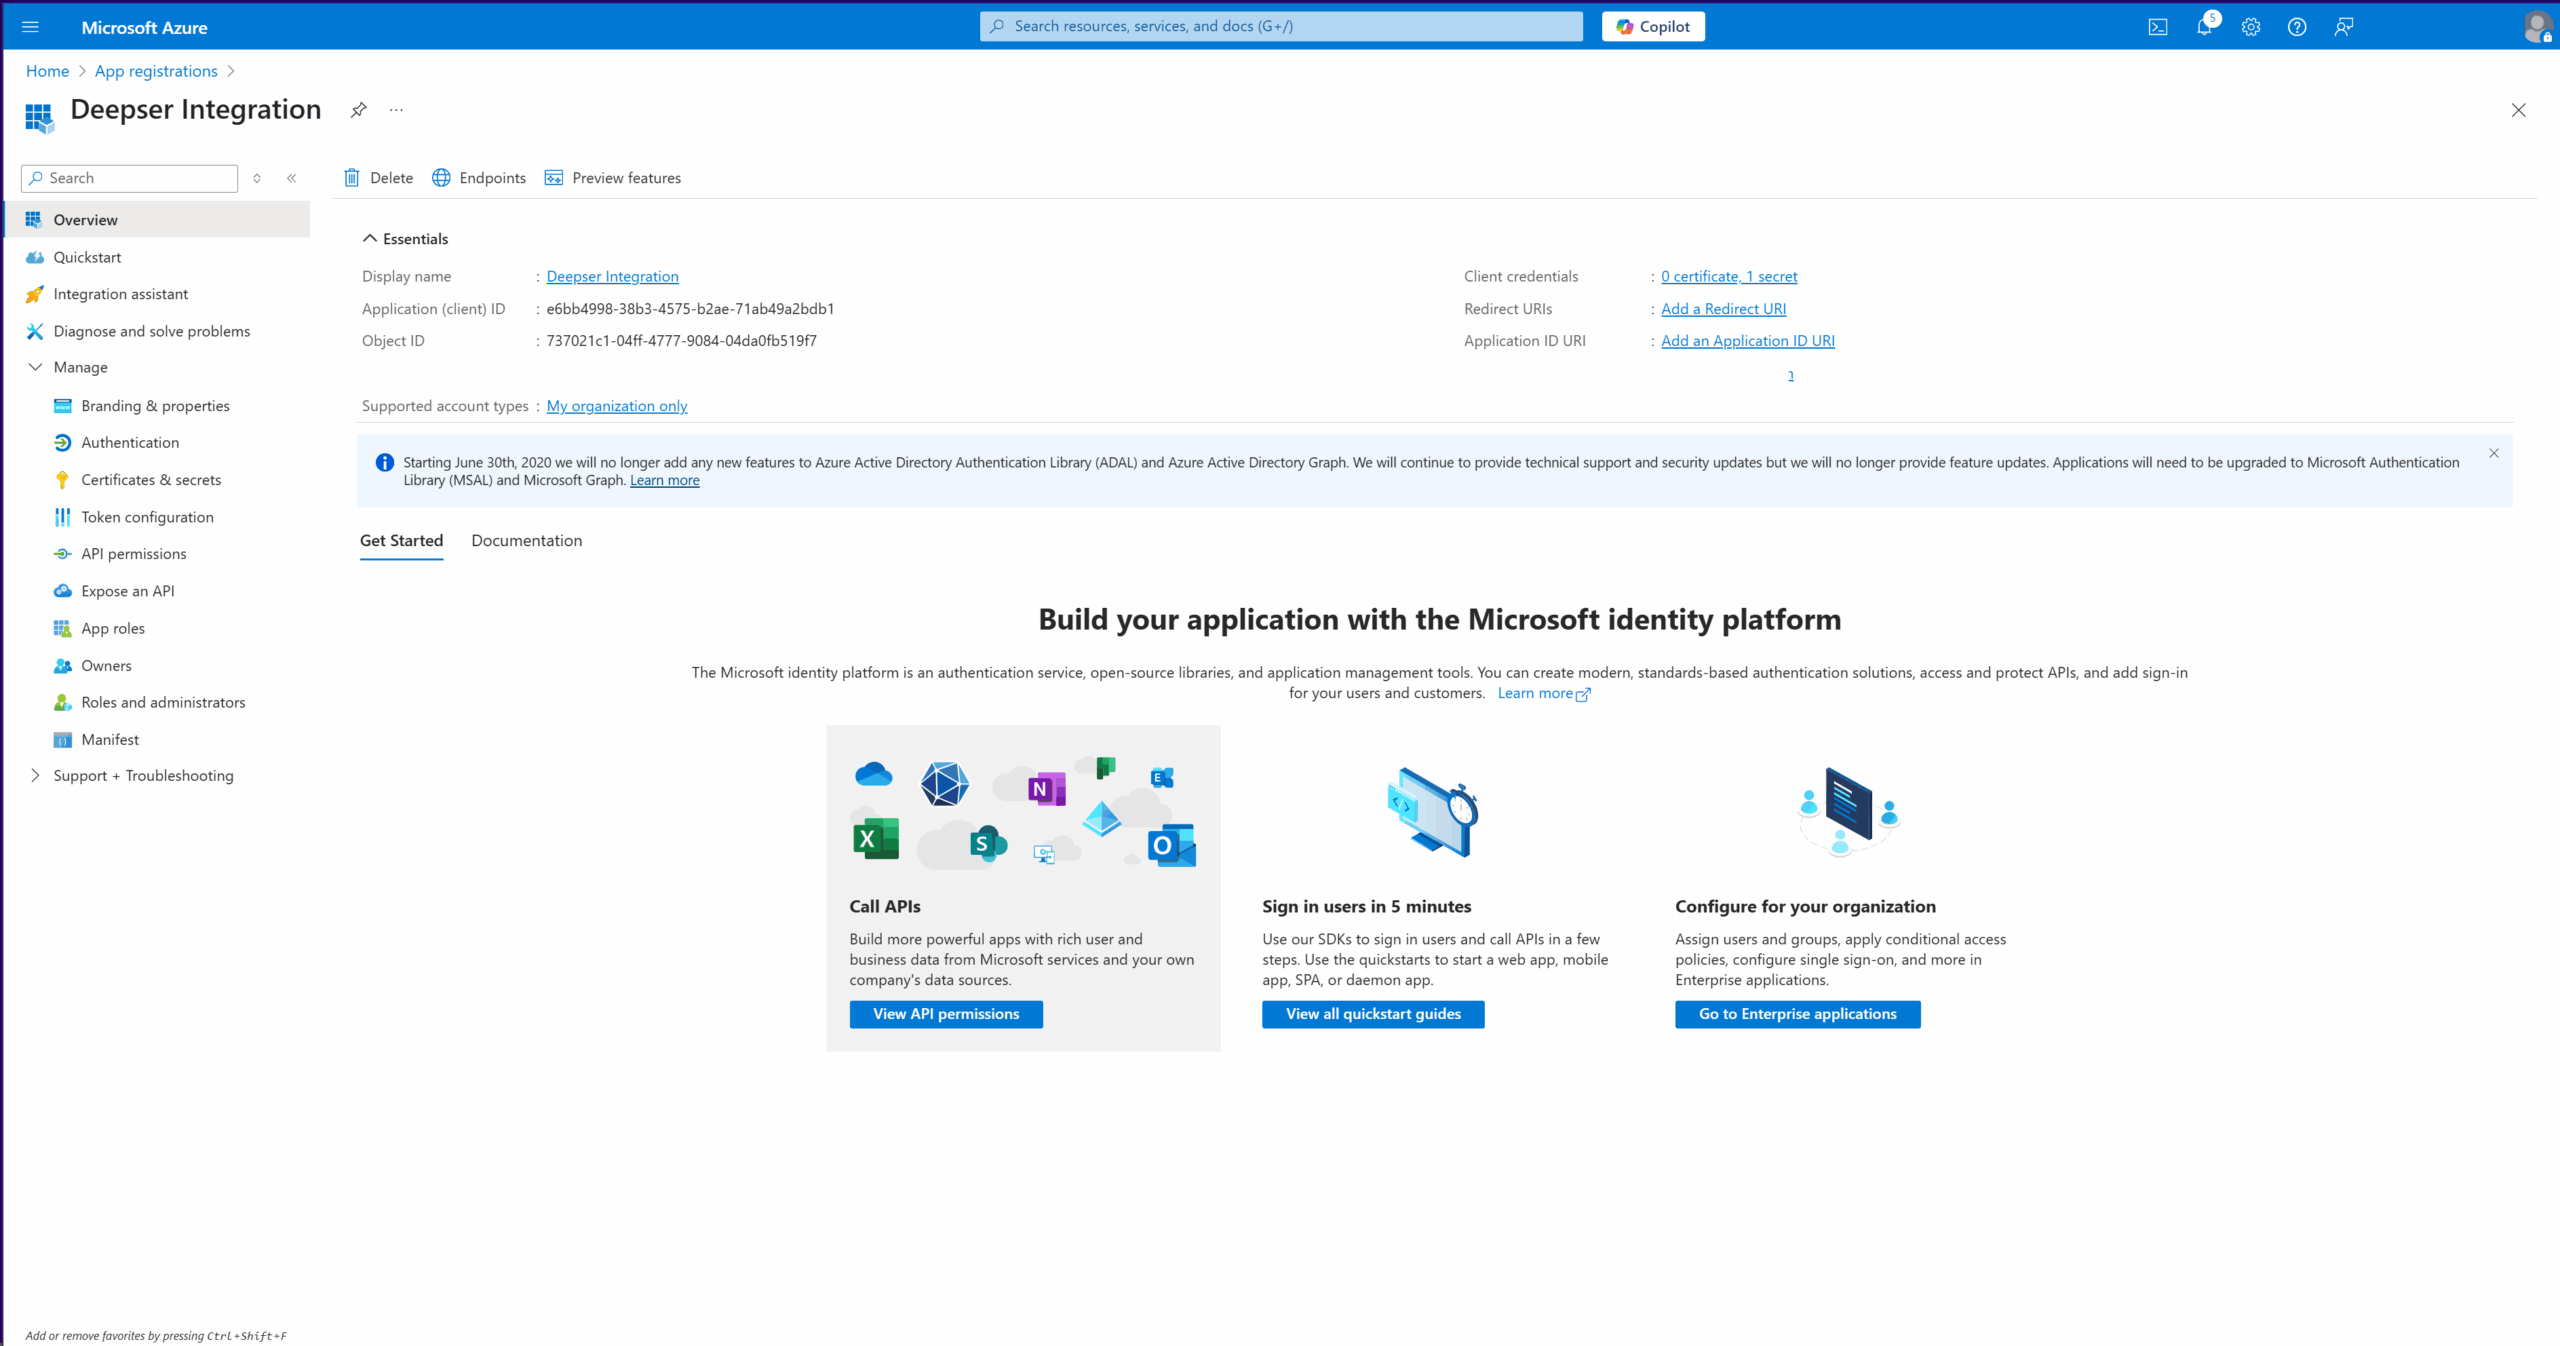
After saving, the screen displays every parameter needed to complete the integration within Deepser.
Assign Permissions
Navigate to the API permissions section to assign the required permissions.
-
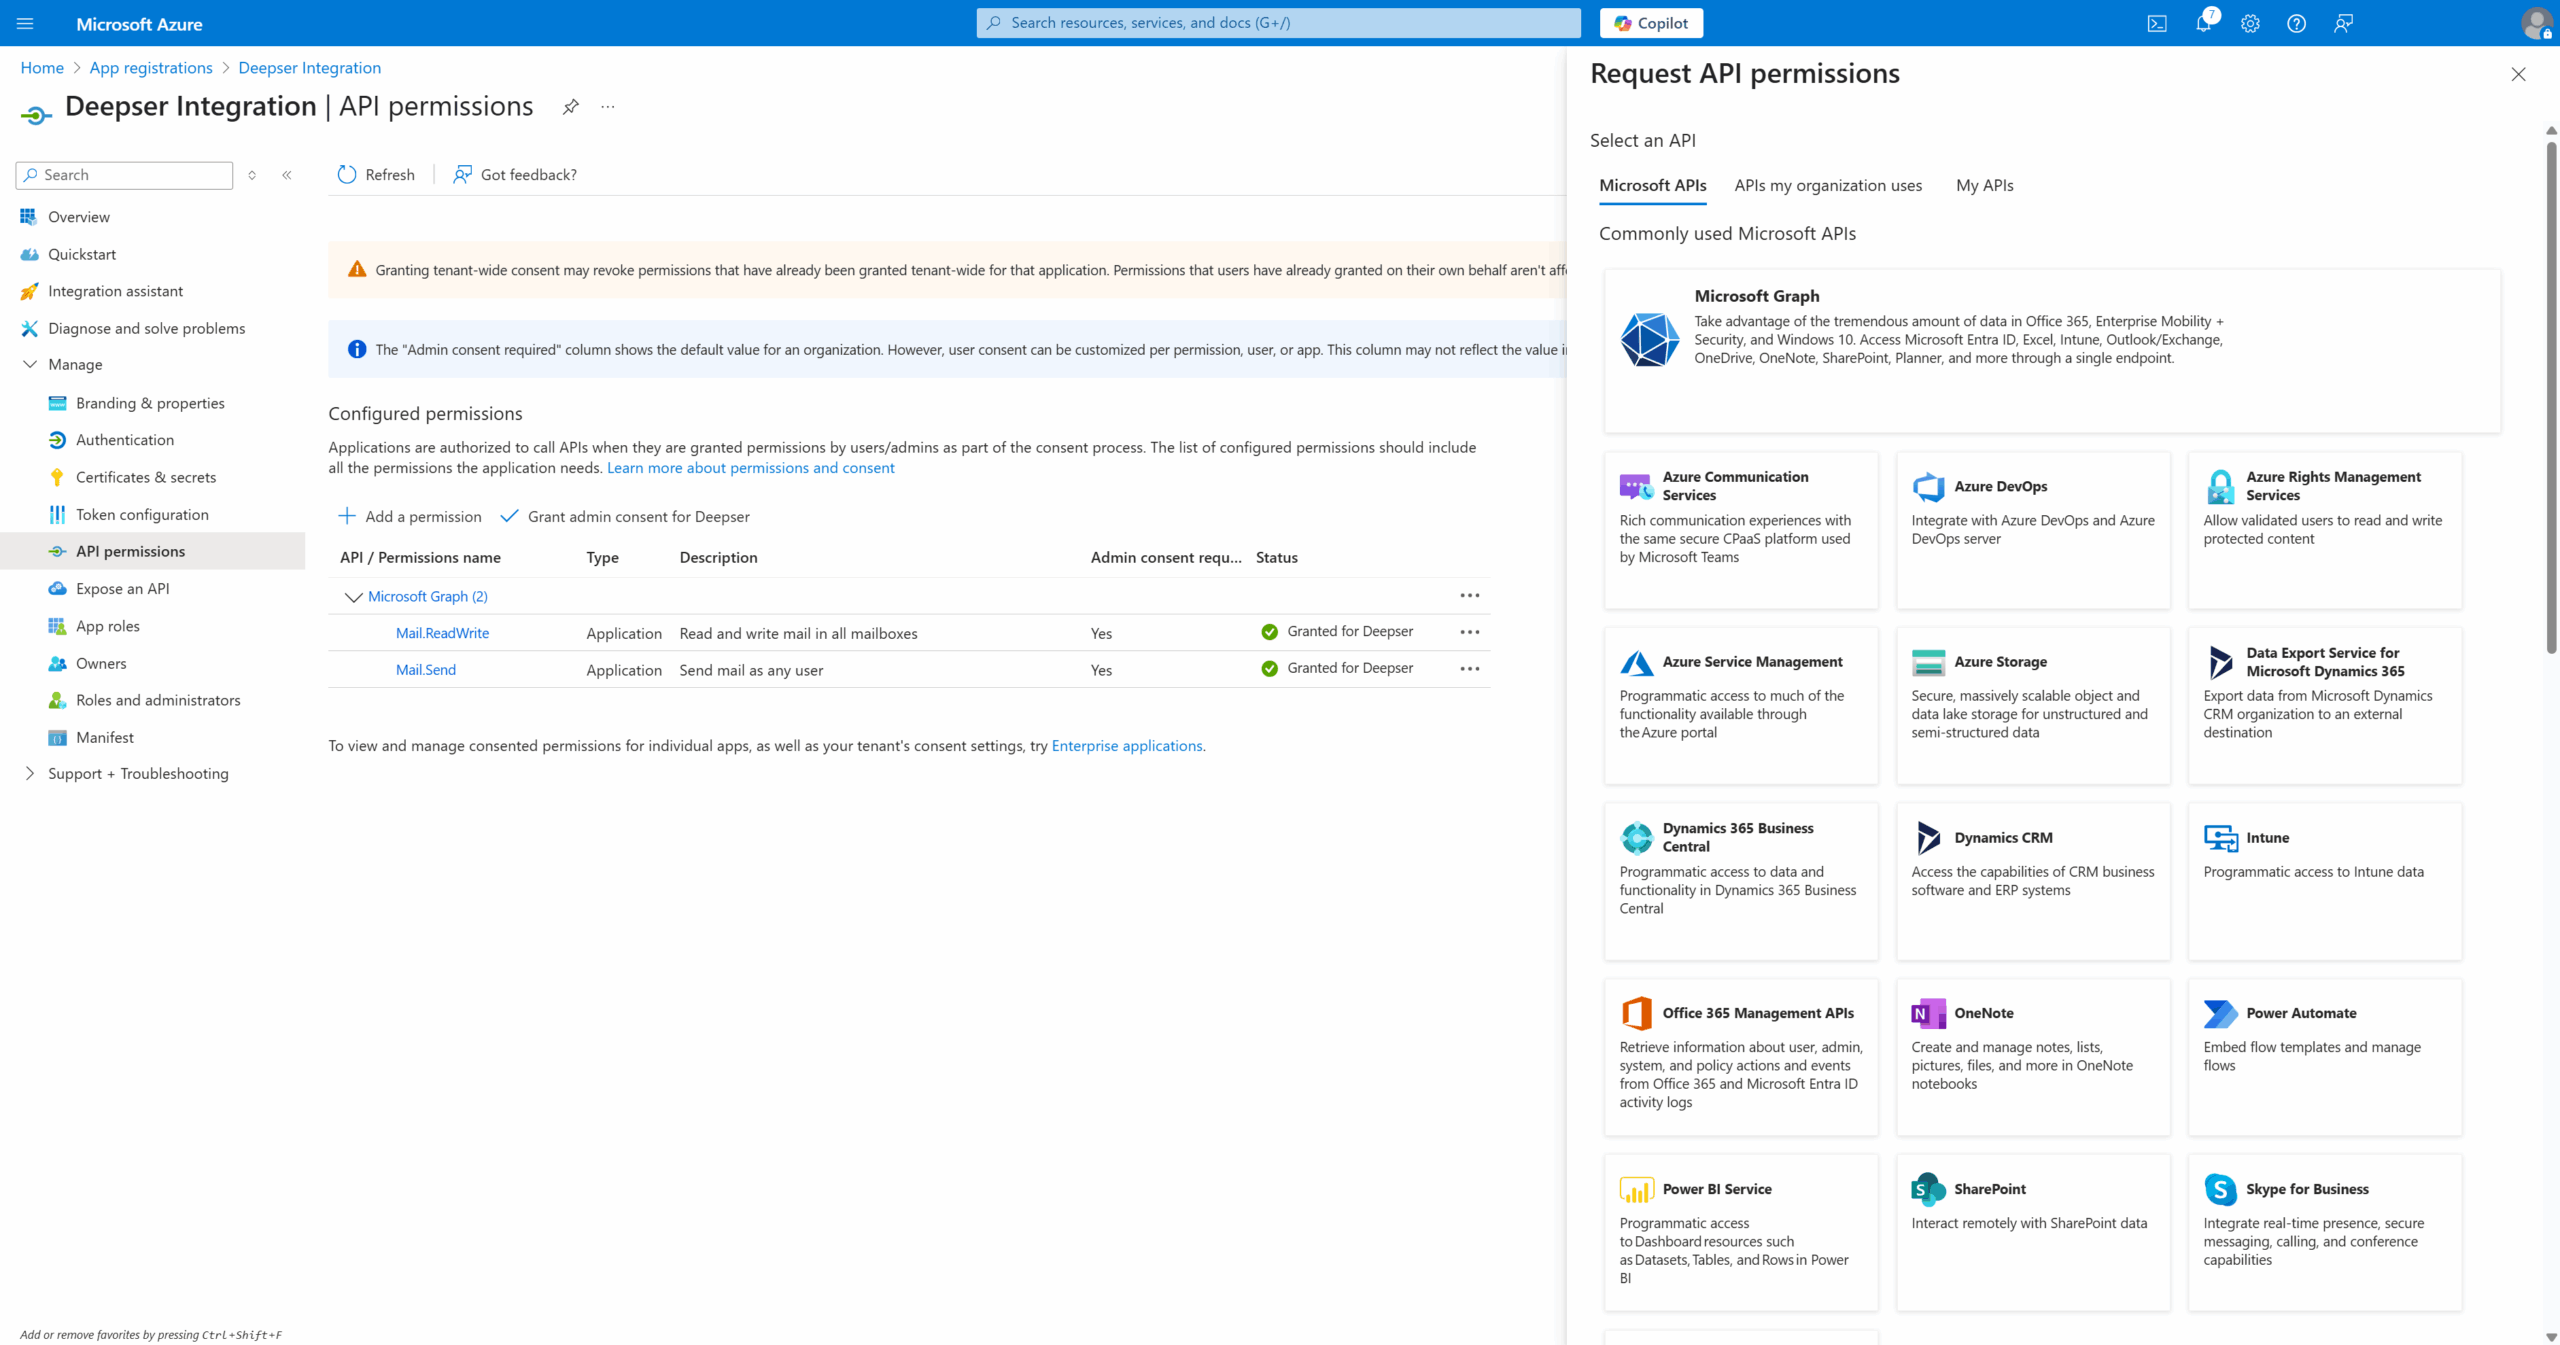
In API permissions, select Add a permission.
-
Choose Microsoft Graph.
-
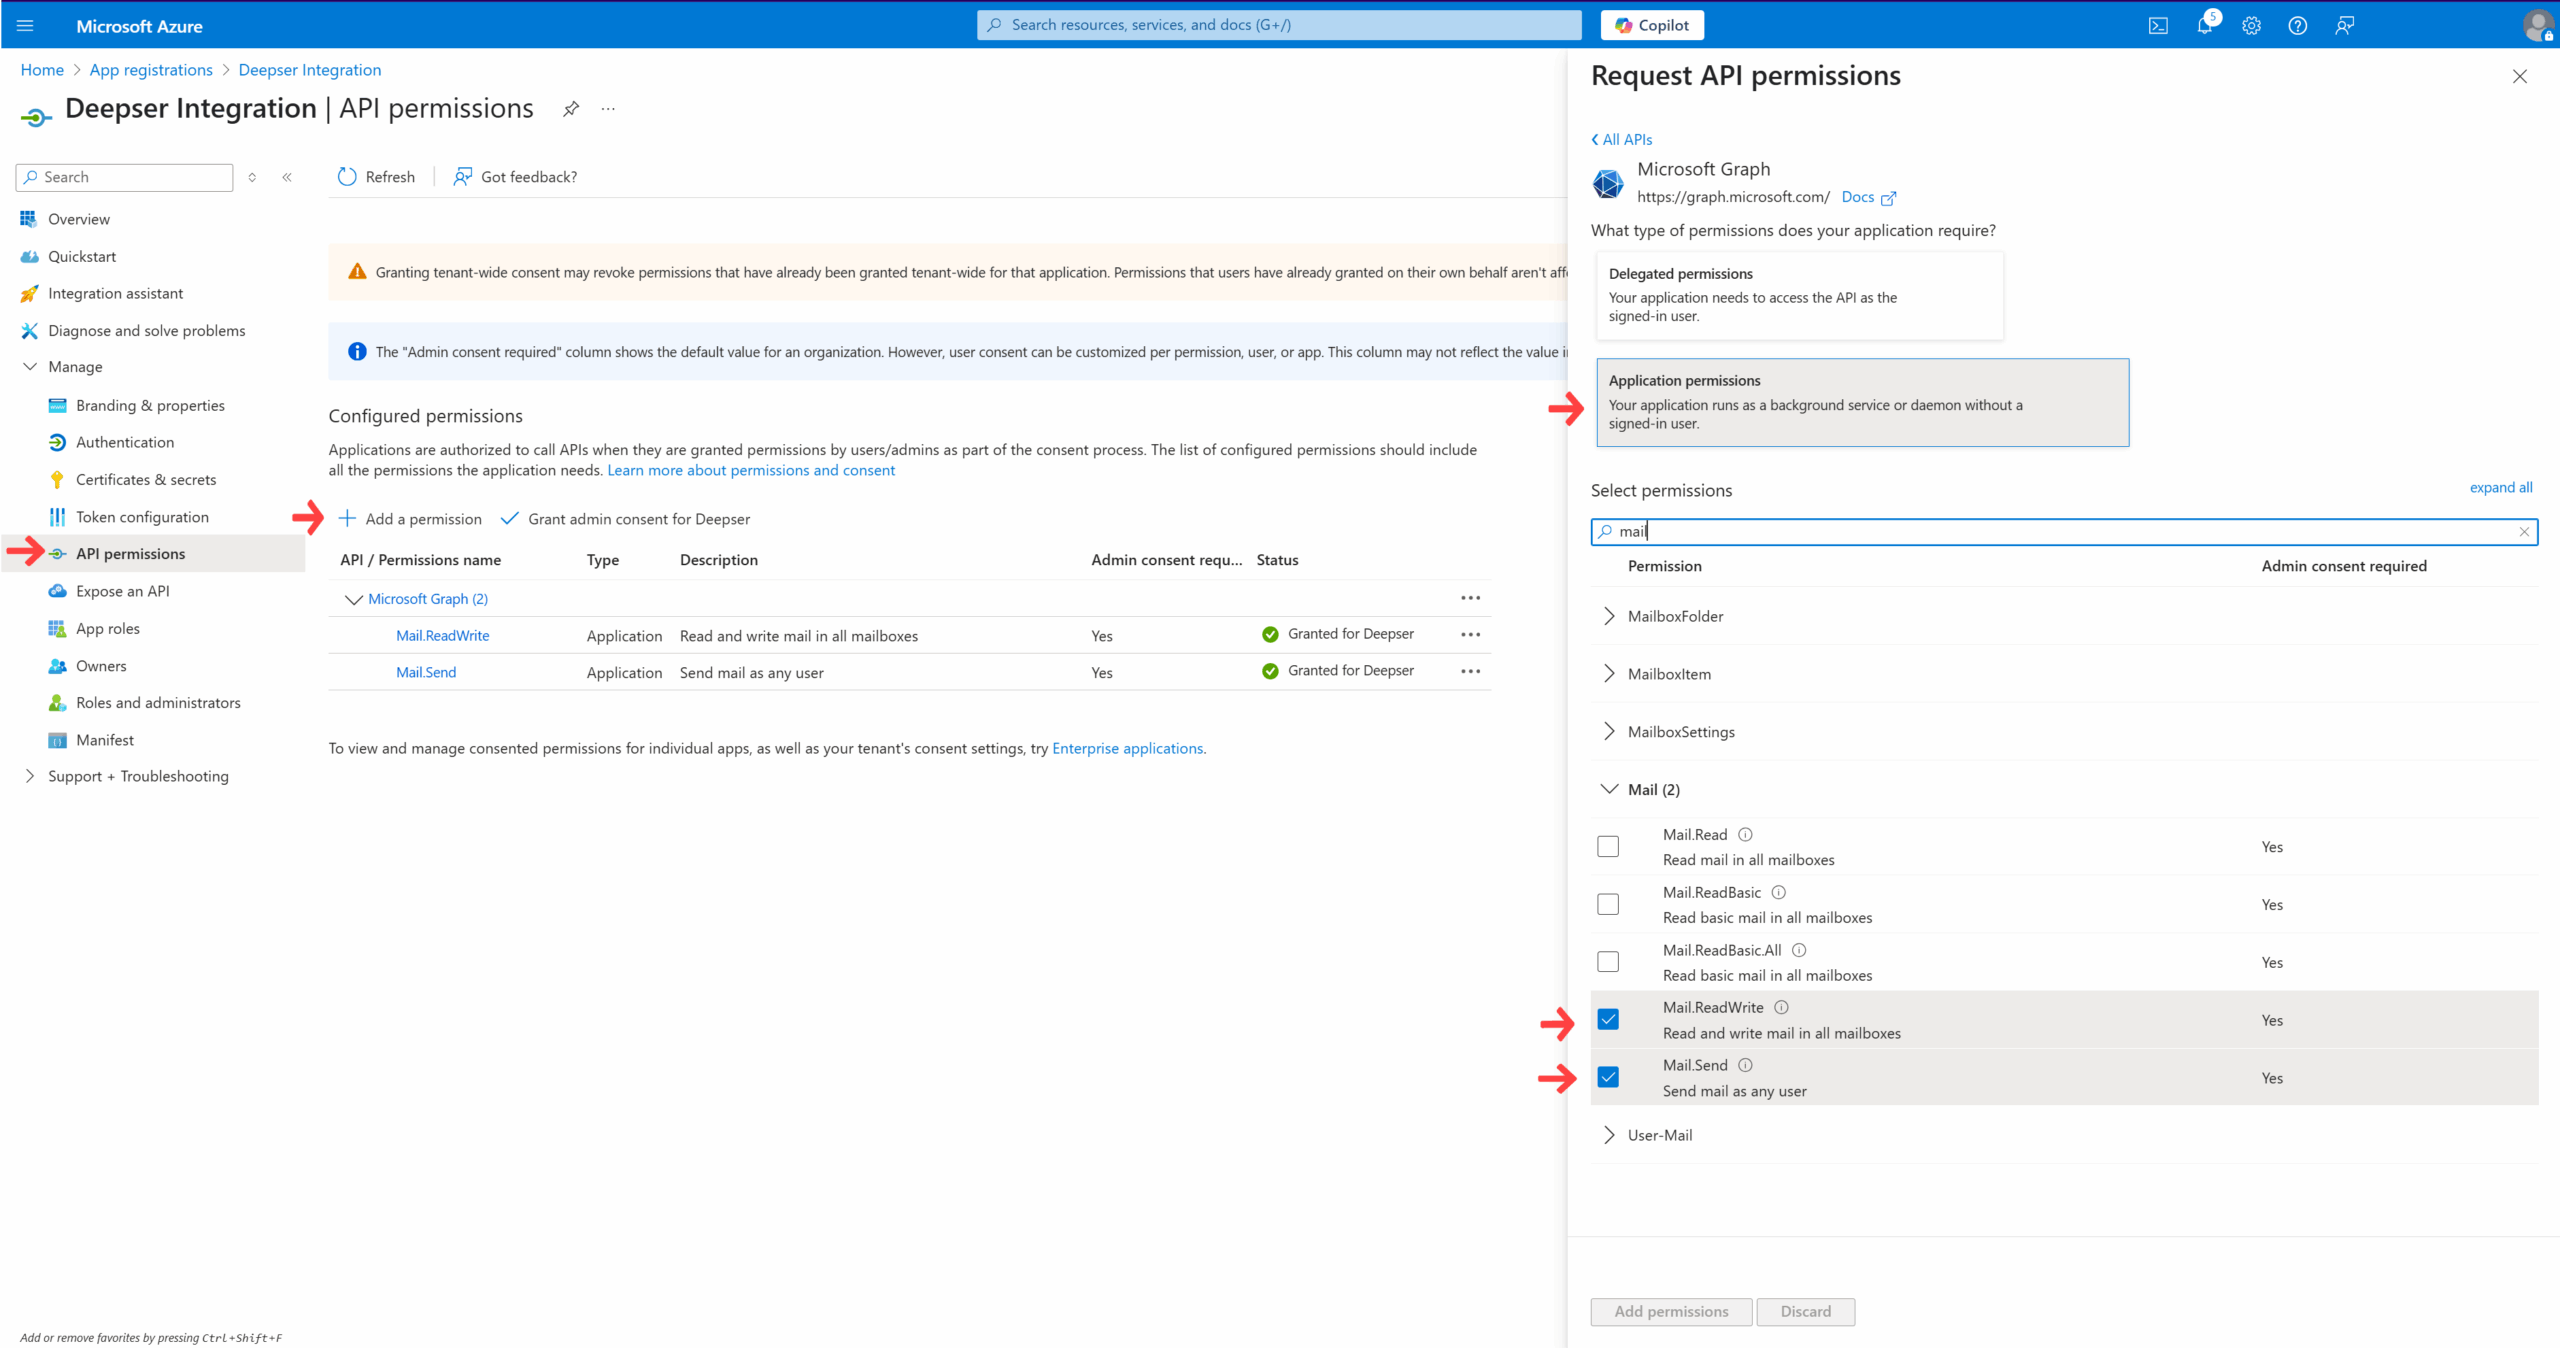
Select Application Permission. Filter the results and select:
- Mail.ReadWrite
- Mail.Send
-
Click "Add Permission".
-
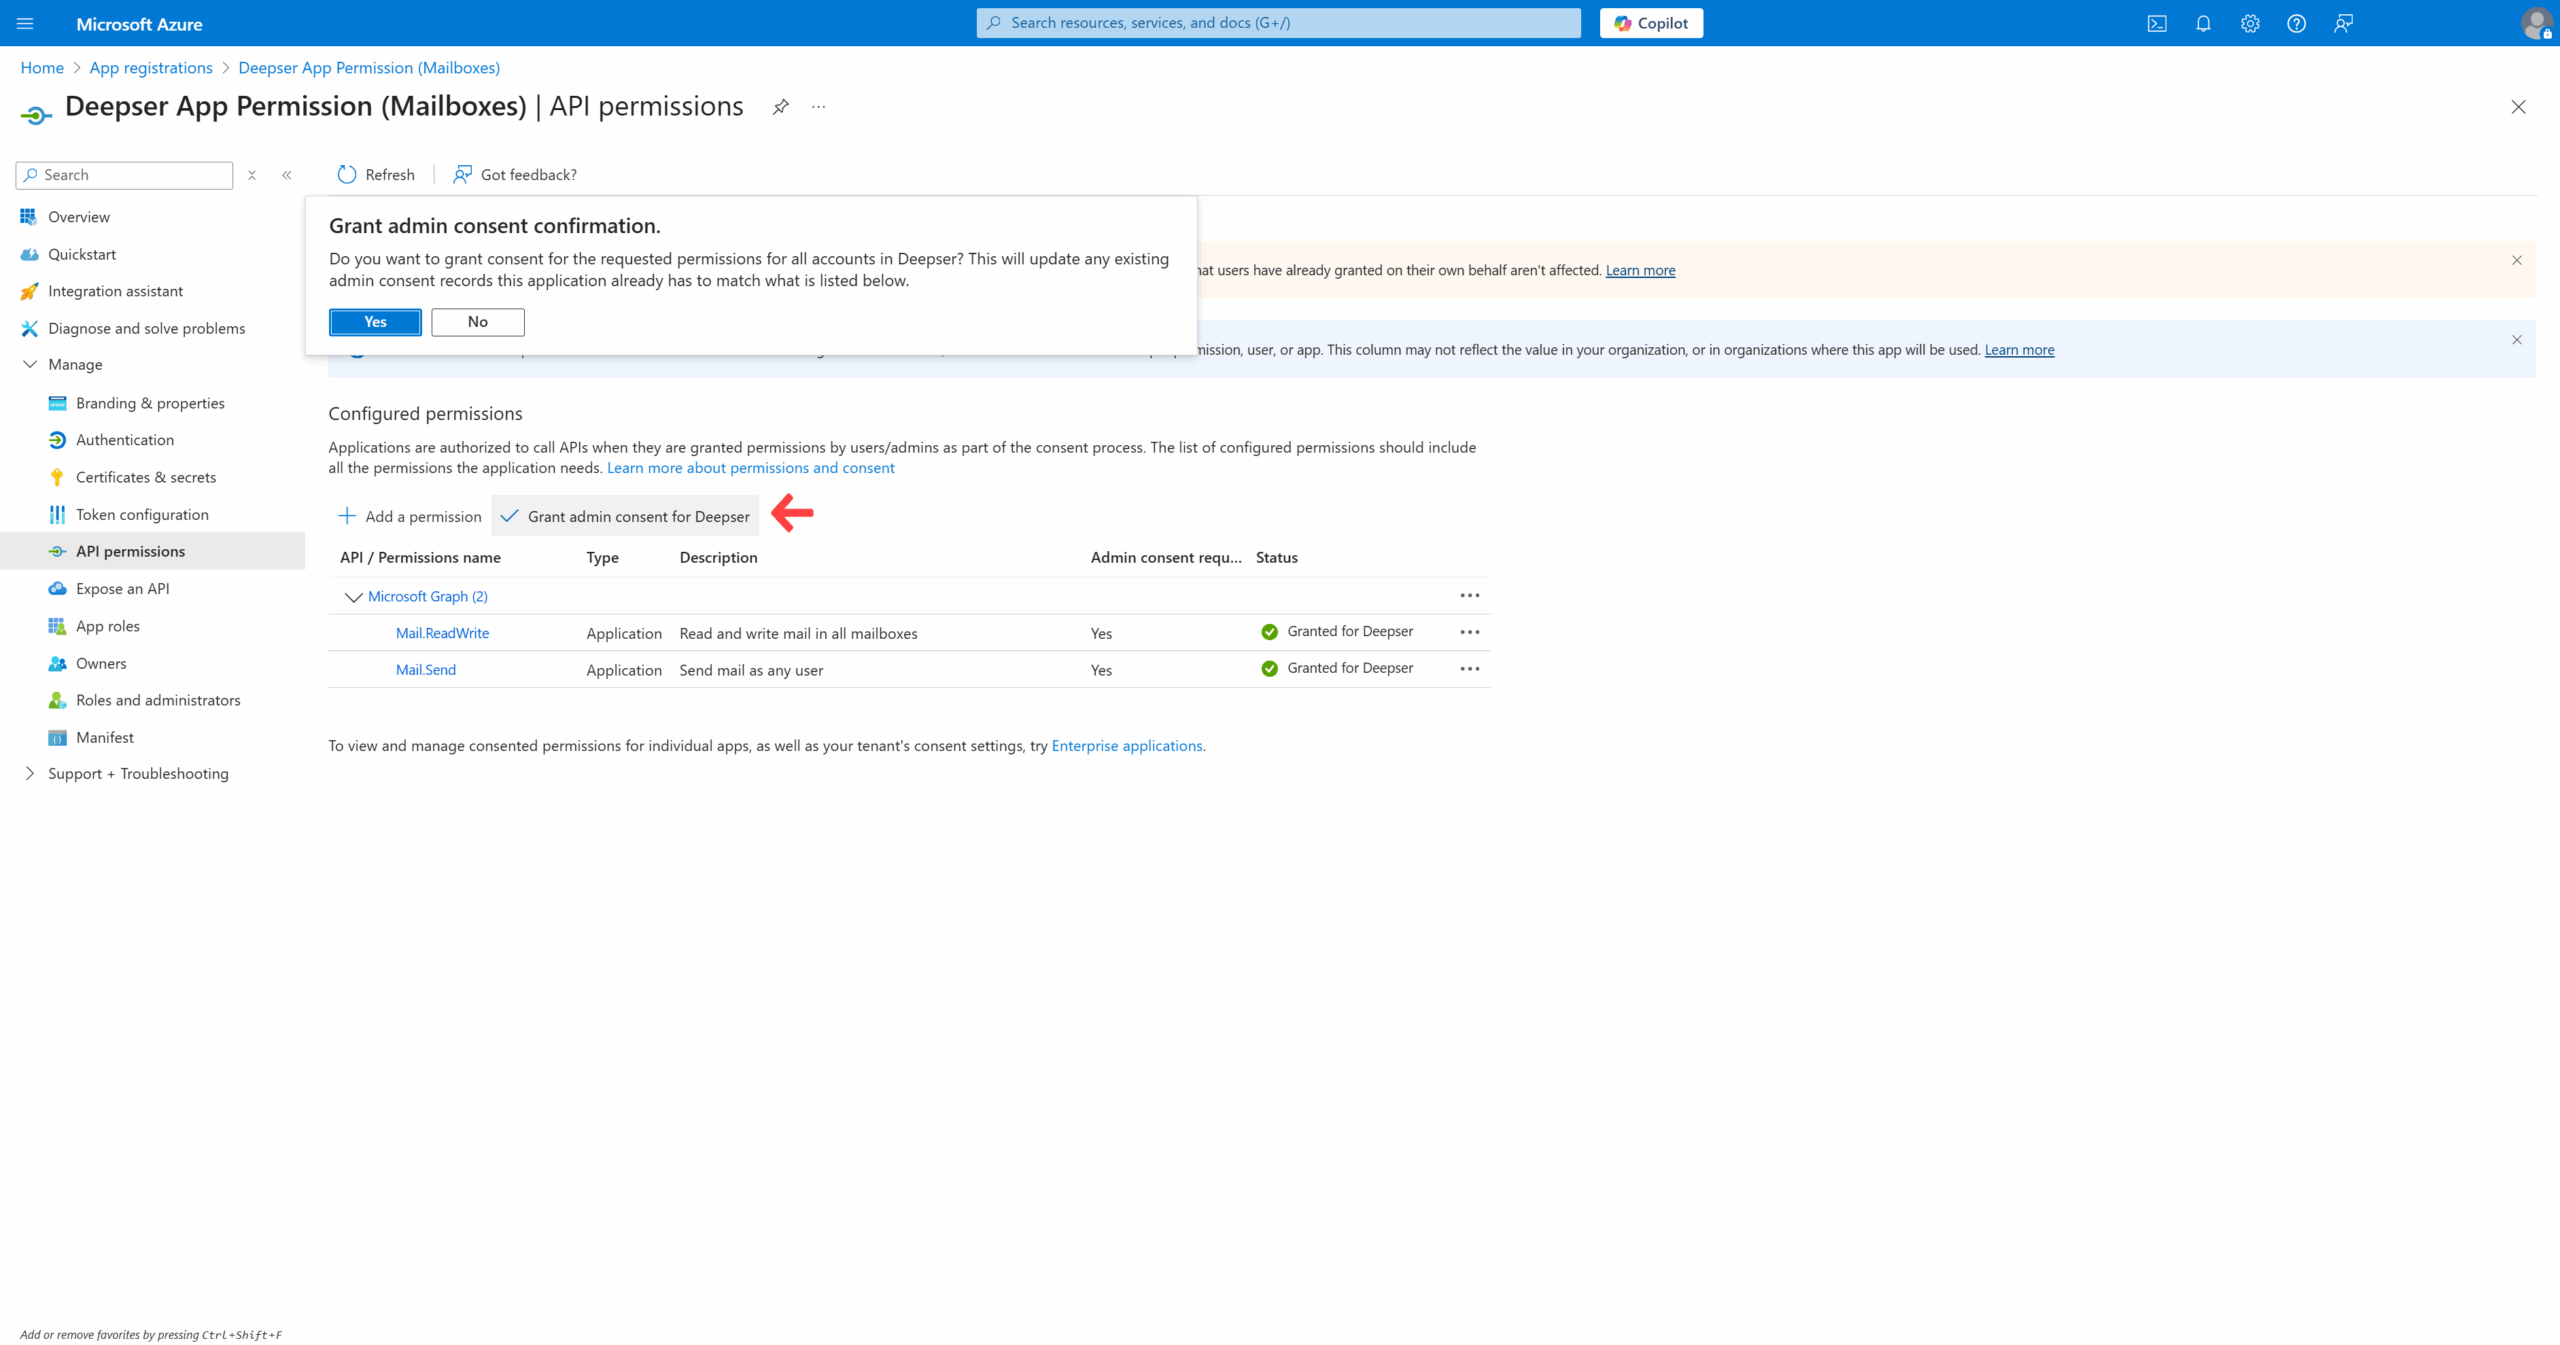
Click "Grant admin consent for Deepser" and confirm by selecting "Yes".
Create the Client Secret
-
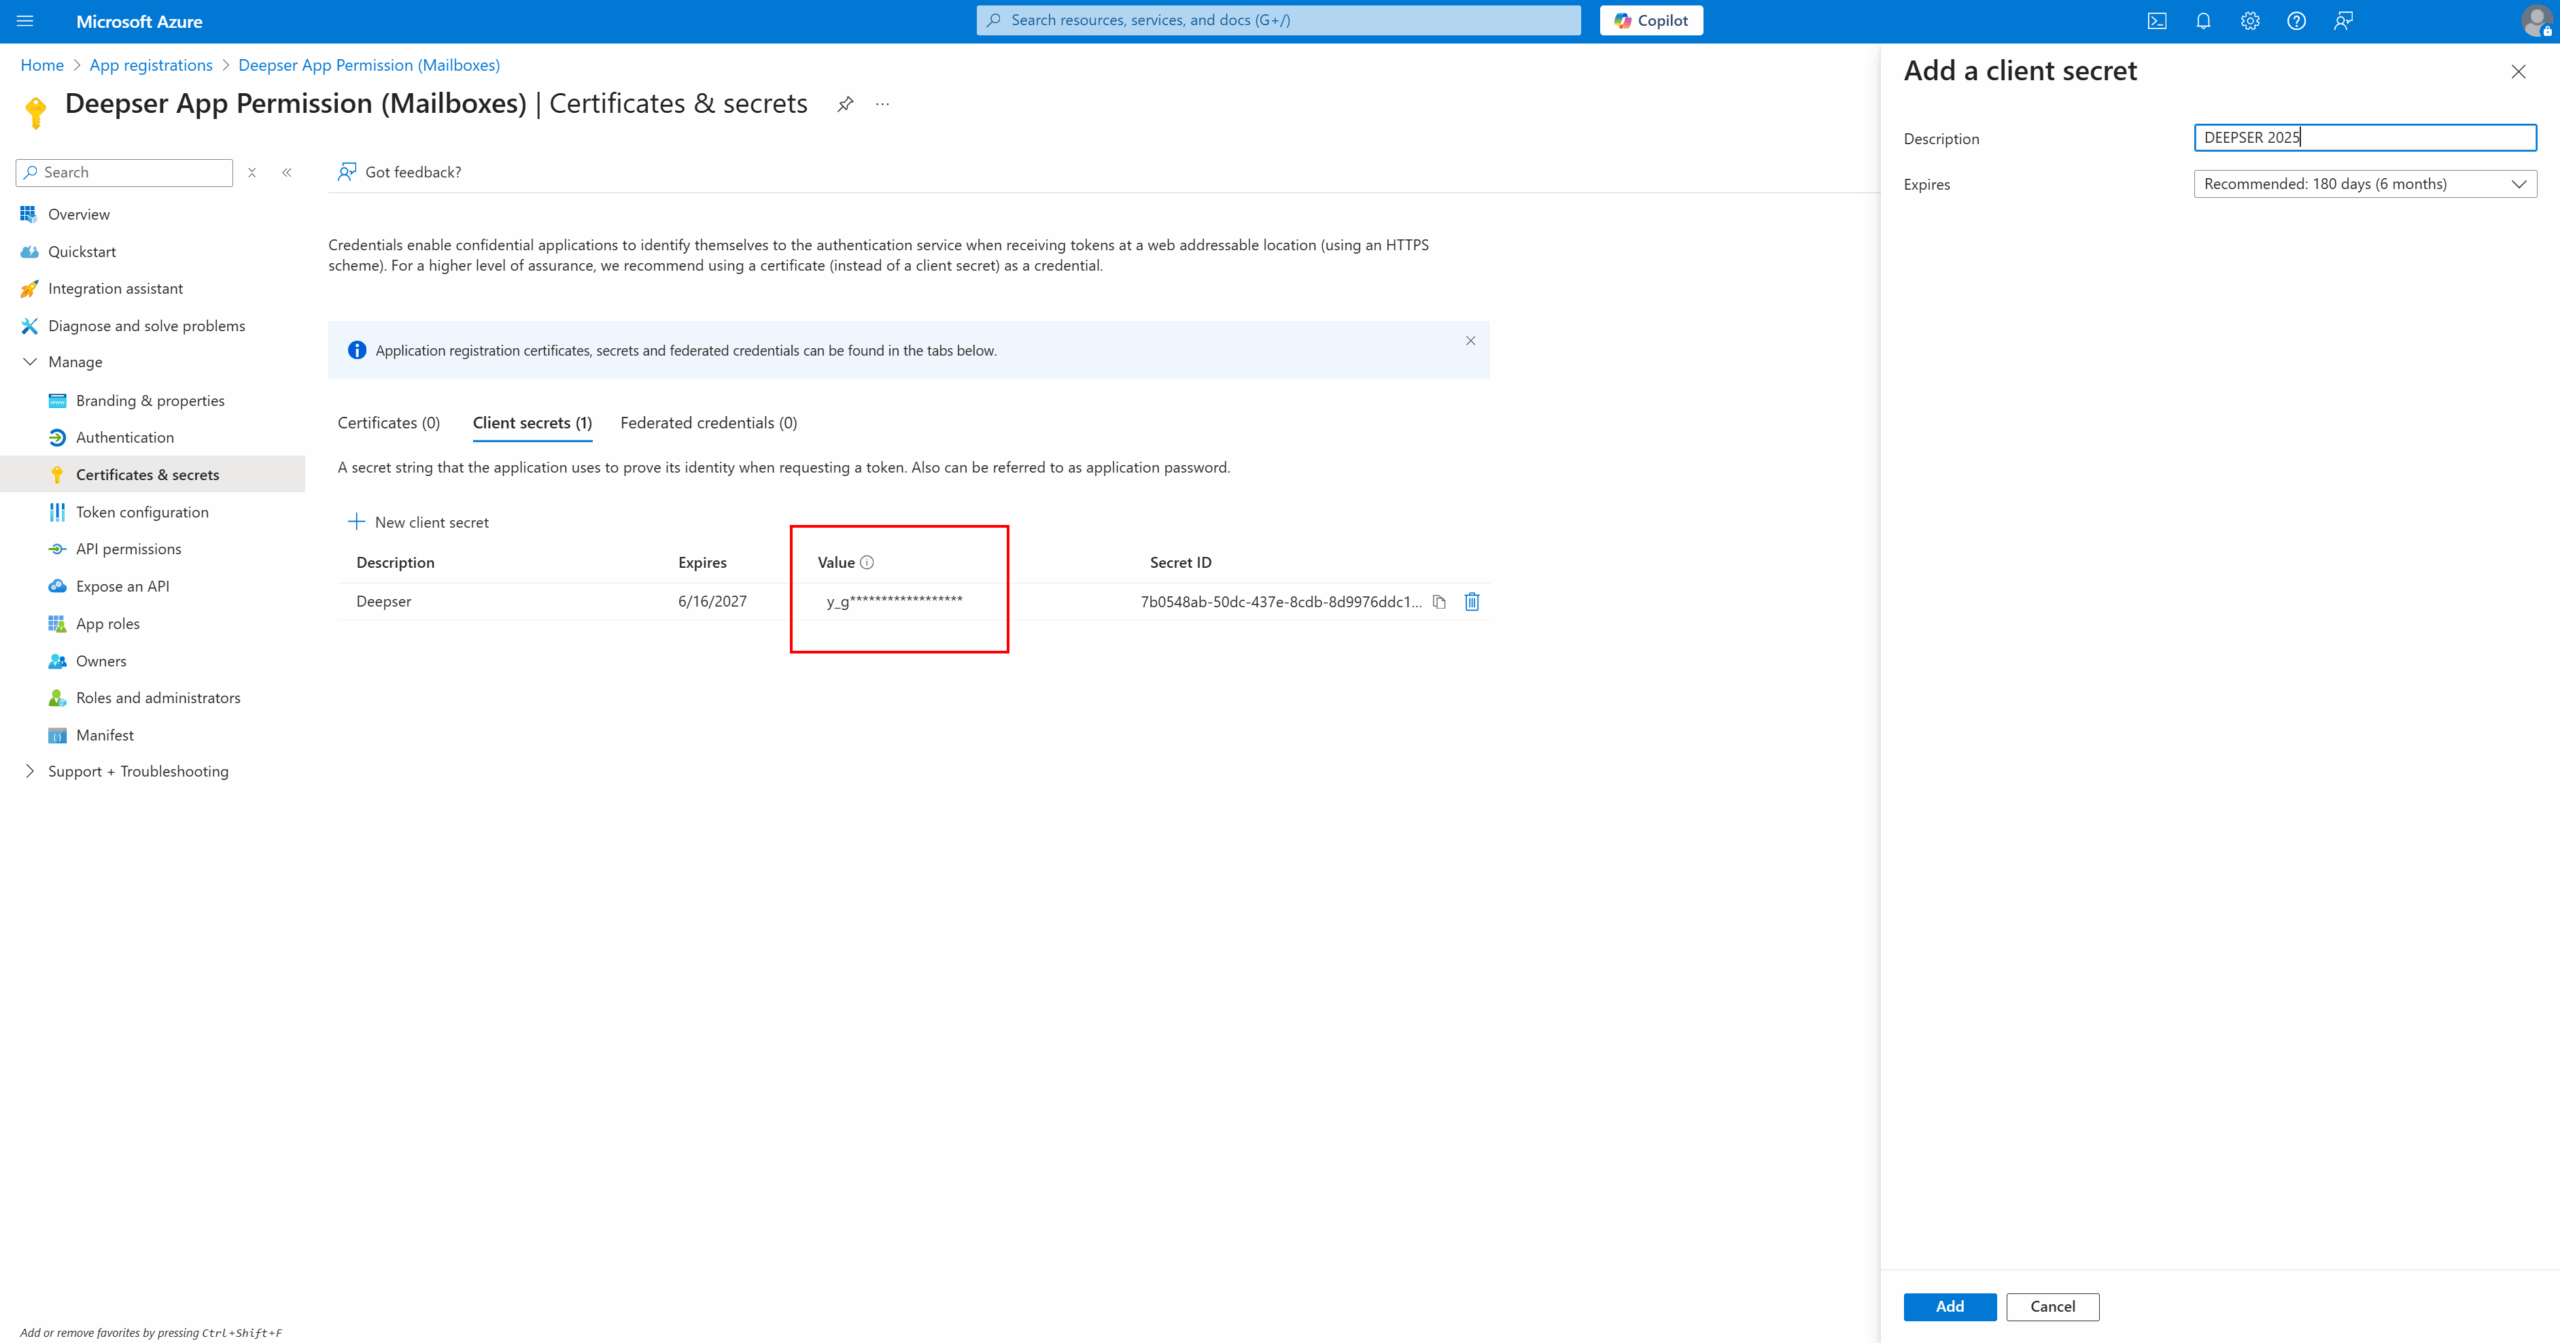
Navigate to Manage > Certificates & Secrets and click "New client secret".
-
Enter a description, select the secret's duration, then click "Add".
-
The SECRET VALUE will be displayed. Save it immediately -- it will not be accessible after leaving the page.
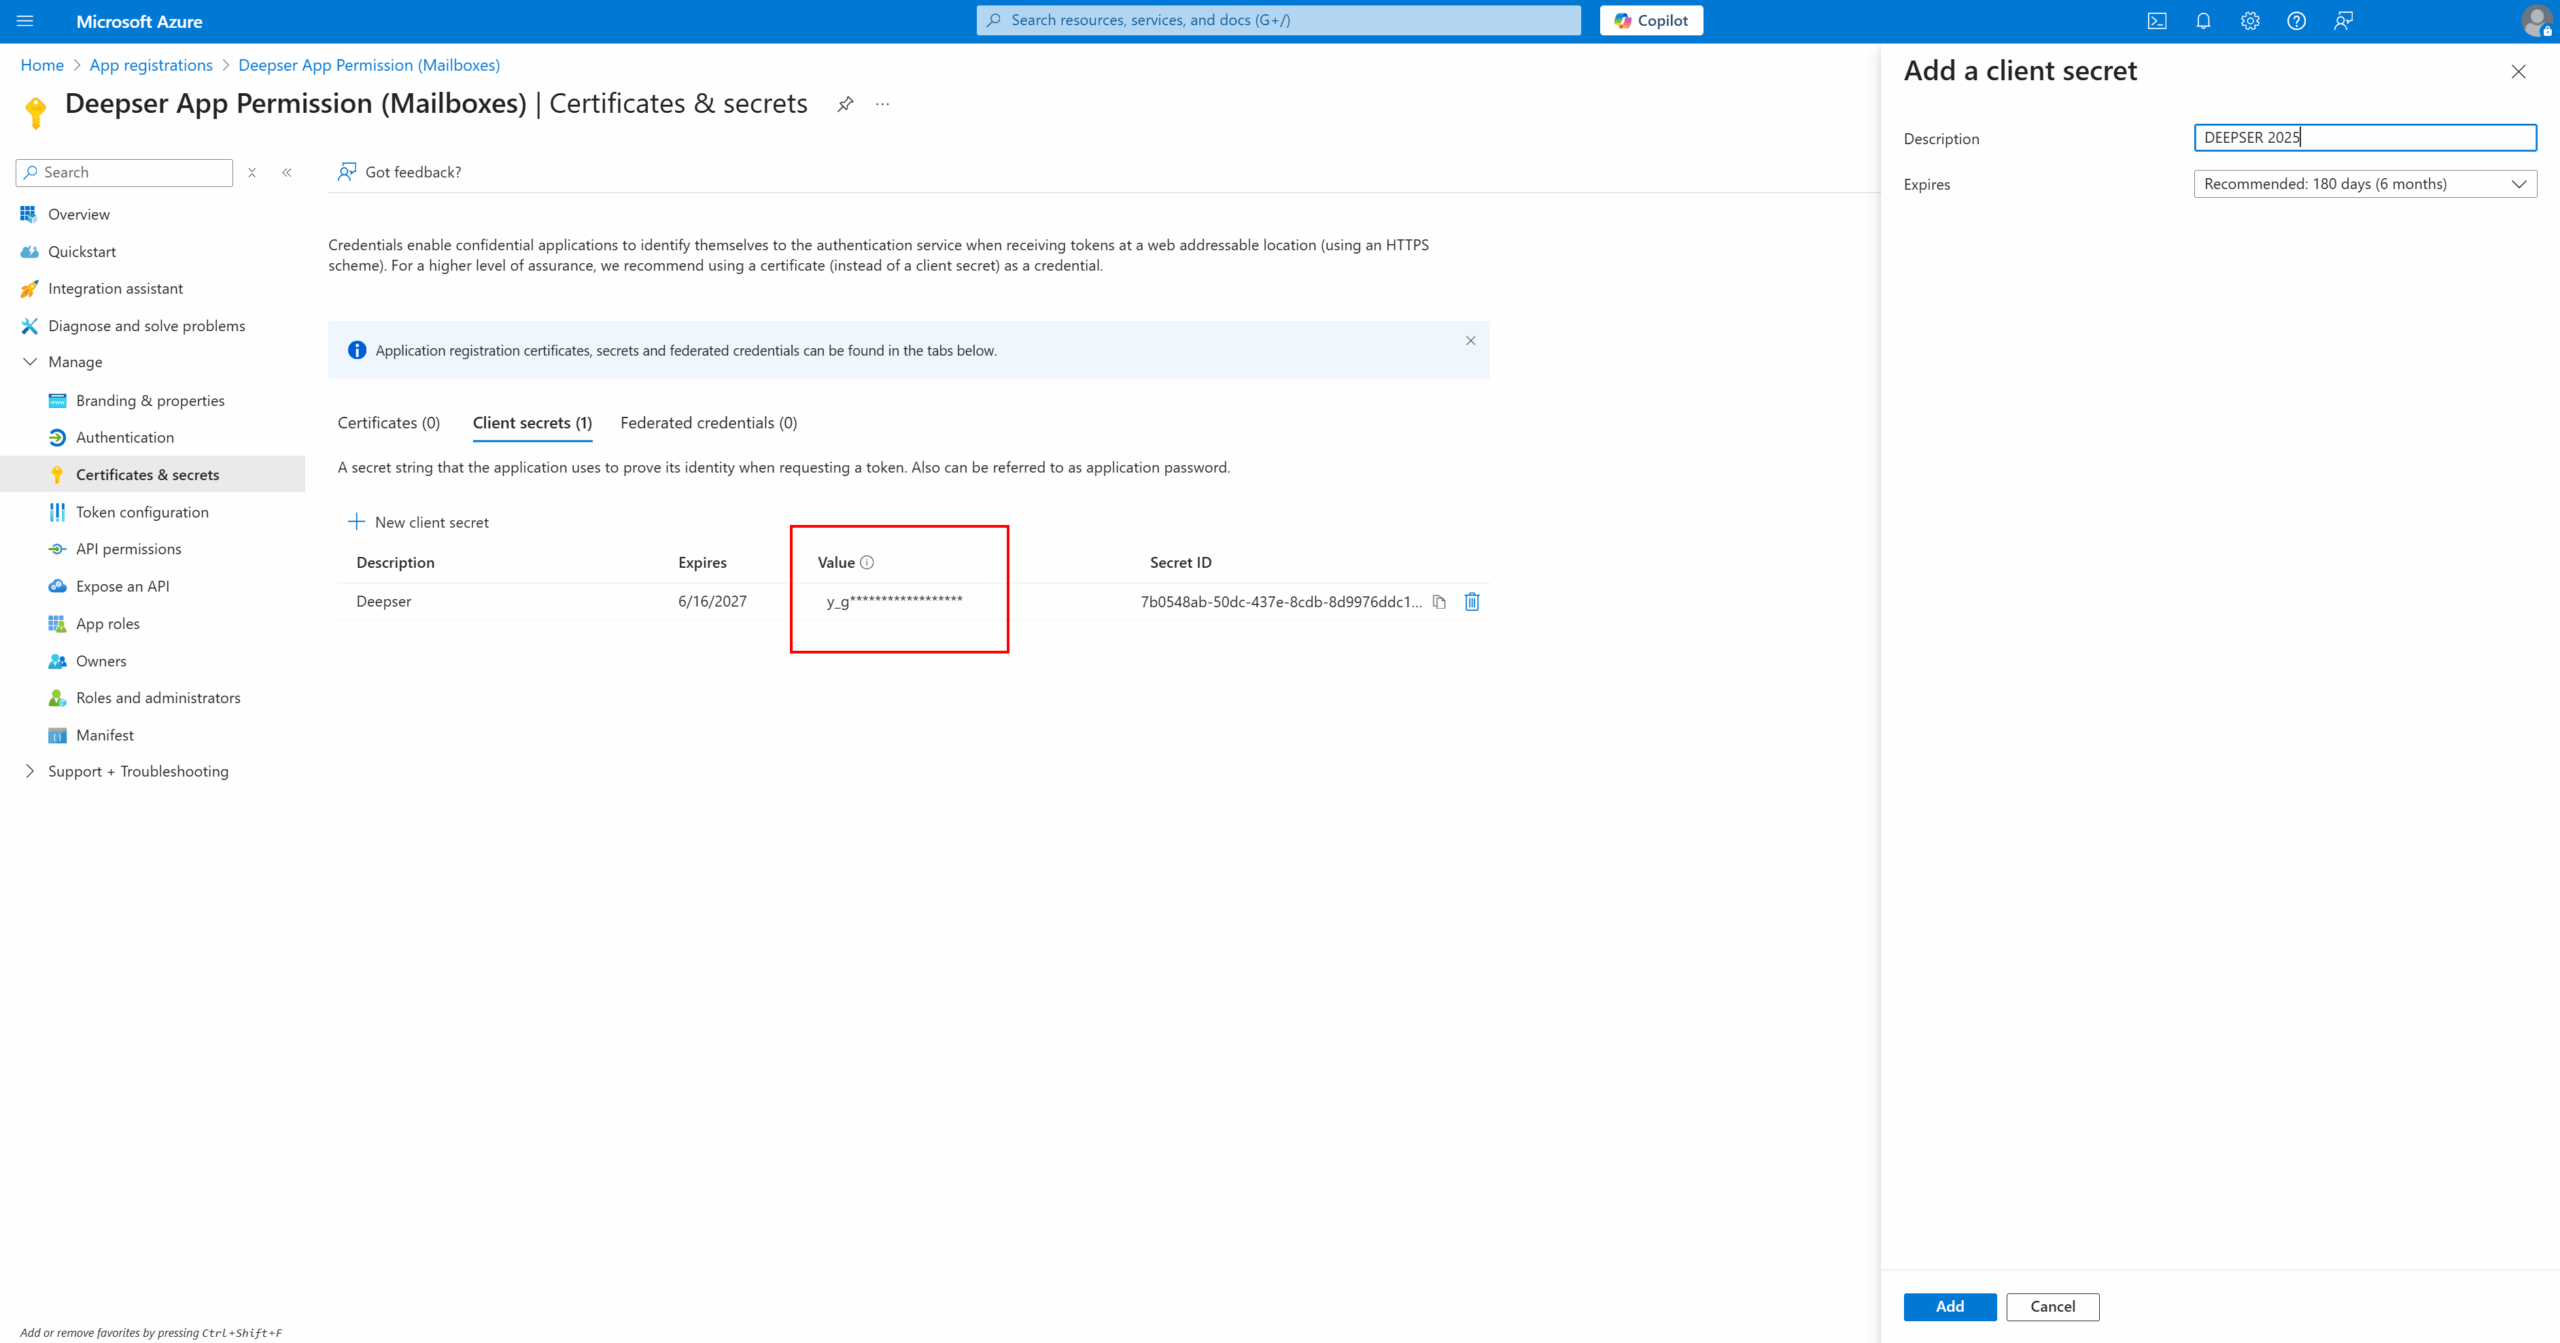
Save the SECRET VALUE immediately, as it will not be visible once you navigate away. The Client Secret has a limited validity. If a 24-month expiration is selected, generate a new secret before it expires to maintain the integration.
Create the OAuth Client in Deepser
-
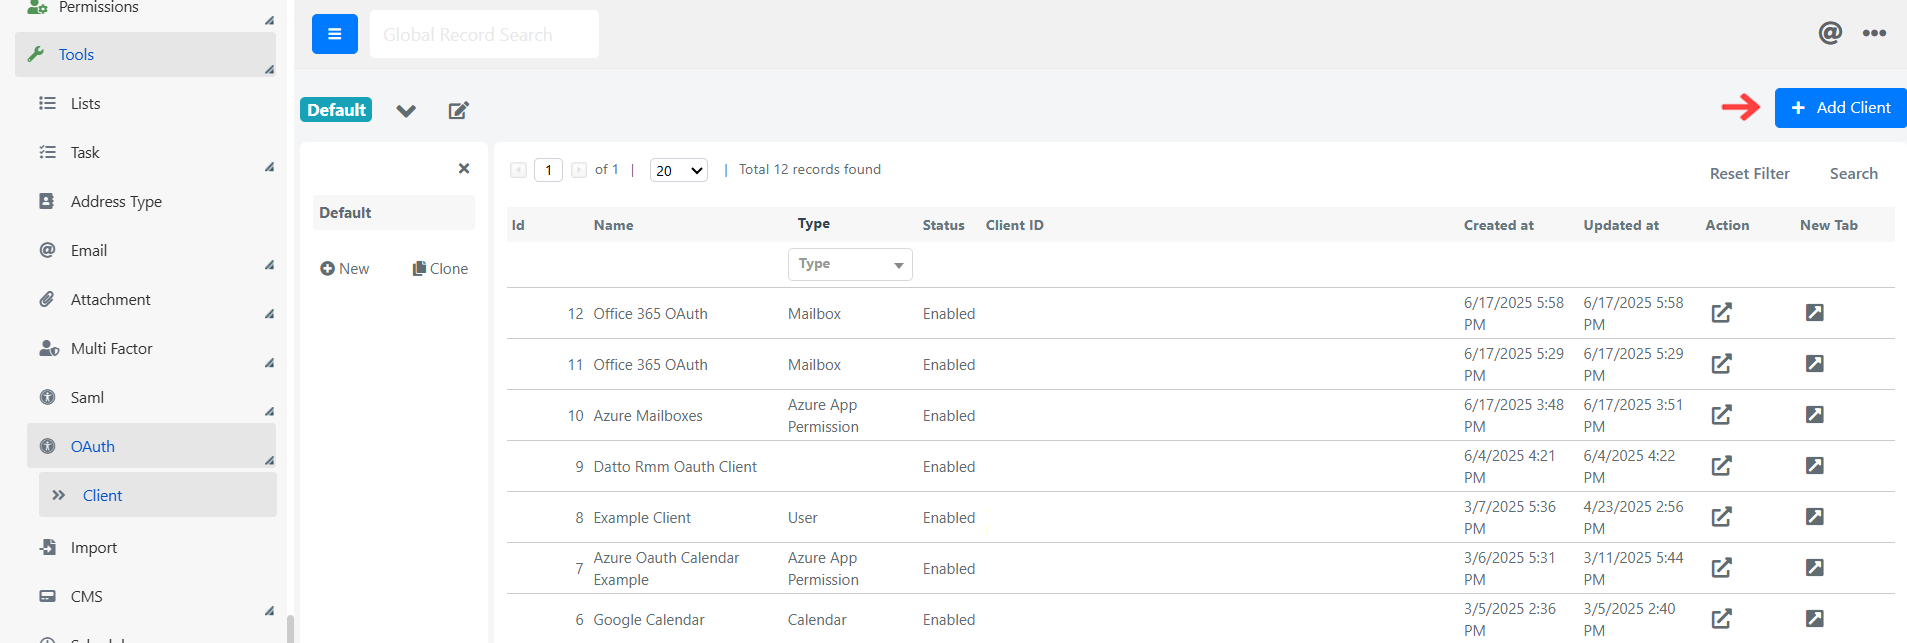
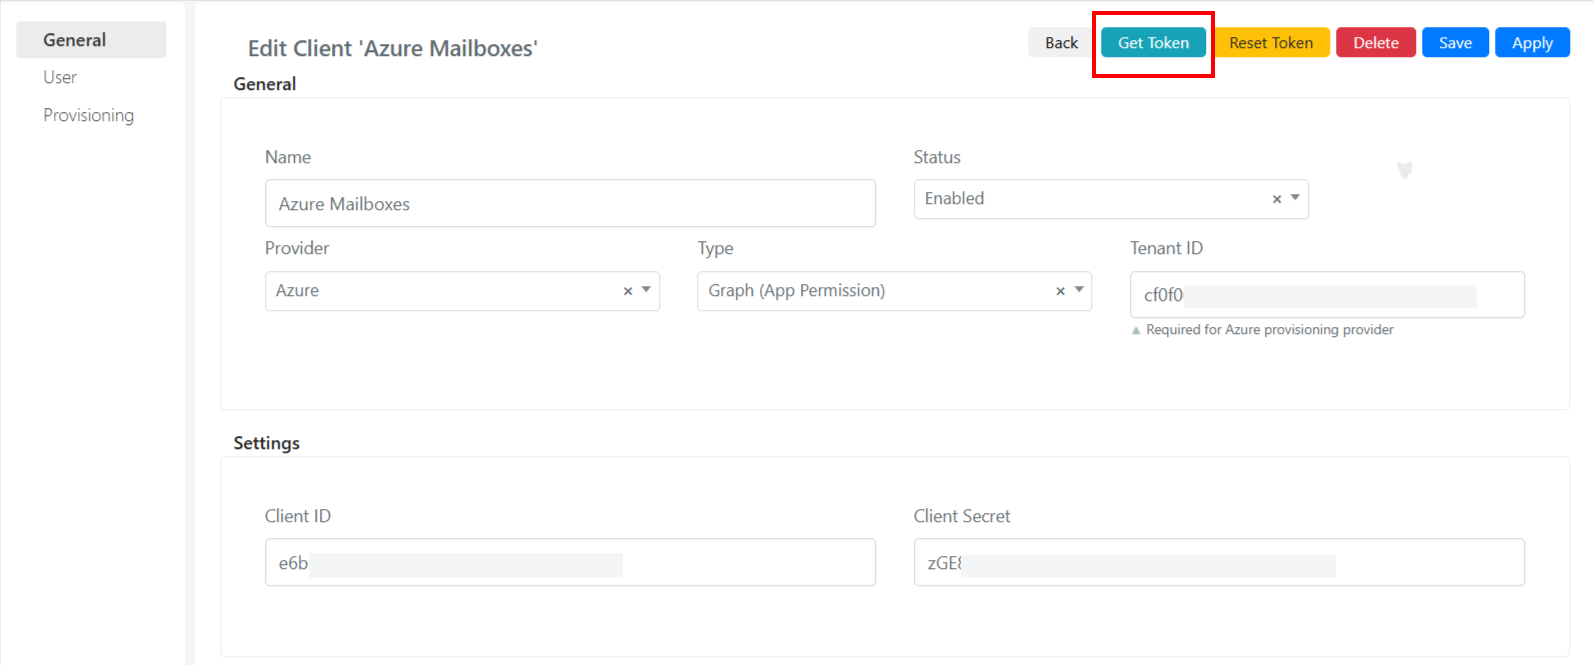
In the Deepser Backend, go to System > Tools > OAuth > Client and click "Add Client".
-
Fill in the following fields:
- Name
- Status: Enabled
- Provider: Azure
- Type: Graph (App Permission)
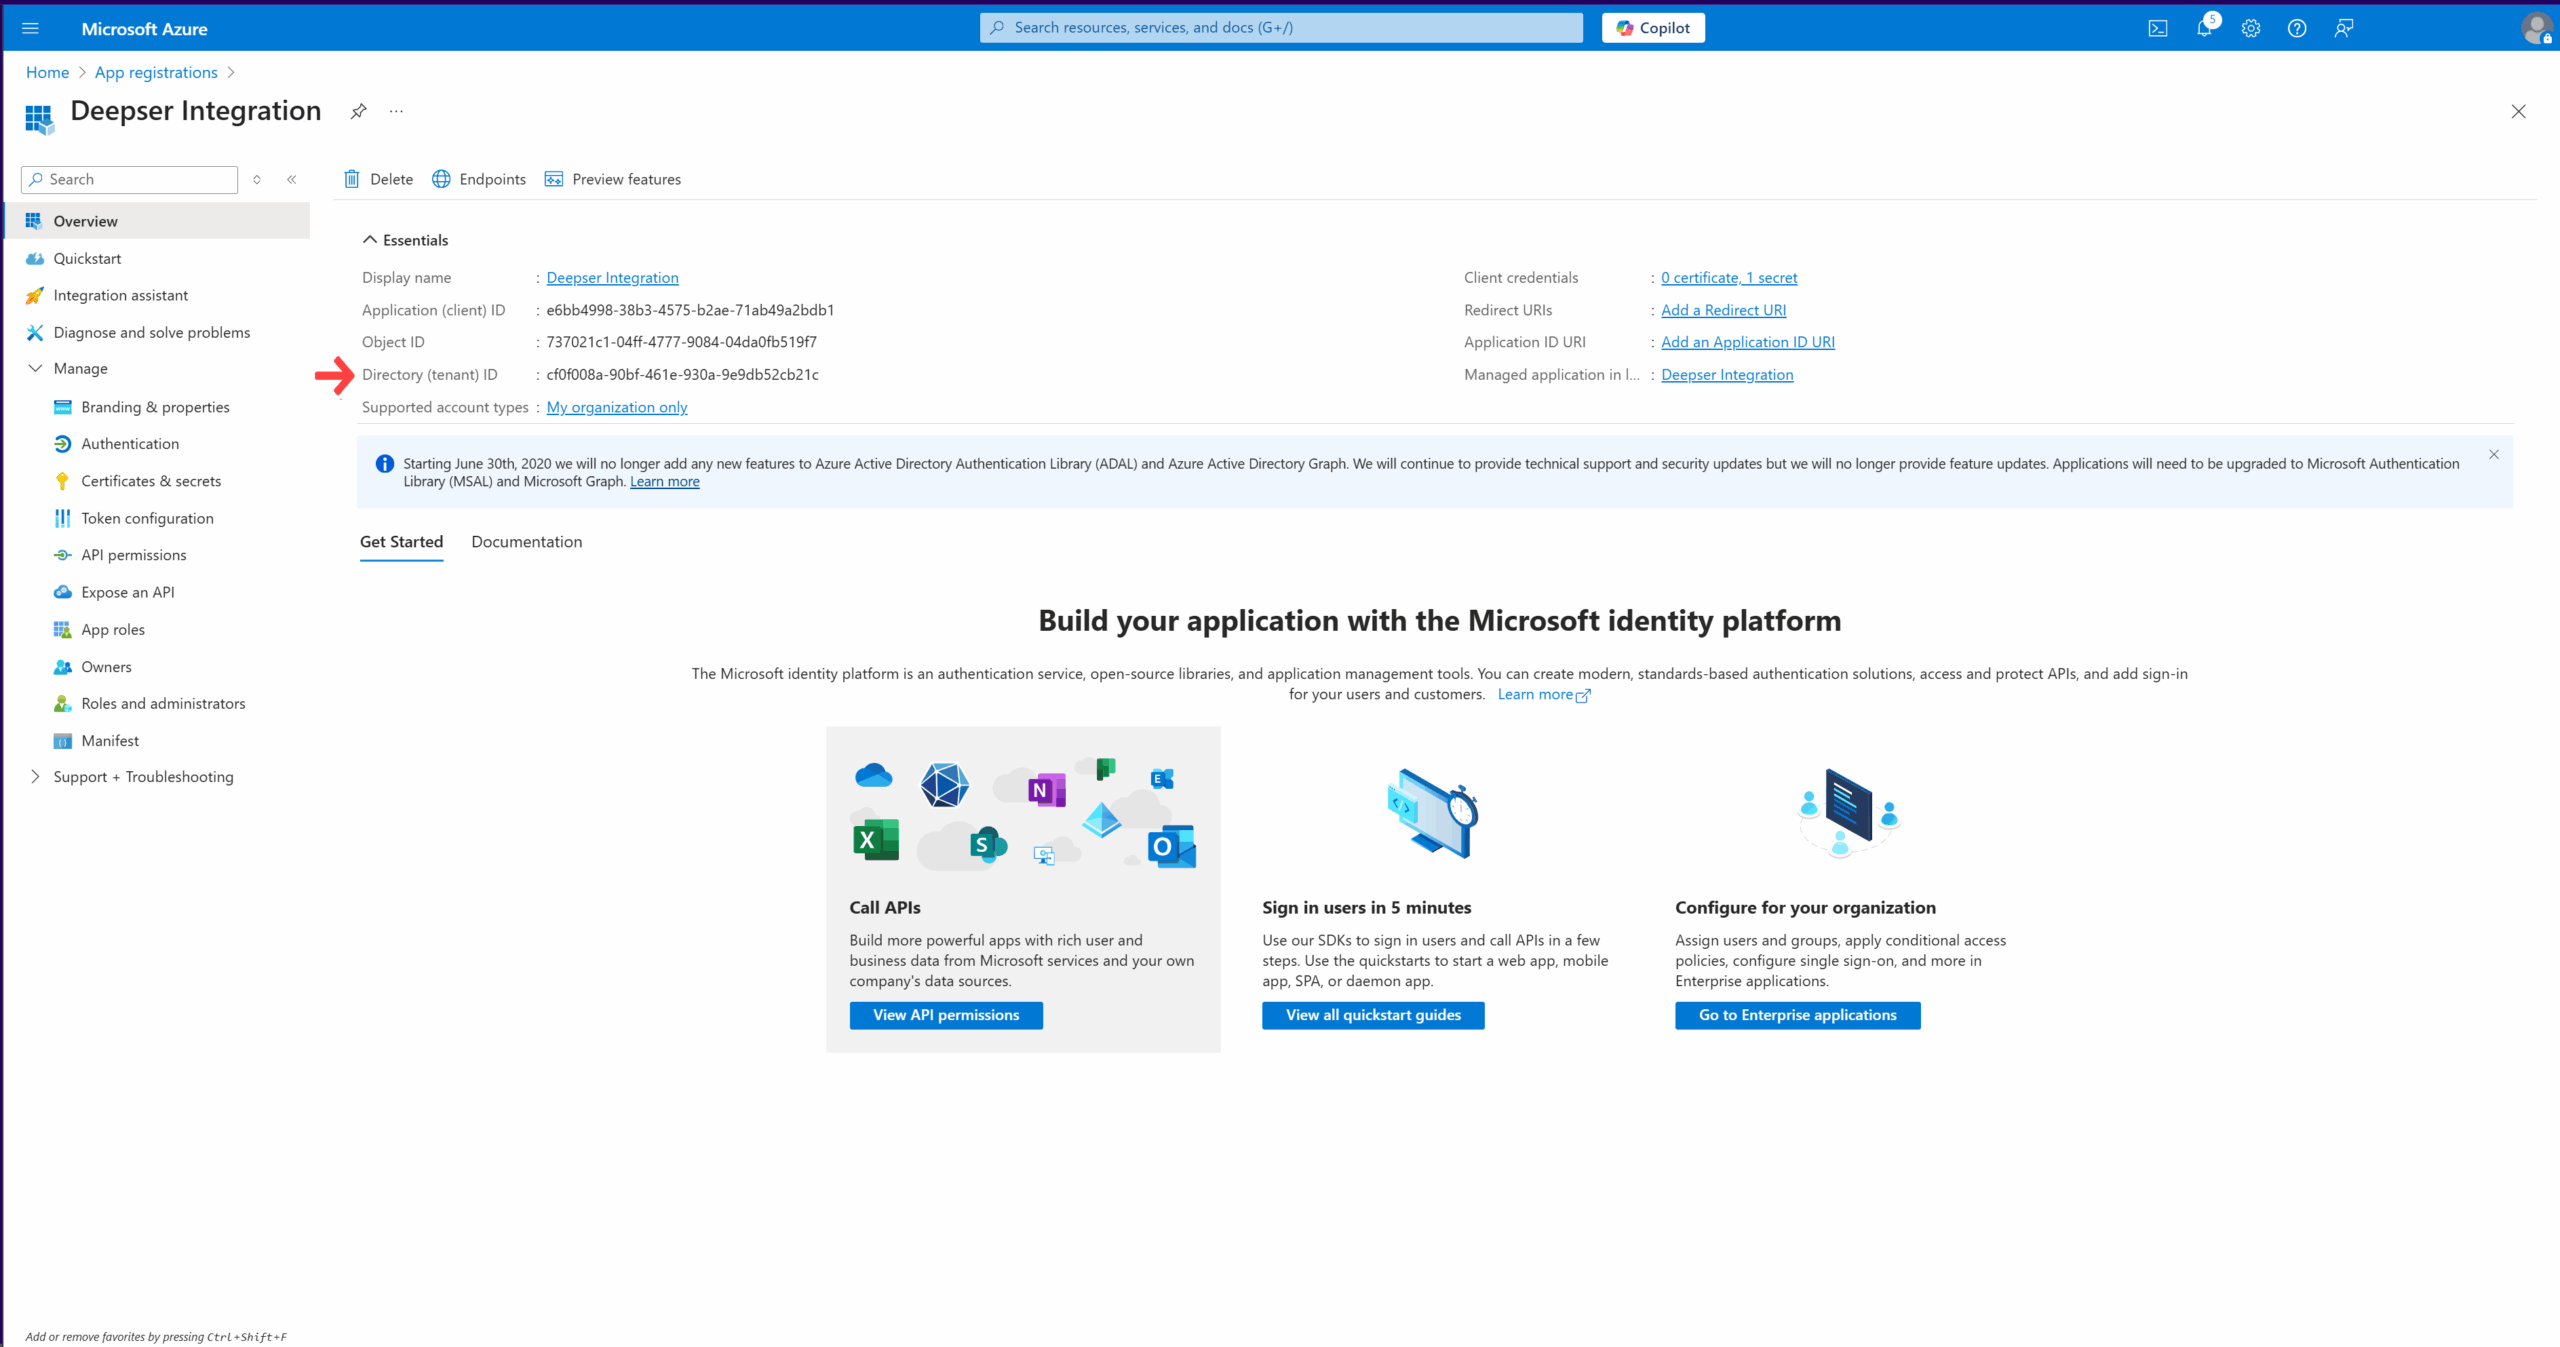
- Tenant ID: Copy from Azure under Overview > Directory (tenant) ID
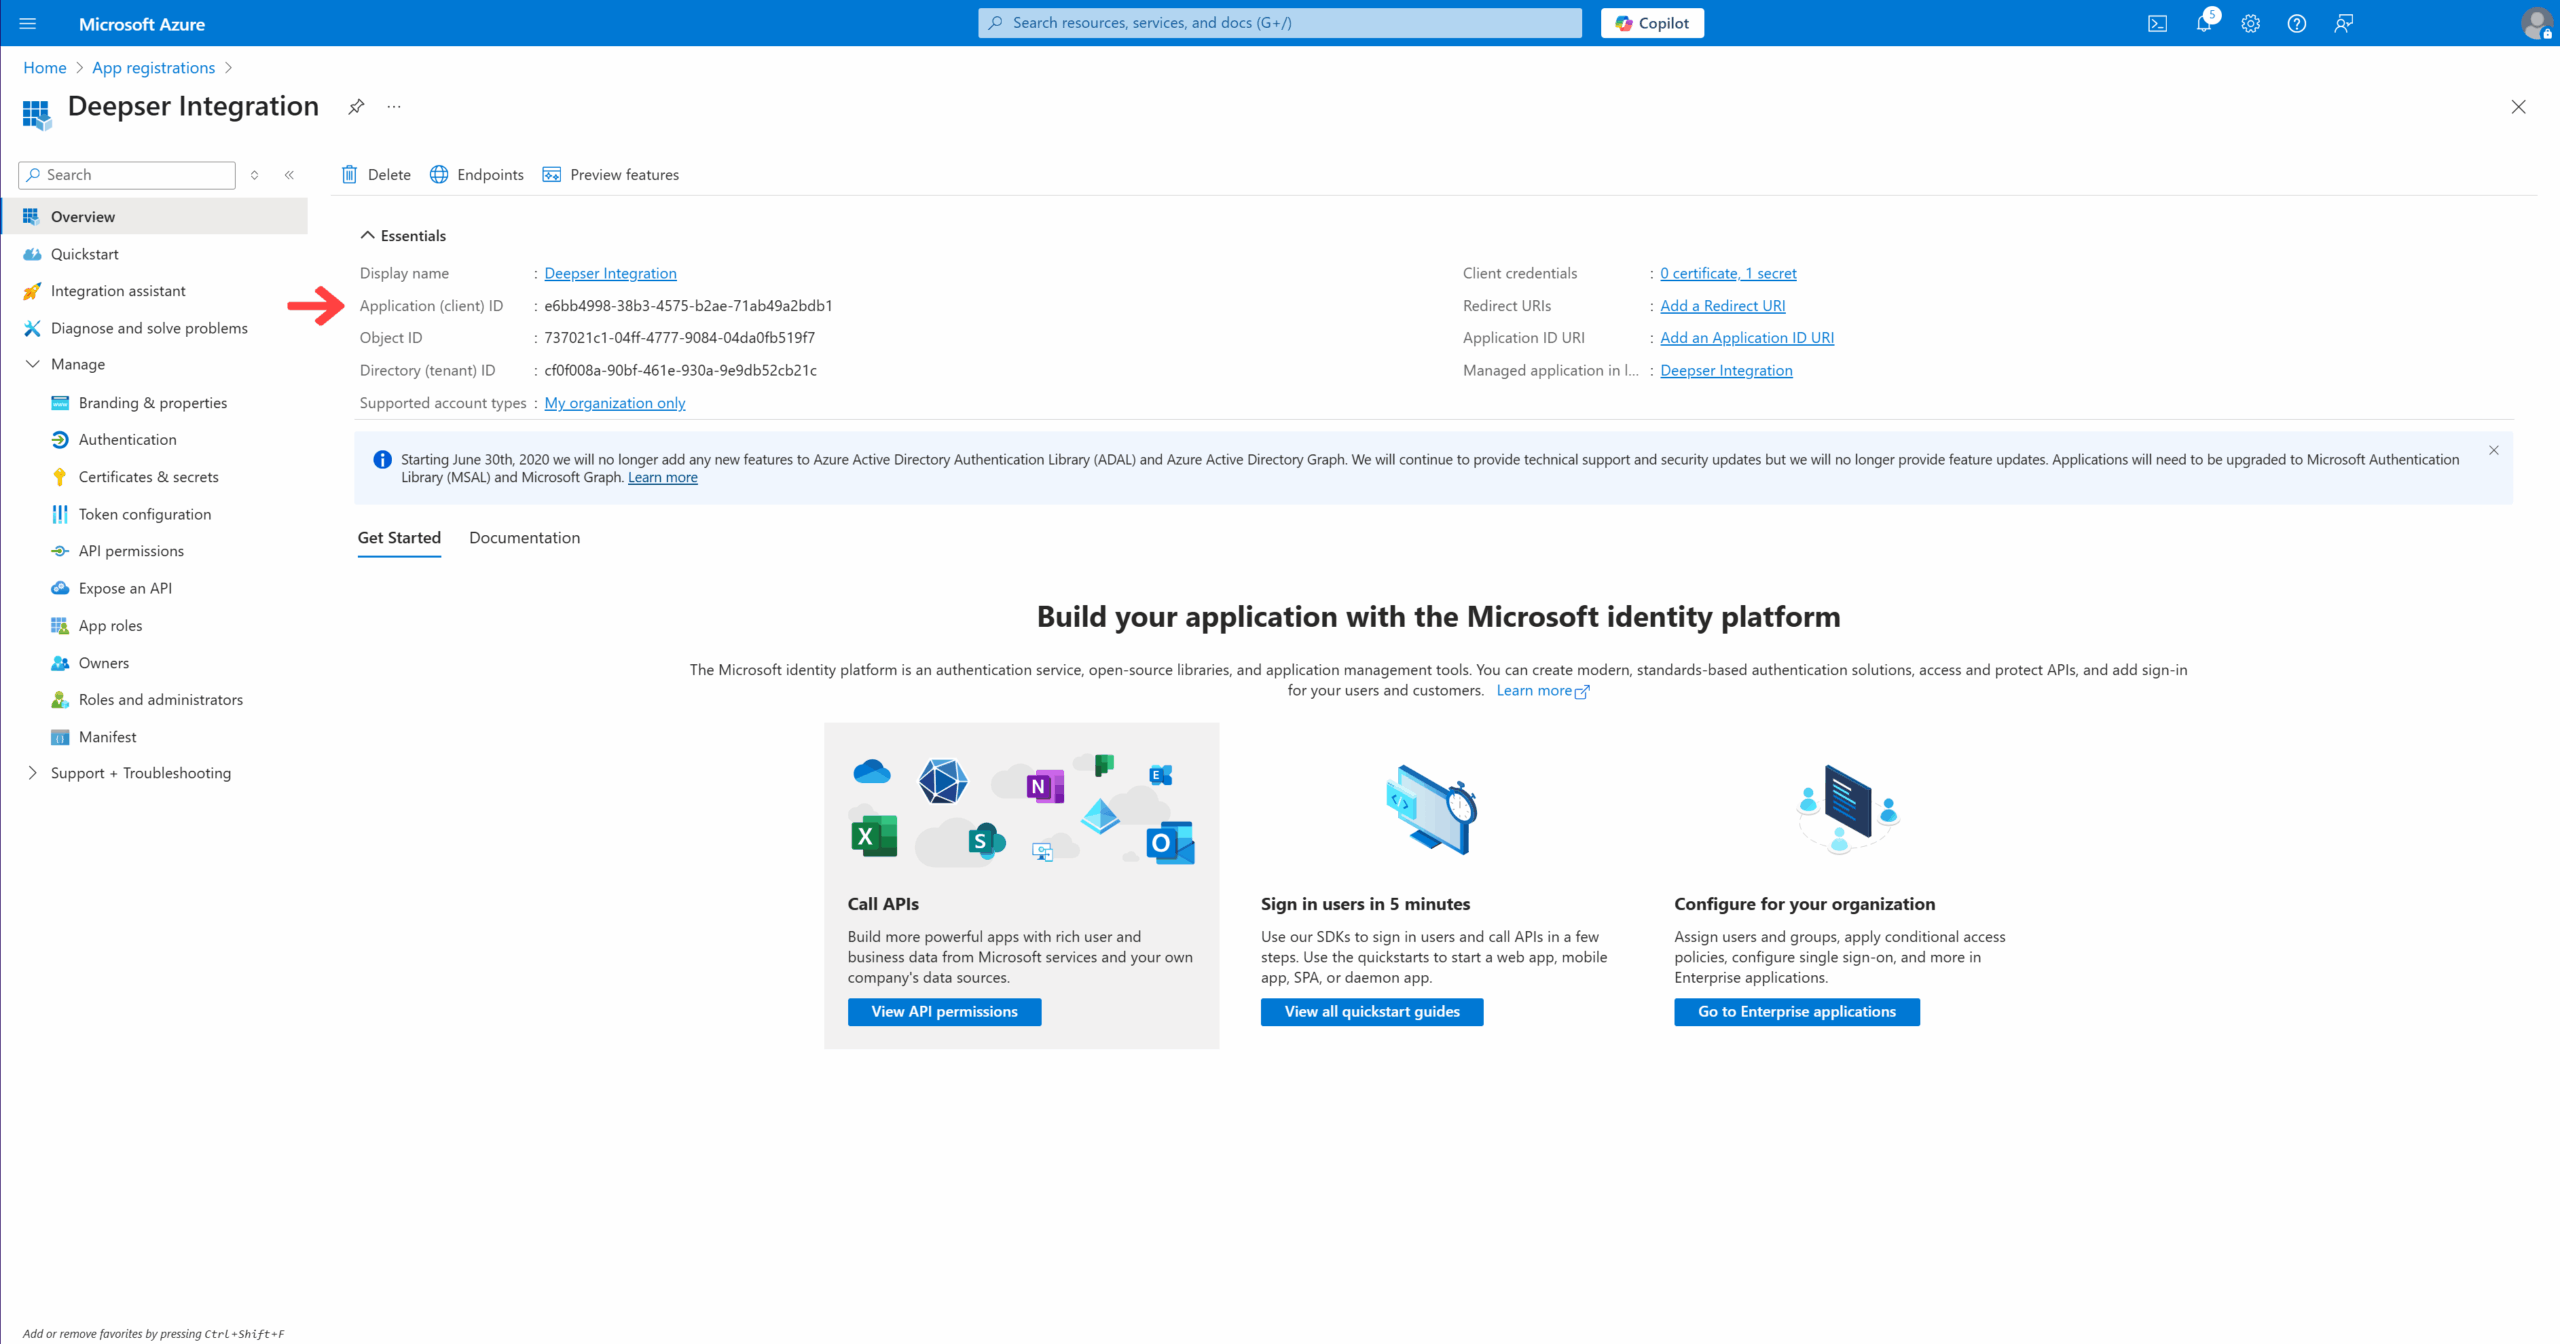
- Client ID: Copy from Azure under Overview > Application (client) ID
- Client Secret: Paste the previously saved secret value
-
Click "Apply" to save. Then click "Get Token" to make the OAuth Client ready for mailbox configuration.
Configure the Incoming Mailbox
-
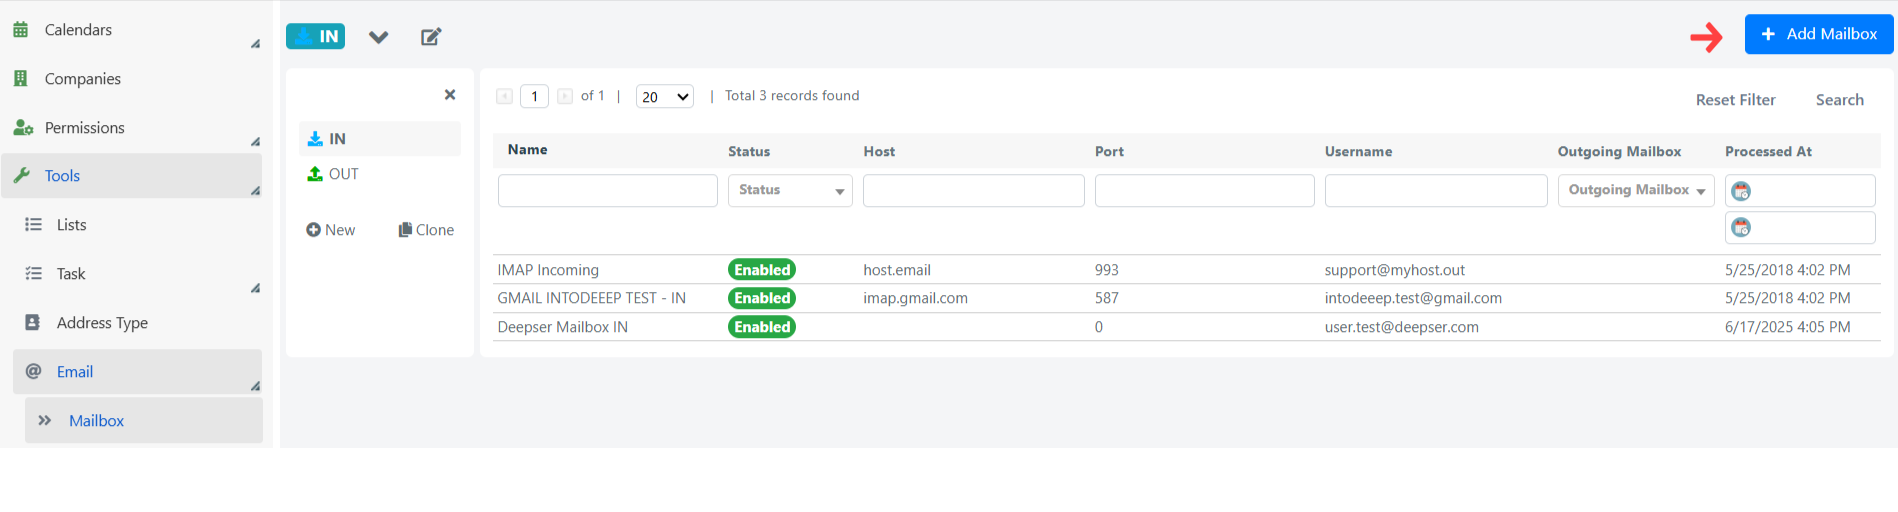
Navigate to System > Tools > Email > Mailbox and open or create the incoming mailbox.
-
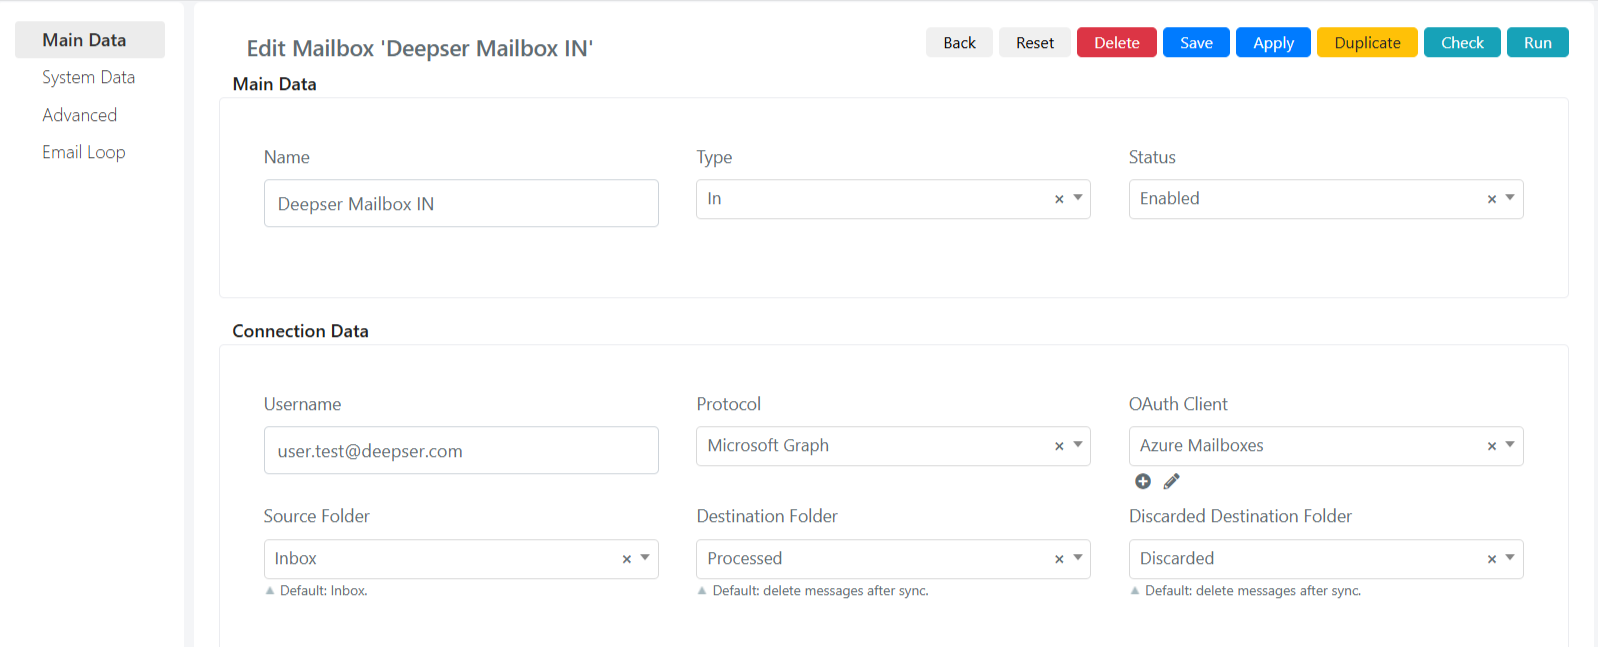
Fill in the following fields:
- Name
- Type: In
- Status: Enabled
- Username: Email address to be integrated
- Protocol: Microsoft Graph
- OAuth Client: Select the OAuth Client created above
-
Click "Apply" to save.
-
Set the folders:
- Source Folder: The folder from which Deepser reads messages (default: inbox).
- Destination Folder: Where processed messages are moved. If not selected, messages are deleted.
- Discarded Destination Folder: Where messages excluded by email rules are moved. If not selected, messages are deleted.
Tip: Configure destination and discarded folders to store messages rather than deleting them.
-
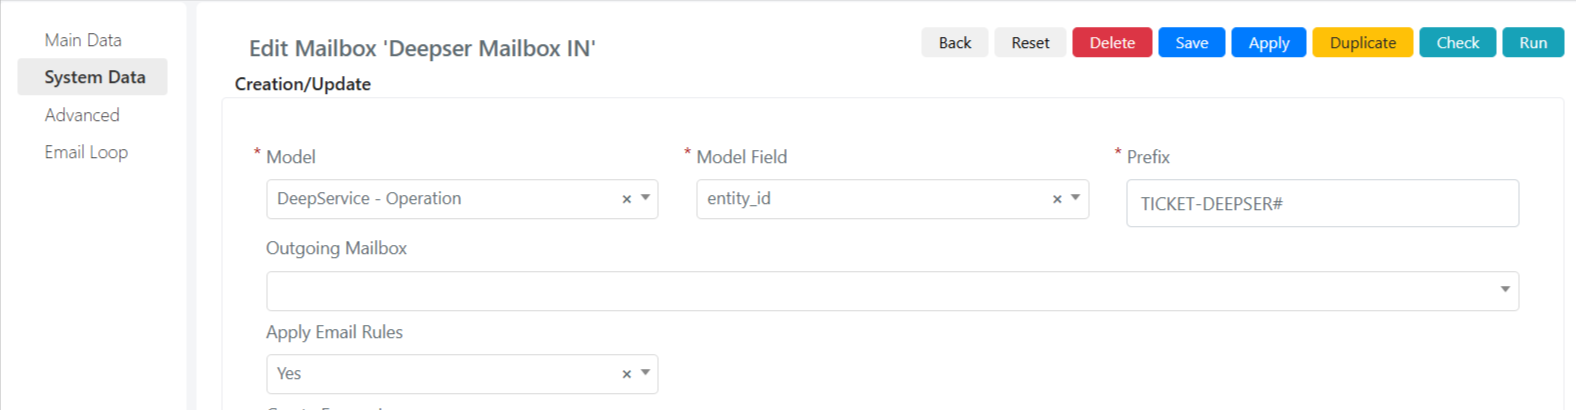
In the System Data tab, fill in:
- Model: DeepService - Operation
- Model Field: entity_id
- Prefix: TICKET-Company Name (replace with your company or service name) #
- Apply Email Rules: Yes
-
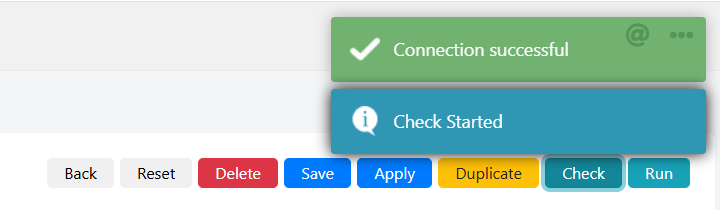
Click "Check" to verify that all required permissions are granted.
-
Click "Run" to execute.
Configure the Outgoing Mailbox
-
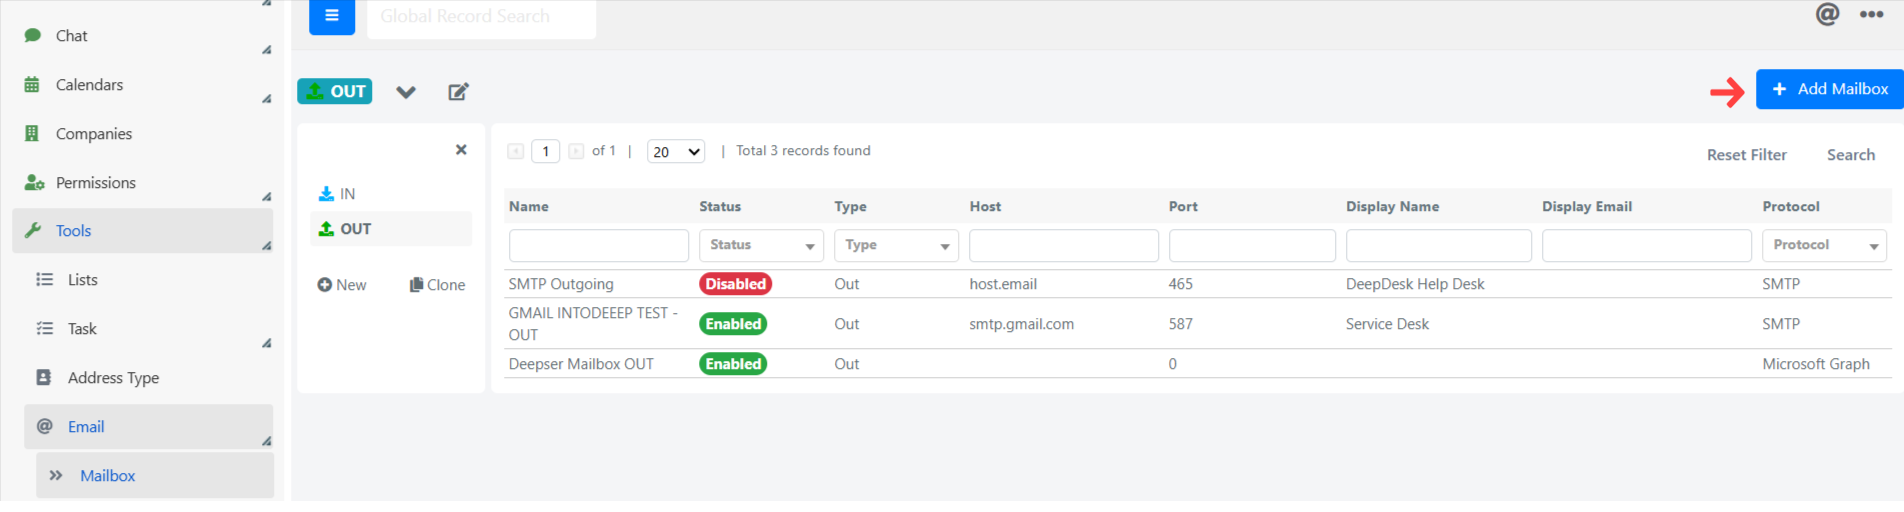
Go to System > Tools > Email > Mailbox and click "Add Mailbox".
-
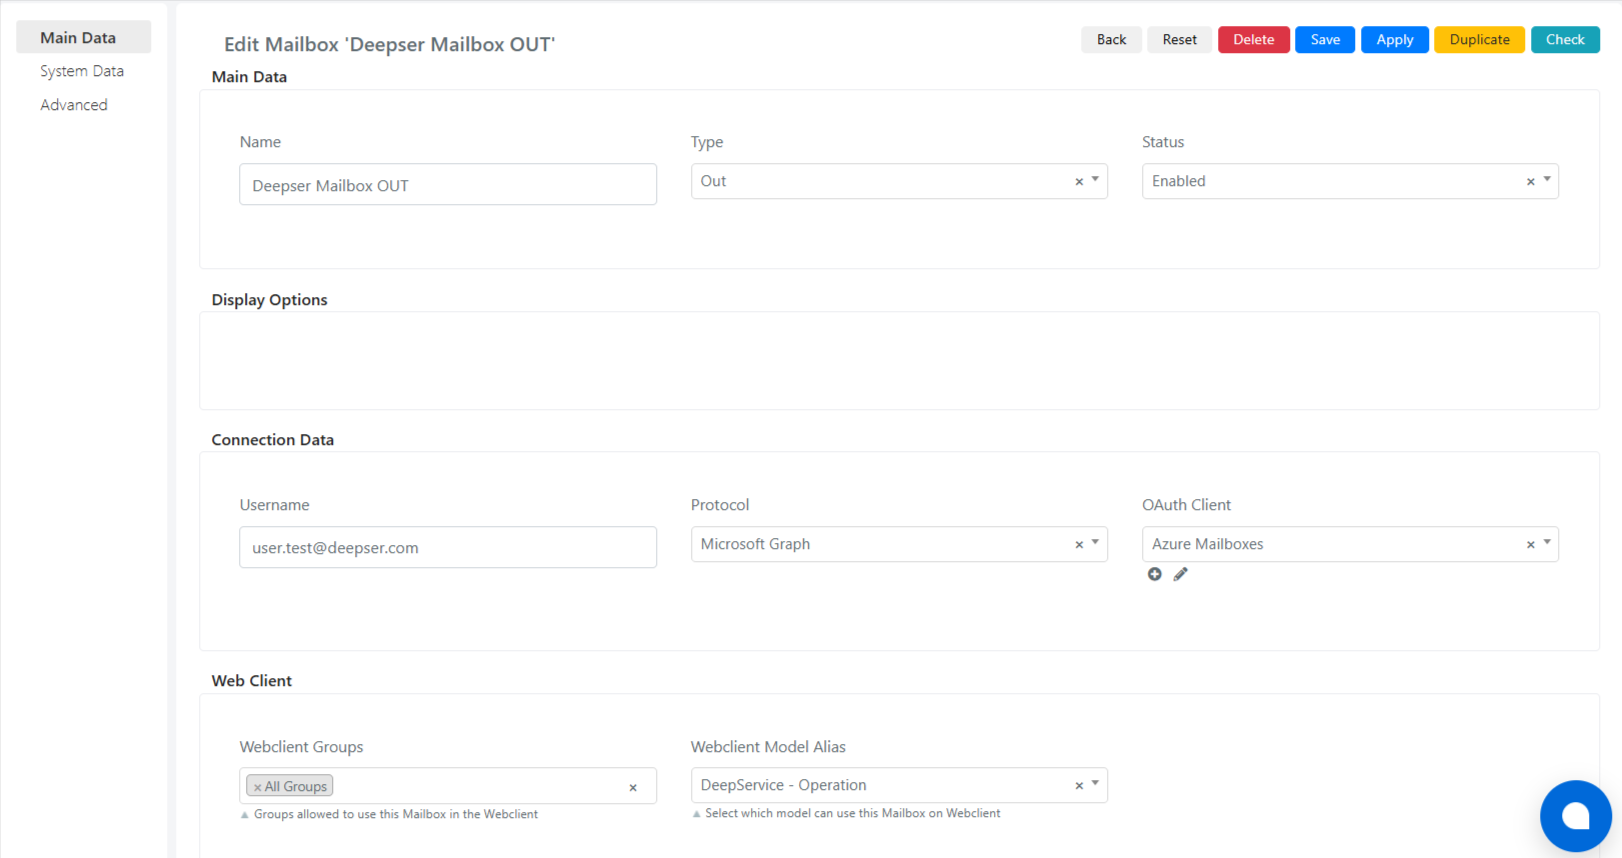
Fill in the following fields:
- Name
- Type: Out
- Status: Enabled
- Username: Email address to be integrated
- Protocol: Microsoft Graph
- OAuth Client: Select the previously created OAuth Client
- Webclient Groups: Select the group of users authorized to use the mailbox
- Webclient Model Alias: Select the model type (e.g., "operation" for Service Operations)
-
In the System Data tab, set Is Default Outgoing to "Yes" if you want this to be the default outgoing mailbox.

The system sends all outbound mail only through the mailbox marked as the default. To change the default, open the desired mailbox and set Is Default Outgoing to Yes.
- Click Apply to save, then click Check to confirm the configuration is working.