Configure a Relation
In Deepser, you can configure relations between entities to connect records across different models. This guide covers the relation setup, the creation of a Relation Grid field, and column configuration.
Create a Relation
To create a relation, follow these steps:
- Go to System > Relations and click Add Relation.
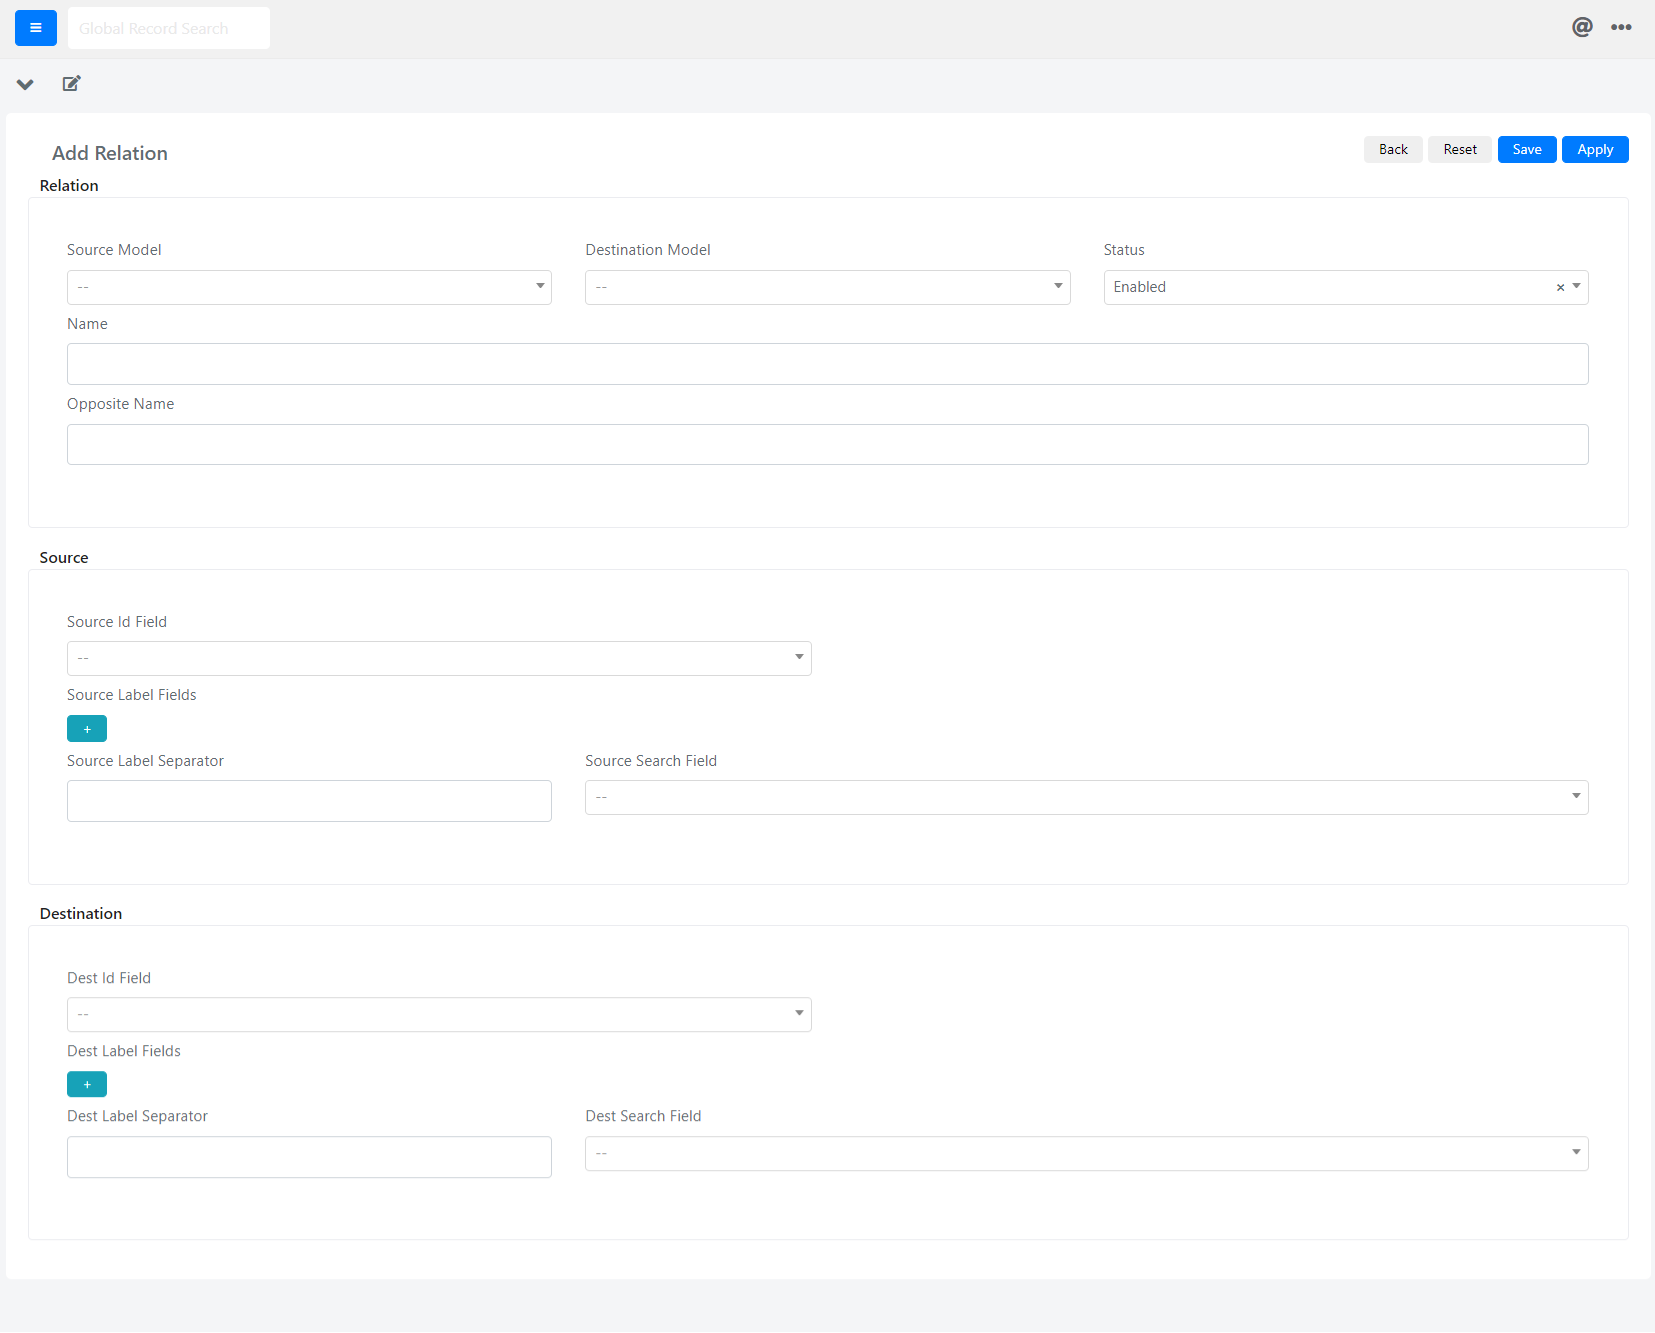
- Fill in the fields described below:
| Field | Description |
|---|---|
| Source Model | Main model of the relation. |
| Destination Model | The target (or related) model of the relation. |
| Status | Status of the relation. If "Enabled" then it is visible and usable; otherwise it is not. |
| Name | Relation name, from Destination to Source Model. |
| Opposite Name | Inverse relation name, from Source to Destination Model. |
| Source Id Field | The field used to identify the source model. For example, you can choose "entity_id". |
| Source Label Fields | The fields shown in the source Relation Grid. For example, you can choose "Name". |
| Source Label Separator | The separator of the label fields in the source Relation Grid. |
| Source Search Field | The field used to search the source model. For example, you can choose "Name". |
| Dest Id Field | The field used to identify the destination model. For example, you can choose "entity_id". |
| Dest Label Fields | The fields shown in the destination Relation Grid. For example, you can choose "Name". |
| Dest Label Separator | The separator of the label fields in the destination Relation Grid. |
| Dest Search Field | The field used to search the destination model. For example, you can choose "Name". |
- Click Save or Apply to save the relation.
Example: Configure a Relation Between a Service Operation and a CI
In this example, you will configure a relation between a Service Operation and a CI.
- Go to System > Relations and click the Add Relation button.
- Set the Source Model field to "DeepCmdb -- Ci" and the Destination Model field to "DeepService -- Operation".
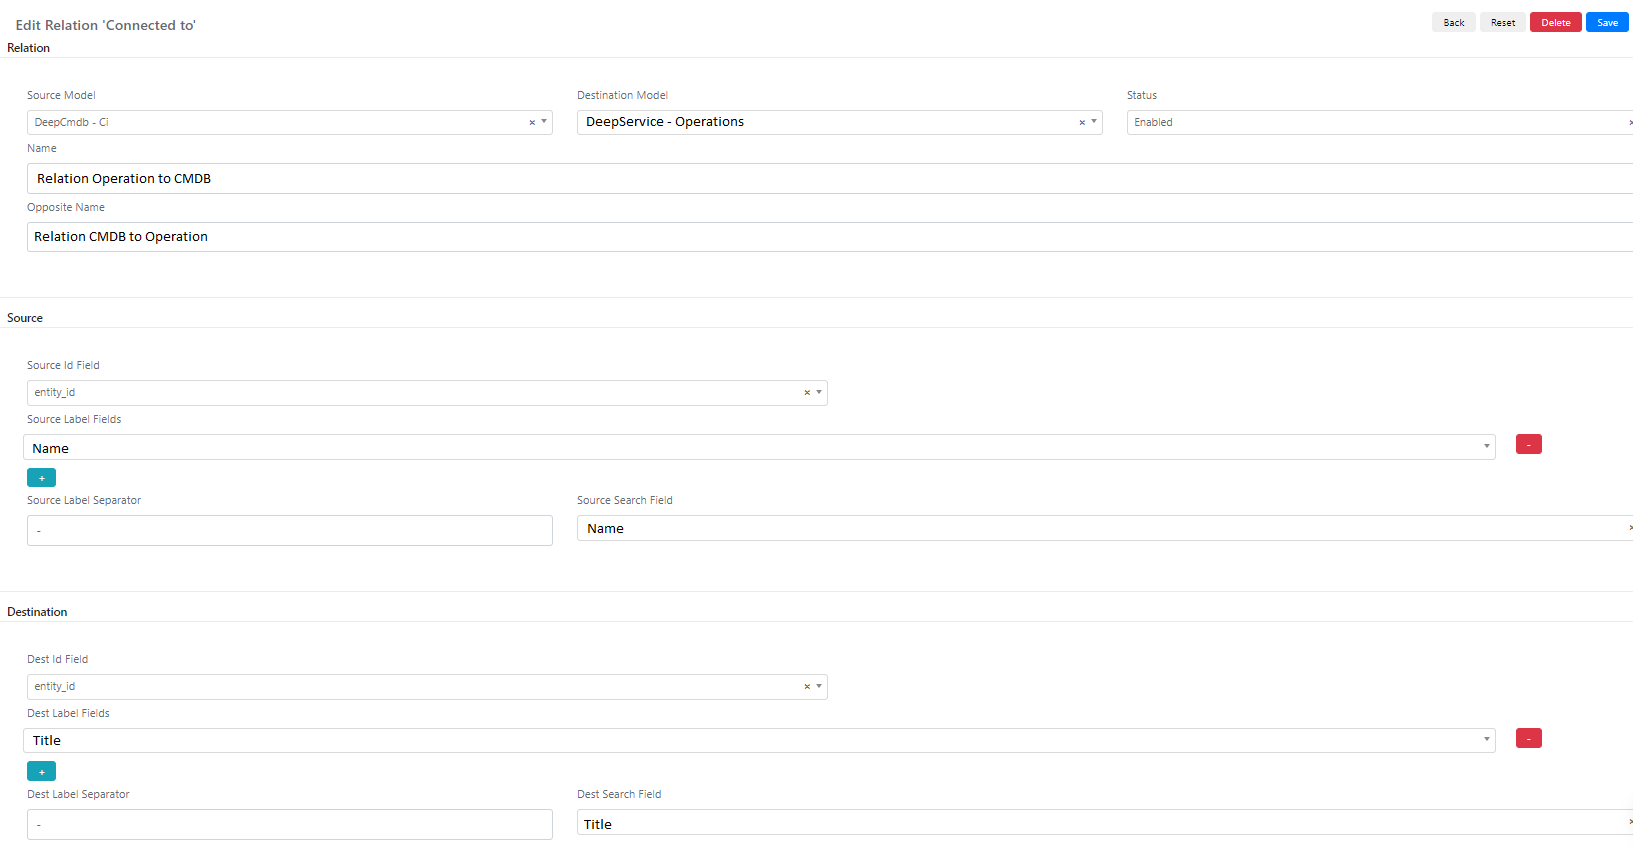
- In the Name field, enter the name you want to give to the relation.
- In the Opposite Name field, set the name for the opposite relation. For example, if you want to link a CMDB element to a Service Operation, you need to use the opposite relation.
- In the Source section, configure the Source Id Field with "entity_id" and set both the Source Search Field and Source Label Field to "Name".
- In the Destination section, set the Dest Id Field to "entity_id" and both the Dest Search Field and Dest Label Field to "Title".
- Click Save or Apply to save the relation.
Create a Relation Grid Field
To interact with the relation you created, you need to create a custom field of type Relation Grid.
- Go to System > Custom Fields and choose the model "DeepService -- Operation".
- Navigate to the Fields section and click Add Field.
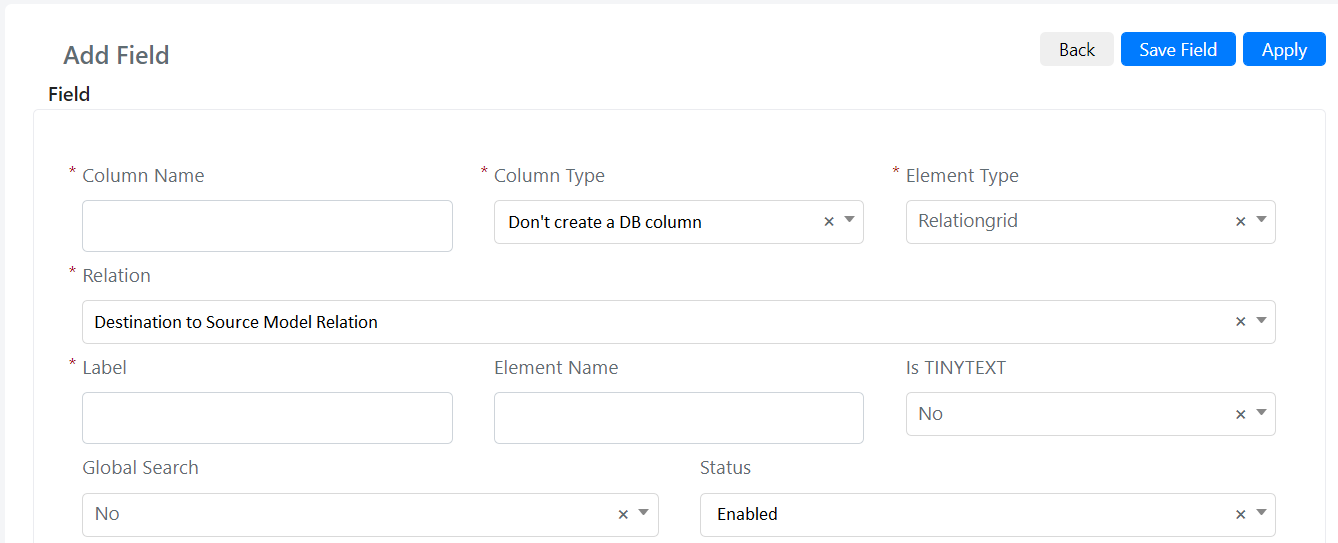
- In the Column Name field, set the name you want to display -- in this case, "Relation Operation to CMDB".
- In the Column Type field, set "Don't Create DB Column".
- In the Element Type field, set "Relationgrid".
- In the Relation field, select the relation you previously created from the drop-down menu.
- Click Save or Apply to save the field.
You can now add this field called "Relation Operation to CMDB" to the form template of the Service Operation. For the configuration, see the articles "Form Template Configuration" and "Column Configuration".
Configure Relation Grid Columns
You can configure which columns are visible in the Relation Grid. This allows you to control what information is displayed when viewing related entities.
To configure columns, first set up the form template and add the custom field to it.
- Inside the Service Operation, navigate to the Relation tab.

- Click the Edit button.
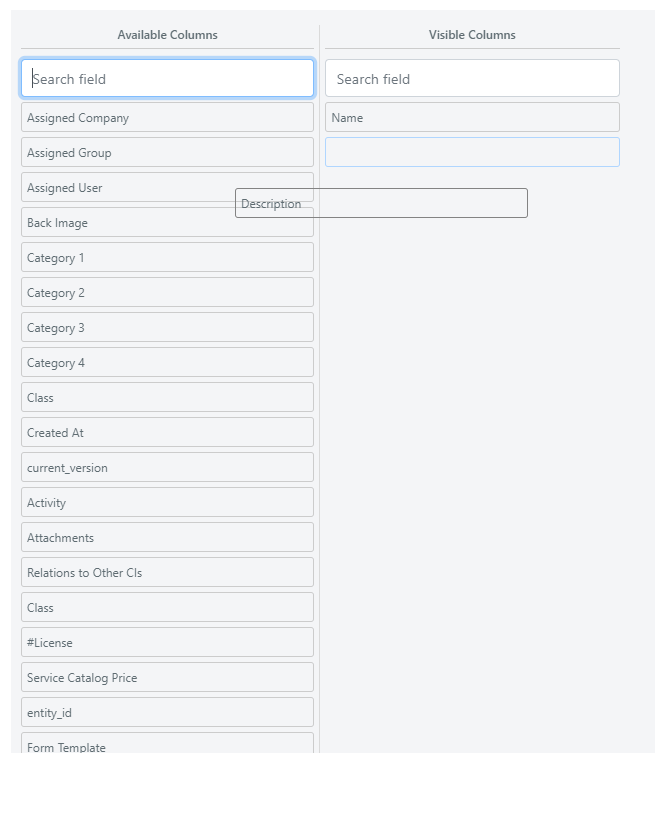
- Add or remove columns by dragging entries from the Available Columns section to the Visible Columns section and vice versa.
- Click Save or Apply to save the new configuration.
You will see that the column has been added correctly.
