Configure Reports
Reports in Deepser allow administrators to extract, format, and distribute data as PDF, XLS, or CSV files. This guide covers how to create report folders, build custom reports with filters, and schedule automatic delivery.
Within the report configuration, an admin user can:
- Create a custom folder to organize reports
- Create an executable report with filters
- Schedule a report for automatic delivery to one or more users
Create a Report Folder
Report folders help you organize reports into logical groups and control access by user group.
- Go to System > Report > Folder in the Deepser Backend.
- Review the folders grid, which shows all previously created folders.
- Click the Add Folder button. The following form appears:
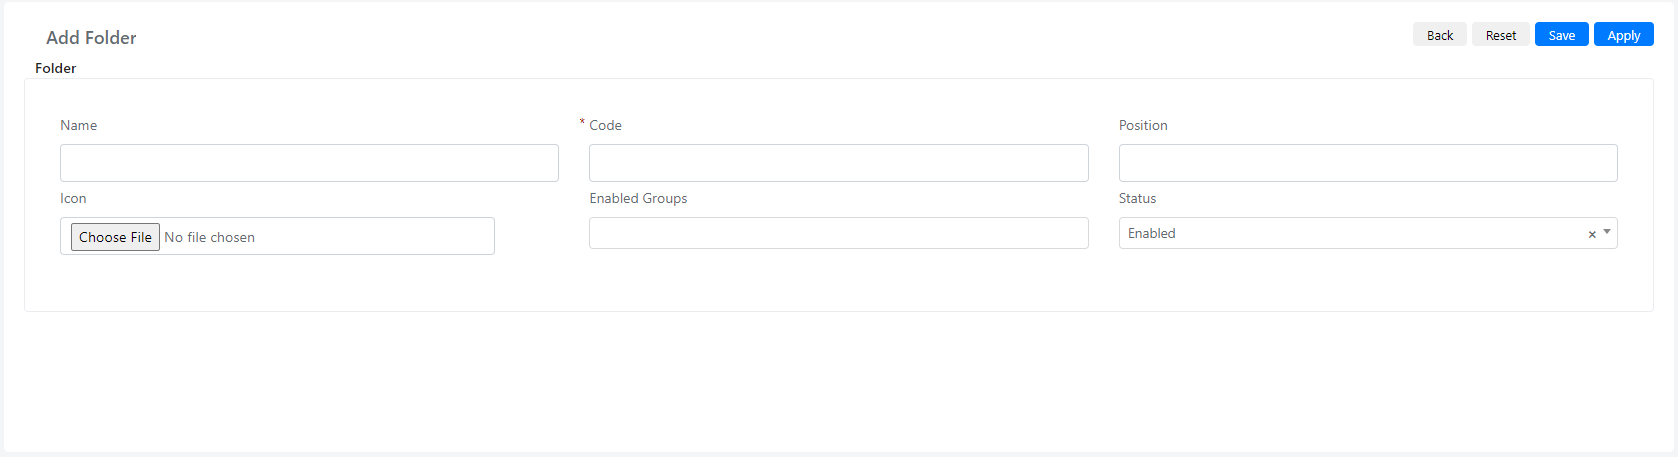
| Field | Description |
|---|---|
| Name | The folder's name. |
| Code | Used to uniquely identify a folder. |
| Position | Indicates the position and listing order of this folder on the grid. |
| Icon | Allows you to use an image as an icon for the folder. |
| Enabled Groups | Limits visibility to specific user groups that can access this folder. |
| Status | Enables or disables the folder. |
Create a Report
- Go to System > Report > Report in the Deepser Backend.

- On the reports grid, click the Add Report button.
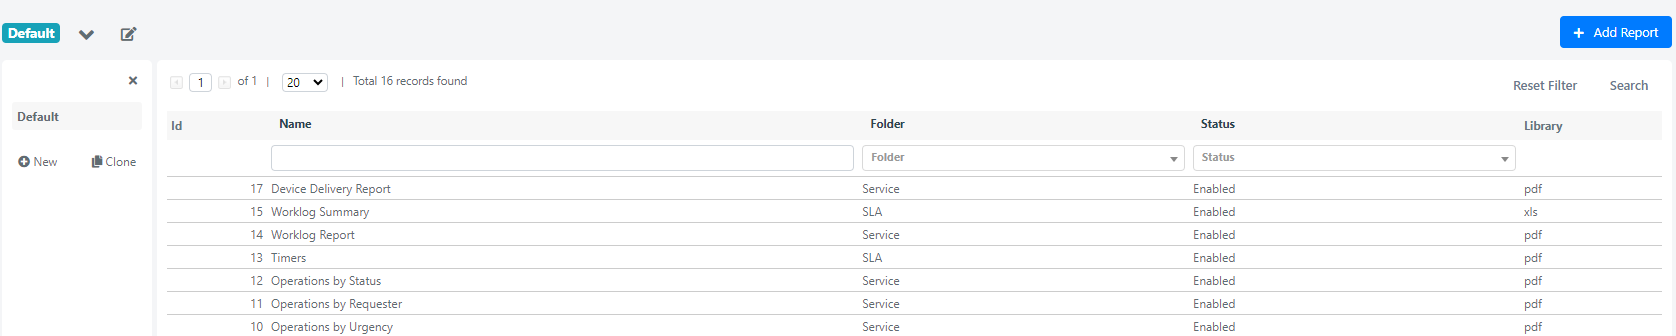
- Fill in the report form:
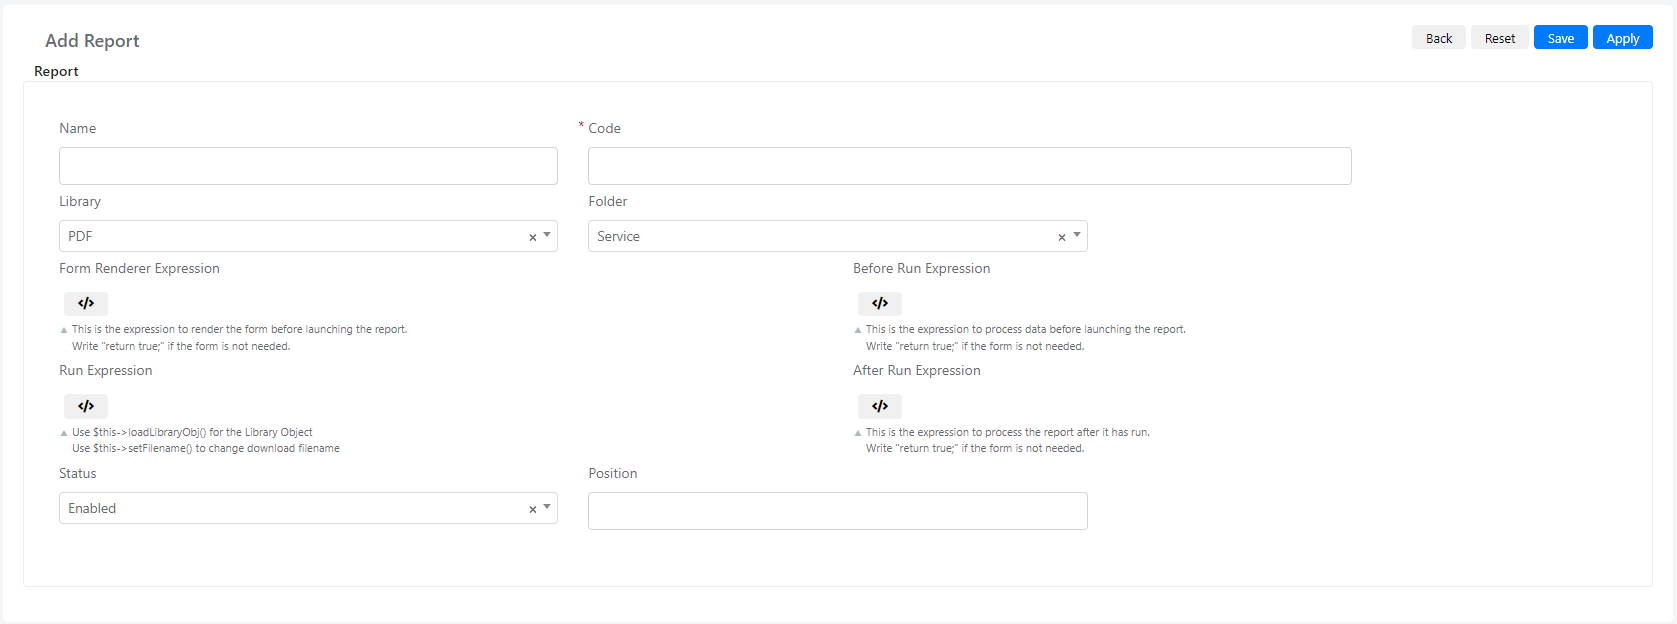
| Field | Description |
|---|---|
| Name | The report name. |
| Code | Used to identify the report with a unique string. Using a single descriptive string is the most effective approach. |
| Library | A select field where you choose the report type: PDF, XLS, or CSV. |
| Folder | A select field where you choose the destination folder for this report. |
| CSV Delimiter | Only visible if the library is CSV. Specify a character such as ; or , to use as a separator between file records. |
| CSV Enclosure | Only visible if the library is CSV. Define the enclosing characters of each record, for example double or single quotes. |
Form Render Expression
The Form Render Expression field defines the filter controls that determine which data the report extracts. You configure this field the same way for both PDF and Excel reports.
To add filters, use the following custom code:
					// Firstly it is retrieved type values array. This values will be used as options on the filter field.
$type = Deep::helper('deep_service/type')->typeToOptionArray();
$this->addField(
            'type_id', // this indicates the filter field code, which has to be unique for each field
            'select', // filter field type, in this case its select, but it can also be text, date
            array(
                'label' => Deep::helper('deep_service')->__('Type'), // Label of the filter field
                'multiple' => 'multiple', // In fields of type select you can add this parameter if you want to select multiple choices for this    //filter
                'values' => $type,  // If field is of type select you also need to provide the option values that can be selected from this field. // The given value for this parameter should be of type array. In this case the given value is an array with all the service types.
                'columns' =>1 // This field indicates the width of this field on the report fieldset.
            )
        );
$this->addField(
            'created_at_from',
            'date',
            array(
                'label' => Deep::helper('deep_service')->__('(Created Date) From'),
                'image' => $this->getSkinUrl('images/grid-cal.png'),
                'time' => true,  // this parameter indicates whether you want to display also the time on this field.
// with format parameter you set the format of the date. In this case the given value gives a format date based on the //current user Local time zone.
                'format'  => Mage::app()->getLocale()->getDateTimeFormat(Mage_Core_Model_Locale::FORMAT_TYPE_SHORT),
                'columns' =>1,
            )
    );
$this->addField(
            'created_at_to',
            'date',
            array(
                'label' => Deep::helper('deep_service')->__('(Created Date) To'),
                'image' => $this->getSkinUrl('images/grid-cal.png'),
                'time' => true,
                'format'  => Mage::app()->getLocale()->getDateTimeFormat(Mage_Core_Model_Locale::FORMAT_TYPE_SHORT),
                'columns' =>1,   ));
After configuring the Form Render Expression, click the Preview button to see all the filters you created. Below is an example of a PDF report that extracts Service Operations filtered by type and creation date.

Here is the preview of report filters:
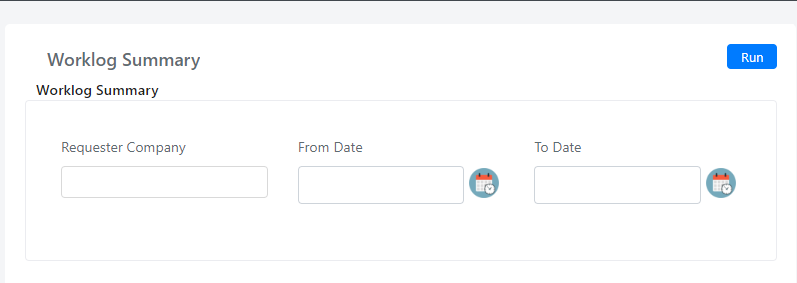
To extract the report based on these filters, click the Run button in the right corner.
If the "Before Run Expression" or "Run Expression" script is not correct, the report will not run.
Before Run Expression
The Before Run Expression filters the data collection that appears in the report, using the filter fields configured in the Form Render Expression.
On the first line, the PDF library is initialized by setting the paper format and orientation. The code then iterates through each filter field to narrow down the collection. Finally, the filtered Service Operation collection is set on the report object.
					// PDF library is initialized by setting the paper format and orientation.
$this->loadLibraryObj()->setPaper('A4', 'landscape');
$filters = $this->getFormData(); // Retrieve all the filters from Form Render Expression
// Retrieve the operation collection
$collection = Deep::getResourceModel('deep_service/operation_collection');
// Iterate through each filter field and filter the collection based on those.
if ($filters['created_at_from'] !='')
        {
             $collection->addFieldToFilter( 'main_table.created_at', [ 'gt' =>
            Deep::helper('deep_calendar')->filterDateTime($value) ] );
        }

        if ($filters['created_at_to'])
        {
$collection->addFieldToFilter( 'main_table.created_at', [ 'lt' =>
Deep::helper('deep_calendar')->filterDateTime($value) ] );
        }

        if ($filters['type_id'] !='') {
            $collection->addFieldToFilter( 'main_table.type_id', [ 'in' => $value ] );
        }
// Then the variable assigned with the operation collection is set to the report object.

$this->setData('operation_collection',$collection);
Run Expression
The Run Expression field configures the layout structure of the report and retrieves all the records from the Before Run Expression to display them. For a PDF report, you can write HTML code to create tables and styles, and PHP code to retrieve the values to display.
When the report is of type PDF, here is an example. The first part of the code contains styles to format the page structure and the table that displays the Service Operation data.
<!DOCTYPE html>
<html>
<head>
    <style>
        /** Define the margins of the page and the font **/
        @page {
            margin: 70px 25px;
font-family: Helvetica;
font-size: 12px;
        }
            /** Define the header style */
            header {
                position: fixed;
                top: -70px;
                left: 0px;
                right: 0px;
                height: 50px;
                color: grey;
                text-align: center;
                line-height: 35px;
	font-size: 18px;
            }
            footer {
                position: fixed;
                bottom: -70px;
                left: 0px;
                right: 0px;
                height: 50px;

                /** Extra personal styles **/
                color: grey;
                text-align: center;
                line-height: 35px;
	font-size: 12px;
            }

            #report-title{
text-align: center;
}

 #report-title{
text-align: center;
}
#report-table {
border-collapse: collapse;
width: 100%;
	}
#report-table td, #report-table th {
    border: 1px solid #ddd;
    padding: 8px;
			}
#report-table tr:nth-child(even){
    background-color: #f2f2f2;
			}
#report-table th {
    padding-top: 12px;
    padding-bottom: 12px;
    text-align: left;
    background-color: #D90C0C;
    color: white;
			}

    </style>

  <?php
        // get the report name
        $reportName = $this->getName();
        // collection of operation to be later used on the table
        $collection = $this->getData('collection');
// map the  fields that are to be shown on the table of operation records
        $fields = [
            'entity_id'=>'Id',
            'type_id'=>'Service Type',
            'title'=>'Title',
            'requester_username'=>'Requester User',
            'status'=>'Status',
        ];
// retrieve the status List values
$statusList = Deep::helper('deep_list')->loadListValues(Deep_Service_Model_Operation::LIST_CODE_STATUS)->toOptionHash();
    ?>
<title><?php echo Deep::helper('deep_report')->__($reportName); ?>

<title><?php echo Deep::helper('deep_report')->__($reportName); ?></title>
</head>
<body>
    <script type="text/php">
        if ( isset($pdf) ) {
            $x = 800; // position on y
            $y = 580; // position on x
            $text = "{PAGE_NUM} / {PAGE_COUNT}";
            $font = $fontMetrics->get_font("helvetica", "bold"); // document's font
            $size = 8;
            $color = array(0,0,0);
            $word_space = 0.0;  //  default
            $char_space = 0.0;  //  default
            $angle = 0.0;   //  default
// add page numbers (in the format of "{PAGE_NUM} / {PAGE_COUNT}") to the generated PDF
// document at the specified position using the specified font and styling
            $pdf->page_text($x, $y, $text, $font, $size, $color, $word_space, $char_space, $angle);
        }
    </script>
<!-- document's header -->
    <header>
        <?php echo Deep::helper('deep_report')->__($reportName);
        ?>
    </header>

<?php
if (!$collection || $collection->count() == 0){
    echo "No data found";
    return;}?>
<!-- table that shows the operations-->
<table id="report-table" style="page-break-inside: auto;">
    <thead><tr><?php foreach ($fields as $field => $value): ?>
    	<th><?php echo Deep::helper('deep_service')->__($value); ?></th>
    	<?php endforeach; ?>
    	</tr></thead>
<!-- iterate through all the operations and add each record as a table row  -->
<?php foreach ($collection as $operation): ?>
	<tr>    <?php foreach ($fields as $field => $value): ?>
<td>   <?php
		    if($field =='requester_username') // Retrieve the requester Name And Surname
		    {$value = Deep::getModel('deep_admin/user')->load($operation->getData($field),'username')->getId()  ? Deep::getModel('deep_admin/user')->load($operation->getData($field),'username')->getName() :''  ;
		    }else if($field == 'status')
		    {
		        $value = $statusList[$operation->getData($field)]; // Retrieve status Value Label
		    }else if($field == 'type_id')
		    {
     $value = Deep::getModel('deep_service/type')->load($operation->getData($field))->getId() ? Deep::getModel('deep_service/type')->load($operation->getData($field))->getName() :'' ;
		    }else{
		        $value = $operation->getData($field);
		    }
		        echo $value;
		    ?>
		    </td>
<?php endforeach; ?>
</tr>
<?php endforeach; ?>

</table>
</body>

  <!-- Report's footer -->
    <footer class="footer">
        <?php echo Deep::helper('deep_report')->__('Powered by DeepDesk'); ?>
        <span class="page-number">Page </span>
    </footer>
Schedule a Report
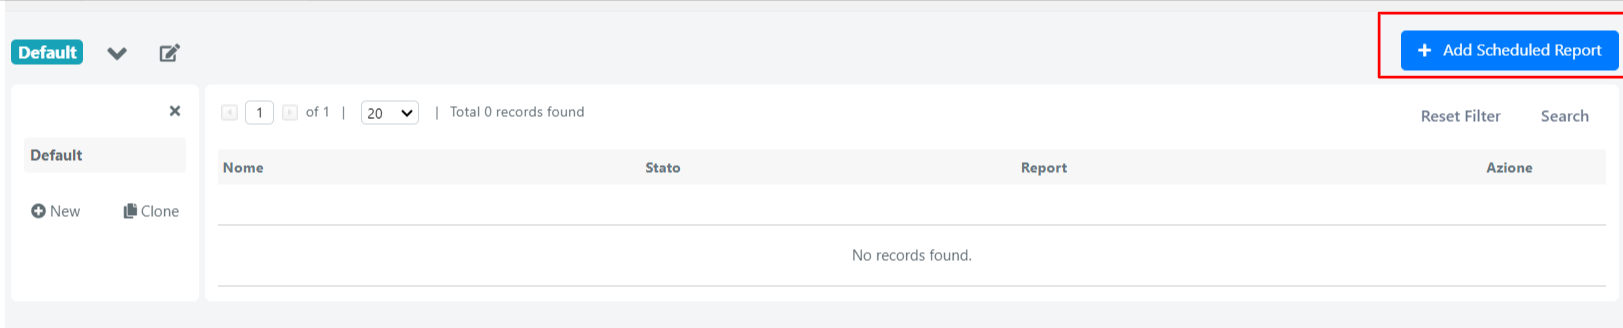
Scheduled reports are sent by email at regular intervals using a cron expression. To set one up:
- Go to System > Report > Scheduled Report in the Deepser Backend.
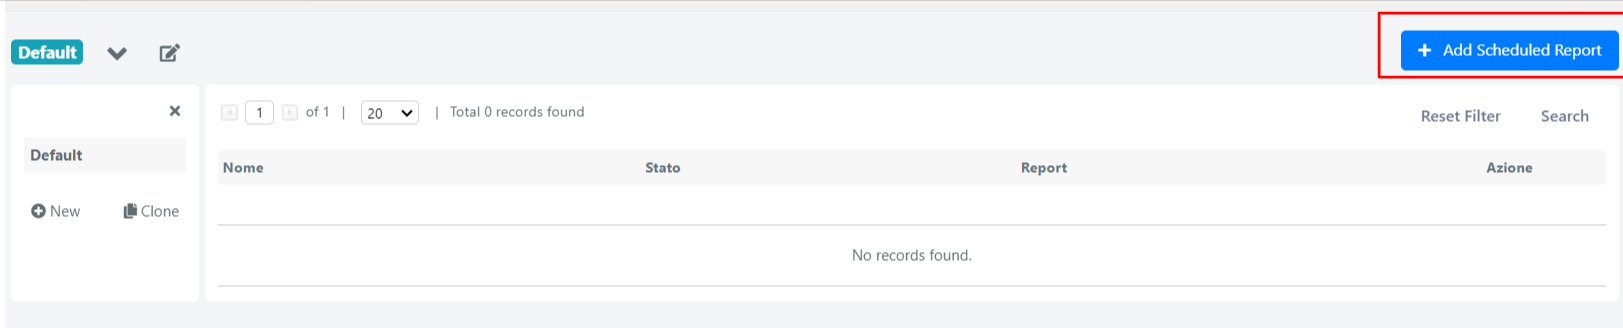
- Click the Add Scheduled Report button.
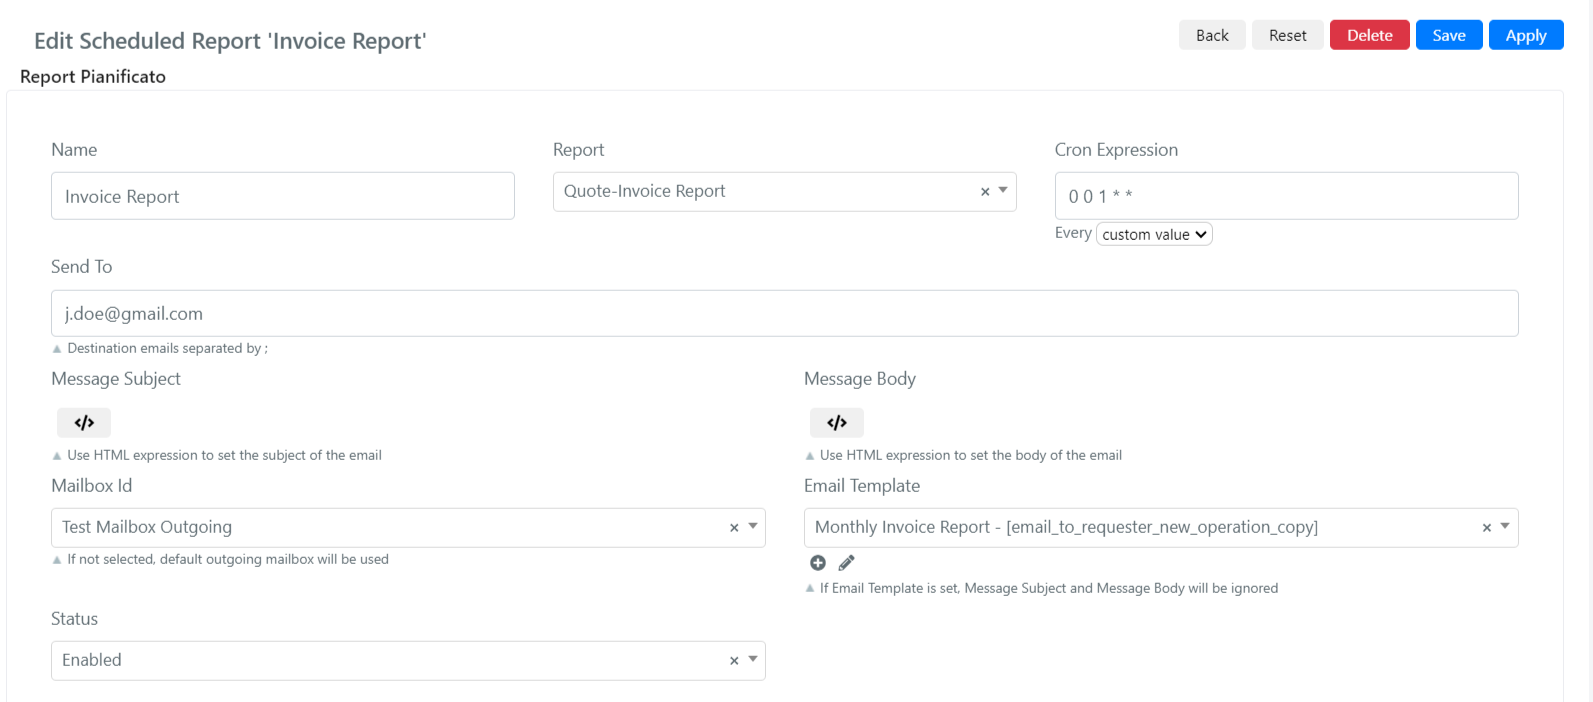
Below is an example of a scheduled report that sends an email with the Invoice Report attached on the first day of every month.
| Field | Description |
|---|---|
| Name | The scheduled report's name. |
| Report | A select field where you choose a configured report to use as the scheduled report. |
| Cron Expression | Define the time period on which the report will be sent. |
| Send To | Enter the email addresses separated by ; that will receive the report. |
| Message Subject | A custom code expression field where you set the email subject in HTML format, using the same format as email templates. |
| Message Body | A custom code expression field where you set the email message body in HTML format, using the same format as email templates. |
| Mailbox Id | A select field where you choose the mailbox from which the email will be sent. |
| Email Template | A select field where you choose the email template for this email. When you select an email template, the Message Subject and Message Body fields are ignored. |
| Status | Enables or disables the scheduled report. |
When you select an email template, the Message Subject and Message Body fields are ignored in favor of the template content.