Survey Designer
The Designer module is designed to organize, manage, and create surveys using predefined templates configured beforehand. It provides the foundation for all surveys you create in Deepser.
Within a Designer record, you find the same structure as a Survey record, with the difference that the fields are used to preconfigure the surveys created from it.
To create a survey, you first need to generate a template. Navigate to Survey > Designer and click +Add Survey Template:

The following screen will appear:
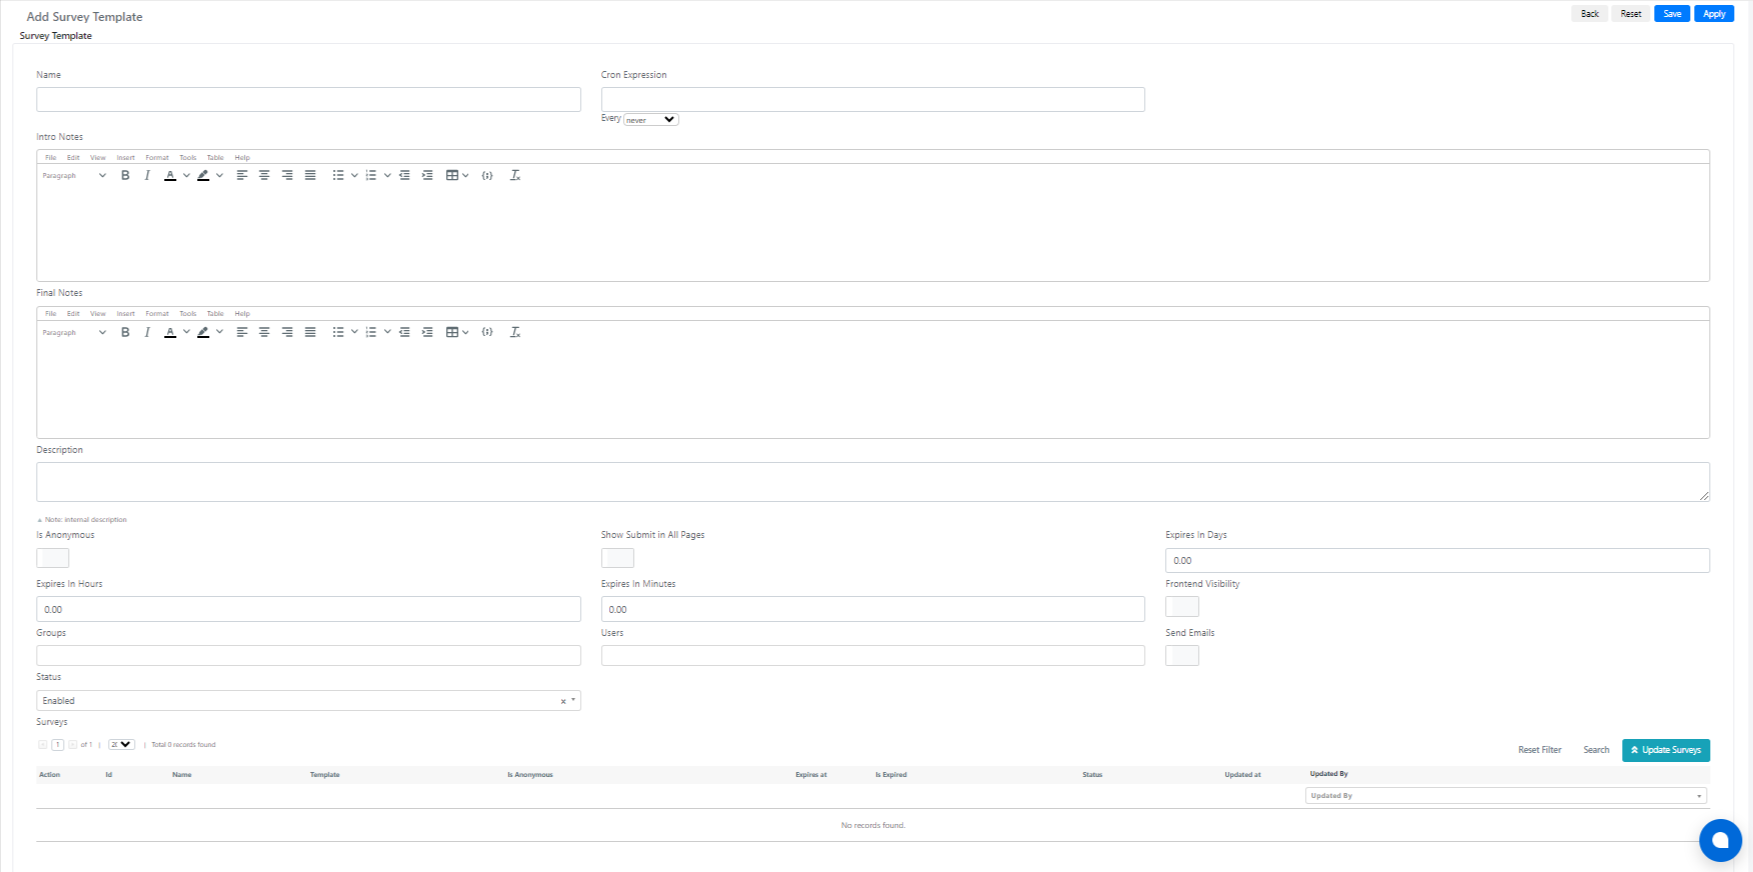
All fields available in the Survey Template (Designer) will be available in the Survey record after its creation. In the survey template, the fields have no functionality other than being inherited by the surveys created from it.
Below is the list of available fields and their meaning for the Designer module:
| Field | Description |
|---|---|
| Name | The text field used to name surveys on creation. A survey template can produce multiple survey records. When you click the "Create Survey" button, the system prompts you to enter a name for the new survey, suggesting the template name as a default. |
| Intro Notes | Editor field where you can insert a short introduction for the surveys. |
| Final Notes | Editor field where you can insert a short final note for the surveys. |
| Description | Internal description field for the surveys. |
| Is Anonymous | If set to Yes, allows recipients to submit anonymous answers. |
| Show Submit in All Pages | If set to Yes, shows the "Submit" button on all survey pages (if there is more than one). |
| Expires in Days | Numerical field that sets a time of expiration for the survey in days. |
| Expires in Hours | Numerical field that sets a time of expiration for the survey in hours. |
| Expires in Minutes | Numerical field that sets a time of expiration for the survey in minutes. |
| Frontend Visibility | Enables the surveys for the User Portal (portal for unregistered users). |
| Send Email | If set to Yes, sends a mail on survey creation. |
| Groups | Multiselect field where you can choose the groups who should have visibility on the created survey. |
| Users | Multiselect field where you can choose the users who should have visibility on the created survey. |
| Send Emails | If set to Yes, permits email sending on survey creation. |
| Mailbox | Field where you can choose a specific mailbox to use for sending emails. |
| Use Template | If set to "ON", enables "Email Template ID" to be used for email sending on survey creation. |
| Email Template Id | Field where you can select a preconfigured email template to be used for the email sent on survey creation. |
| Subject | Displayed only if the "Use Template" field is set to "OFF". Used to set a subject for the email sent on survey creation. You can use the variables "users" and "survey" to create a dynamic template. Example: to get the survey ID you can use: {{var survey.getId()}} |
| Email HTML Body | Displayed only if the "Use Template" field is set to "OFF". Used to set a mail body for the email sent on survey creation. You can use the variables "users" and "survey" to create a dynamic template. Example: to get the survey ID you can use: {{var survey.getId()}} |
| Status | Enables or disables a survey. |
| Surveys | A relation grid that shows all the surveys generated from this survey template. |
Questions Creation
After creating the base for the survey, you can proceed to question creation. Click the Open Designer button in the top-right corner:

To add a new question to the survey, click the + button and select the question type.
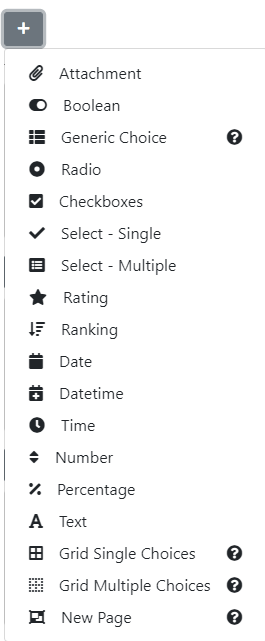
Once the question row is created, you can edit it by selecting the edit icon to access further options:

The following screen will appear:
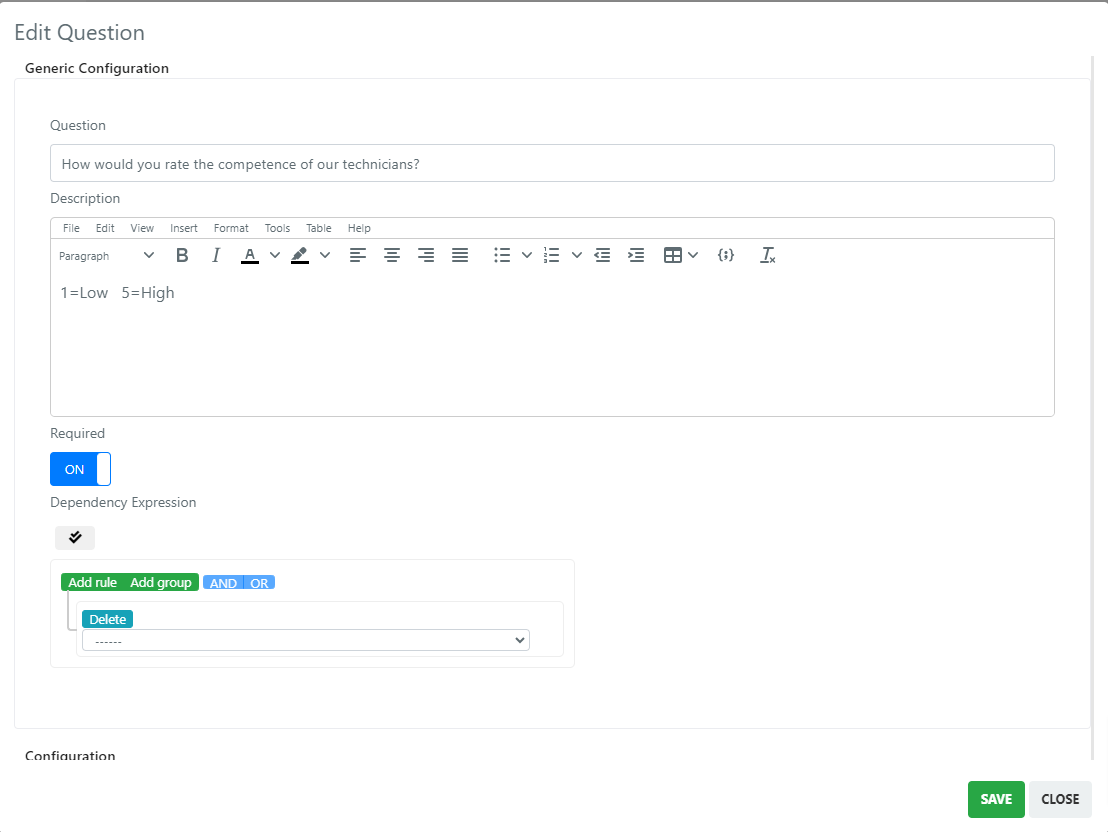
Below is the list of available fields and their meaning:
| Field | Description |
|---|---|
| Question | The text field that adds the question text. |
| Description | Editor field to add a description for the question. |
| Required | Toggle button that can make a question mandatory on the survey. |
| Dependency Expression | Used to add rules and make this question dependent on another question. |
Based on the previously selected question type, the configuration fieldset provides the following options:
Text Type

- For the Text question type, you can configure how you want to render the question: Textbox, Textarea, or Advanced Editor.
- You can also apply a predefined type of data validation such as Email, URL, Telephone, Numeric, or Alphanumeric.
- You can set a placeholder.
Boolean Type
For the Boolean question type, you can configure how you want to render the question: a toggle button, select (with Yes/No values), or a checkbox.

Attachments Type
With this type, you can choose the minimum and maximum file count to upload.

Generic Choices, Multiple and Select Types, Radio, Checkboxes
These types of questions are represented in the form of select fields.
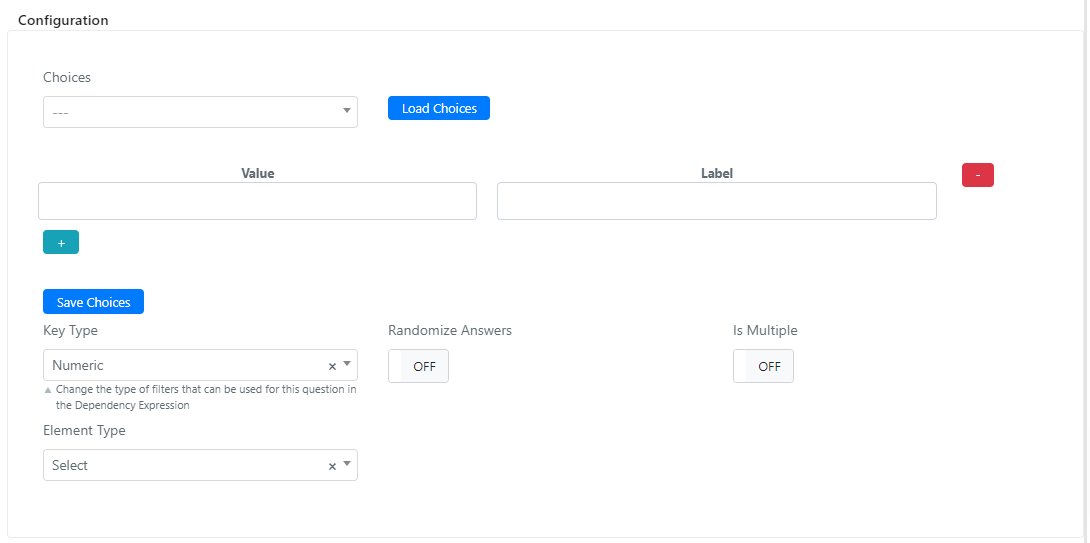
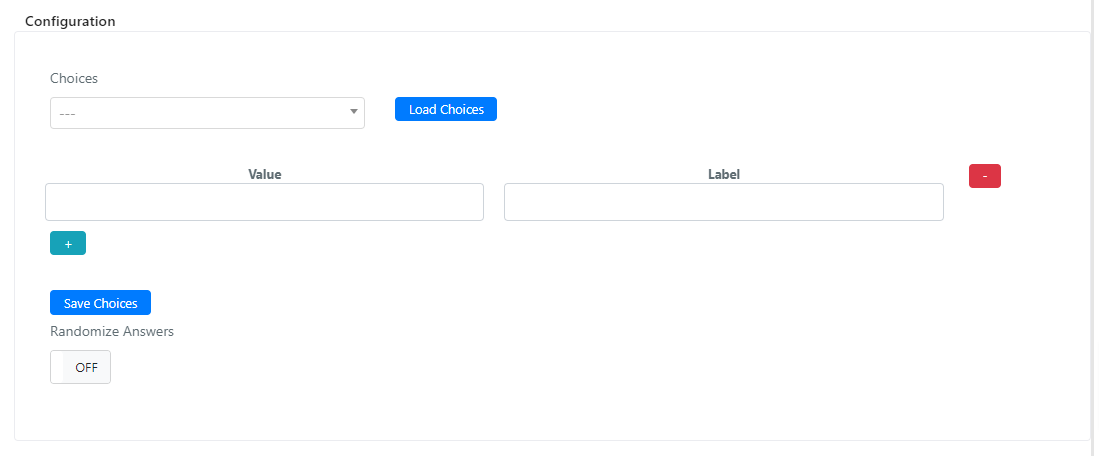
Choices: A select field where you can choose precreated lists and click Load Choices.
To create a new list of choices, click the + sign and add key (value) to label pair list values, then click Save Choices.
Key Type: Select field to choose the type of key for the list, which can be numeric or alphanumeric.
Is Multiple: When toggled to ON, the user can choose multiple values on the question.
Rating Type
The rating question is a form of evaluation visualized as stars. For this question type, the configuration fieldset lets you set a Max Value that represents the maximum number of stars in the rating question.

Ranking Type
With this type, you can allow respondents to rank a list of predefined choices. You can add choices in the same way as other select types, and you can randomize the list of defined choices by clicking the Randomize Answers toggle:
Number or Percentage Type
With a numeric type, you can specify the minimum and maximum values in the configuration fieldset:

Page
The page type does not require any specific configuration. Simply insert it between two questions.
Questions Preview
On the main page containing the questions, you can find the question preview frame:
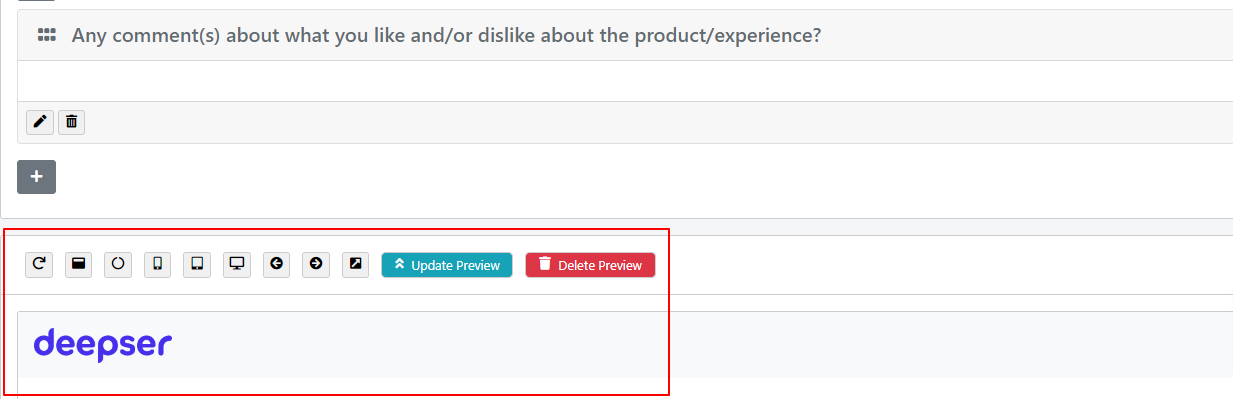
After changing your questions, you can always update the survey preview by clicking the Update Preview button.
Survey Creation
After saving the template and creating the related questions, you can create a Survey record by clicking the Create Survey button in the top-right corner:

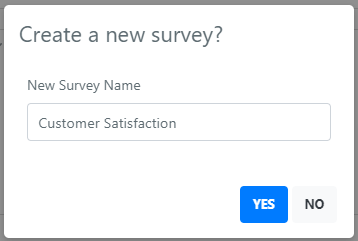
Clicking it will bring up a popup that informs you about the number of emails that will be sent (based on the Groups and Users fields). In this popup, you can also choose a name for the survey by entering it in a text field.
After creation, in the Designer module, you can view the newly created survey under the Surveys relation grid:
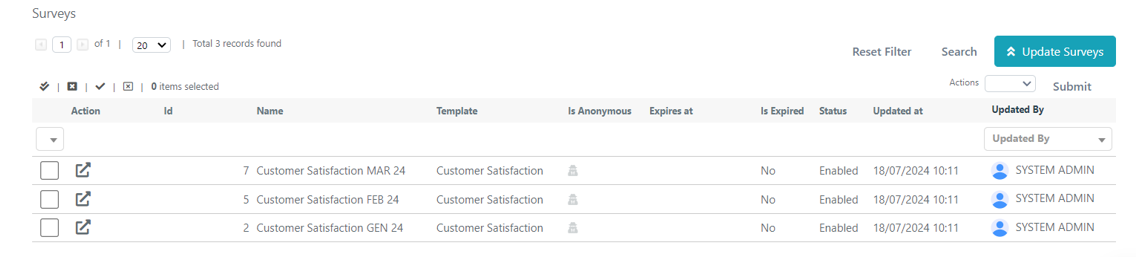
You can use the Update Surveys button after selecting one or more survey records from the grid to update all their related data. The main data and related questions will be updated based on the associated survey template.