Configure a Multi-Stage Approval Flow
This page walks you through configuring a multi-stage approval flow in Deepser. The flow creates a resource access approval when an "Access Management" type Service Operation is opened, requiring two levels of approval before completion.
For this tutorial, assume that the environment has a type of "Access Management" service already configured.
Suppose that this flow requires 2 stages of approval: in the first phase, the assignee group of the Service Operation authorizes access to the resource; in the second phase, a Deepser administrator user authorizes access.
Stage Configuration
The stages we will create are:
- Approval of Assignee Group
- User Administrator Approval
- Approved
- Not Approved
To configure a Stage Set, go to the Flow > Stage Set menu.
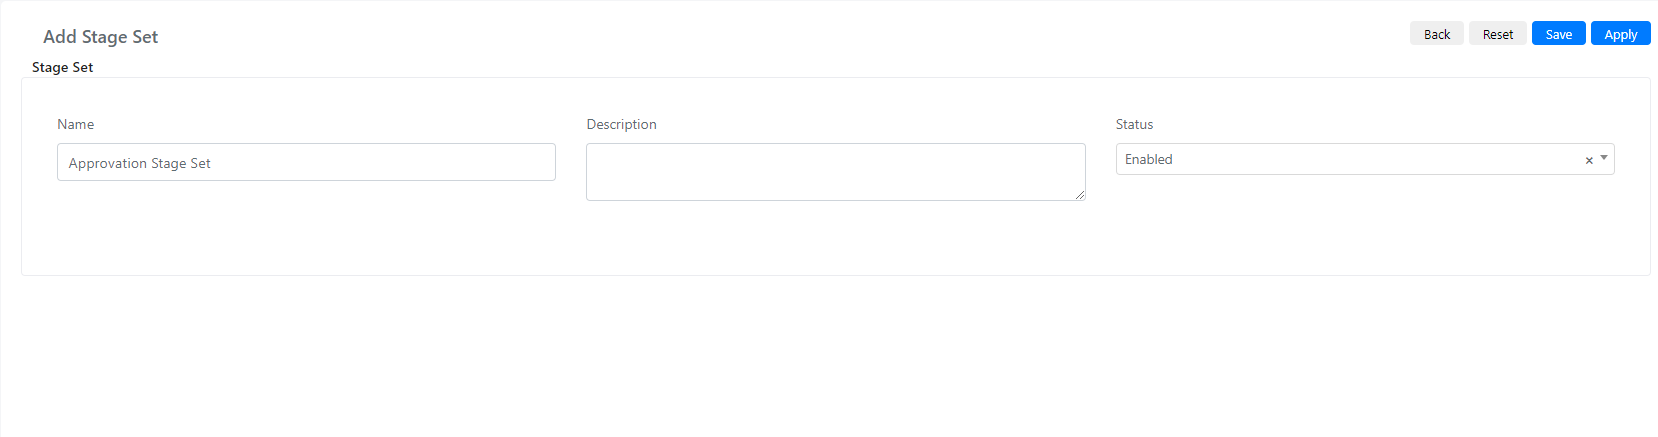
Click the "Add Stage Set" button, then set the Name field to "Approval Stage Set" and click "Save" or "Apply."
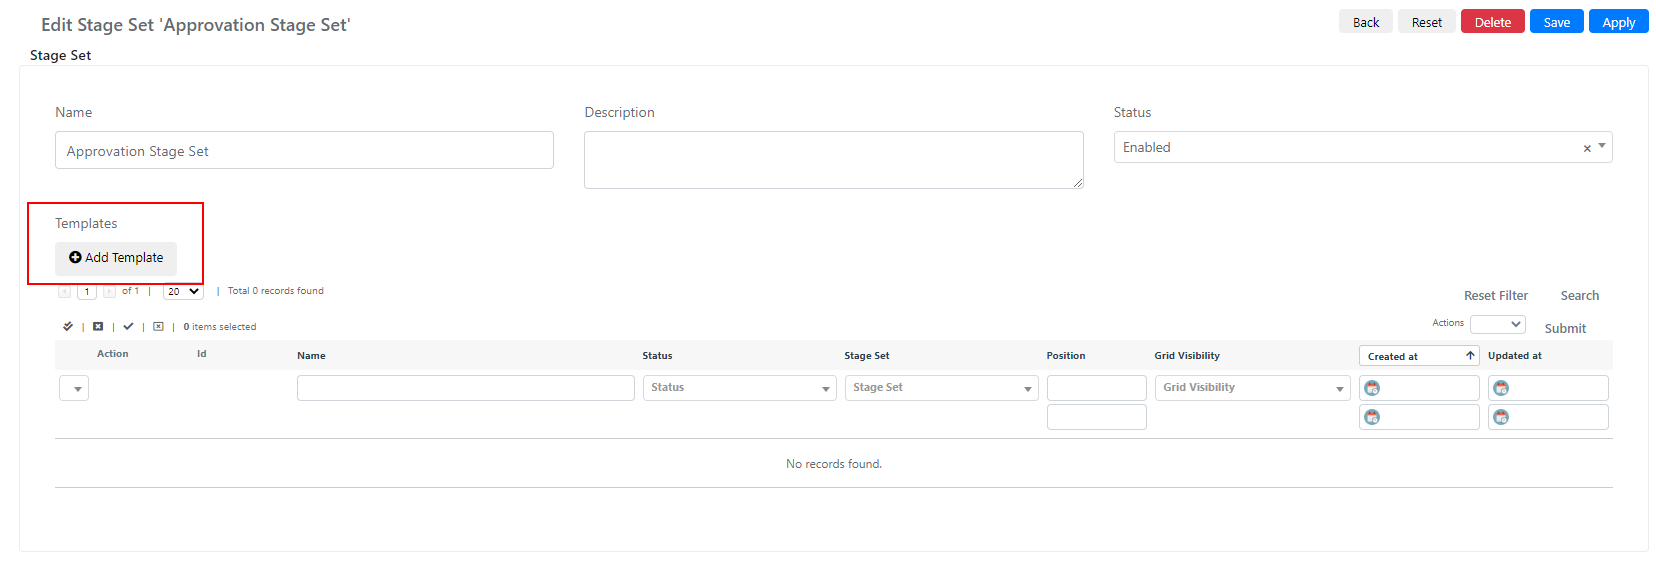
You can now include the various stages in this stage set. Click on Add Template:
In the screen that opens, configure the "Name" field and click the "Save And New" button.
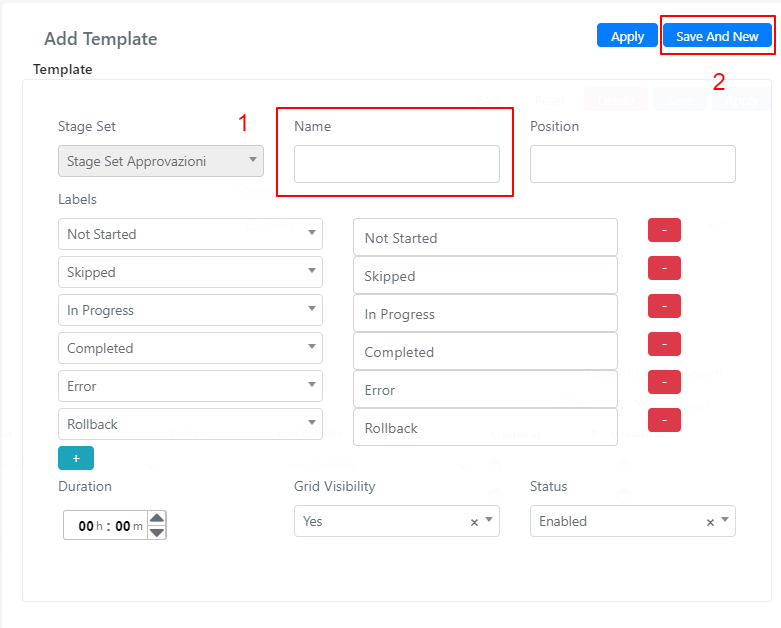
Repeat this step for each stage you want to add.
For more information about Stage Sets, consult the Stage Set page.
Once you have finished adding the stages, click the "X" button in the upper right corner of the screen.

Configuring a Flow with Multiple Stages
Below is the final result of the flow:
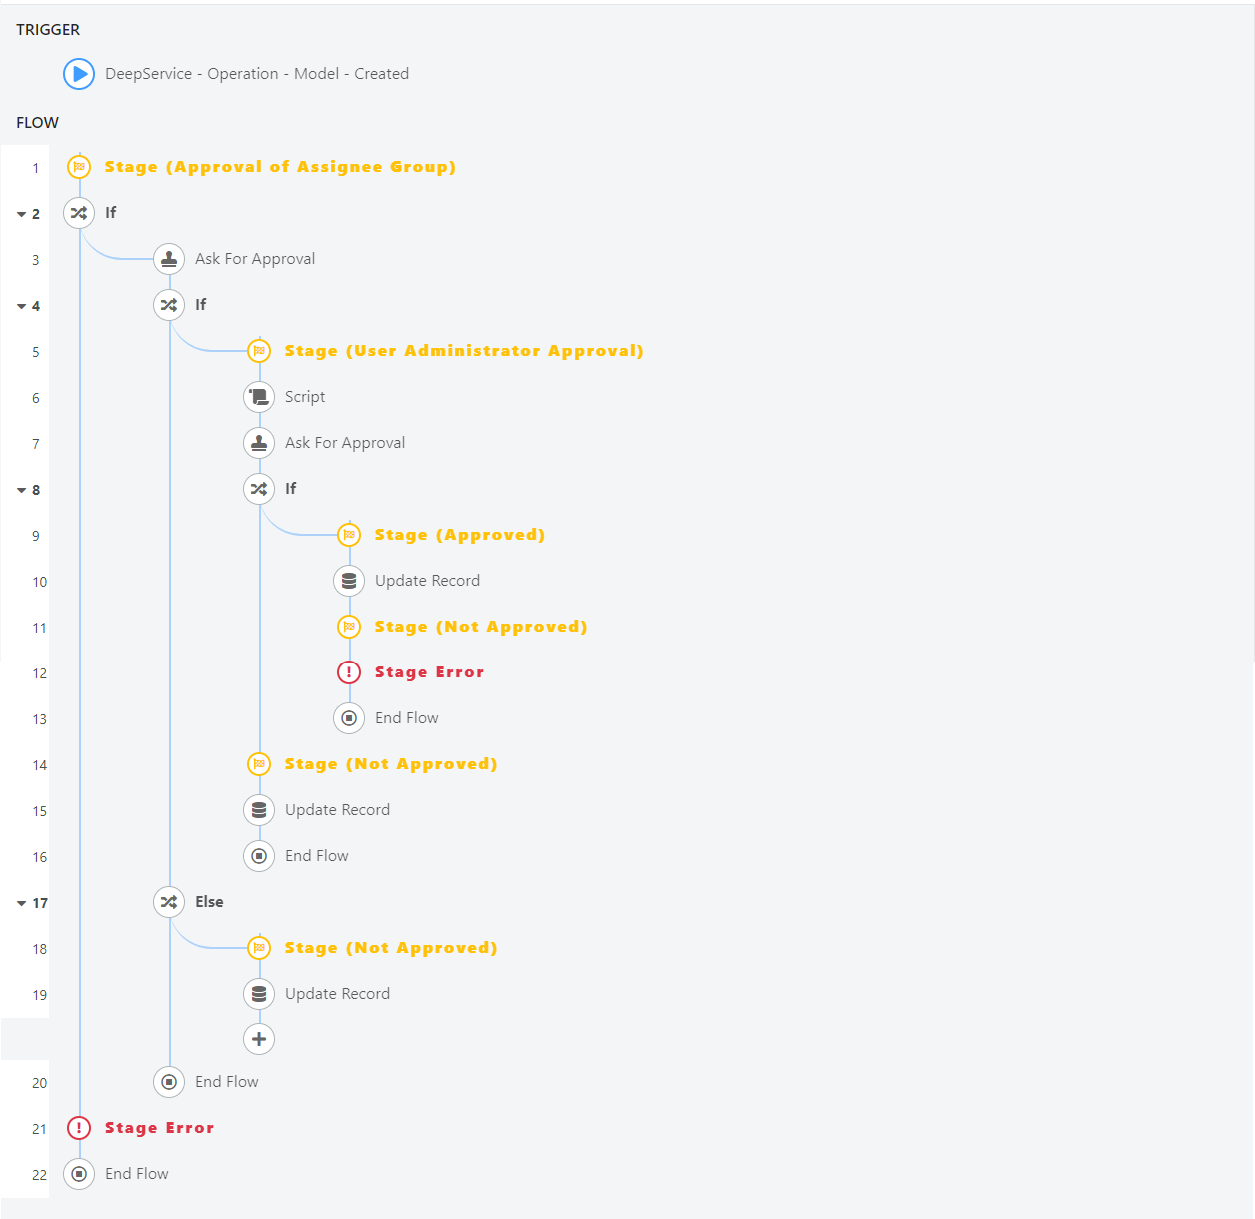
Go to the Flow > Designer menu.
Click the NEW button in the upper left corner of the page:

Then click the word "Flow" that will appear below the button.
The following page will open:

Below are the fields with their meaning:
- Name -- Define the name that this flow will have.
- Description -- Define the description for the flow.
- Icon -- Define the icon for the flow.
- Enable Log -- This toggle, when enabled, activates logging in the flow.
Once you have configured the fields, click the "Save" button.
The following screen will appear:
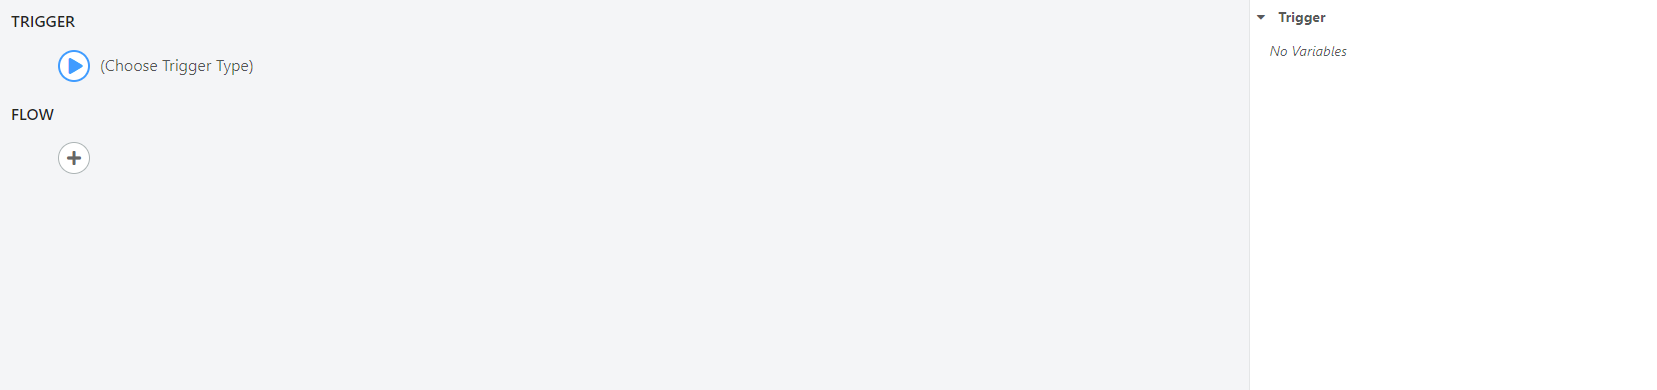
Configure the "Trigger" field as follows:
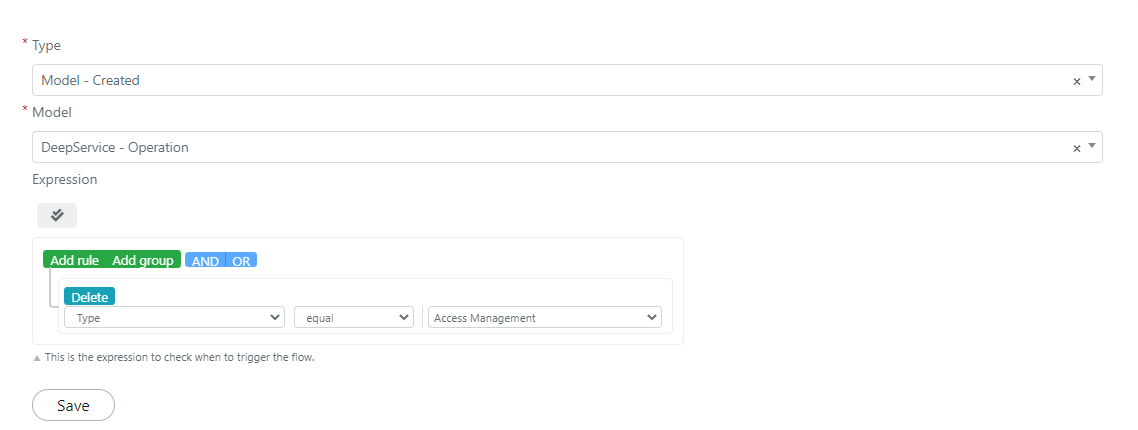
Click "Save" to save the block.
Before continuing, import the stages created in the previous section. Click on the three dots in the upper right part of the page:

In the screen that opens, select the Stage Set from the drop-down menu and click "Import."

The stages set in the previous step will now appear:
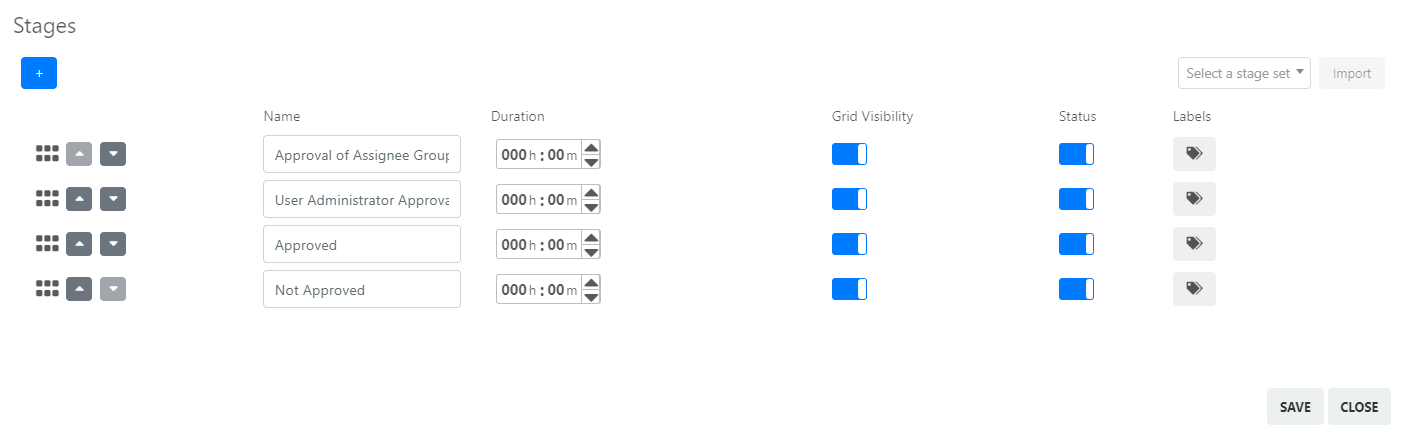
After clicking "Save", the stages will have been imported correctly.
Now click on the button:

From the "Actions" section, select a Stage block and configure it as follows:

Assignee Group Approval
At this point, we will differentiate between the case where there is an assignee group on the Service Operation and the case where there is not.
Insert an "If" block from the "Logic" section below the previous block. Configure the IF block to verify that the assignee group is set on the Service Operation:
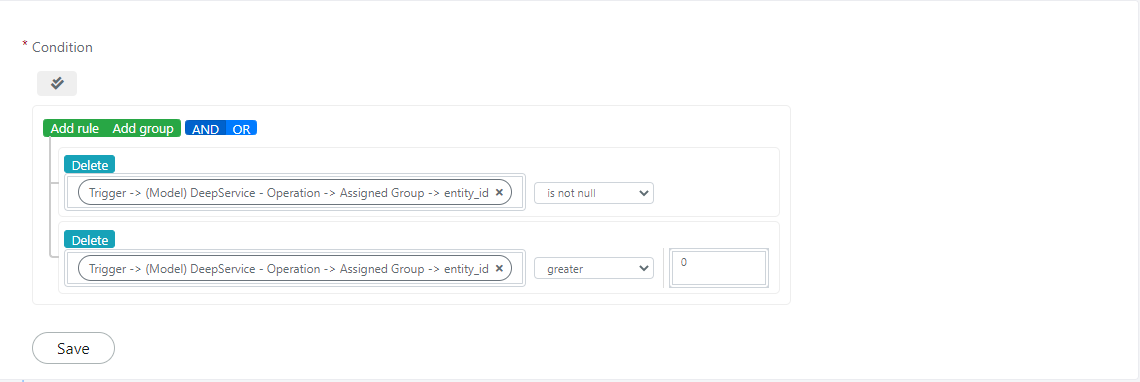
Check if the Assignee Group Is Not Present
In the left branch of the "IF" block, configure an "Else" block from the "Logic" section:
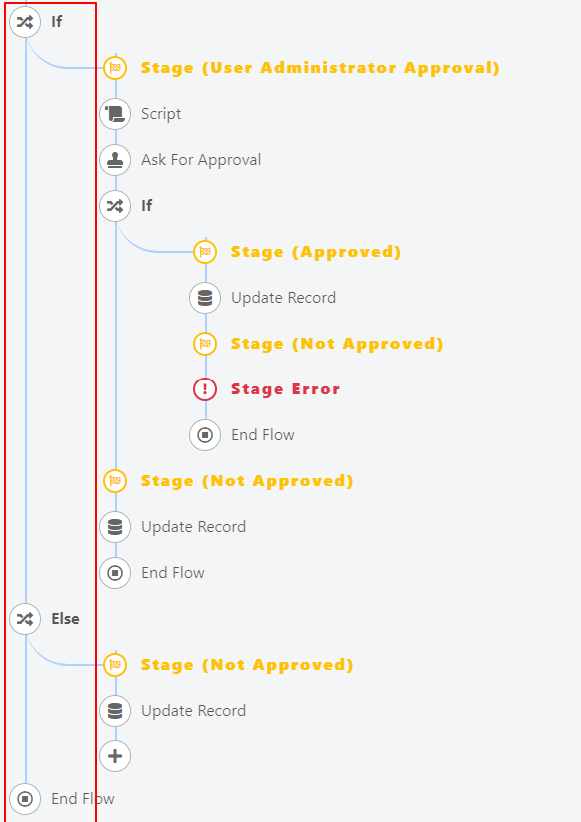
In the left branch, insert an "End Flow" block.
Check if the Assignee Group Is Present
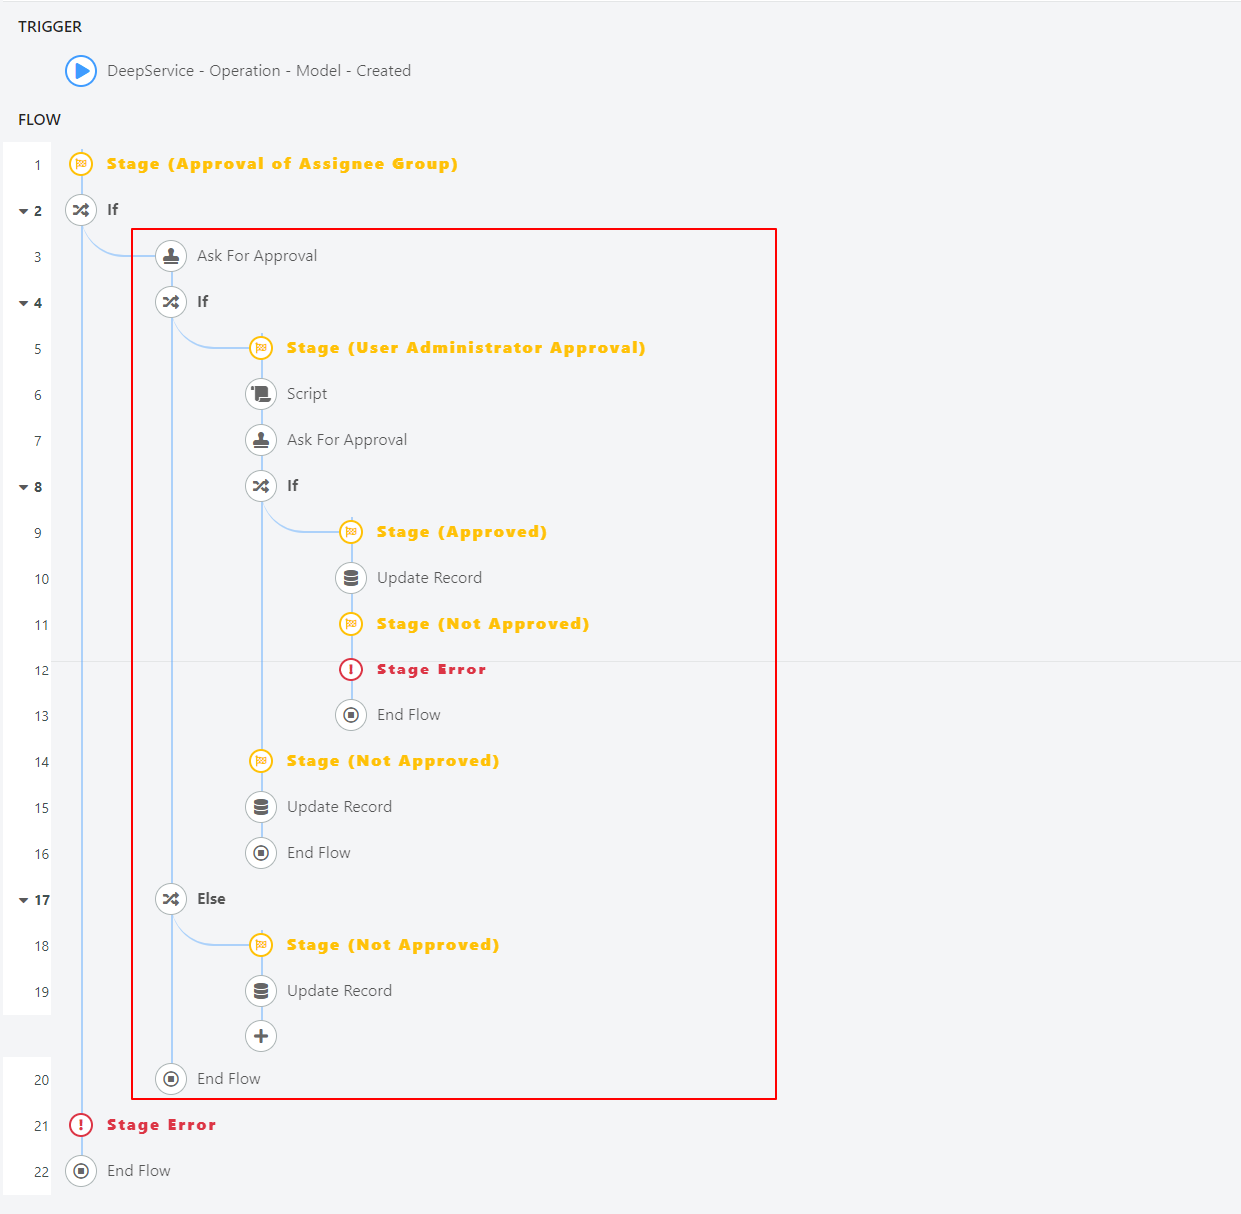
In the left branch, insert a "Stage Error" block and an "End Flow" block. In the right branch, insert an "Ask for Approval" block from the "Actions" section.
Configure the "Ask for Approval" block as follows:
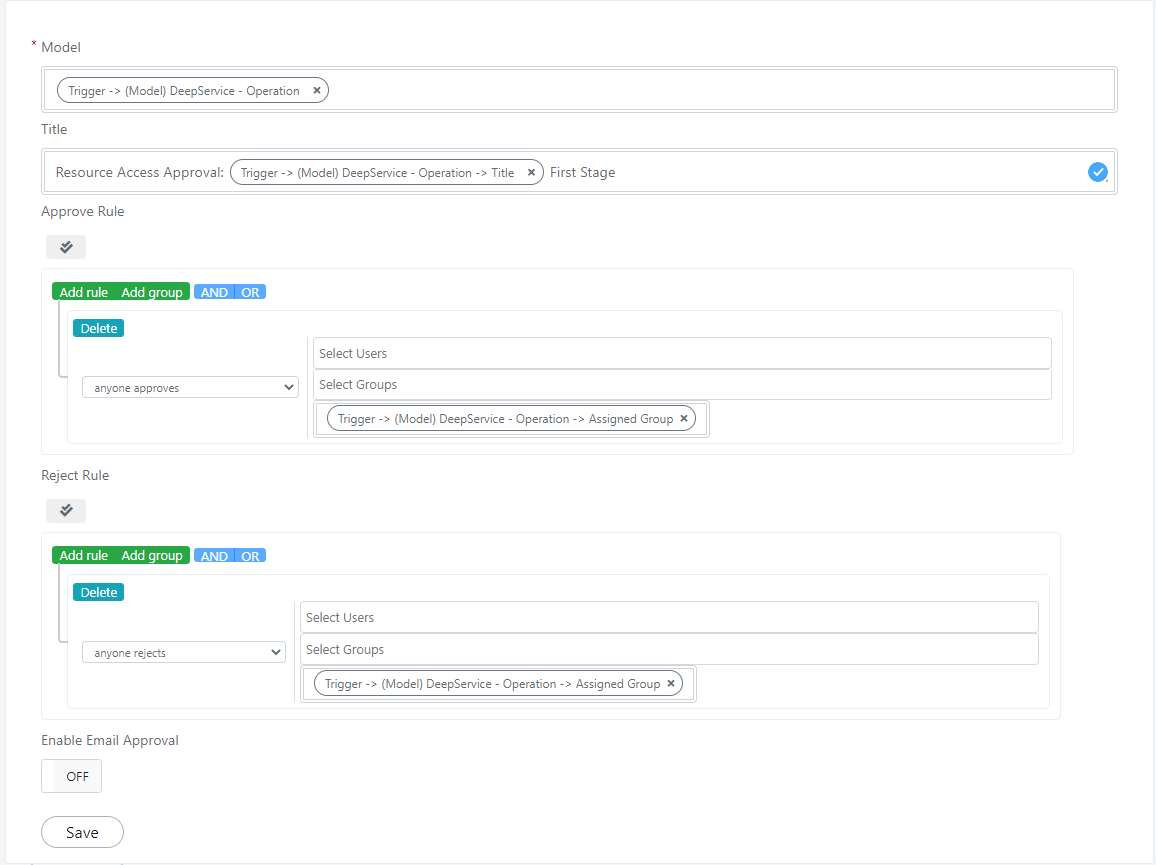
Check First Approval
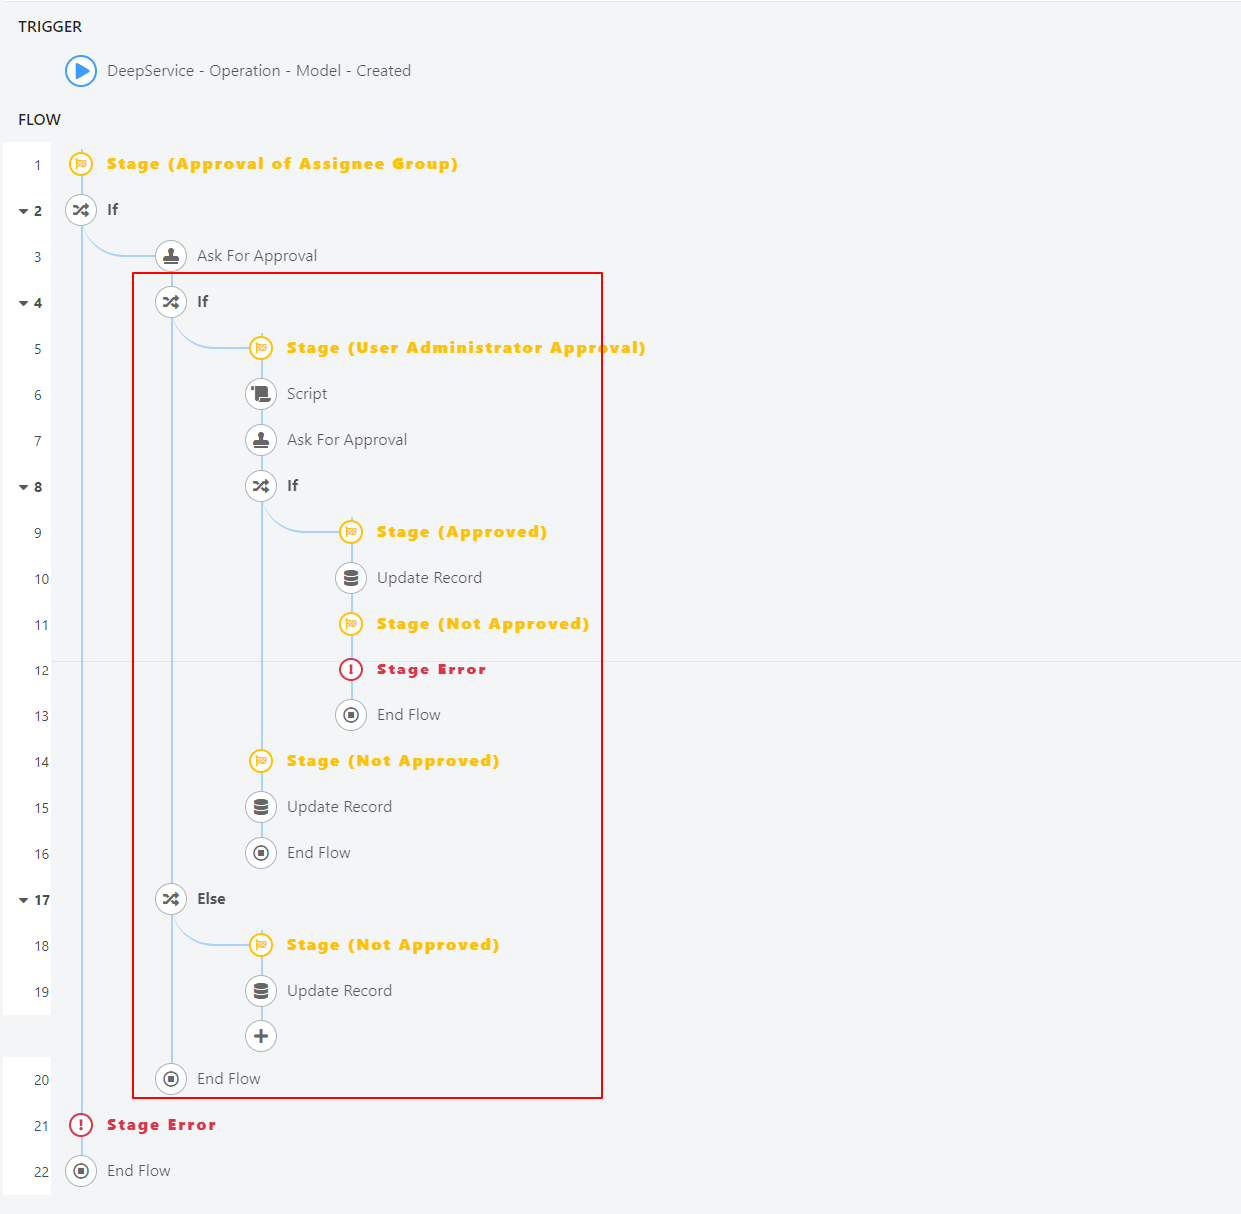
Insert an IF block that checks if the approval has been accepted or rejected.
The IF block will be configured as follows:
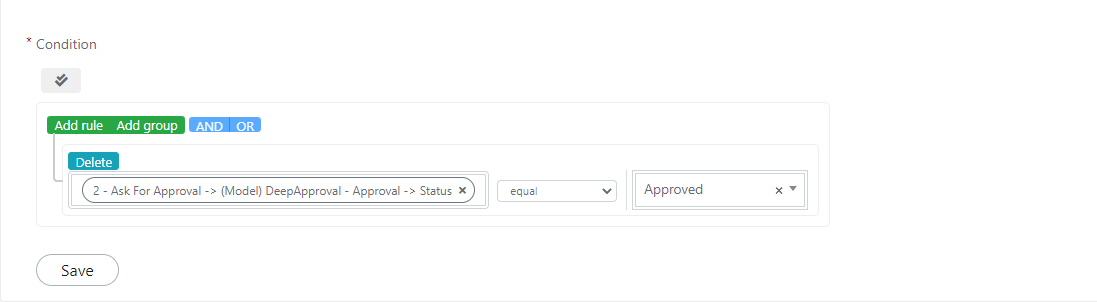
Below this IF, configure an Else block in the left branch and the procedure to continue the approval in the right branch (as discussed in the following sections).
Else Branch Configuration
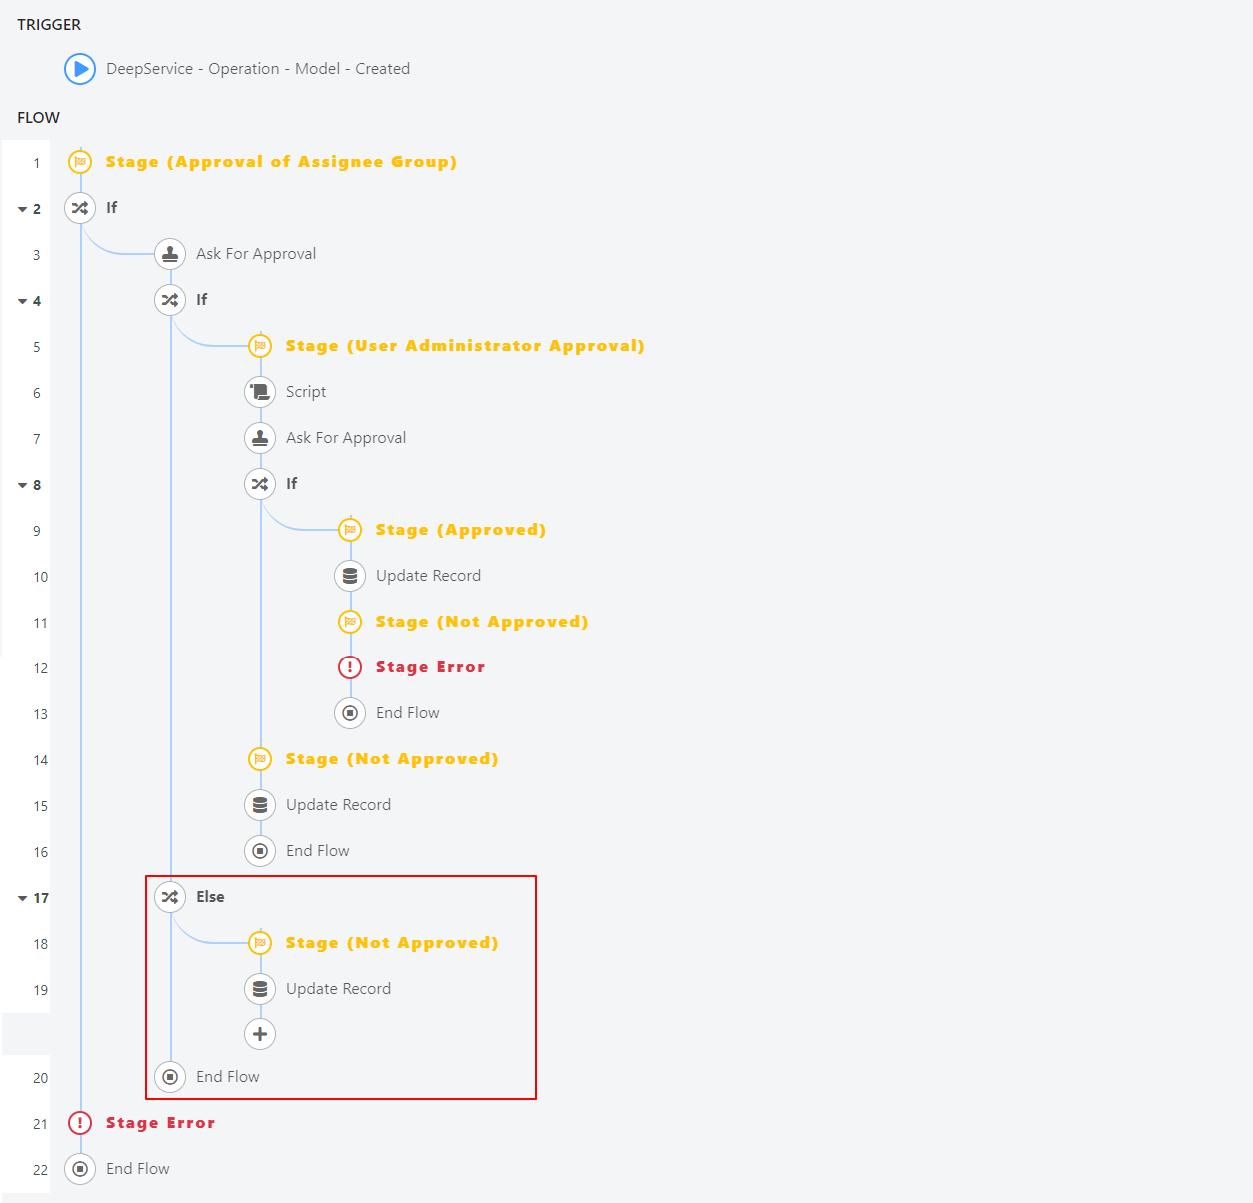
In the left branch of the "IF" block, add an "Else" block. Then insert a Stage block configured as follows:

Below the previous block, insert an Update Record:
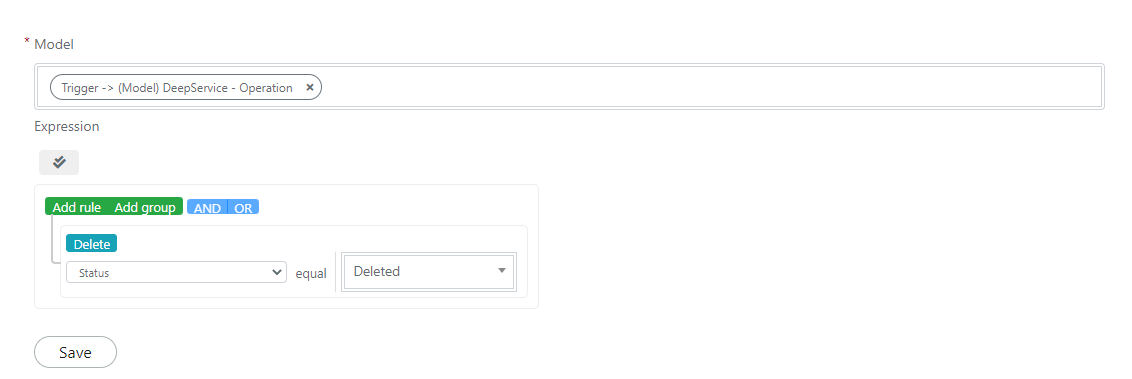
After this block, remember to insert an End Flow block.
If Branch Configuration
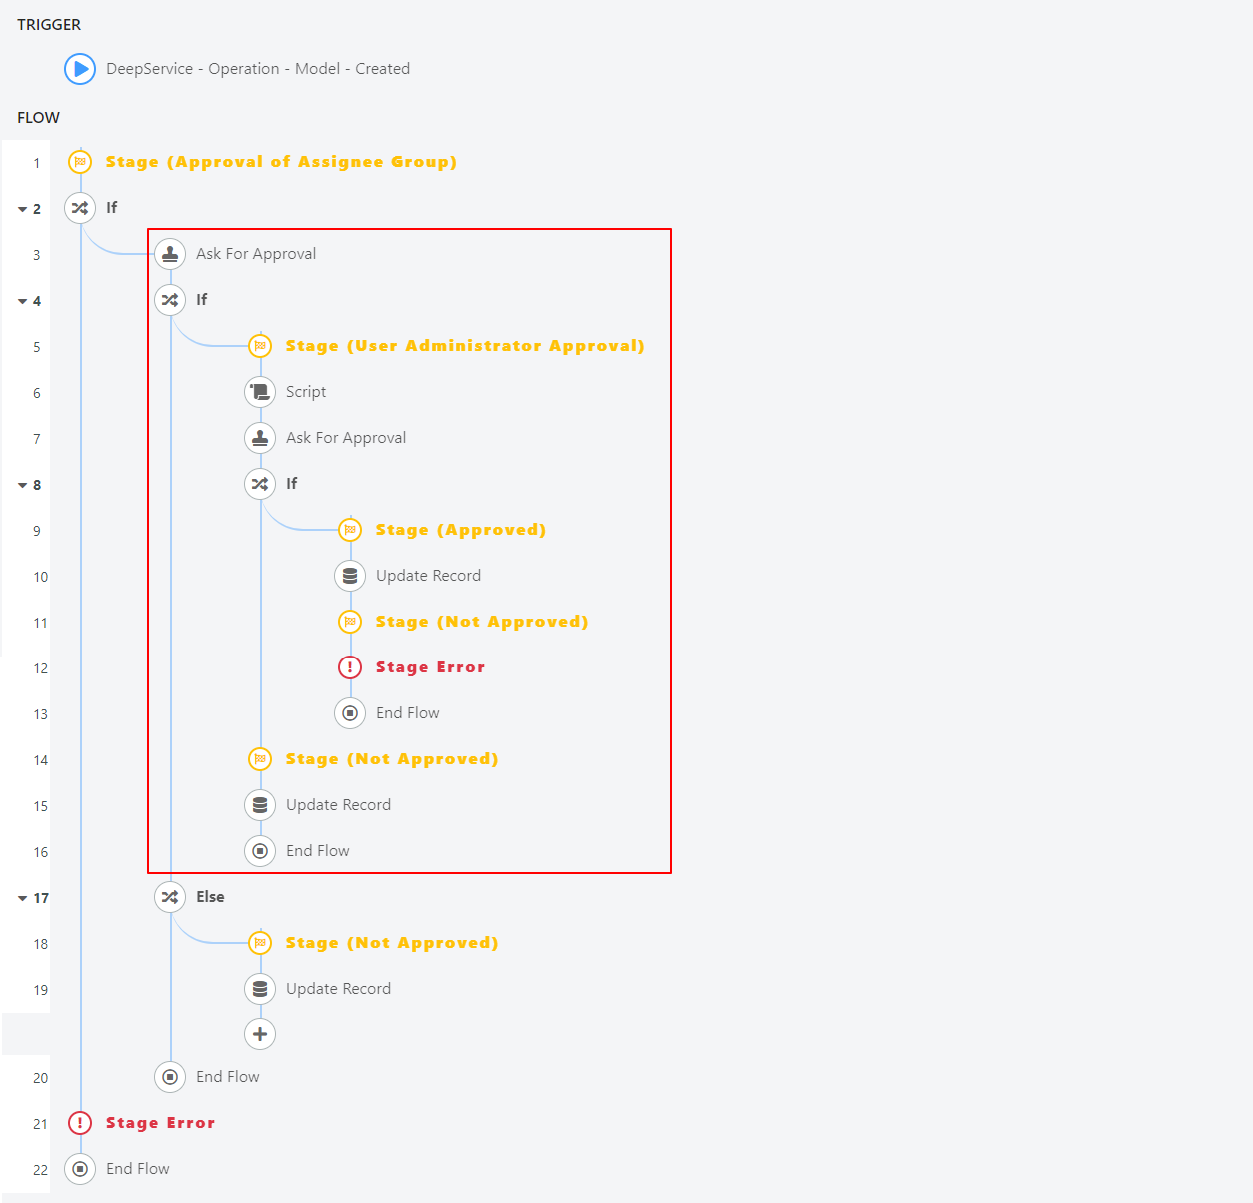
In the right branch of the "IF" block, add a "Stage" block configured as follows:

Below the block, insert a Script block configured as follows:
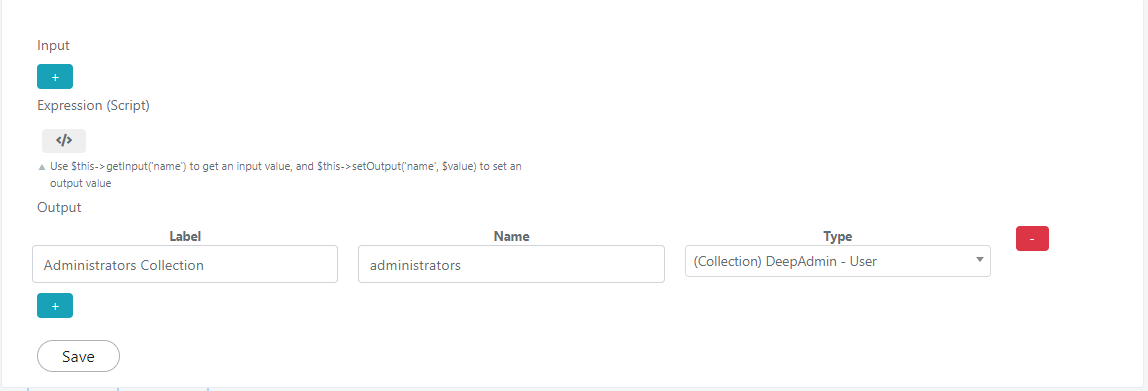
In the "Expression (Script)" section, enter the following code:
$usersCollection = Deep::getResourceModel('deep_admin/user_collection');
$usersCollection->getSelect()->join('admin_role', 'main_table.user_id = admin_role.user_id', [])
                             ->join(['ar2' => 'admin_role'], 'ar2.role_id = admin_role.parent_id', array('user_type'));

$usersCollection->addFilterToMap('user_id', 'main_table.user_id');
$usersCollection->addFieldToFilter('ar2.user_type', ['eq'=> 'ADMIN']);
$this->setOutput('administrators', $usersCollection);
After the scripting block, insert a new "Ask for Approval" block configured as follows:
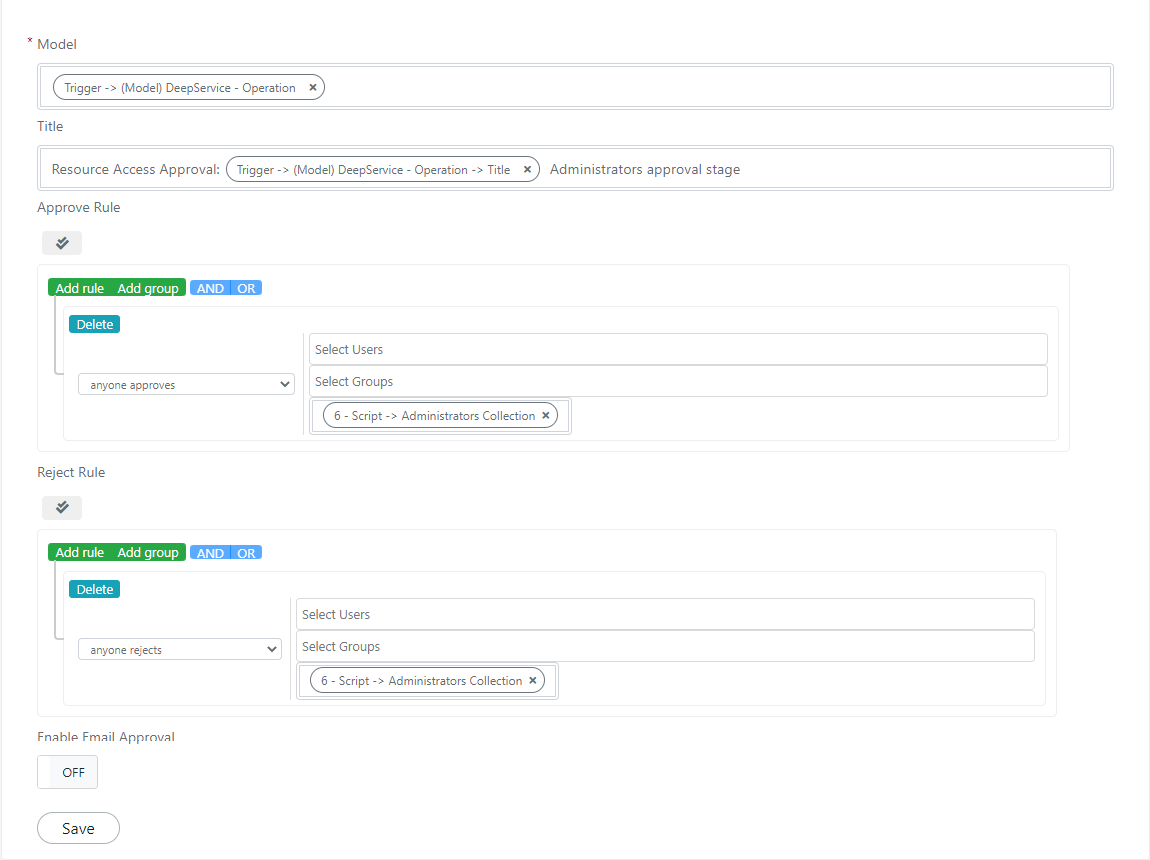
Check Second Approval Status
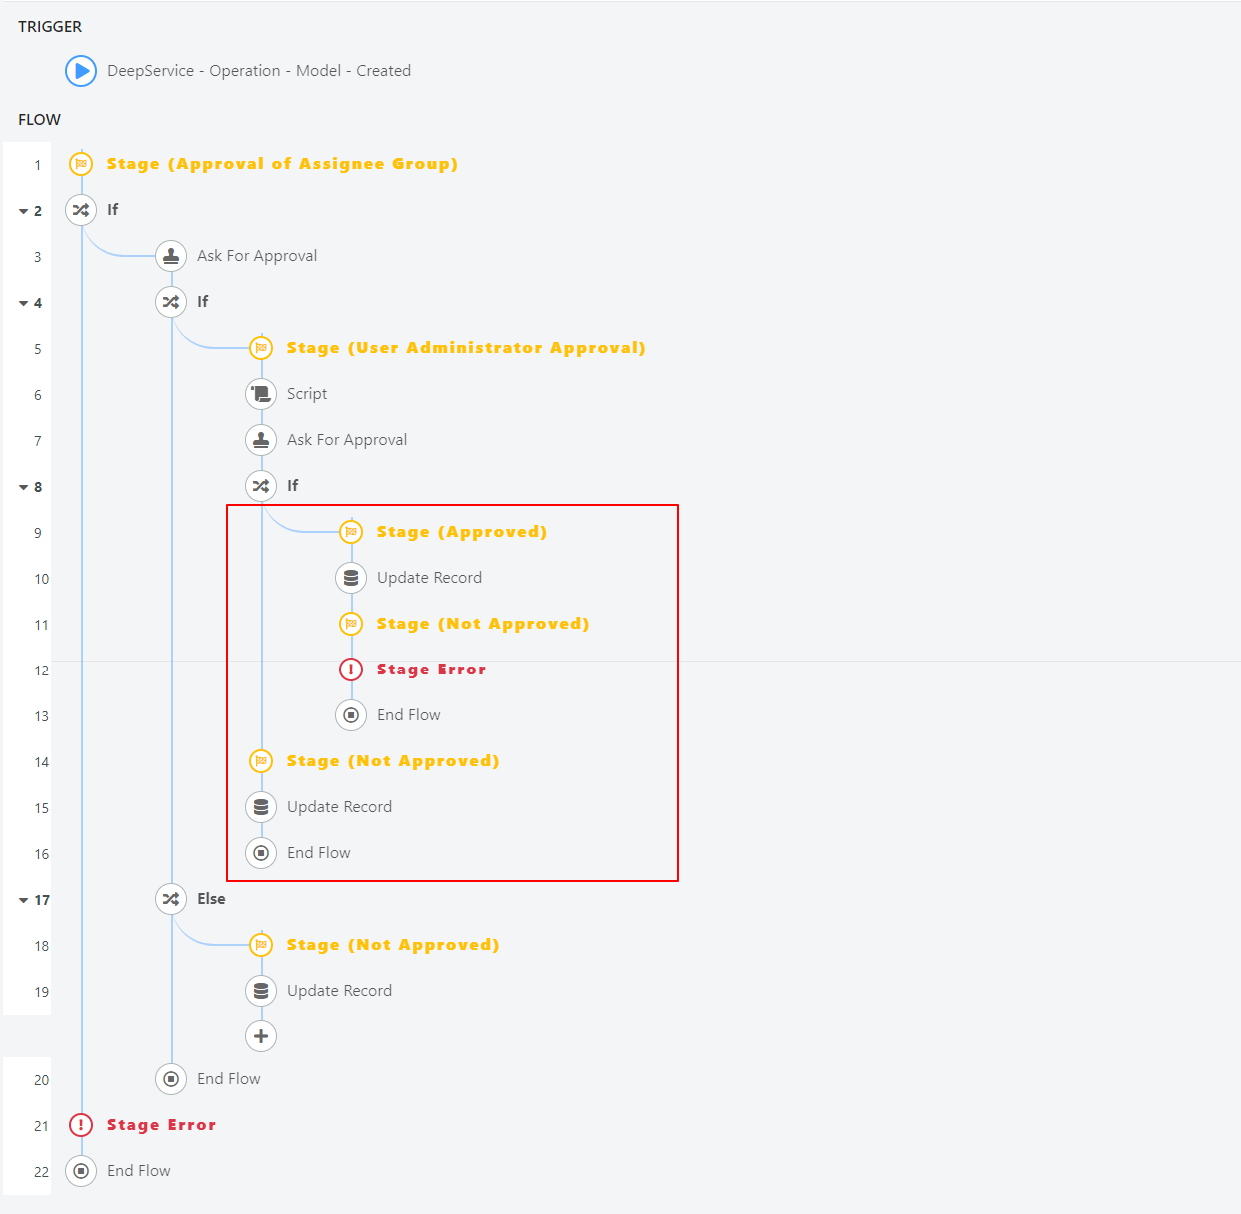
Configure an IF block that checks the approval status.
Add under the previous "Ask for Approval" block an "IF" block configured as follows:
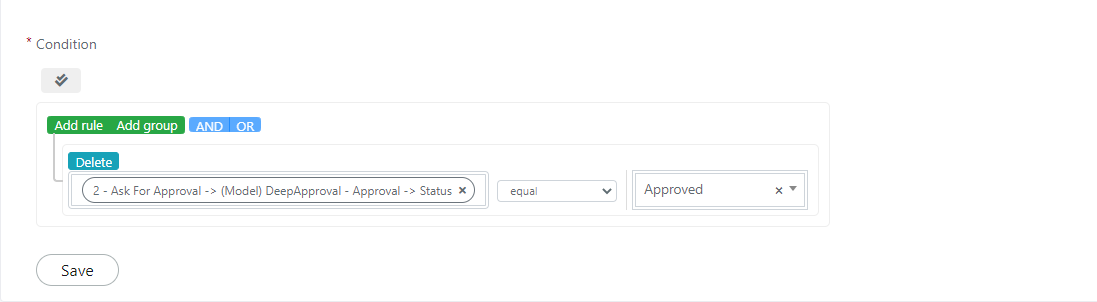
Below this IF, include the case where the approval was successful in the right branch and the case where it was rejected in the left branch.
Approval Accepted Branch Configuration

In the right branch, add a "Stage" block configured as follows:

Then insert an "Update Record" block to change the status of the Service Operation that gave rise to the flow:
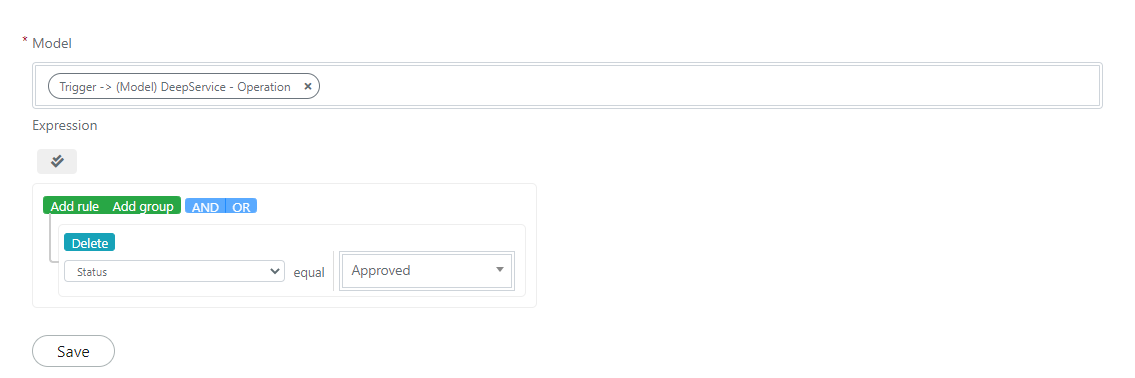
As a visual indicator for users, this flow sets the "Error" status on the "Not Approved" stage in case of approval.
Add a Stage block configured as follows:

Then insert a "Stage Error" block, which does not require configuration.
Approval Rejected Branch Configuration
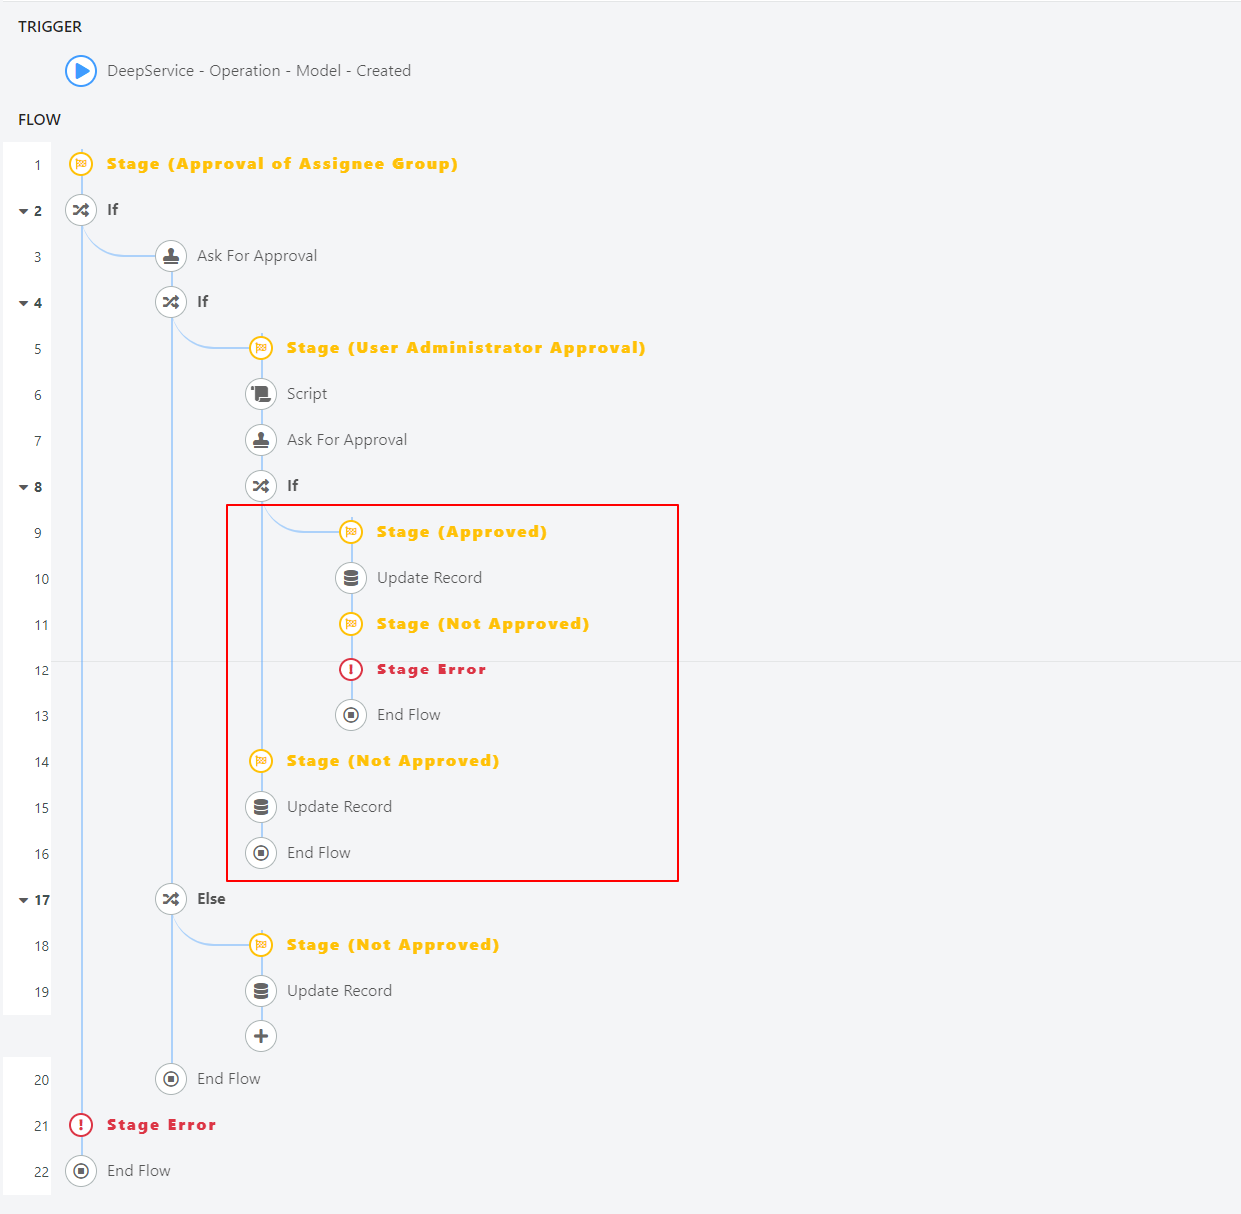
In the left branch of the IF block that controls the second approval, insert a Stage block configured as follows:
Finally, add an "Update Record" block to change the status of the Service Operation on which the flow is being executed:
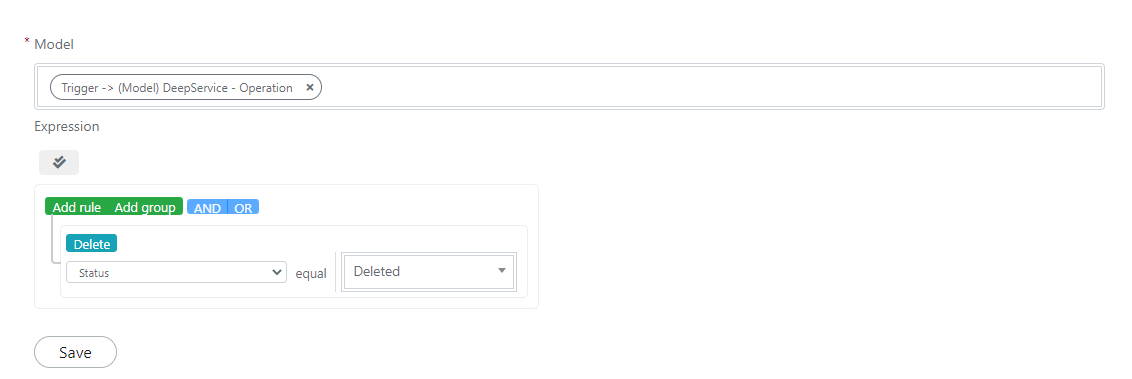
Before you can see the effects of the flow, enable the flow by setting the "Status" toggle.

The flow will now be up and running.
Related Articles
- Stage Set -- Configure stage sets for workflows
- Workflow Actions -- Available action blocks including Ask for Approval
- Workflow Samples -- Additional flow examples
- Monitor Workflow Executions -- Track flow progress