Workflow Actions
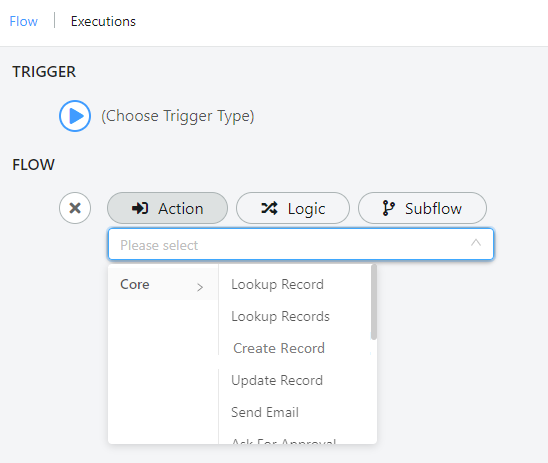
Workflow actions are preconfigured, reusable building blocks that you can insert into your flows to automate common tasks. This page covers all available action types and how to configure them.
Lookup Record
Use the "Lookup Record" action to retrieve a record from a Deepser model or entity within your workflow.
- Open your workflow in the Flow module.
- Add the action Lookup Record inside the Flow section.
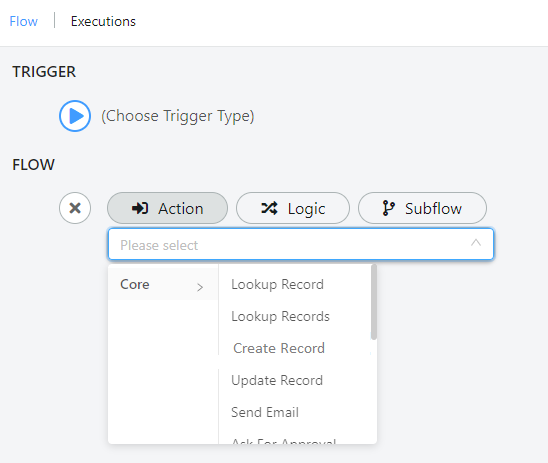
The following screen will open:
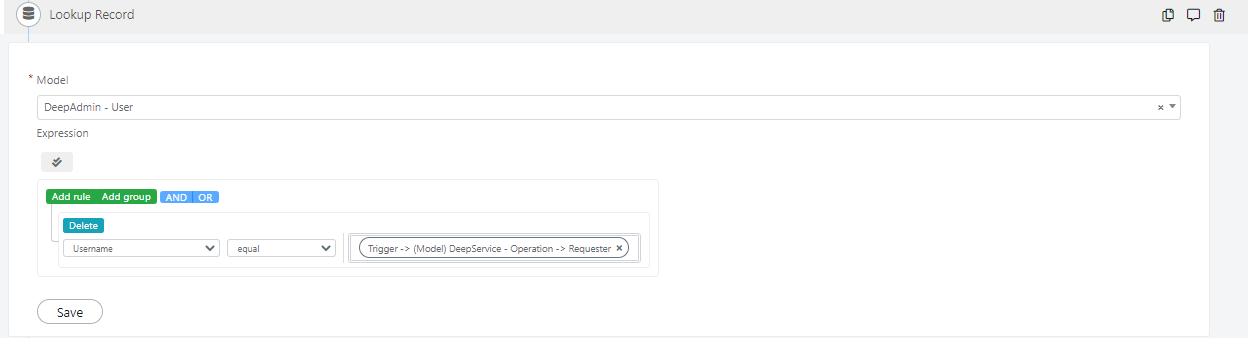
In this example, you retrieve the user record associated with the Service Operation. Select the model "DeepAdmin -- User" and set the expression to filter by the Requester username from the trigger event.
Create Record
Use the "Create Record" action to create a new record within your workflow.
- Open your workflow in the Flow module.
- Add the action Create Record inside the Flow section.
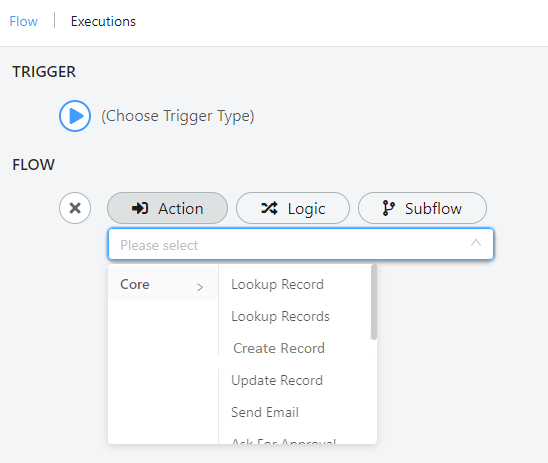
The following screen will open:
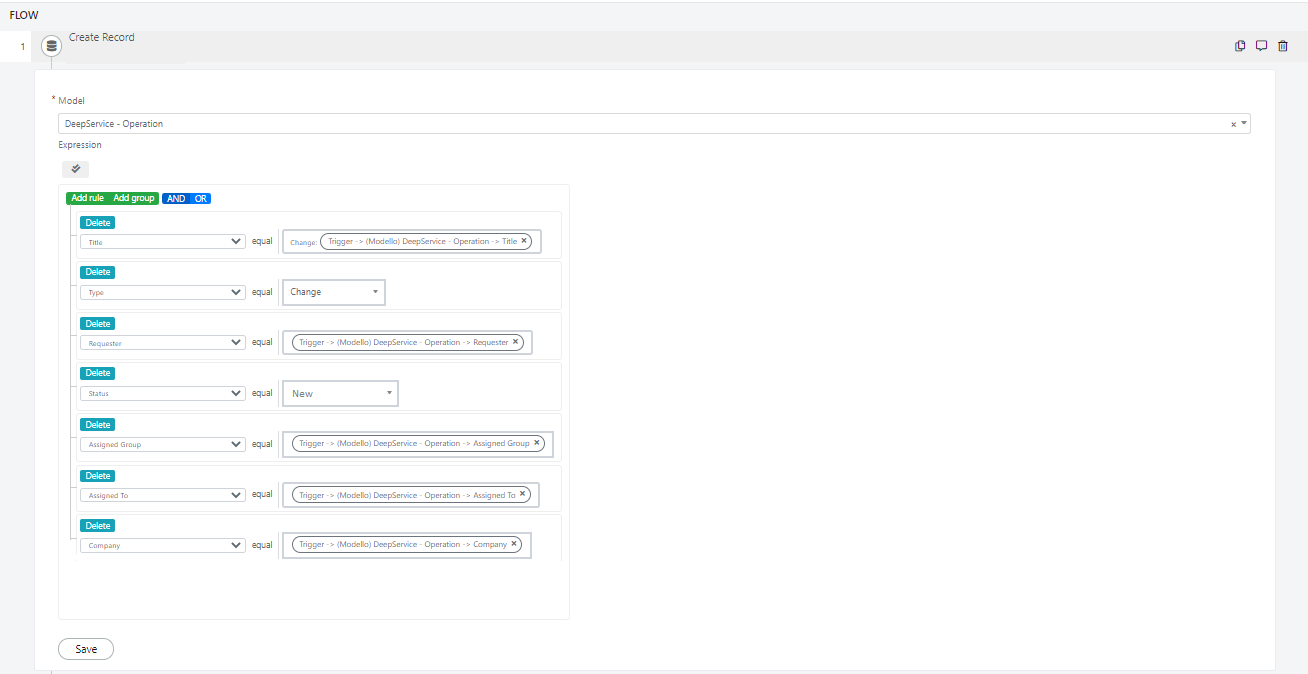
In this example, the model "DeepService -- Operation" is selected to create a new Service Operation. The expression sets the Type field to "Change" and the Status field to "New."
All variables are dragged and dropped from the right section (trigger variables).
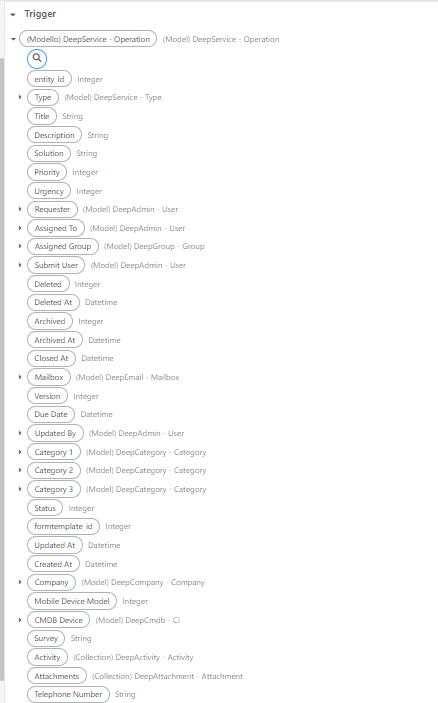
For example, the "Title" and "Requester User" of the new change are taken from the Service Operation that triggered the process.
Update Record
Use the "Update Record" action to modify an existing record within your workflow.
- Open your workflow in the Flow module.
- Add the action Update Record inside the Flow section.
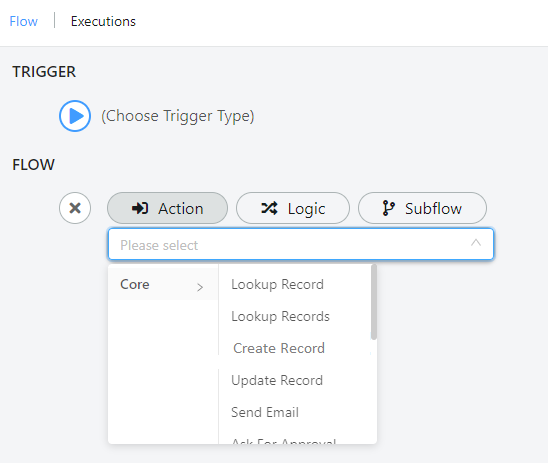
The following screen will open:
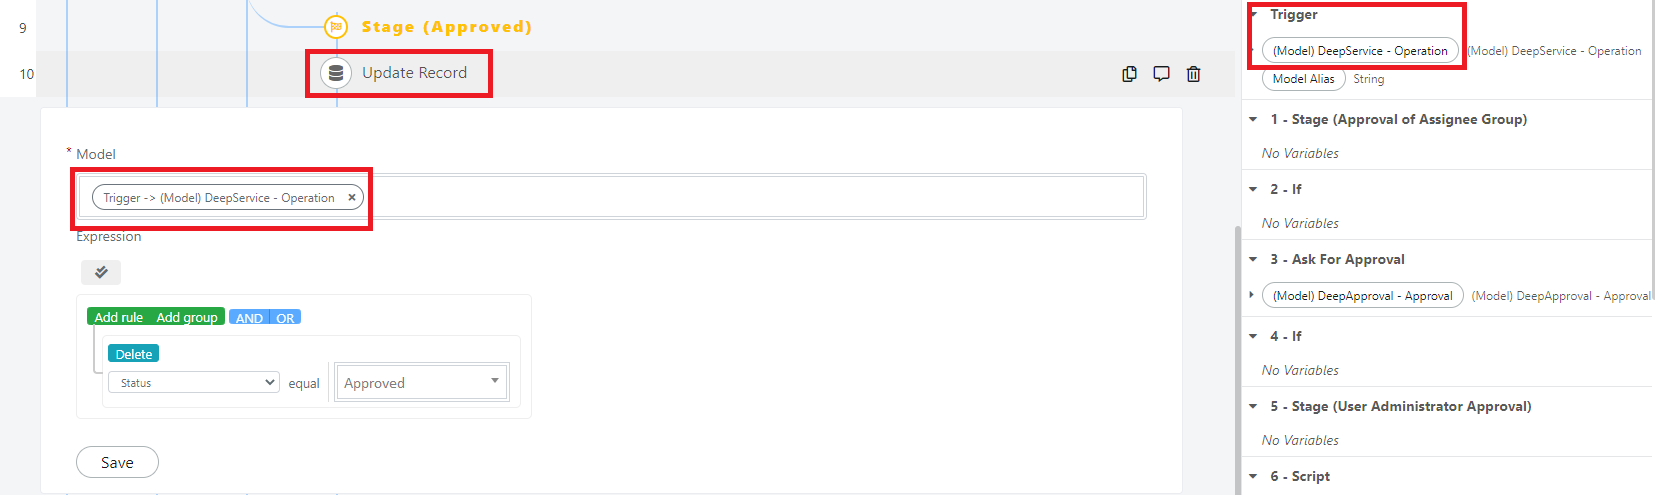
For example, before an approval process ends, you want to update the Service Operation status to "Approved." Select the model Operation (dragged from the trigger variables) and set the Status field to "Approved" in the Expression section.
Delete Record
Use the "Delete Record" action to remove a record within your workflow.
- Open your workflow in the Flow module.
- Add the action Delete Record inside the Flow section.
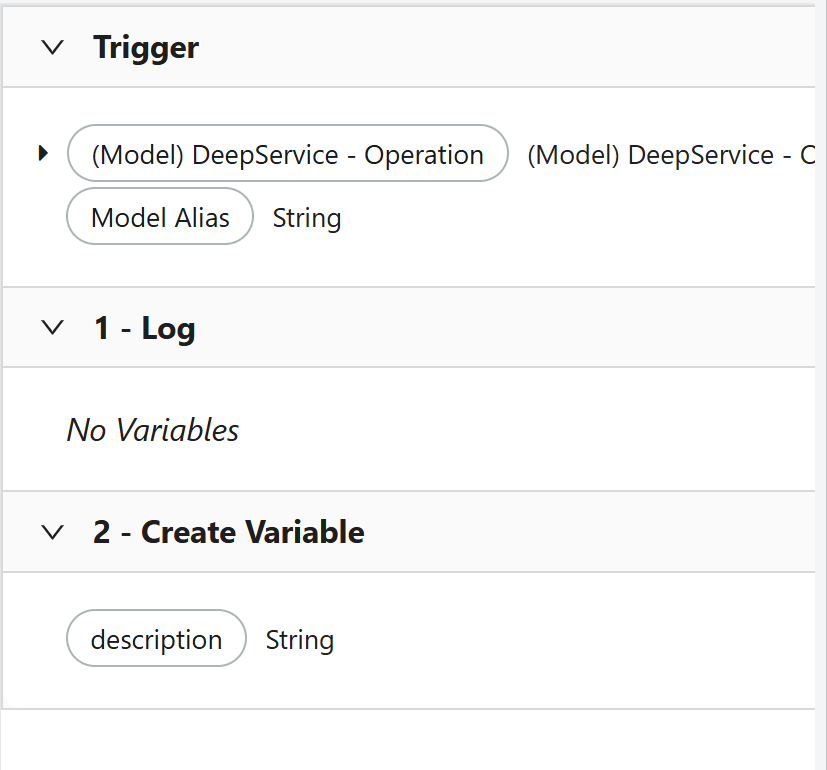
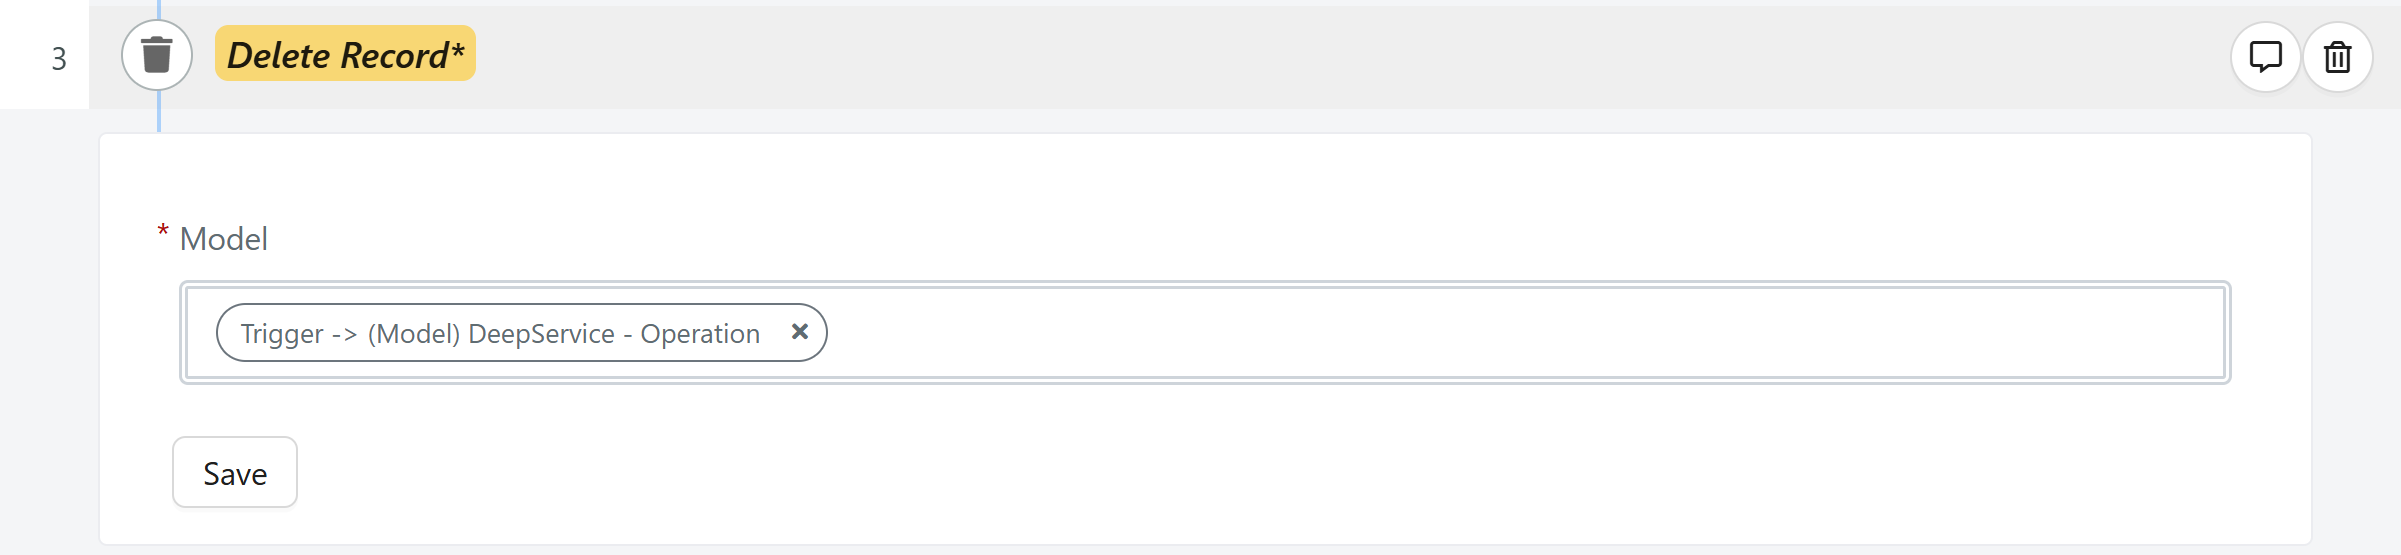
In this example, the model Operation is selected, and the record to delete is dragged and dropped from the trigger variables.
Script Block
The "Script" block allows you to run custom code for advanced calculations that cannot be achieved through the default actions.
To add a Script block, click the action menu and navigate to Core > Script.

Script Input

In the input section, set all the inputs from the flow that the script will use. You can add a new input by clicking the "+" button or delete one by clicking the "-" button.
- Name -- The name of the input value, used inside the script.
- Type -- Must match the actual input type (e.g., an operation collection).
- Value -- Set manually or dragged from the flow variables on the right.
Expression (Script)
In the expression section, write custom code using the defined inputs. In this example, the Script block calculates and retrieves Service Operations with a due date within a week:
// retrieve the subscription collection (from input)
$operationCollection = $this->getInput('operation_collection');
// retrieve the current date and the current day
$currentDate = new DateTime('now');
$currentDate->setTimezone(new DateTimeZone('UTC'));
$day = $currentDate->format('l');

// calculate the starting day of next week
$nextWeek = new DateTime('now');
$nextWeek->setTimezone(new DateTimeZone('UTC'));
$nextWeek->setTimestamp(strtotime("-1 day +1 week"));
$nextWeek->setTime(0,0);
$nextWeek = $nextWeek->format('Y-m-d H:i:s');

// calculate the ending day of next week
$endOfDay = new DateTime('now');
$endOfDay->setTimezone(new DateTimeZone('UTC'));
$endOfDay->setTimestamp(strtotime("+1 week"));
$endOfDay->setTime(0,0);
$endOfDay = $endOfDay->format('Y-m-d H:i:s');

//filter the operation collection based on the next week day interval
$operationCollection
    ->addFieldToFilter('due_date',['gteq' => $nextWeek])
    ->addFieldToFilter('due_date',['lt' => $endOfDay]);


// Set outputs with the result tickets
$this->setOutput('operations',$operationCollection);
$this->setOutput('operations_count',$operationCollection->count());
Script Output
All outputs set in the expression area must also be defined in the "Output" section. You can add a new output by clicking the "+" button or delete one by clicking the "-" button.
- Label -- The display label for the output variable, visible on the right side of the flow.
- Name -- Must match the name used in the expression script.
- Type -- The output type returned.
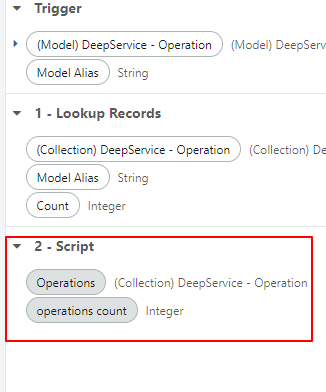
After saving the script block, the defined outputs appear on the right side of the flow under the "Script" label and are ready to use.
A complete example of a script block-based flow can be found in Workflow Samples.
Create Variable
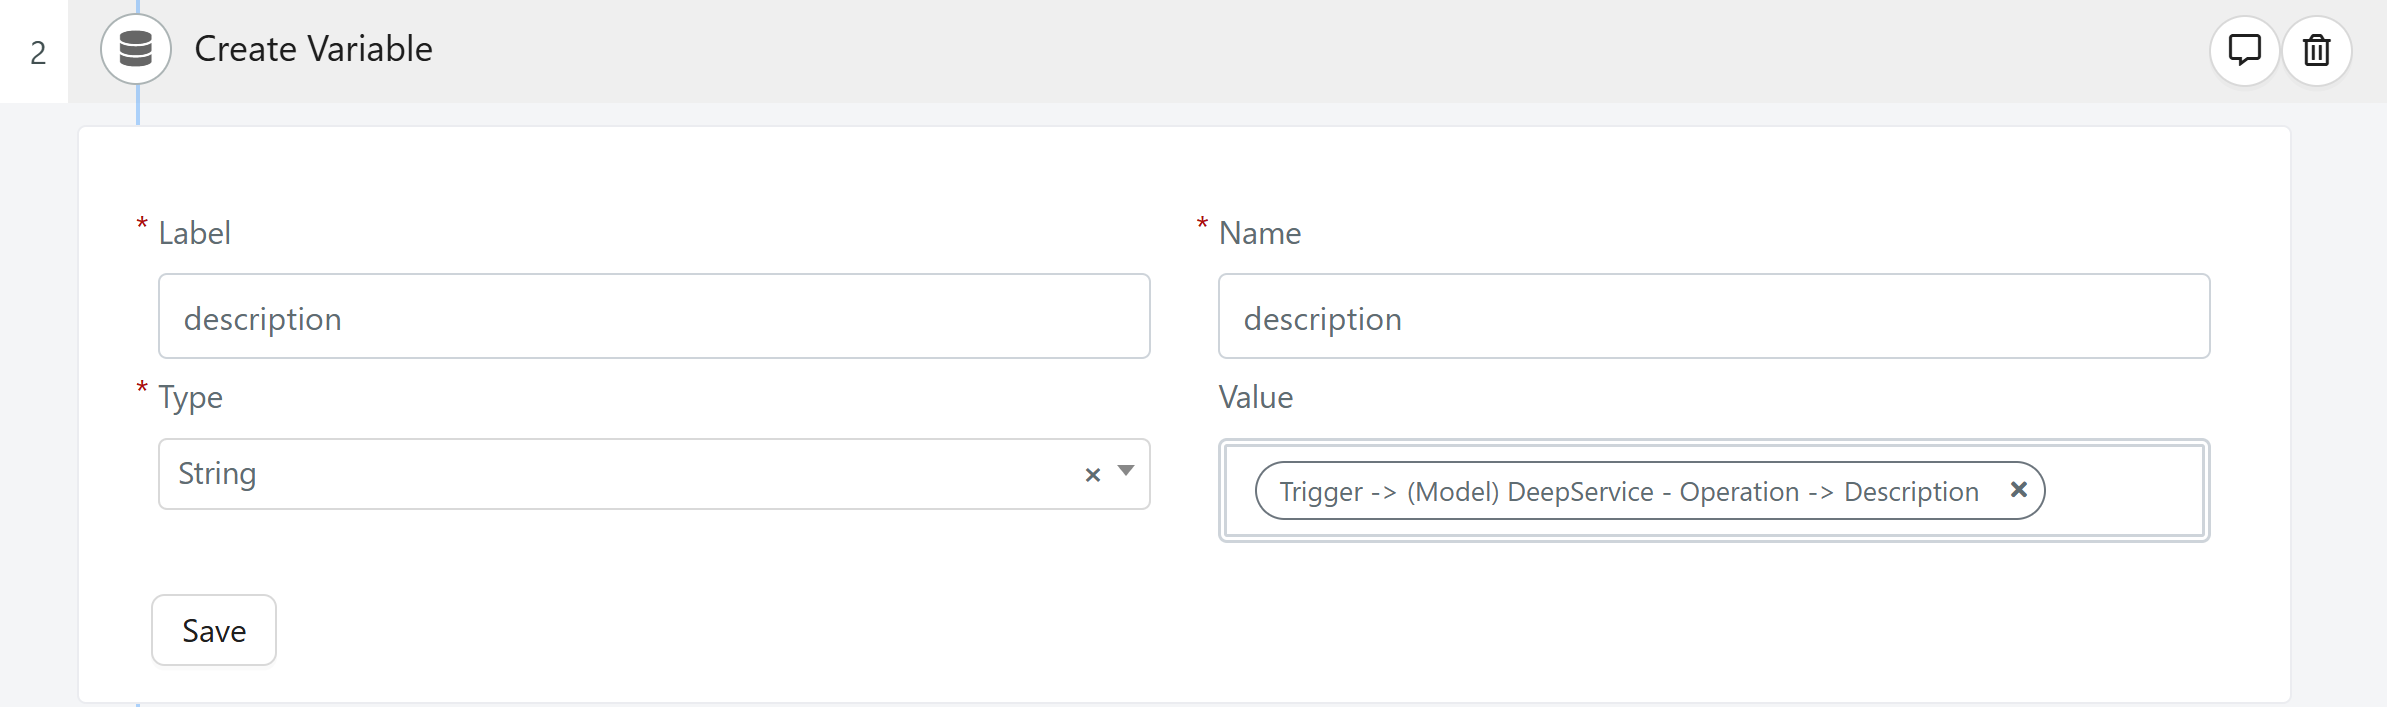
The Create Variable node lets you create a new variable and assign a value to it. The value can be a fixed input or the result of a previous operation within the flow.
You must complete the following four mandatory fields:
| Field | Note |
|---|---|
| Label | Specifies the display name of the variable, which will appear in the right section under trigger variables. |
| Name | Defines the internal name of the variable. |
| Type | Determines the variable's data type. There are 9 available types, including integer, string, boolean, datetime, and others. |
| Value | Assigns a value to the new variable, selected from the options in the right section under the trigger. |
Send Email
Use the "Send Email" action to send an email notification from your workflow.
- Open your workflow in the Flow module.
- Add the action Send Email inside the Flow section.
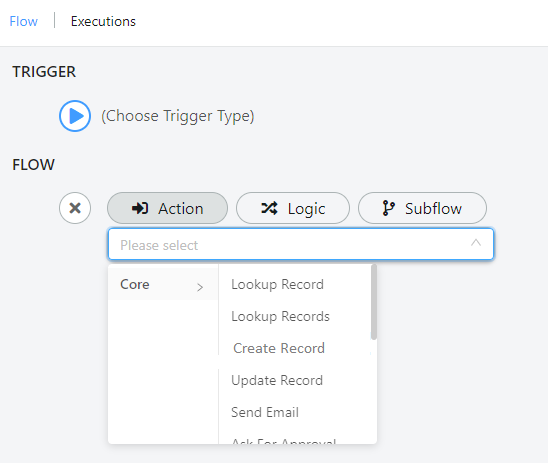
The following screen will open:
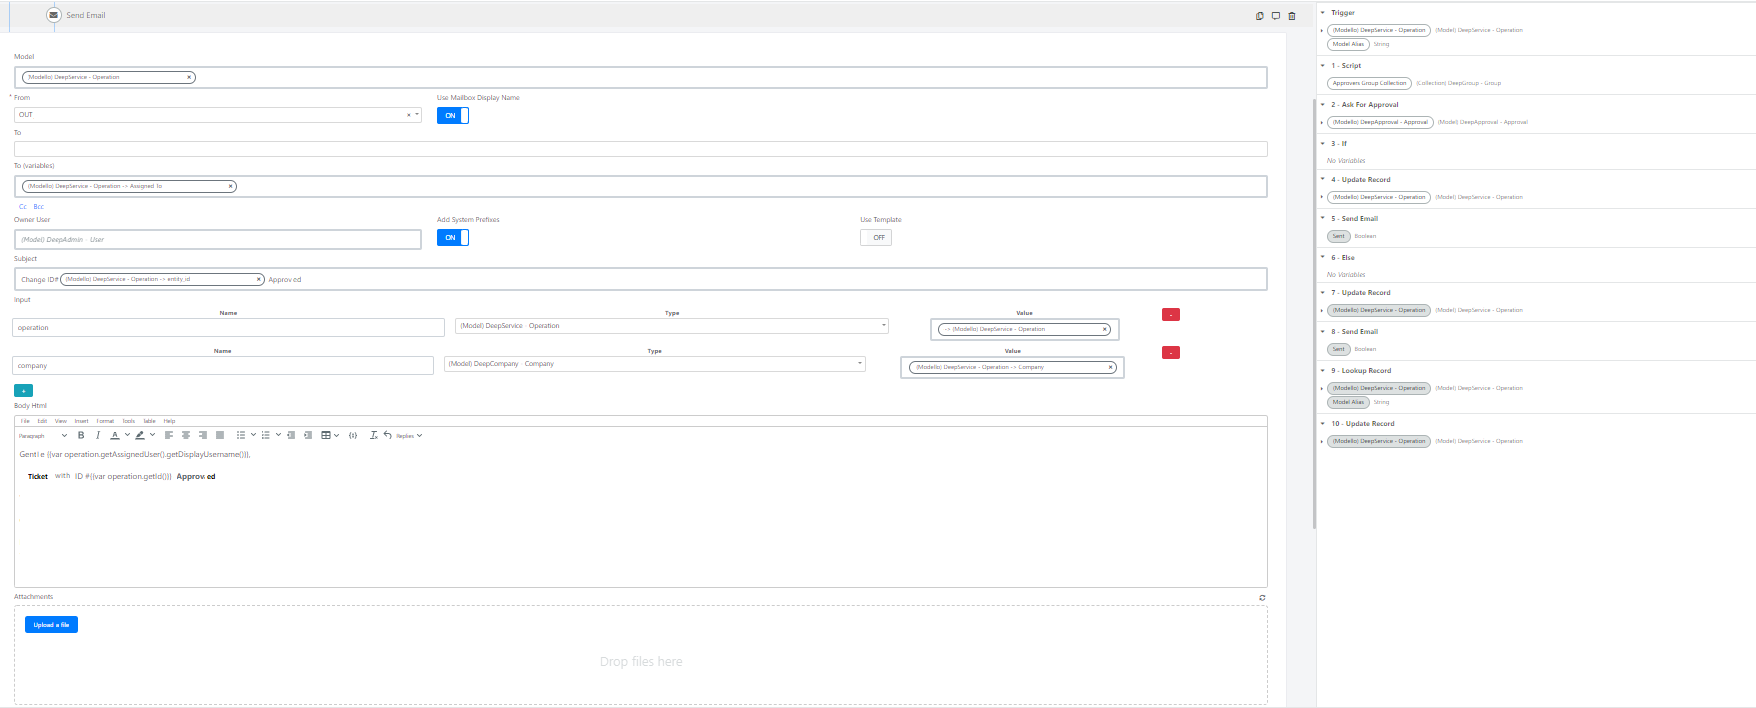
For example, to send a message to the Assigned User of a Service Operation about an approved request, configure the fields as follows:
| Name | Value | Note |
|---|---|---|
| Model | DeepServiceOperation | Reference variables needed for the email. |
| From | Out | The outgoing mailbox. |
| To(Variables) | Assigned To (from DeepServiceOperation) | The recipient. |
| Subject | Change Id #(entityId) Approved | Subject line including the Service Operation ID. |
In the Input section, set the variable Name, Type, and Value of the entity you want to use in your body HTML message.
In the Body Html section, create the message content for the receiver.
Ask for Approval
Use the "Ask For Approval" action to create an approve/reject request and send it through the User Portal or by email.
- Open your workflow in the Flow module.
- Add the action Ask For Approval inside the Flow section.
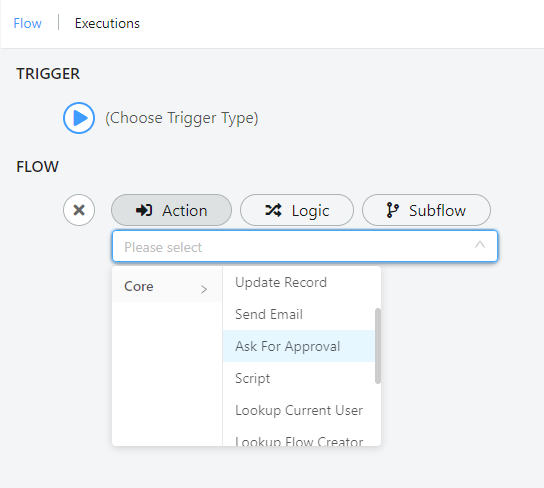
The following screen will open:
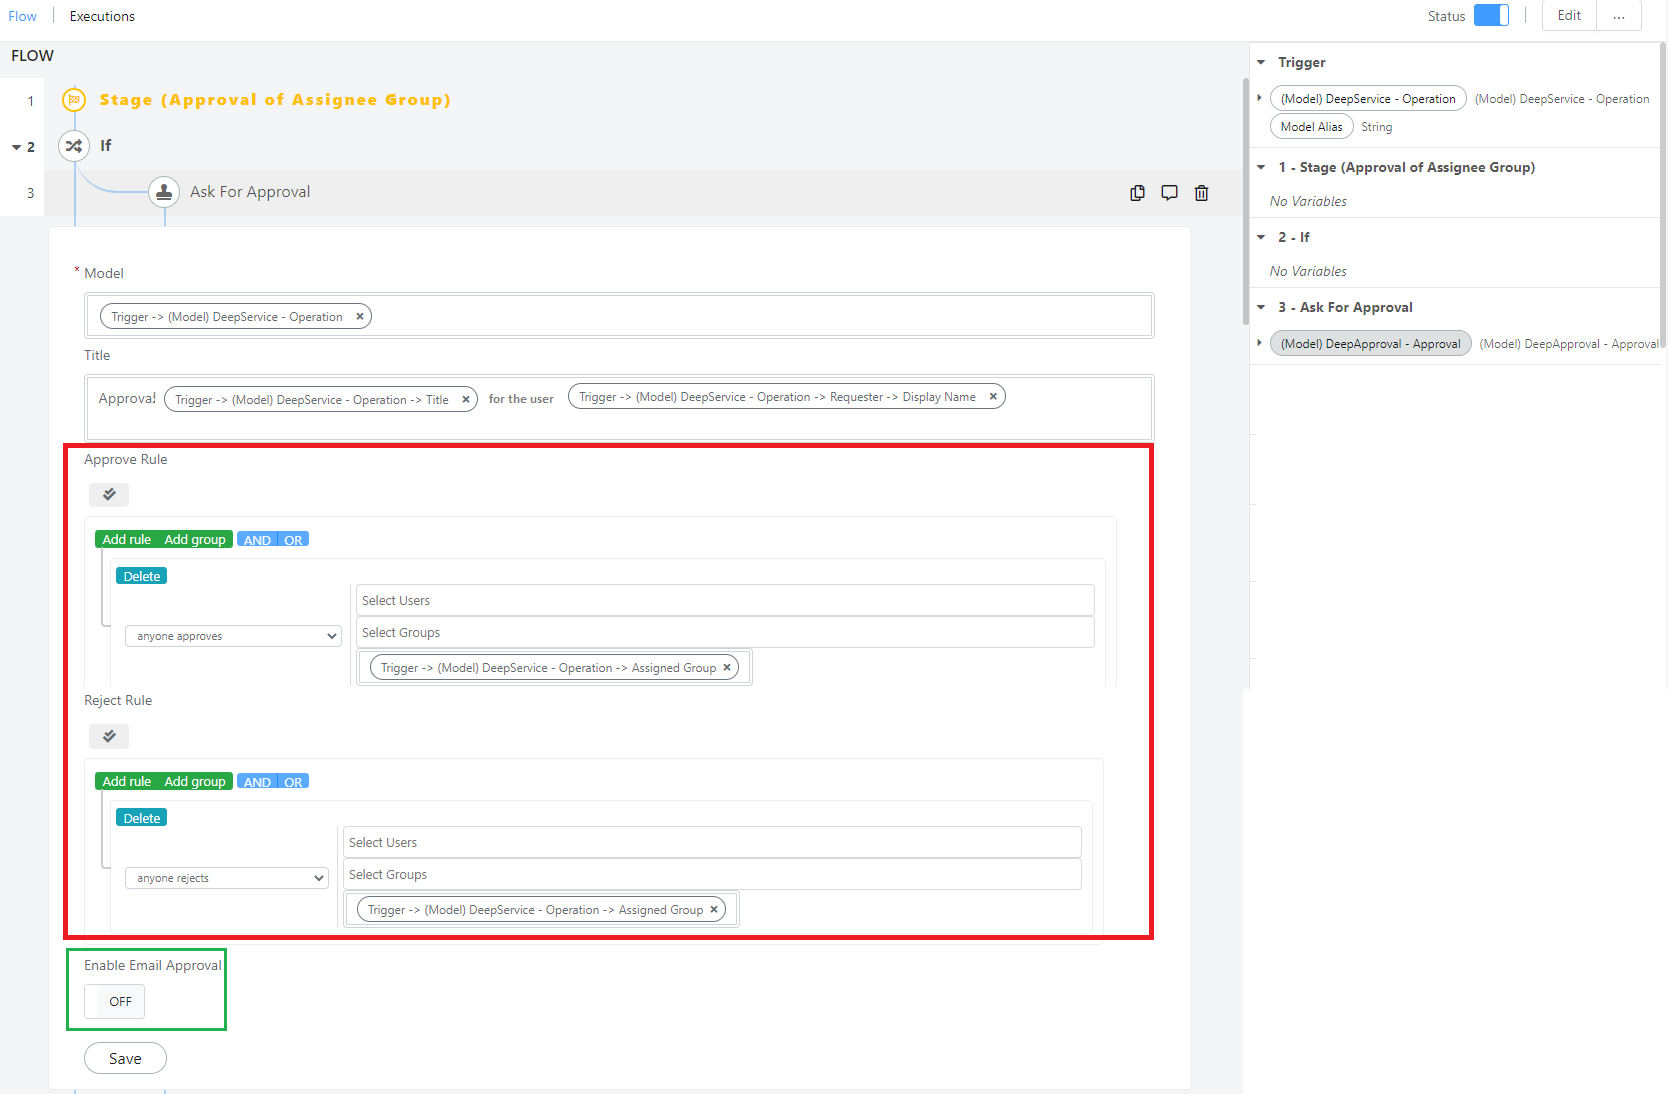
For example, to ask a group of people to approve a service request, select the model Operation and drag the required variables from the trigger section.
- Title -- Combine text with variables from the Service Operation (e.g., Title and Requester User).
- Approve Rule -- Determines how the approval is accepted.
- Reject Rule -- Determines how the approval is refused.
Approve Rule Options

| Name | Description |
|---|---|
| anyone approves | Any user or group chosen can approve the request. |
| all users approve | All users chosen need to approve the request. |
| all responded and anyone approves | All must respond, and at least one approves. |
| % of users approve | The chosen percentage of users need to approve. |
| # of users approve | The chosen number of users need to approve. |
Reject Rule Options
| Name | Description |
|---|---|
| anyone rejects | Any user or group chosen can reject the request. |
| all users reject | All users chosen need to reject the request. |
| all responded and anyone rejects | All must respond, and at least one rejects. |
| % of users reject | The chosen percentage of users need to reject. |
| # of users reject | The chosen number of users need to reject. |
To send the approval request by email, enable the flag Enable Email Approval in the Ask For Approval block.
Log Action
Use the "Log" action to display a message inside your workflow for debugging and monitoring.
- Open your workflow in the Flow module.
- Add the action Log inside the Flow section.
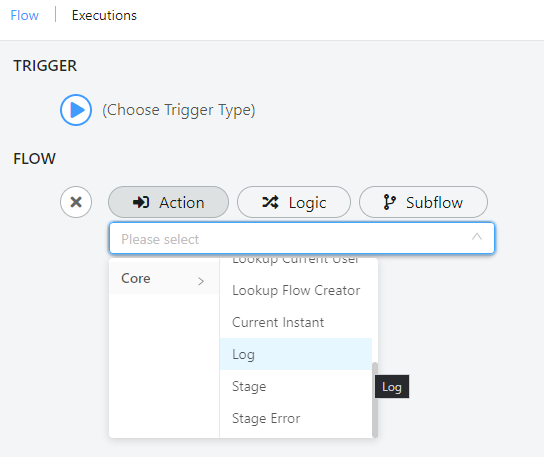
The following screen will open:

For example, to display the message "The status of the Service Operation with #ID was not modified," select the Model Operation to retrieve the entity ID and write the message text.
This message is visible in the Execution tab under the log section after the workflow runs. The log file can also be downloaded.
Logs are only visible if the Enable Log flag inside the Flow Properties is enabled.
Custom Log File
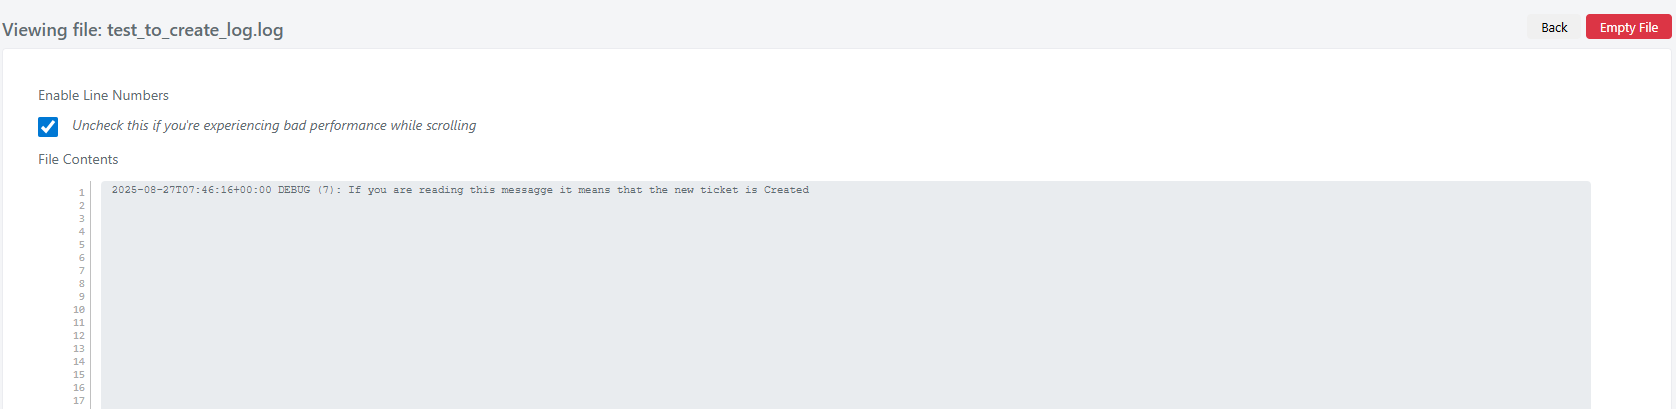
You can also write logs to a custom file. Under the log node, enter a value in the File field -- this value becomes the log name under System > Tools > Log > System Log.
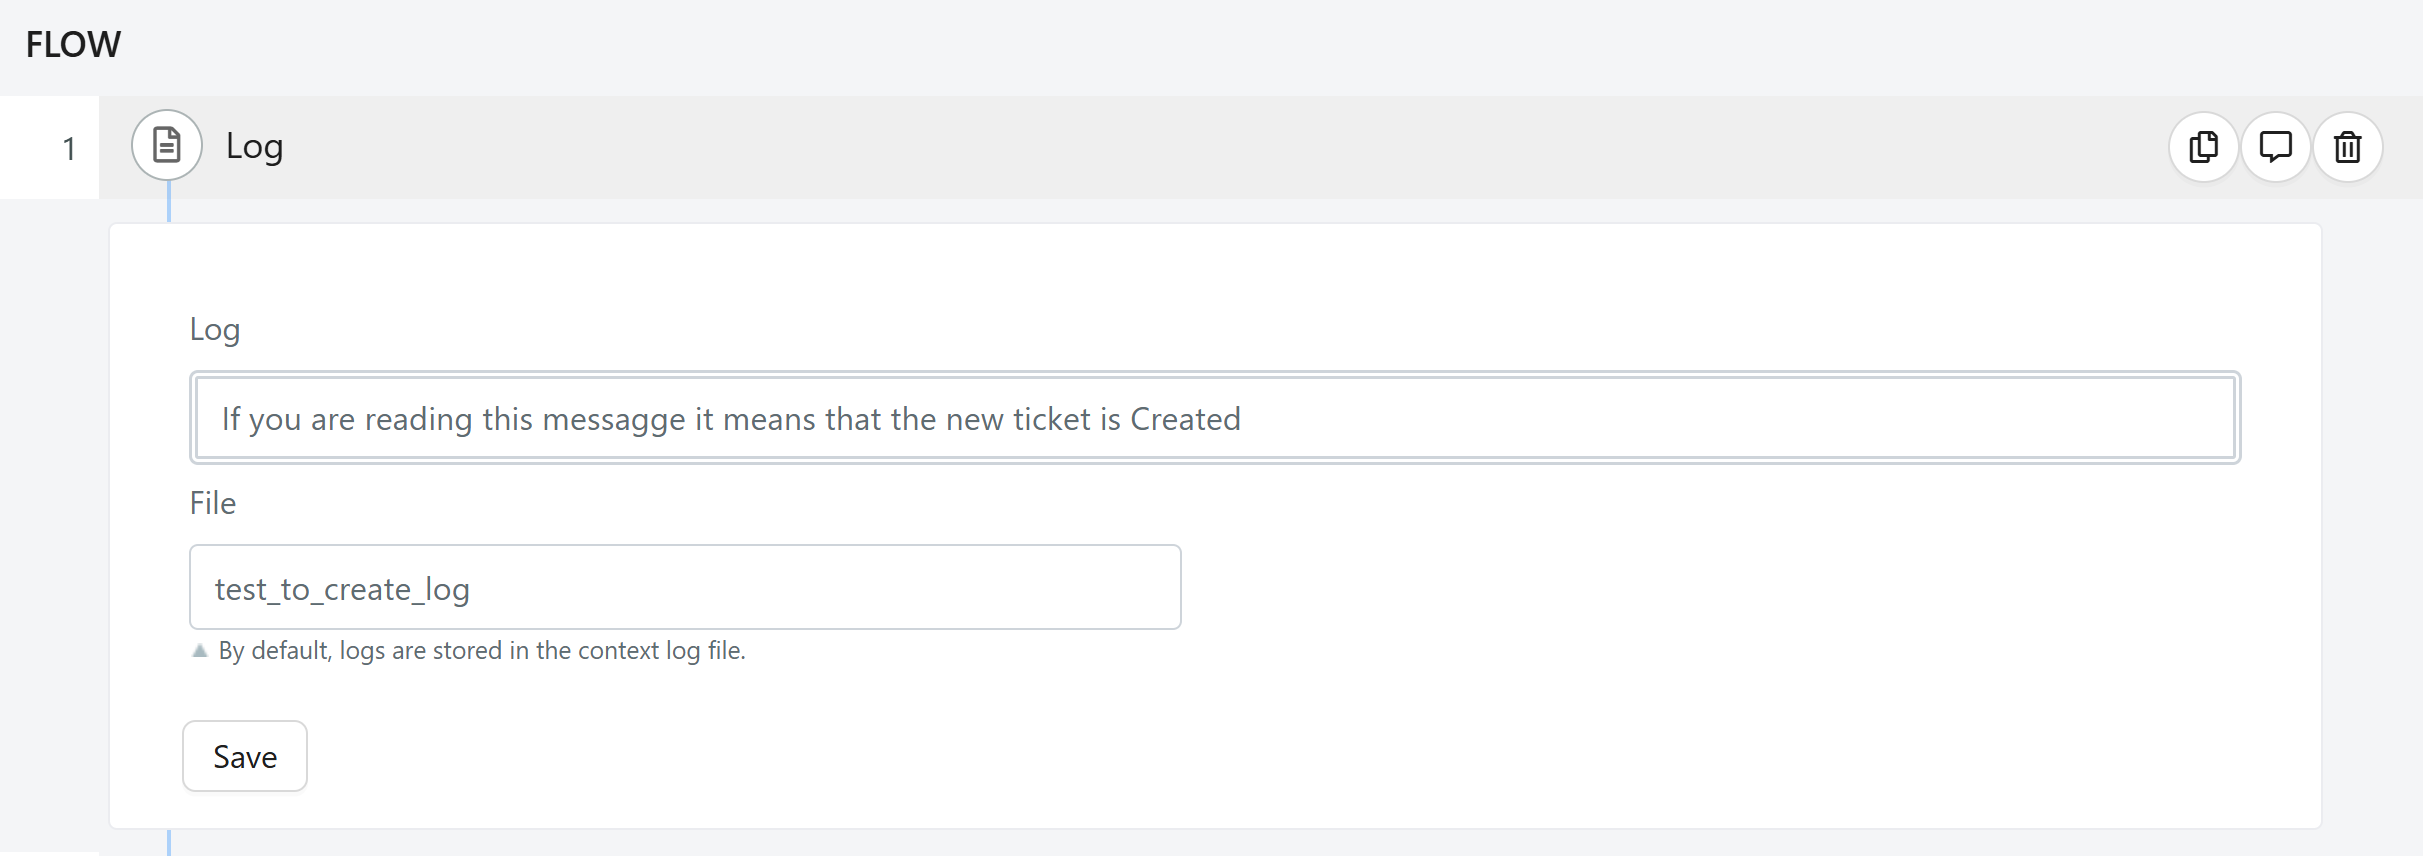
After creating the Service Operation, navigate to System > Tools > Log > System Log, where the new log appears with the file name from the example.

Stage Action
Use the "Stage" action to add workflow stages created with the Stage Set module into your workflow.
- Open your workflow in the Flow module.
- Add the action Stage inside the Flow section.
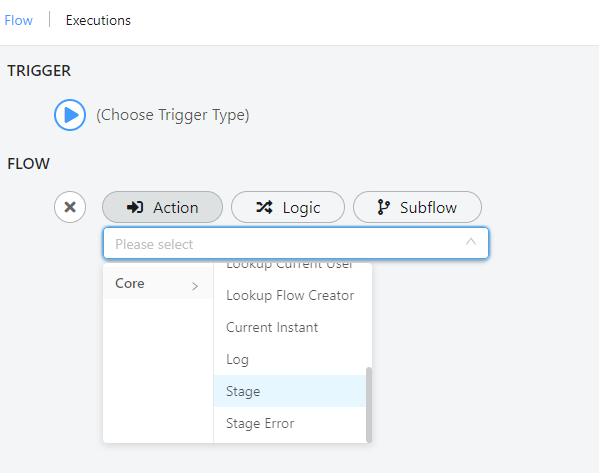
The following screen will open:
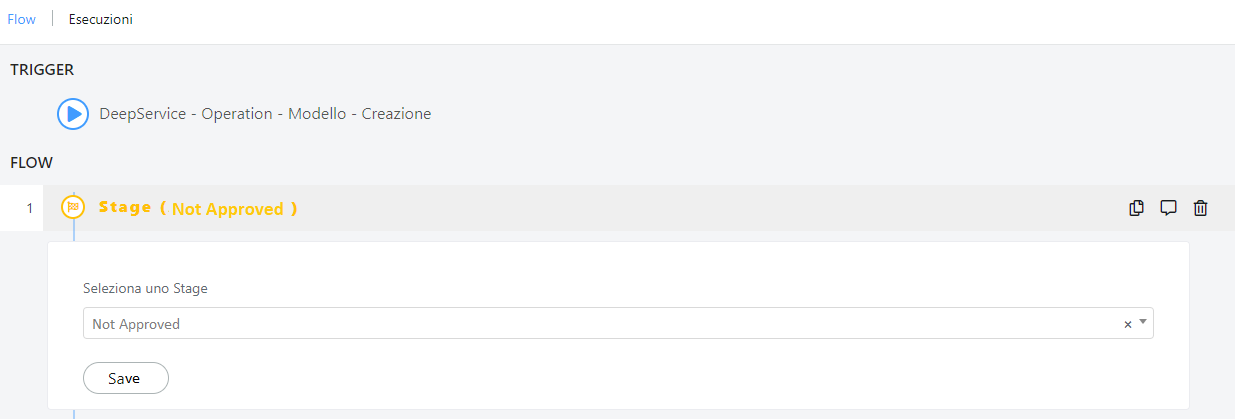
The final outcome will be:

Stage Error
Use the "Stage Error" action to display an error state on a workflow stage.
- Open your workflow in the Flow module.
- Add the action Stage Error inside the Flow section.
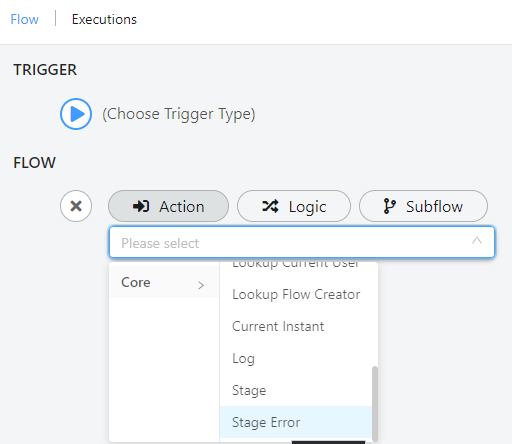
The following screen will open:
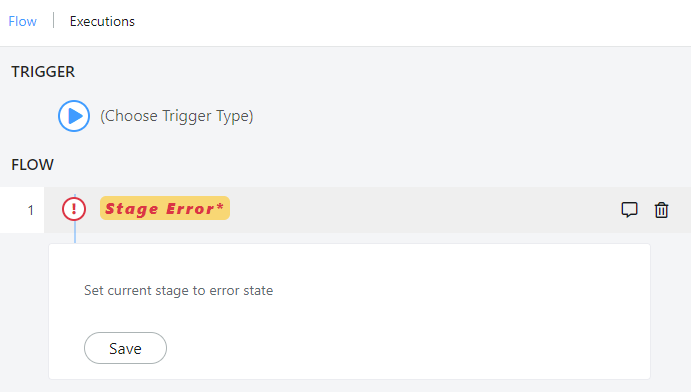
The final outcome displays as a "Stage Error" handler:

SFTP Actions
The SFTP actions within the Flow module allow interaction with files on remote servers via SFTP (Secure File Transfer Protocol). They automate file transfer operations within workflows, ensuring security and integration with external systems.
Available operations:
- Uploading or updating files on a remote server
- Downloading files from a remote SFTP server
- Deleting files on a remote server
To insert one of these actions, add a new node and search for the corresponding action:
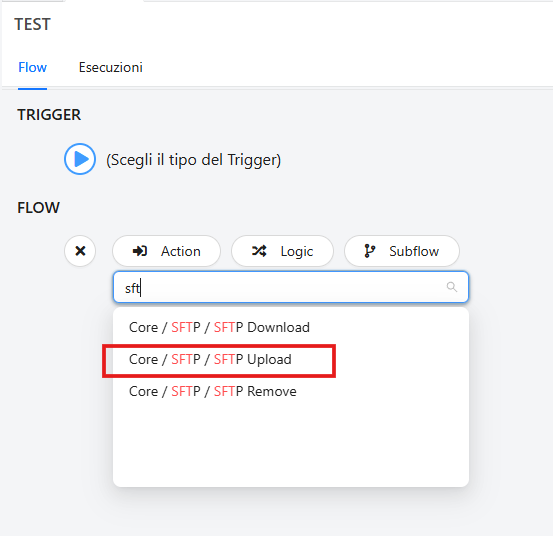
SFTP Upload
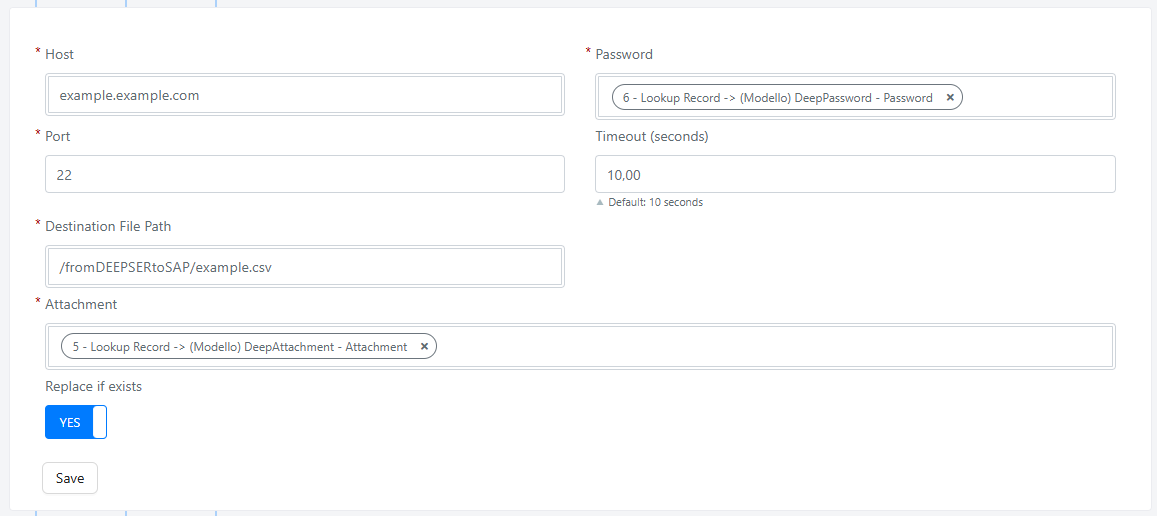
| Name | Notes |
|---|---|
| Host | The host of the remote SFTP server. |
| Port | The port used for the connection. |
| Password | The password for the SFTP server. It can only be loaded via Deepser's Password module. Save the password first, then retrieve it using the "Lookup Record" action. |
| Timeout (seconds) | The number of seconds within which the request must complete. |
| Destination File Path | The full path on the remote server (path + file name). Example: /home/user/documents/report.csv |
| Attachment | The file to upload. It must already be present in Deepser. Load it using the "Lookup Record" action, then reference it here. |
| Replace if exist | Overwrites the file if one with the same name already exists on the remote server. |
SFTP Download
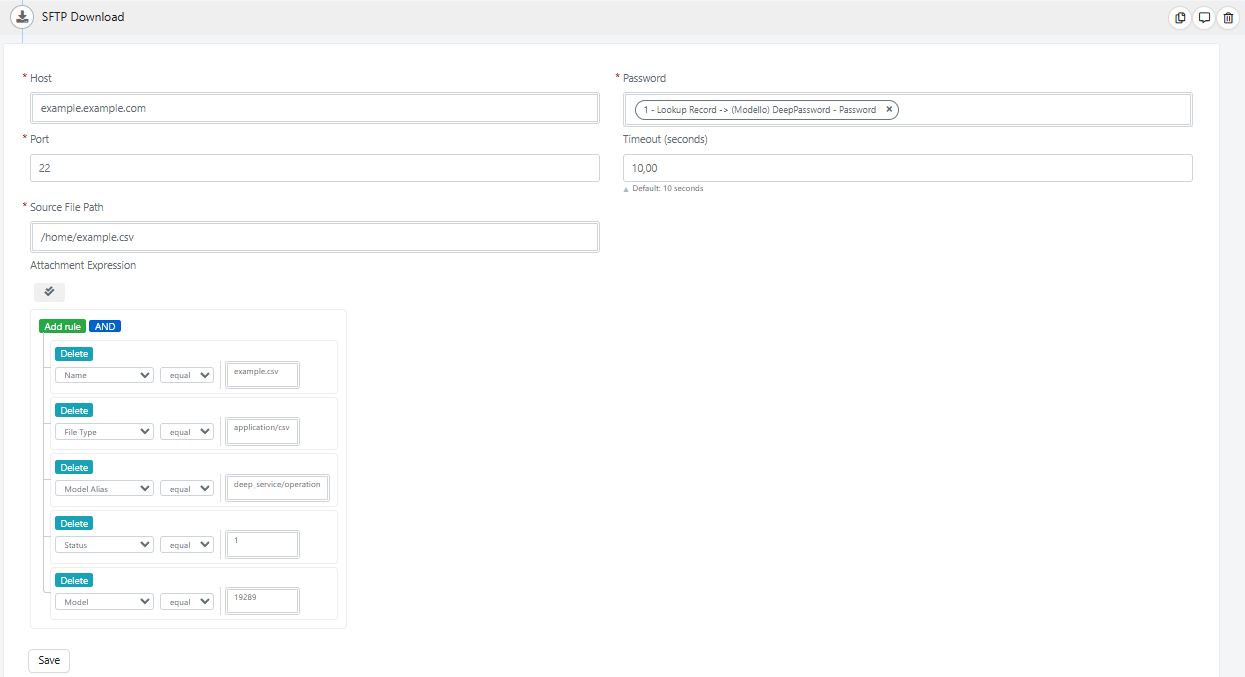
| Name | Notes |
|---|---|
| Host | The host of the remote SFTP server. |
| Port | The port used for the connection. |
| Password | The password for the SFTP server. Load it via Deepser's Password module first. |
| Timeout (seconds) | The number of seconds within which the request must complete. |
| Source File Path | The full path on the remote server for the file to download. Example: /home/user/documents/report.csv |
| Attachment Expression | Configure the fields of the Attachment object that will be created, including references to the main record (Model Alias and Model). |
SFTP Remove
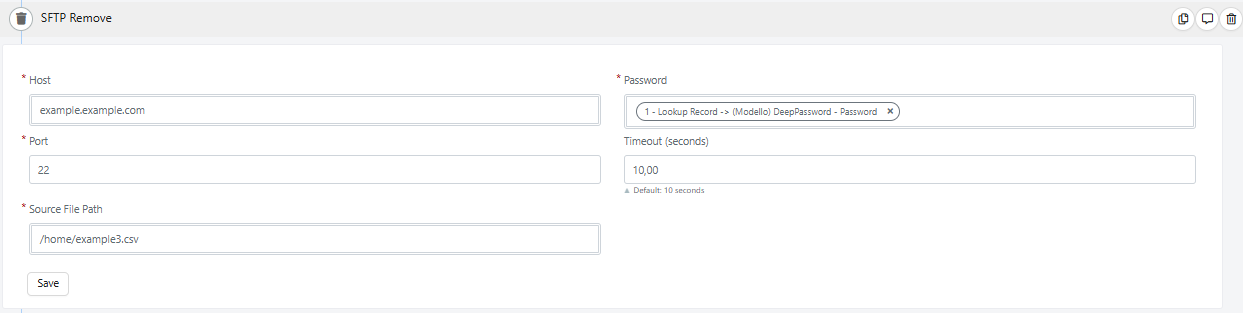
| Name | Notes |
|---|---|
| Host | The host of the remote SFTP server. |
| Port | The port used for the connection. |
| Password | The password for the SFTP server. Load it via Deepser's Password module first. |
| Timeout (seconds) | The number of seconds within which the request must complete. |
| Source File Path | The full path on the remote server for the file to delete. Example: /home/user/documents/report.csv |
SSH
The SSH Action allows remote command execution on Linux/Unix servers via SSH (Secure Shell). It automates system administration tasks directly within a Deepser workflow.
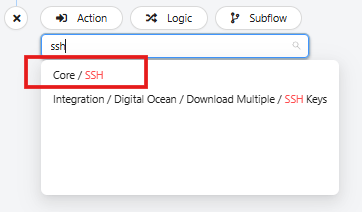
To insert the SSH action, add a new node and search for the corresponding action:
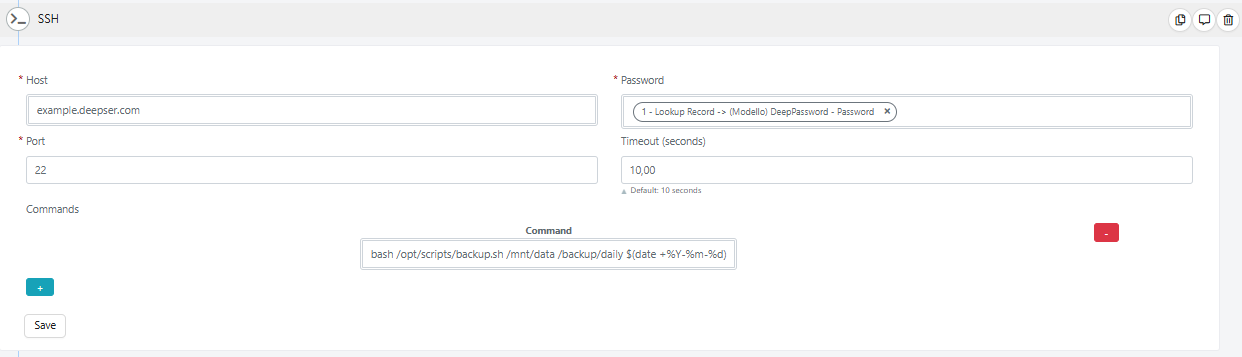
| Name | Notes |
|---|---|
| Host | The host of the remote SSH server. |
| Password | The password for the server. Load it through Deepser's Password module. The Password module record must include both the username and the password. |
| Port | The port used for the connection. |
| Timeout (seconds) | The number of seconds within which the request must complete. |
| Command | Multivalue field. Specify all commands to send to the server via this node. |
API Nodes and Webhook
API Node Configuration
When Deepser is called by an external system, a third-party application can send a request to Deepser, which responds based on how the relevant flow has been configured.
- Go to Flow > Designer and click the New + button.
- Select the API trigger and click Save.
- After saving, the endpoint URL appears. Click it to copy all URLs.
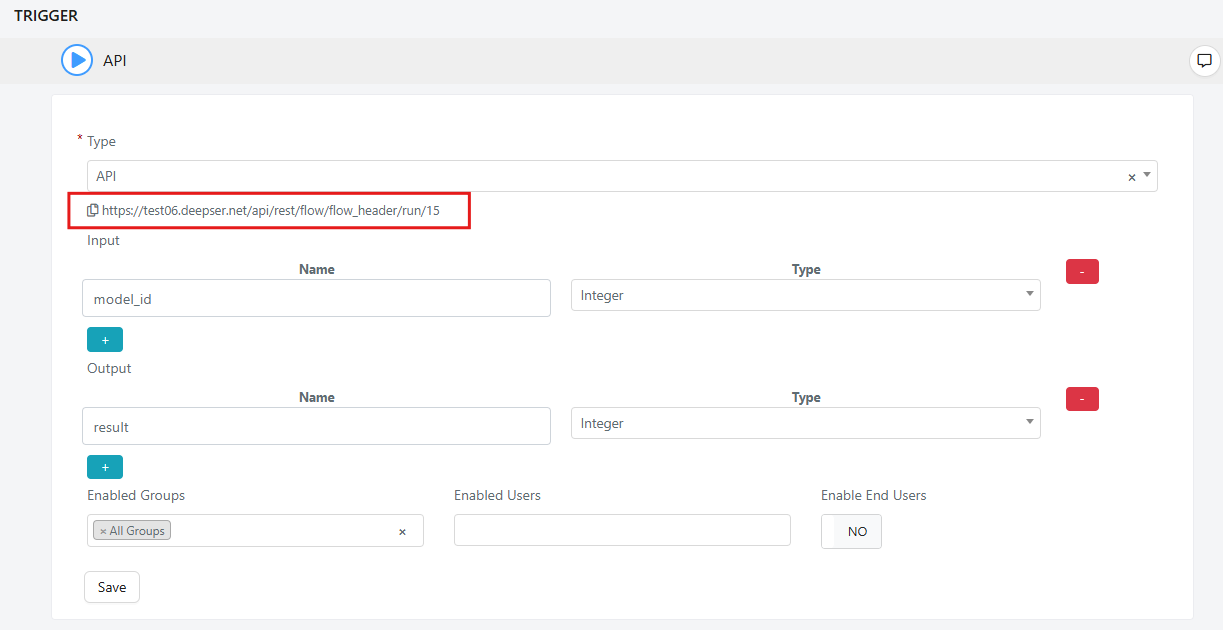
The highlighted link represents the endpoint provided by Deepser.
The following fields are available in the Flow trigger:
| Field | Description | Note |
|---|---|---|
| Type | Trigger type. | |
| Input | Fields passed by the API call. | Visible if type is API. |
| Output | Fields returned by the API call. | Visible if type is API. |
| Enabled Groups | Groups authorized to execute the flow. | Visible if type is API. |
| Enabled Users | Users authorized to execute the flow. | Visible if type is API. |
| Enable End Users | Enables end users to execute the flow. | Visible if type is API. |
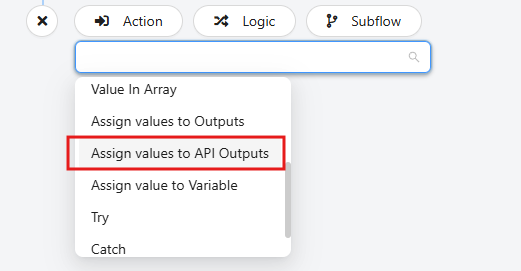
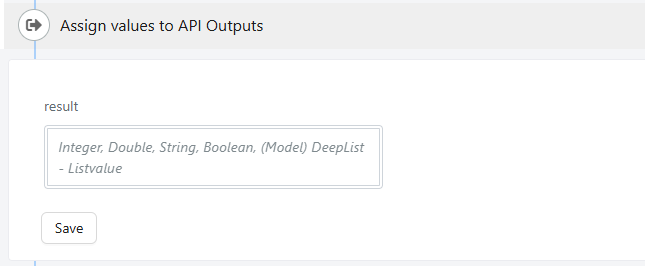
To assign a value to the output variable, insert an "Assign values to API Outputs" node:
Webhook Node Configuration
When Deepser calls the APIs of an external system, you configure a webhook. When a specific event occurs in Deepser (for example, the creation of a Service Operation or assignment of a task), the system automatically sends a request to another external service.
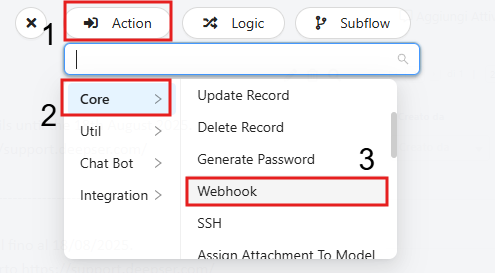
The Webhook node can be used with any trigger. To find it, click Action > Core > Webhook:
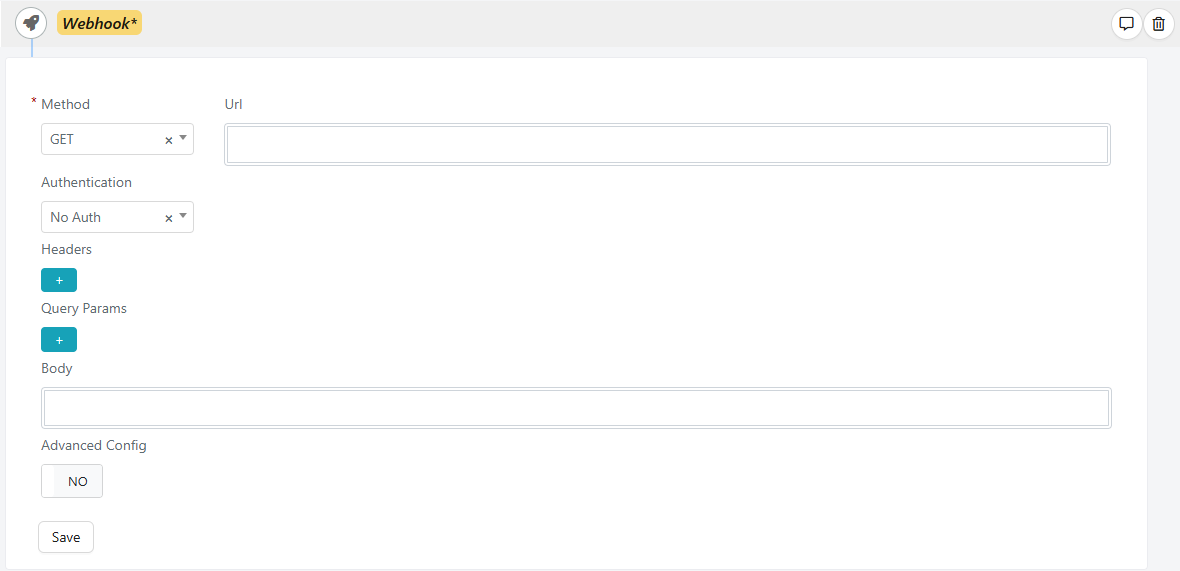
| Field | Description | Note |
|---|---|---|
| Method | Calling method. | Usually "Post" for webhooks. |
| Url | Endpoint to which the call is sent. | |
| Authentication | Type of authentication required. | |
| Headers | Key-value pairs included in the HTTP request. | e.g., Content-Type: application/json |
| Query Params | Parameters passed in the URL after "?" in "key=value" format. | Used to filter, sort, or provide additional data. |
| Body | HTTP request content. | |
| Advanced Config | Show fields for advanced configurations. | |
| Disable SSL Verification | Disable SSL certificate checking during HTTP calls. | Only visible if "Advanced Config" is set to "Yes." |
Disabling SSL Verification is not recommended in production environments because it reduces security.
The following data is returned from the webhook node:
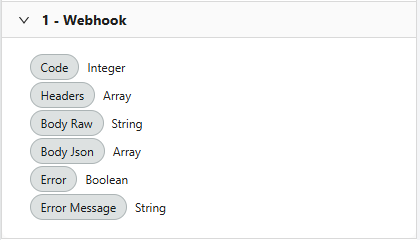
| Field | Description |
|---|---|
| Code | HTTP status code returned by the server. |
| Headers | Response HTTP header. |
| Body Raw | The response content in text/raw format. |
| Body Json | The response interpreted as JSON. |
| Error | Returns "true" or "false" to indicate whether an error occurred. |
| Error Message | The error message, if any. |
Related Articles
- Use the Flow Designer -- Build and manage workflows
- Flow Triggers -- Configure trigger conditions
- Workflow Logic -- Conditional and loop blocks
- Workflow Samples -- Complete flow examples