Workflow Samples
This page provides complete, step-by-step examples of workflow configurations in Deepser. Each sample demonstrates a different use case to help you understand how to combine triggers, actions, and logic blocks effectively.
Configuring a Sample Flow
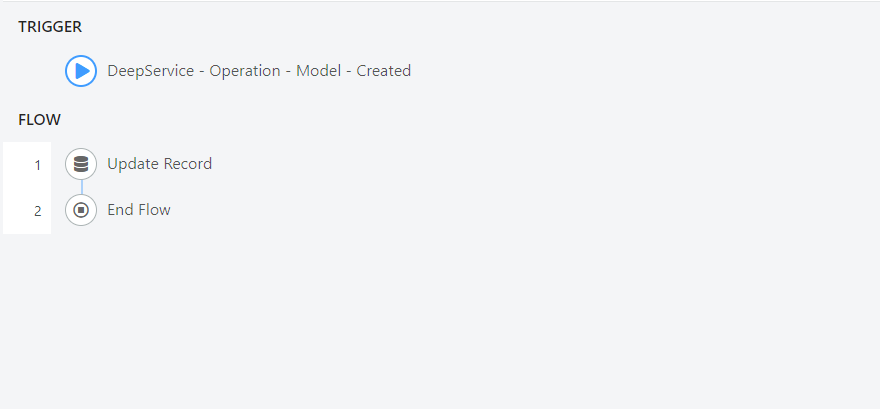
In this example, we will configure a simple flow that automatically sets high priority when the requesting company is "Acme International."
Below is the final structure of the flow:
To begin, go to the Flow > Designer menu.
Click the NEW button in the upper left corner of the page:

Then click the word "Flow" that will appear below the button.
The following page will open:
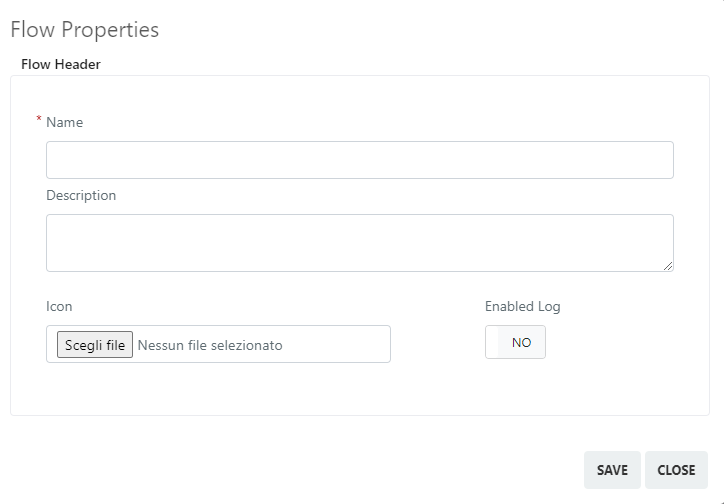
Below are the fields with their meaning:
- Name -- Define the name that this flow will have.
- Description -- Define the description for the flow.
- Icon -- Define the icon for the flow.
- Enable Log -- This toggle, when enabled, activates logging in the flow.
Once you have configured the fields, click the "Save" button.
The following screen will appear:
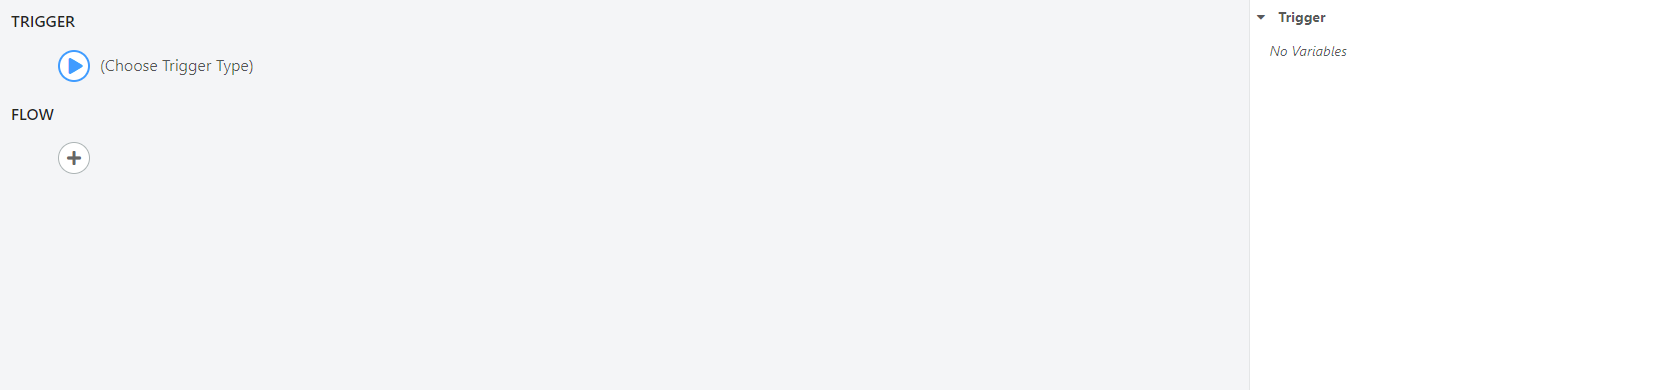
Configure the "Trigger" field as follows:
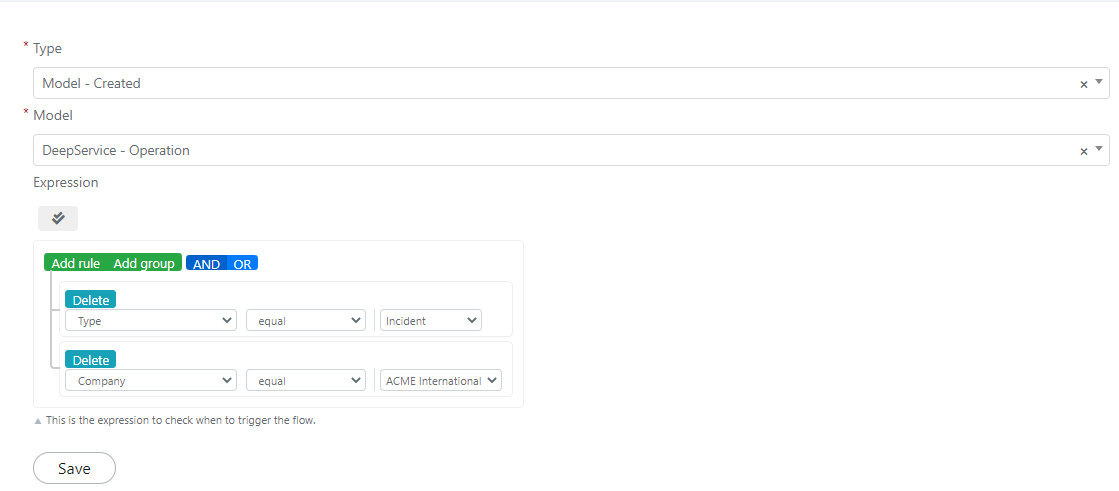
Click "Save" to save the block.
Now click on the button:

From the menu that opens, select "Action."
In the search bar, click on "Core" > "Update -- Record."
Now drag the variable "(Model) DeepService -- Operation" from the right bar into the "Model" section:
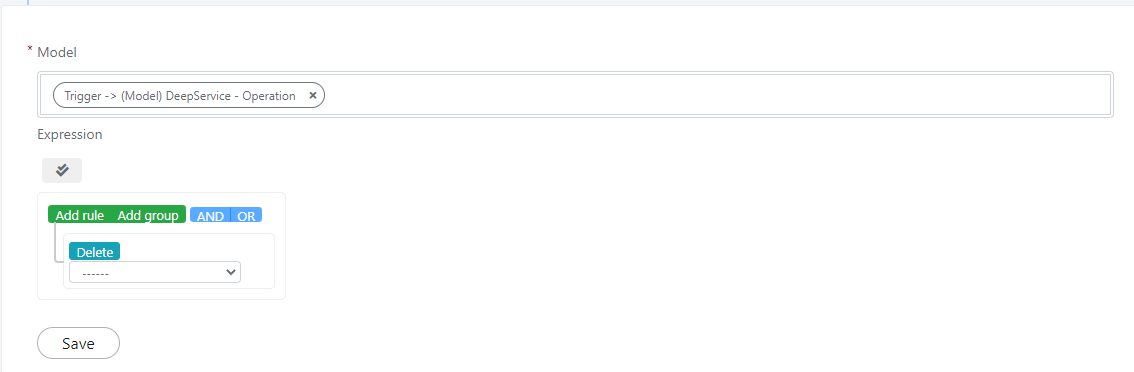
Finally, configure the "Expression" field as follows:

Click the Save button to save the block.
Before enabling the flow, click on the button:

This is placed below the newly created block. Select from the "Logic" section the "End Flow" block, then click Save to save the block.
Before you can see the effects of the flow, enable the flow by setting the "Status" toggle:

The flow will now be up and running.
Configuring a Sample Flow with the Script Block
In this example, we will configure a flow that, when creating or updating a user, makes an API call to retrieve the user's age from an external service.
For this example, we use the public API of "agify.io" to recover a fictitious age for users based on their first name. We also assume that a custom text-type field named "Age" on the user model is configured in the Deepser installation.
Below is the final structure of the flow:
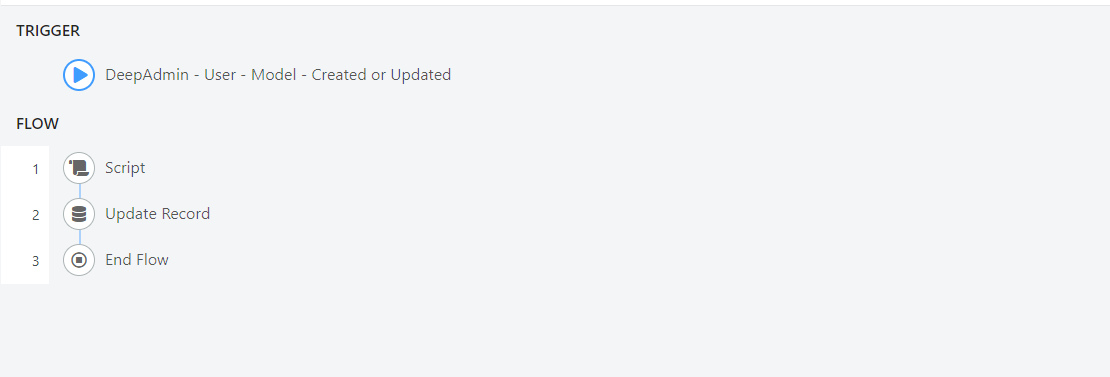
To begin, go to the Flow -> Designer menu.
Click the NEW button in the upper left corner of the page:
Then click the word "Flow" that will appear below the button.
The following page will open:

Below are the fields with their meaning:
- Name -- Define the name that this flow will have.
- Description -- Define the description for the flow.
- Icon -- Define the icon for the flow.
- Enable Log -- This toggle, when enabled, activates logging in the flow.
Once you have configured the fields, click the "Save" button.
The following screen will appear:
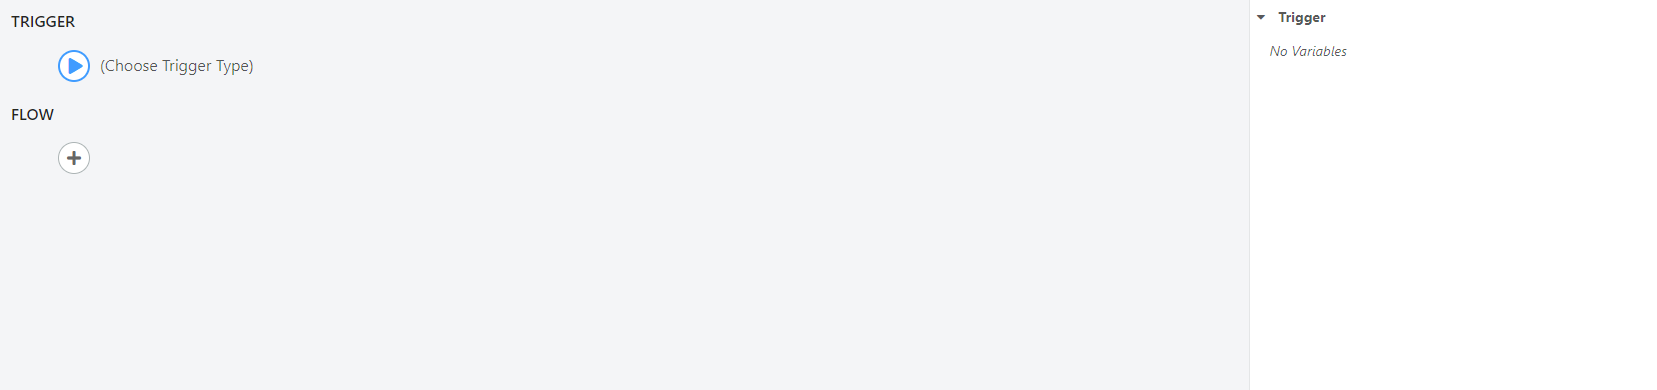
Configure the "Trigger" field as follows:
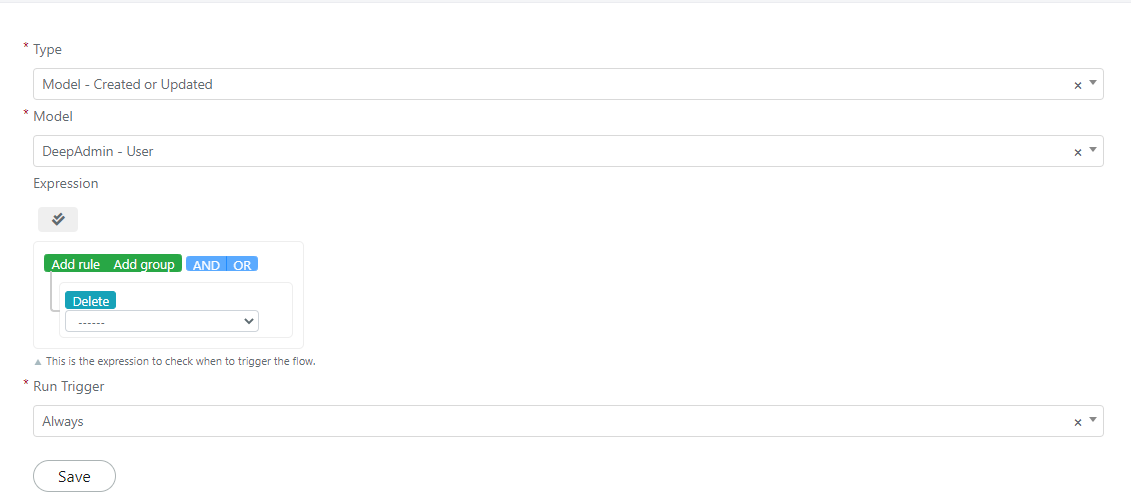
Click "Save" to save the block.
Now click on the button:
From the menu that opens, select "Action."
In the search bar, click on "Core" -> "Script."
Add an input "firstname" enhanced with the firstname of the user you created. To do this, drag the Firstname field into the Value field of the input:

Create an output for the "User Age" script. The final field configuration will look like this:

The Name field must match what you set in the scripting section of the document.
In the "Script" field, enter the following code:
//getting the firstname of the user
$firstname = $this->getInput('firstname') ?? "";

//initializing client http
$client = new GuzzleHttp\Client();

try{
//making the api call
$res = $client->request('GET', 'https://api.agify.io/', [
'query'=>[
'name'=> $firstname
]
]);

//decoding body
$body = json_decode($res->getBody());

//if there is an error throw it
if($body->error){
throw new Exception($body->error);
}
//if no age throw an error
if(!$body->age){
throw new Exception('invalid Age');
}

//setting the output of the script
$this->setOutput('userAge', $body->age);

}catch(Exception $e){
//In case of exceptions log the exceptions
Deep::log($e, null, "agify.errors.log");
}
After configuring the "Script" block, click "Save."
Now add an "Update Record" block from the actions menu on the same branch, configured as follows:
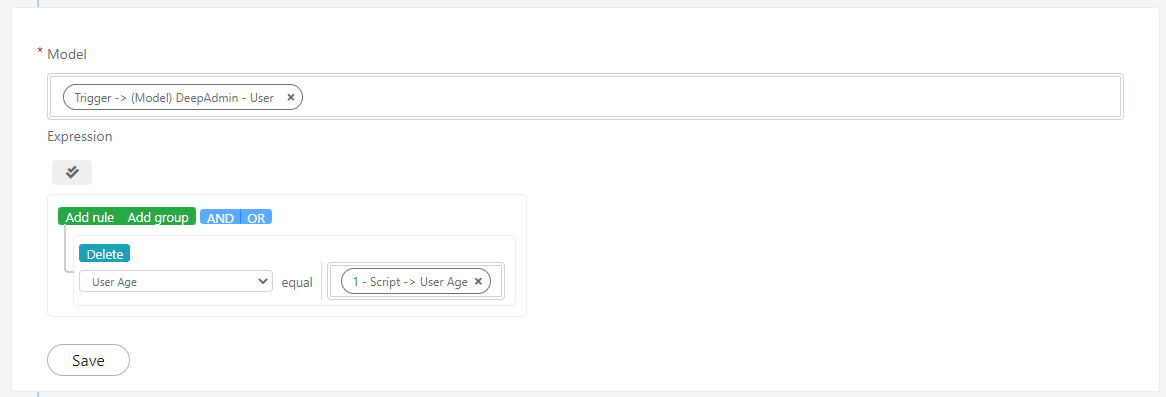
Click the "Save" button to save the block.
Before enabling the flow, click the button:
This is placed below the newly created block. Select from the "Logic" section the "End Flow" block, then click "Save" to save the block.
Before you can see the effects of the flow, enable it by setting the "Status" toggle:
The flow will now be up and running.
Single Stage Flow
In this example, we will configure a flow that creates an approval for resource access when an "Access Management" type Service Operation is opened.
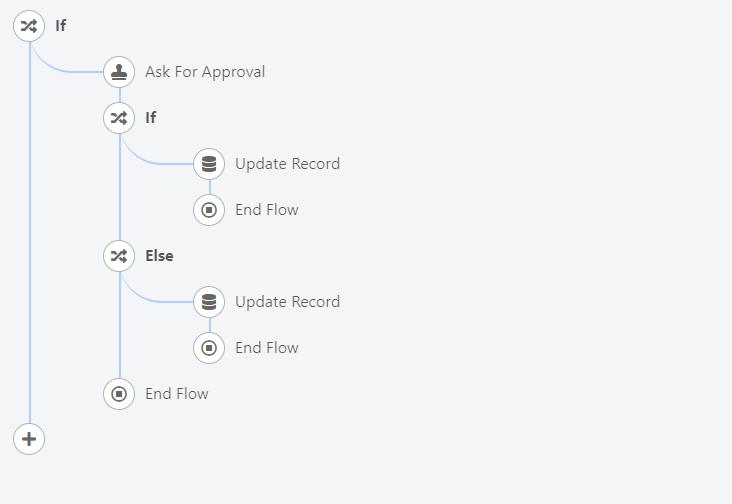
Below is the final result of the flow:
To begin, go to the Flow > Designer menu.
Click the NEW button in the upper left corner of the page:
Then click the word "Flow" that will appear below the button.
The following page will open:
Below are the fields with their meaning:
- Name -- Define the name that this flow will have.
- Description -- Define the description for the flow.
- Icon -- Define the icon for the flow.
- Enable Log -- This toggle, when enabled, activates logging in the flow.
Once you have configured the fields, click the "Save" button.
The following screen will appear:
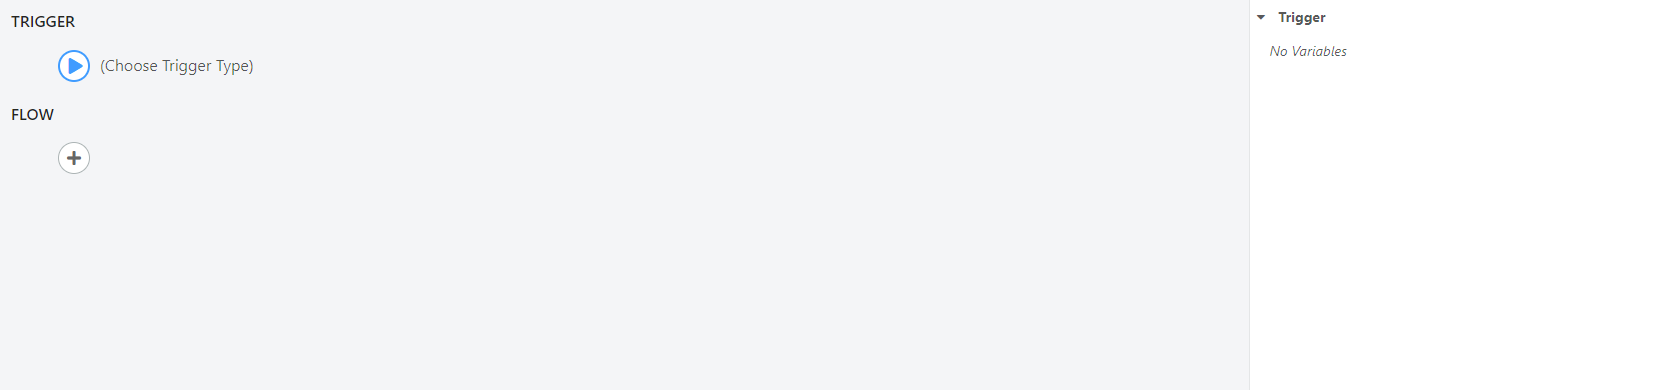
Configure the "Trigger" field as follows:
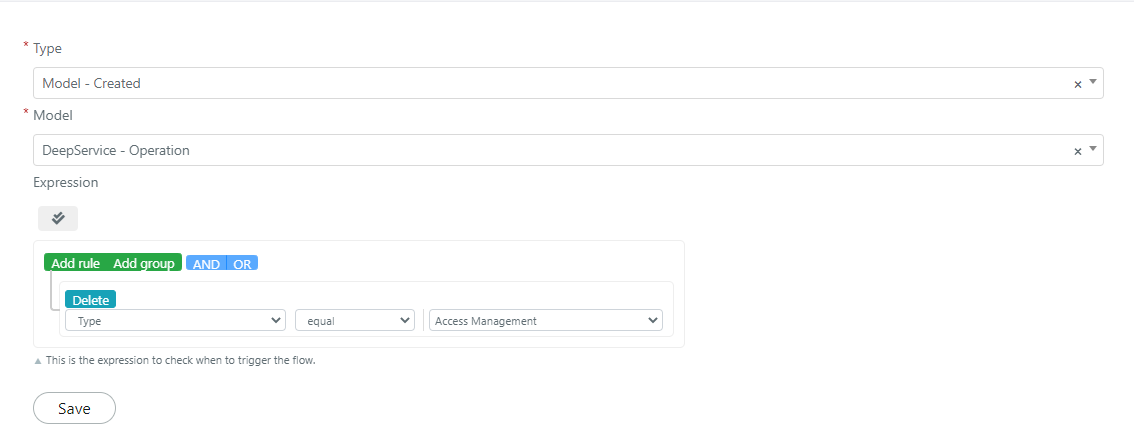
Click "Save" to save the block.
Now click on the button:
From the menu that opens, select "Logic."
In the search bar, click on "If", and configure it as follows:
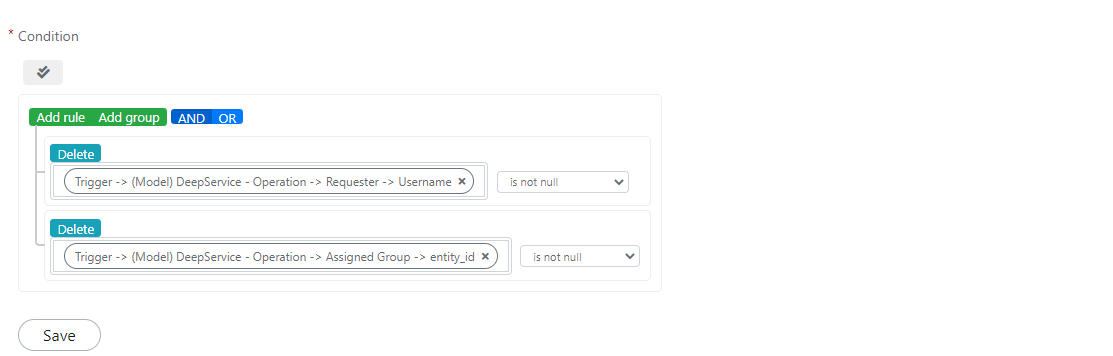
In the left branch, insert an "End Flow" block. In the right branch, insert an "Ask for Approval" block from the "Actions" section.
Configure the "Ask for Approval" block as follows:
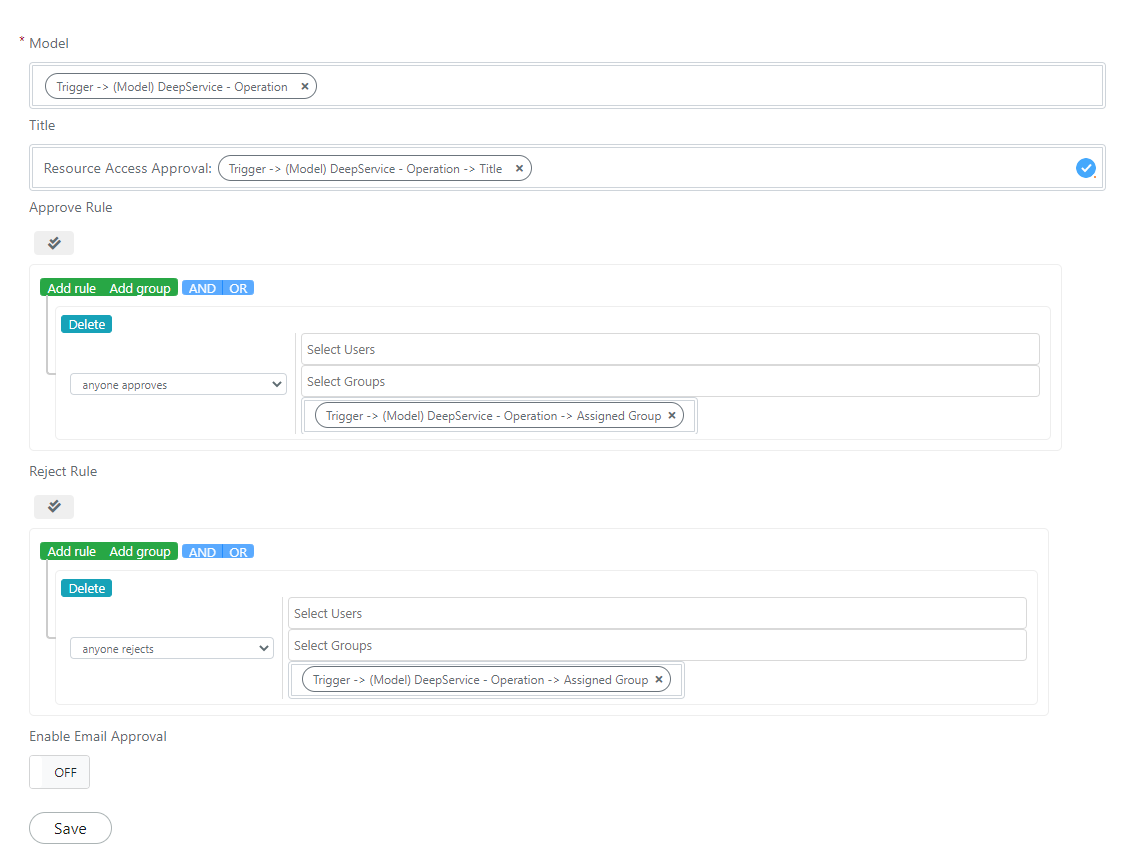
Below the newly created block, create an IF block in which you check the status of the approval.
In the left branch of the "If" block, configure an "Else" block from the "Logic" section:

In the right branch of the IF, add an "Update Record" block configured as follows:
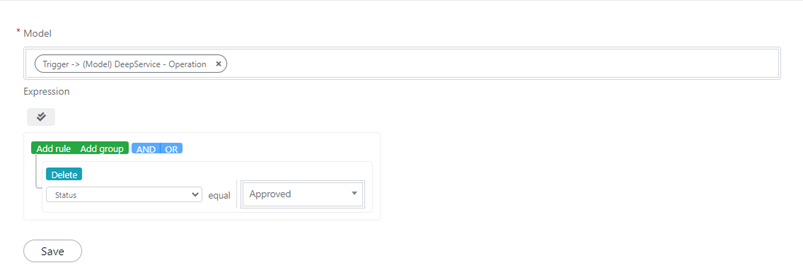
In the right branch of the "Else" block, add an "Update Record" block configured as follows:
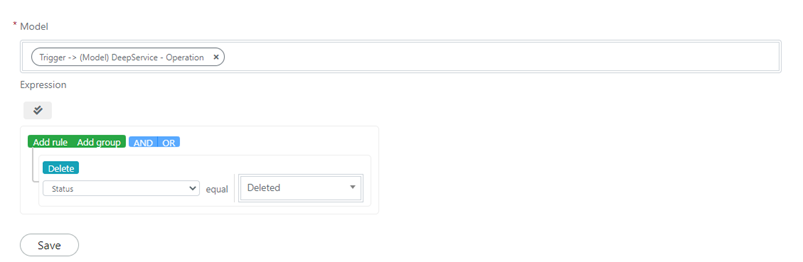
On all terminal branches of the flow, insert an "End Flow" block.
Before you can see the effects of the flow, enable the flow by setting the "Status" toggle:
The flow will now be up and running.
Related Articles
- Use the Flow Designer -- Build and manage workflows
- Workflow Actions -- Available action blocks
- Workflow Logic Blocks -- Conditional and loop blocks
- Multi Stage Flow -- Configure multi-stage approvals