

User Portal CMDB Grid Configuration
To configure the CMDB grid in the user portal, you will need to go to the menu: System->Portal->Ci.
Here you can configure the grid using the pencil button at the top left.
Once you click the pencil button, both will open the following screen:
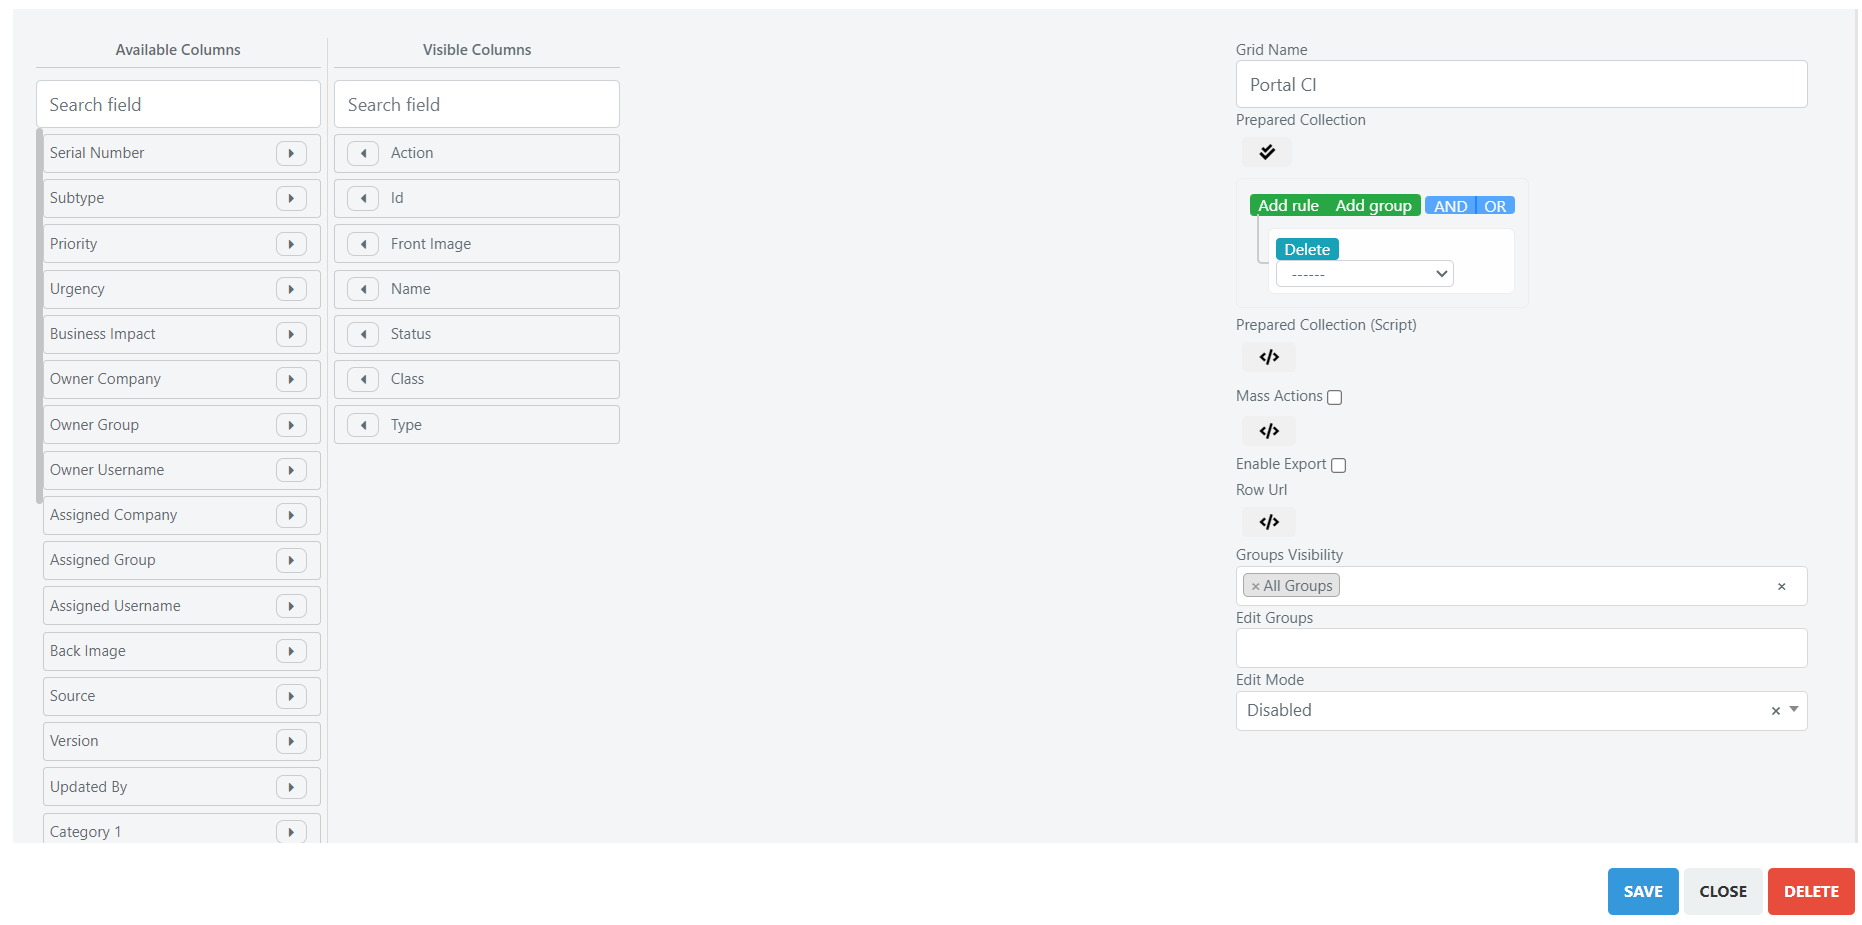
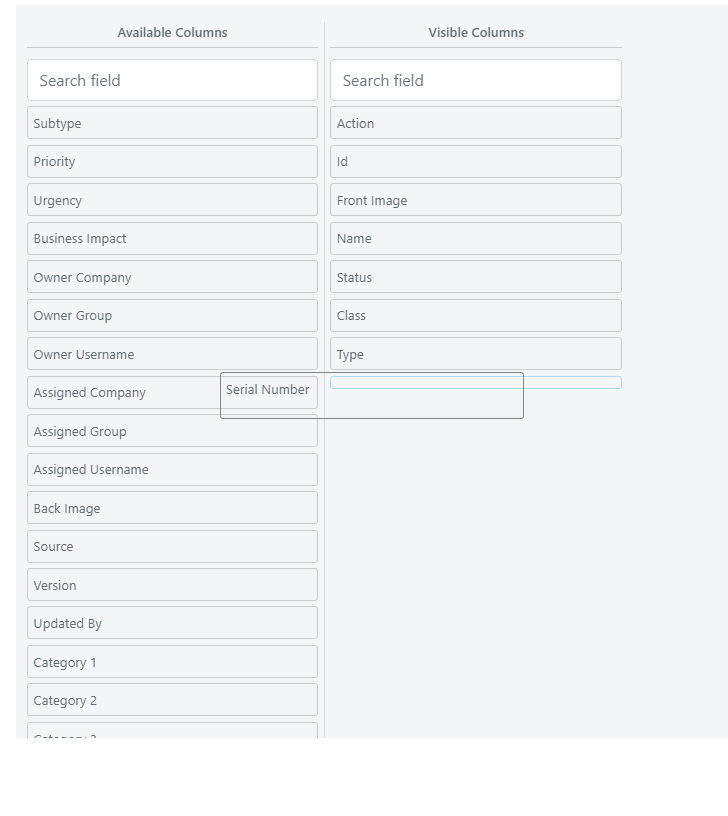
Here, you can insert new fields in the grid by dragging them from the “Available Columns” column to the “Visible Columns” column.
As per the image below.
In addition, from here it will be possible to modify what will be visible through the configuration of the query builder, in the example below we want to make visible only those that belong to the “Locations” class.
Note that these configurations will apply to all end users, to make a more granular configuration it will be possible to implement a custom script, as we will see in the next lessons.
