

Configuring Routing Rules
In Deepser you can create rules to manage automatic ticket assignments, this technology in Deepser is called Routing Rules.
You can exclude a specific ticket from the routing mechanism by using the “Disable Routing” flag, this field is not by default exposed in the formtemplate but is present between the system fields.
Configuring a Routing Rule
To configure a Routing Rule, you will need to go to the menu: System -> Service Design -> Routing.
At this point, you will need to click on the “New Rule” button.
The following screen will then open:
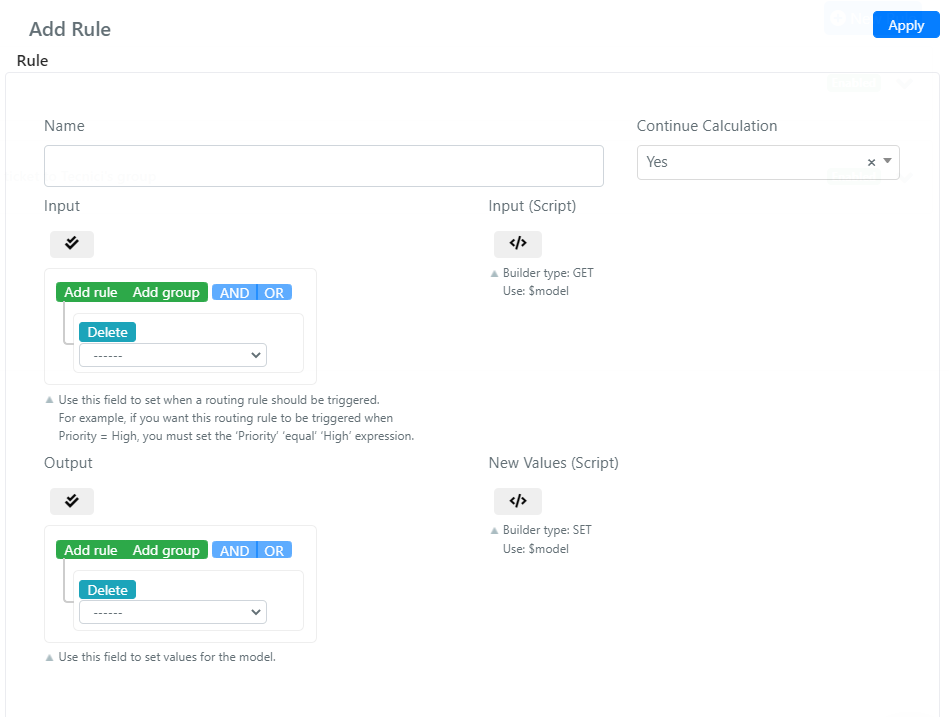
Below are the fields and their Meaning:
| Name | Description |
| Name | This will be the name we will give to our Routing rule. |
| Continue Calculation | This field will indicate whether after evaluating this rule and obtaining a positive result from it, you should continue to process the other routing rules. |
| Input | This field is a query builder that allows you to filter tickets by defining under what conditions this rule should be applied. |
| Input (Script) | This is the corresponding scripting side of the input field; it allows you to programmatically define the conditions to be verified on the tickets for them to be processed by this rule. |
| Output | This field is a query builder that allows you to define the ca values to be configured on the ticket if and only if it meets the conditions provided in the input field and / or in the Input field (Script). |
| New Values (Script) | This is the corresponding scripting side of the input field; it allows you to programmatically define the values to be set on the ticket if and only if it complies with the conditions provided in the input field and / or in the Input field (Script). |
Routing Rule Creation Sample
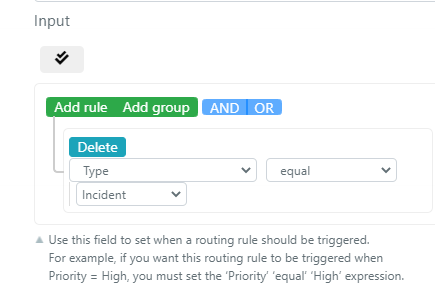
Suppose we want to assign to the user “SYSTEM ADMIN” all the tickets of type “Incident” (id: 1)
To configure a Routing Rule, you will need to go to the menu: System -> Service Design -> Routing.
At this point you will need to click on the “New Rule” button.
The following screen will then open:

In the field “Name” we enter “Assign To Admin Every Incident”.
Now let’s configure the query builder “Input” like this:
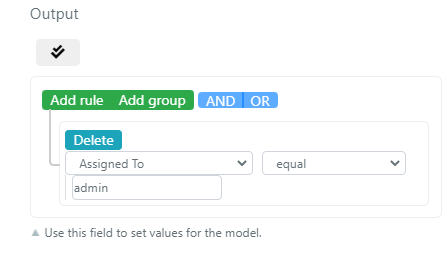
We configure the query builder “Output” as follows:
At the end, we click the “Save” button.
To enable the rule on the main screen of the routing rules, we must click on the word “Disabled” in correspondence with the rule we want to enable. To deactivate a specific rule, we must do a similar procedure on the word “Enabled”.
