Deepser Deepser
  • Documentation
Start Free Trial
Deepser Deepser
Start Free Trial
Deepser
  • Documentation
loading
  1. Home
  2. Documentation
  3. Email Integration
  4. OAuth Client for Email Integration
Updated on December 6, 2023

Documentation

  • Access and Visibility
    • End Users Visibility Overview
    • Creating a new user
    • Visibility management in Deepser
    • Company Supervisors
    • Additional Companies
    • LDAP Configuration
    • New User Registration
    • SSO Deepser Configuration
    • Azure SSO Configuration of Deepser Login
    • Groups
    • Groups Creation
    • Manage Users in Groups
    • Permission and Visibility Handling
    • Groups and Rules Definition
    • Roles
    • Resources
    • Creating and Managing Roles in Deepser
    • Company
    • Companies in Deepser
    • Company Creation
    • Parent Companies
    • Email Domains
    • Sync Account CRM Companies
    • Advanced Sync
  • Activity, Worklogs & Comments
    • DeepActivity Comments
    • Placing a comment
    • Comments System Configuration
    • DeepActivity Worklog
    • Entering a Worklog
    • Enabling Worklogs in the User Portal
    • Worklog Global Grid
    • Worklog Global Grid Configuration
    • Activity Global Grid Advanced Configuration
  • Board
    • Enable groups to create boards
    • Creating a FreeForm Board
    • Creating and customizing a Lane
    • Entry Creation
    • Board Live
    • Live Board Creation
    • Advanced Live Board Configuration
    • Creating and customizing a Lane
    • Creation and Advanced Configuration of a Lane and Drop Code
  • Categories
    • Categories in Deepser
    • Category Hierarchy
    • Creating New Categories and sub-Categories in Deepser
    • Make a category visible in the Guest portal
  • Chat
    • Using the Chat
    • Enabling the Chat on Portals
    • Chat Rooms and Moderators
    • Public Chat
    • Configure a Public Chat Widget
  • CMDB
    • Deepser CMDB
    • Enable CMDB in the User Portal
    • User Portal CMDB Grid Configuration
    • Advanced Configuration of CMDB Grids
    • Class, Type and Subtype
    • Configuring a CI
  • CRM
    • Deep CRM
    • Creating an account in the CRM
    • Creating a contact in the CRM
    • Creating an opportunity in the CRM
    • Contact Types in CRM
    • Opportunity Types in CRM
    • CRM Lists
    • Sync Contacts and Accounts
    • Sales
  • Deepser API
    • API Notions
    • API Endpoint and URL
    • API Verbs and Format
    • API Authentication
    • API Main Methods
    • Retrieve
    • Multiple Retrieve
    • Create
    • Update
    • Delete
    • API Entities
    • API Company
    • User API
    • Group API
    • Service Operation API
    • Service Type API
    • Activity API
    • CMDB CI API
  • Deepser Foundamentals
    • Deepser Backend
    • Deepser User Menu
    • Deepser Navigation Menu
    • Global Search Usage
    • Deepser Home Page
    • Grids
    • Filters and Order
    • Export Data
    • Mass Action
    • Grid Creation and Cloning
    • Configuring Grids
    • Grids System Configuration
    • Advanced Collection Configuration
    • Mass Action Configuration
    • Grids Render and Options Configuration
    • Grids Renderer Tooltip Example
    • Grids Renderer Link Example
    • Grids Custom Options Configurations
    • FormTemplates
    • FormTemplates Structure and Buttons
    • Form Template Theory
    • Form Template Selection and Creation
    • Form Template Configuration
    • Form Template Structure Configuration
    • Formtemplates Fieldset Configuration
    • Formtemplates Buttons Configuration
    • Formtemplates Field Configuration
    • Custom Button Configuration
    • Buttons Conditional Hiding
    • Advanced Form Template Rules
    • User Portal
    • Browsing the user portal
    • Managing Tickets in The User Portal
    • User Portal Additional Features
    • Configuring Portal Groups
    • Configuring Portal Requests
    • Configuring Service Operations in the User Portal
    • Enabling Other Modules in the User Portal
    • Enabling Other Modules in the User Portal Grid
    • Guest Portal
    • Enabling the Guest Portal
    • Guest Portal Visibility Configuration Overview
    • Enabling Service Types on the Guest Portal
    • Adding a Portal Group in the Guest Portal
    • Adding a Portal Request in the Guest Portal
    • Editing Form Templates in the Guest Portal
    • Enabling Categories in the Guest Portal
    • Enabling Notifications for Guest Users
    • Knowledge Base in the Guest Portal
    • CMS in the Guest Portal
  • Email Integration
    • Email Integration in Service Management
    • Enable Embedded Images on Message Body
    • Mailbox
    • Configuring an Outgoing Mailbox
    • Configuring an Incoming Mailbox
    • OAuth Client for Email Integration
    • Email Loop Management Tool
    • AZURE OAUTH CLIENT
    • Email Rules
    • Email Rule Configuration
    • Advanced Email Rule Configuration
    • Avoid Duplicate Tickets By Email
    • Managing additional Email recipients
    • Email Events
    • Enabling / Disabling an Email Event
    • Custom Email Events Creation
    • Custom Email Events Configuration
    • Attach Report to Email Notification
    • Email Templates
    • Email Template Configuration
    • New operation notification template for Requester User
    • New or Updated comment notification template for Requester
  • Escalation
    • Escalation rule levels
    • Configuring Escalation Rules
    • Configure an escalation rule that modifies entity.
    • Escalation rule that sends an email notification
    • Create an escalation rule that is based on a metric
    • Configure an escalation rule that generates other entities
  • Importing Data
    • Import Foundamentals
    • Import Creation
    • Import Basic Data Binding
    • Import Before Run
    • Import Before Run Tutorial
    • Import Before Row
    • Import Before Row Tutorial
    • Import After Row
    • Import Binding The Unique Field “Code”
    • Import Binding the Type Value
    • Import Binding the Dates Values
    • Import Binding a Company, creating the record if it doesn’t exist
  • IT Asset Management
    • ITAM Devices and Software
    • ITAM Agents
    • ITAM Agent Installation
    • ITAM Remote Collector
    • ITAM Agent to Remote Collector Conversion
    • ITAM Job Rules
    • ITAM Device Type and Subtype Configuration
    • Scan Jobs
    • Ping Sweep
    • SNMP Scan
    • WMI Job – Windows Devices
  • Knowledge Base
    • Reading the Knowledge Base
    • Knowledge Base in Service Operations
    • Article Configuration in Knowledge Base
    • Knowledge Base Configuration
    • Knowledge Base Standard Filters
    • Knowledge Base Advanced Filters
  • List
    • Introduction to lists
    • Creating a new list
    • List Values and Model Visibility
    • Use a list as the basis of a custom field
  • Password Management
    • Configuring a Password
    • Using a Password
    • Private Password
    • Password System Configuration
    • Enabling Password Manager Portal
    • Custom Deeppassword fields
    • Password Audit
  • Relations
    • Using a Relation Grid field
    • Configuring a Relation
    • Modifying relation using a custom event.
    • Opposite relation
    • Column Configuration
  • Service Management
    • Introduction to Services in Deepser
    • Service Operations
    • Creating a Service Operation
    • Adding Comments, Activities, Attachments and Tasks to Operations
    • Service Operation Main Fields
    • Service Operation Additional Fields
    • Service Operation Activities, Relations, Email and SLAs
    • Service Types
    • Routing rules
    • Configuring Routing Rules
    • Advanced Routing Configuration
  • SLA
    • Calendar
    • Metrics
    • Goal
  • Task
    • Creation of task type
    • Form configuration of task types
    • Task Global Grid
    • Task Global Grid Configuration
    • Task Global Grid Advanced Configuration
  • Workflow
    • Workflow Overview
    • Flow Designer
    • Flow Trigger
    • Workflow – Stage Set
    • Workflow – Executions
    • Approval workflows
    • Portal Approval Structure
    • Empowered End User
    • Backend Approval Structure
    • Workflow Actions
    • Workflow Logic
    • Workflow Samples
    • Multi Stage Flow
    • SubFlow

OAuth Client for Email Integration

Estimated reading: 4 minutes

Some systems require web applications, such as Deepser, to perform authorization before they can use their services.

Deepser allows you to configure multiple OAuth clients in order to authorize it , through the OAuth2 protocol, on different services.

CONFIGURATION

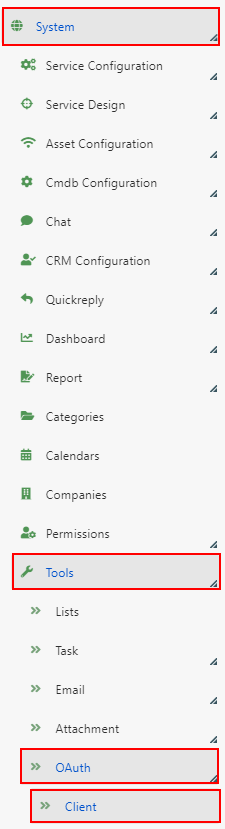
To configure an OAuth client in Deepser, navigate to the System-> Tools->OAuth->Client section.

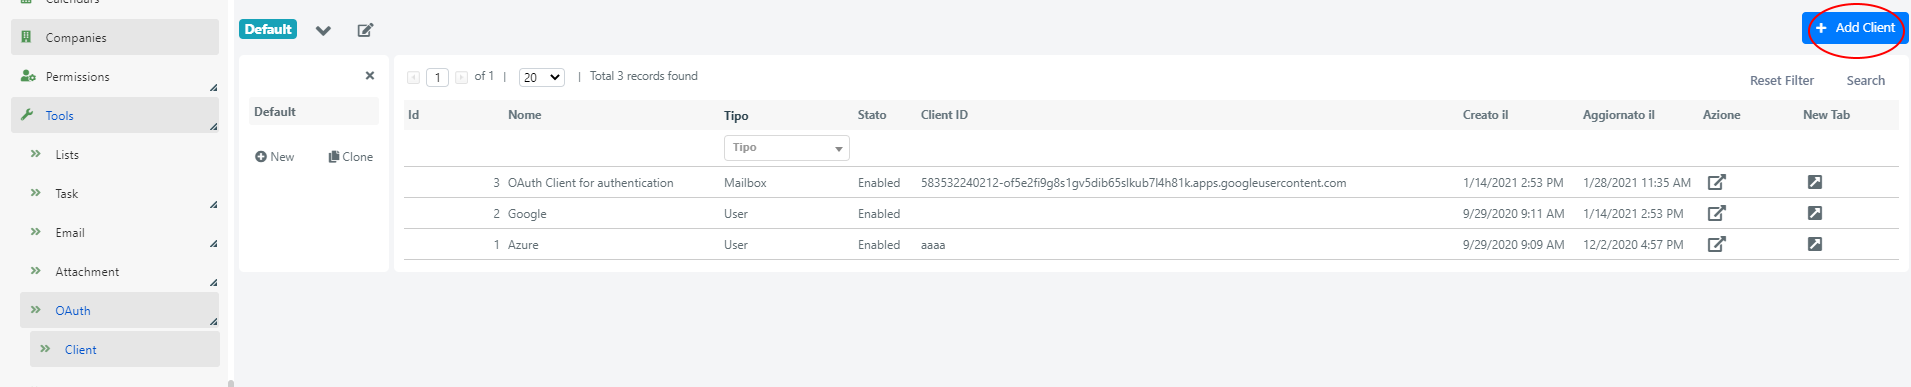
You will see a grid containing all oauth clients defined as Deepser.

To configure a new client click on the ‘+ Add Client’ button in the top right corner.

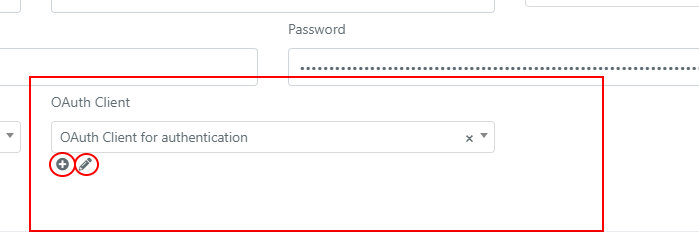
A new OAuth Client can be also created and configured from the configuration form of a mailbox.

Under the OAuth Client field, of the Select type, whose options are the already configured clients, clicking on the ‘+’ icon allows you to create a new client, while clicking on the ‘pencil‘ icon allows you to modify the configuration of the selected client.

The fields of the configuration form of an OAuth client are listed and explained below:

FIELDMEANING
Redirect UriDeepser Url from which Deepser which will send requests to the provider. The URL must be authorized in the administration panel of provider. The URL will appear once the client is saved. After saving, the ‘Validate‘ button will appear, by ckicking it you can authorize the client once its configuration is complete.
NameClient name. It represents a descriptive field with which the client will be displayed in the system.
ProviderProvider: Google, Azure, Generic. If you use Google or Azure as a provider the only other fields that must be filled are Client ID, Client Secret and status. Generic value is used to configure the authentication to all other providers.
Client IDPublic identifier for applications. It is provided by the provider, usually when a new application is authorized.
Client SecretSecret part of the authentication credentials. It is provided by the provider.
TypeType of data you want to access/recover.
ScopeScopes to which the application requires access. No need to fill it for Google or Azure providers, default values will be used.
Url AuthorizeIt is the ‘base URL’ of the Identity Provider that manages OAuth 2 authentication. No need to fill it for Google or Azure providers, default values will be used.
Url Access TokenThis is the ‘base URL’ to which the parameters for requesting the authentication token are added (post-authorization step). No need to fill it for Google or Azure providers, default values will be used.
ProxyIP address and port of any used proxy. It is not necessary for Google or Azure providers, default values will be used.
VerifyIf a proxy has been configured you can enable or disable the SSL check. No need to fill it for Google or Azure providers, default values will be used.
StatusIf ‘disabled’ the client is not active.
Scope Separator CharCharacter used to separate different scopes. Used during the construction of the request url. No need to fill it for Google or Azure providers, default values will be used.
Endpoint User DataIn case the OAuth configuration is User type and the User Data Source is set to ‘Endpoint’, once the authentication is done with the Identity Provider the user data is retrieved by connecting to this endpoint. No need to fill it for Google or Azure providers, default values will be used. No need to fill it for Email Box type.
Related LDAPsAny LDAP integrations already configured, whose users must be linked. No need to fill it for Email Box type, the default values will be used.
Username AttributeAttribute (field) that desctibe the user’s username. No need to fill it for Google or Azure providers, default values will be used. No need to fill it for Email Box type.
User FieldsMaps the user (Deepser entity) attributes to those retrieved from the specified user data endpoint. No need to fill it for Google or Azure providers, default values will be used. No need to fill it for Email Box type.
User Create ExpressionPHP code for configuring the user creation, for example in case of an SSO integration. No need to fill it for Email Box type.
Login Button CaptionButton label for access via SSO. No need to fill it for Email Box type.
Login Button IconIcon displayed on the SSO authentication button. No need to fill it for Email Box type.
Access TokenThis field is not filled out in the form for security reasons. It contains the serialized access token.
Original Access TokenThis field is not filled out in the form for security reasons. It contains the serialized access token.

Once the form has been completed and the OAuth client configuration has been re-saved, you can validate it.

Just click on the ‘Validate‘ button that will appear once the client is saved for the first time.

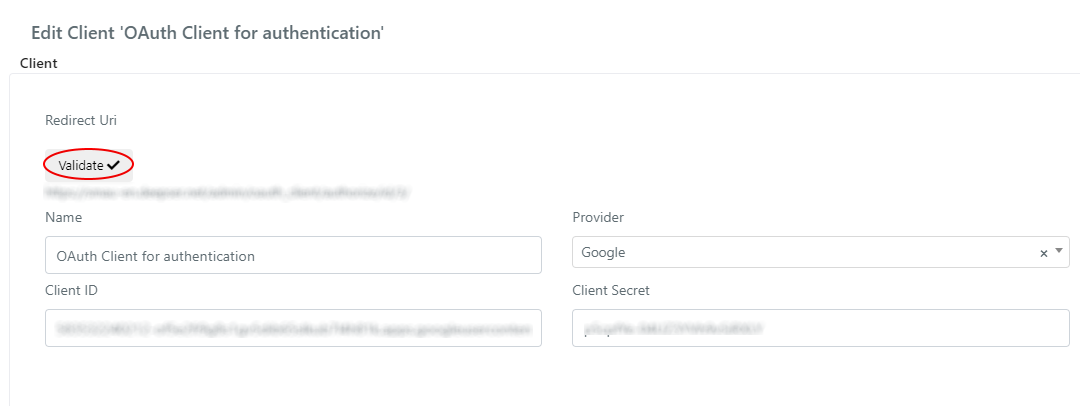
Authenticate on Provider through the form that will appear, once logged in the client is authorized.

Was this guide helpful? Yes No

Share this Doc

OAuth Client for Email Integration

Or copy link

Clipboard Icon
CONTENTS
Leaf Illustration

Deepser srl
Via Luigi Dalla Via 3/B,Torre A, piano 7, int. 12
36015 Schio (VI), Italy

© Deepser. All right reserved.