Workflow Actions

By definition, an action is a way, technique, or process of or for doing something.
In order to create a workflow process, preconfigured recurring actions can be helpful.
In this course we will cover how to use actions into the Flow module inside Deepser.
Lookup Record
If you want to get a record inside a Deepser model or entity in your workflow process, all you need is the action “Lookup Record” inside your workflow.
After opening your workflow process inside the “Flow” module, to add the action “Lookup Record” inside the FLOW section:

Then the following screen will open:
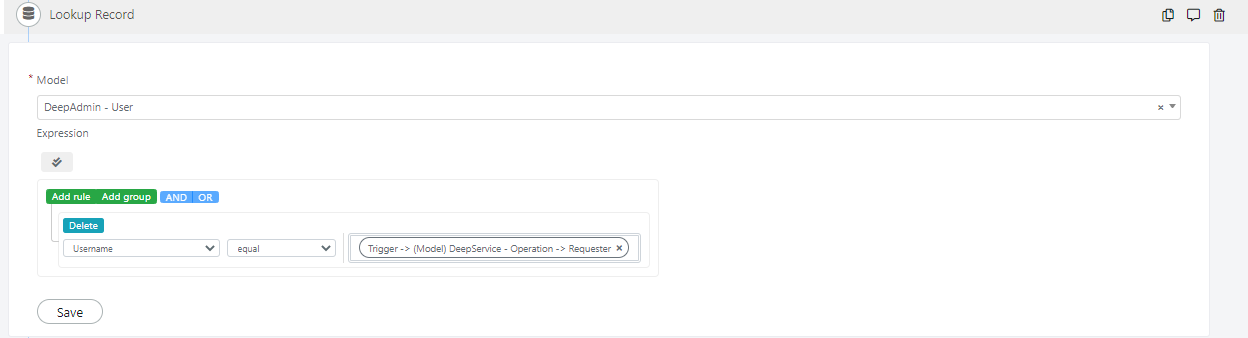
In our example, we want to get the record of the user that has created the ticket.
We choose the model “DeepAdmin – User” to get the entity of the user and then we set the expression or condition to filter the query.
In our case, we want to get the username equal to the Requester user of the ticket, from the trigger event.
Create Record
If you want to create a record in your workflow process, all you need is the action “Create Record” inside your workflow.
After opening your workflow process inside the “Flow” module, to add the action “Create Record” inside the FLOW section:

Then the following screen will open:
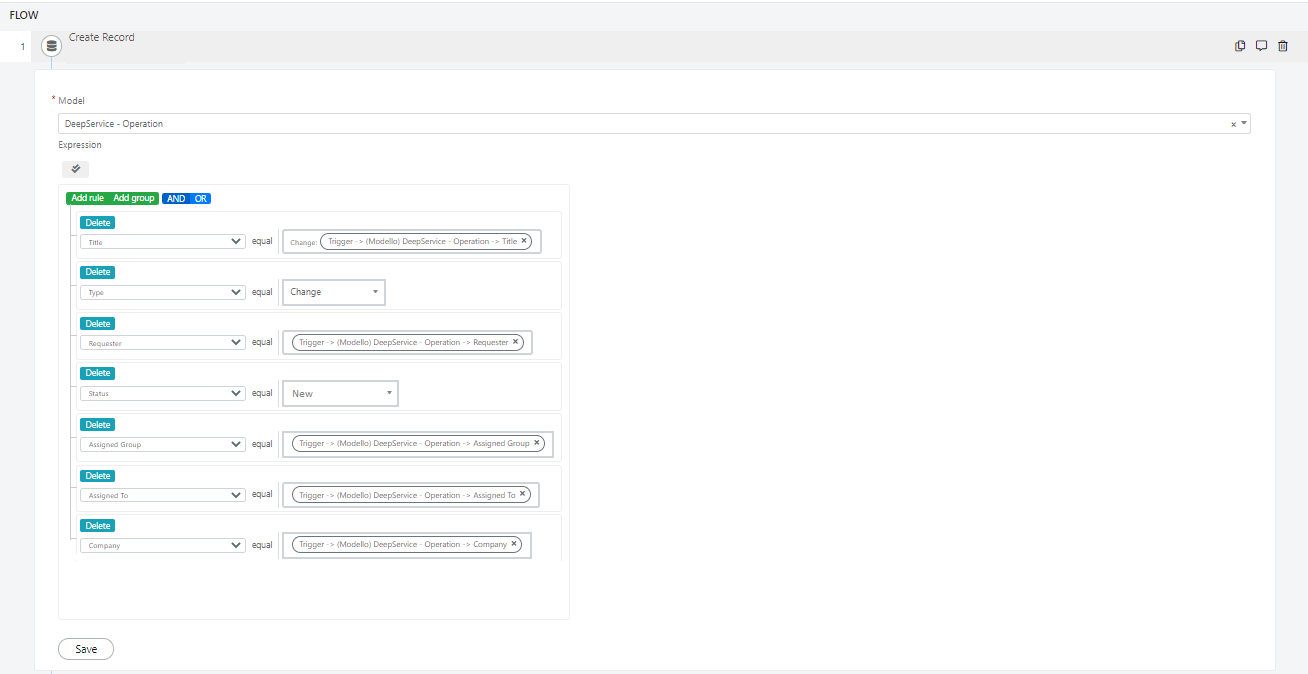
In our example, we choose the model “DeepService – Operation” because we want to create a new Operation (or ticket).
Inside the expression we set the “Type” field equal to the Service Type “Change” and we set the “Status” field equal to “New”.
In our case, the final outcome will be the creation of a new Change request with some precompiled fields.
All the variables were dragged and dropped from the right section inside the trigger variables.
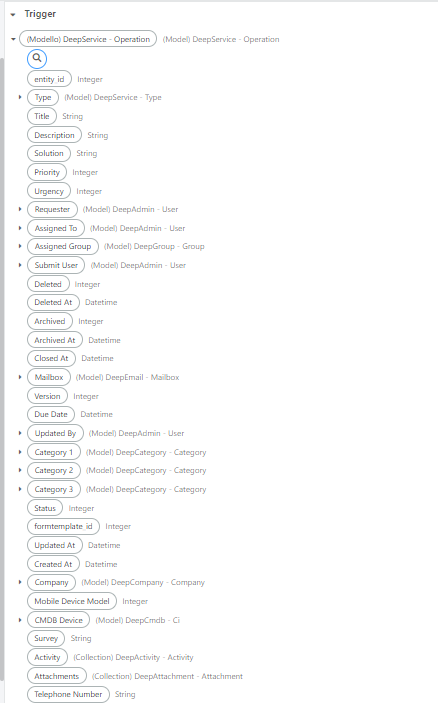
For example, the “Title” and the “Requester User” of the new change were taken from the Operation that has triggered the process.
Update Record
If you want to update a record in your workflow process, all you need is the action “Update Record” inside your workflow.
After opening your workflow process inside the “Flow” module, to add the action “Update Record” inside the FLOW section:

Then the following screen will open:
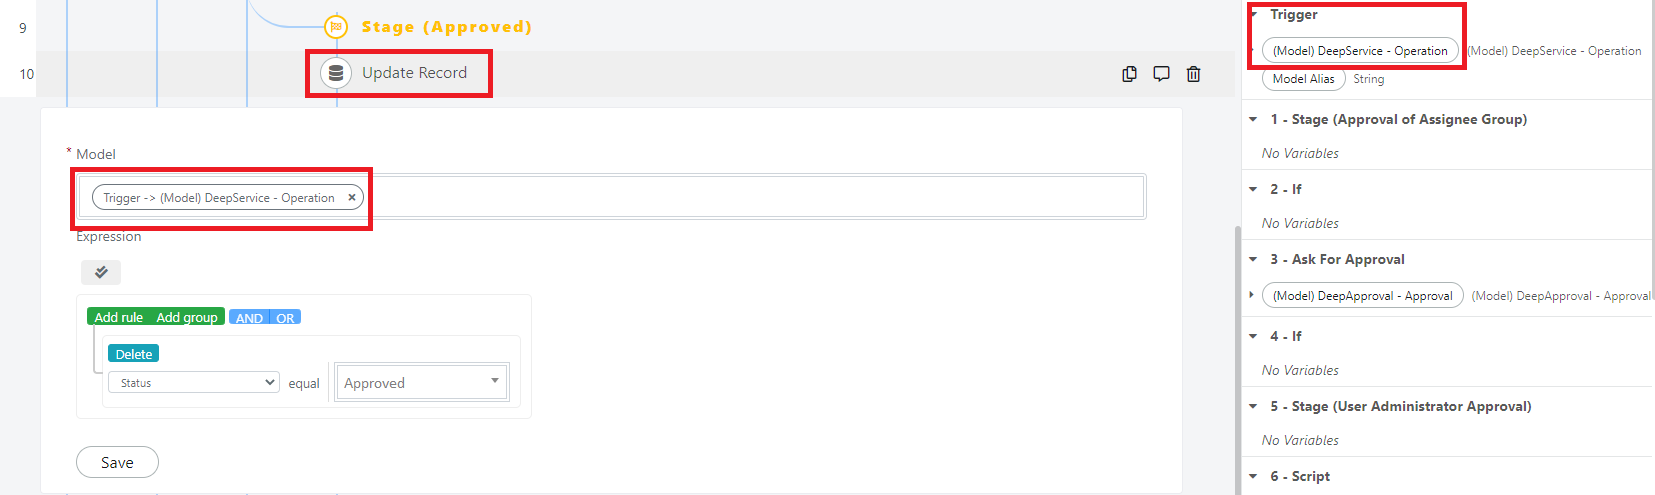
For example, before the approval process ends, you want to update the status inside your ticket or Operation and set it as “Approved”.
In our example, we choose the model Operation in which we want to update the record (dragged and dropped from the right section inside the trigger variables).
In the Expression section we set the field “Status” equal to “Approved”.
Send Email
If you want to send an email inside your workflow process, all you need is the action “Send Email” inside your workflow.
After opening your workflow process inside the “Flow” module, to add the action “Send Email” inside the FLOW section:

Then the following screen will open:
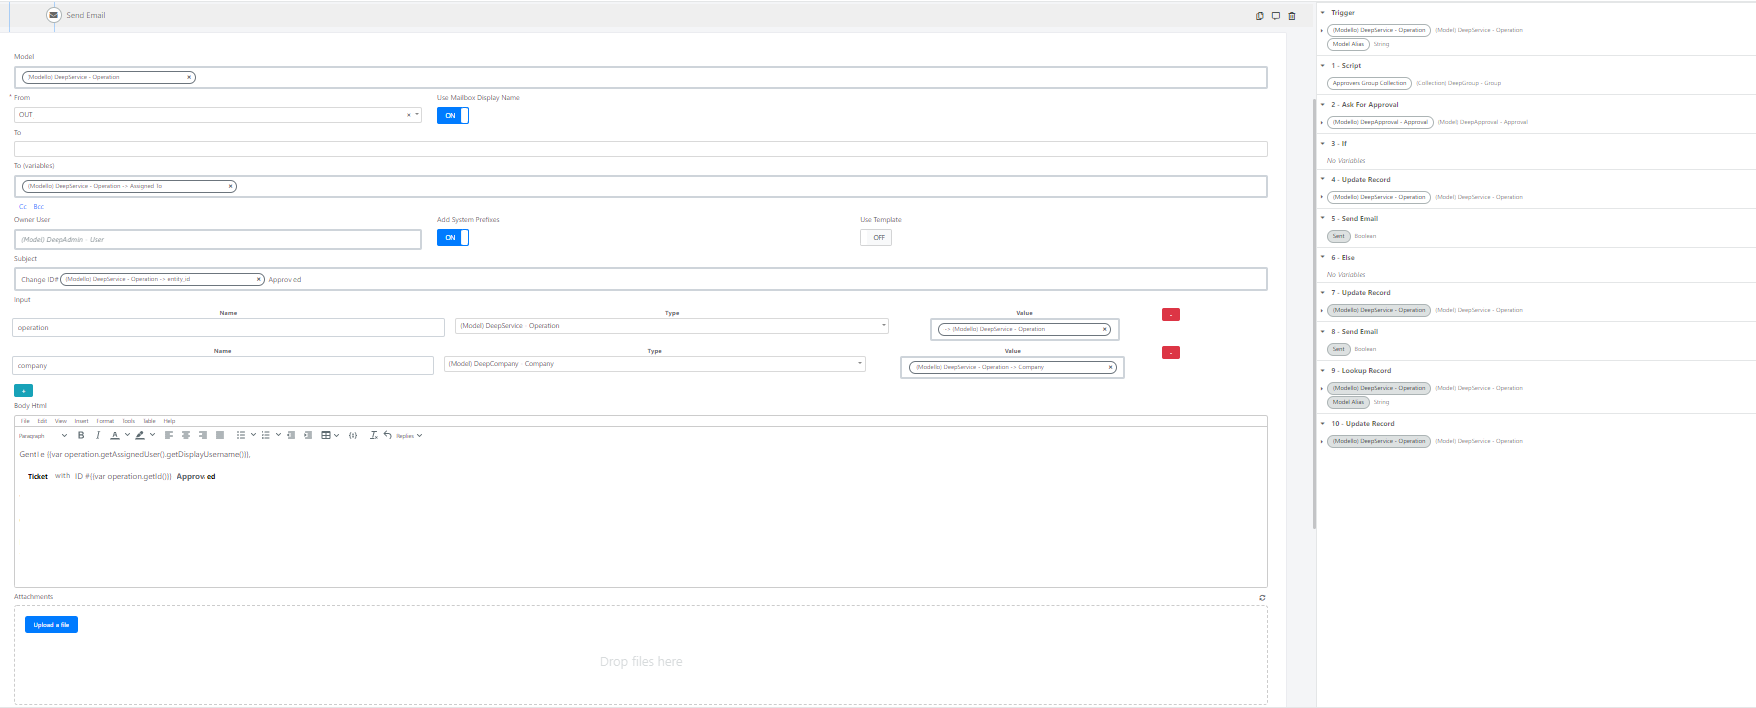
Inside each field we set
| Name | Value | Note |
| Model | DeepServiceOperation | We set this model to take some variables that we need to send by email |
| From | Out | We set the Outgoing mailbox |
| To(Variables) | Assigned To (from DeepServiceOperation) | We want to send an email to the Assigned User of our Operation |
| Subject | Change Id #(entityId) Approved | We set the Subject of our mail including the ID of the ticket |
Inside the “Input” section we are going to set the Name of the variable, the Type of the Deepser model or entity and the Value of the Deepser model or entity that we want to use to create our body Html message.
Inside the “Body Html” section we are going to create our message that we want to show to the receiver.
Ask For Approval
If you want to create an Accept/Refuse request to the approval user/group inside your approval workflow and you want to send it into the Deepser portal or to send it by email, all you need is the action “Ask For Approval” inside your workflow.
After opening your workflow process inside the “Flow” module, to add the action “Ask For Approval” inside the FLOW section:
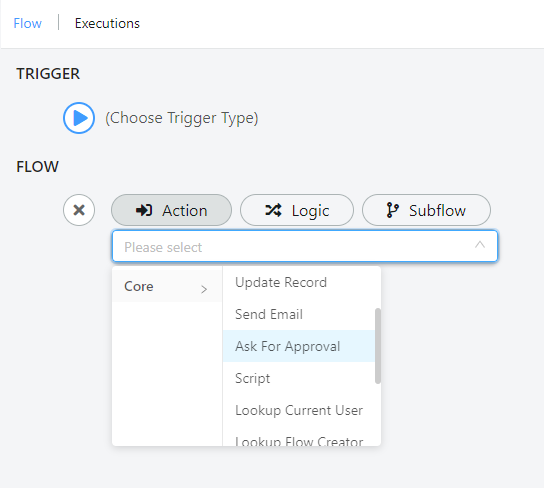
Then the following screen will open:
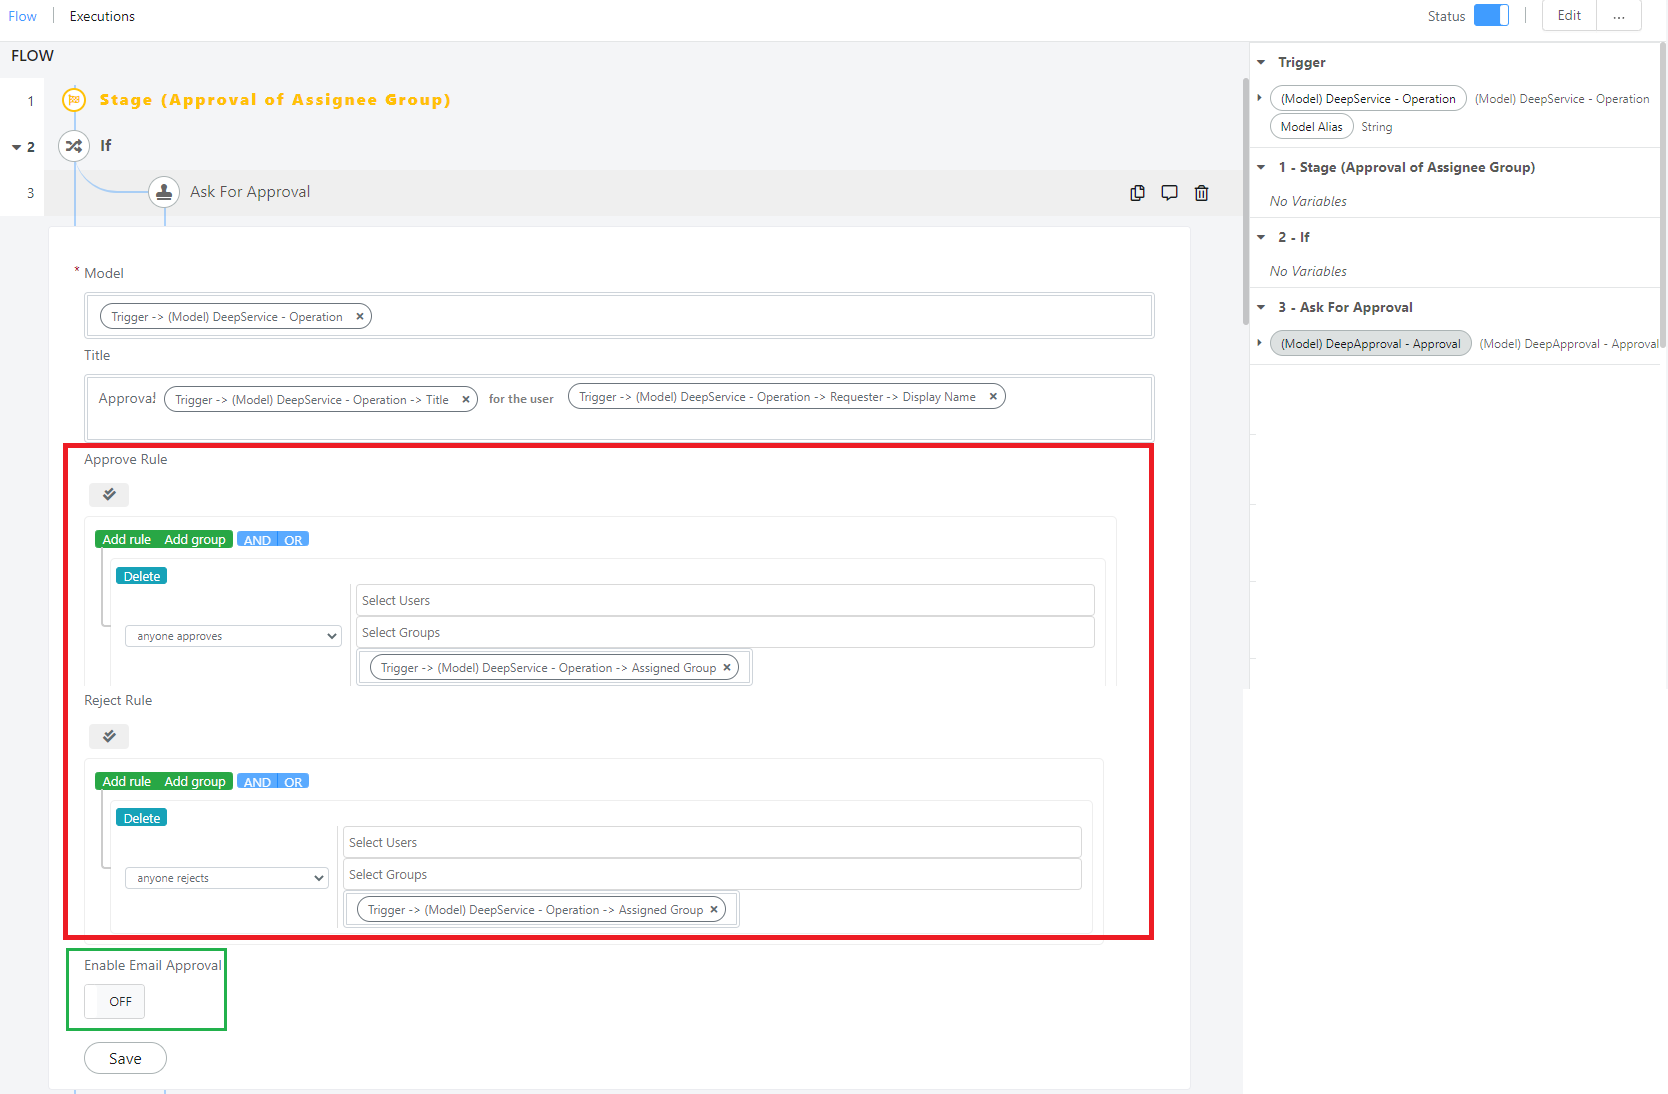
For example, we want to ask to a group of people to approve a service request, opened by some user.
In our example, we choose the model Operation or “ticket” in which we want to take some variables (dragged and dropped from the right section inside the trigger variables).
In the “Title” section we can write some text and show some variables from the ticket.
In our case, we take the Title and the Requester User related to the ticket from the trigger section.
In the “Approve Rule” section we can choose how the approval process can be approved and we choose to send the request to the Assigned Group assigned to the ticket (or Operation).
Inside the query builder we can find some options:
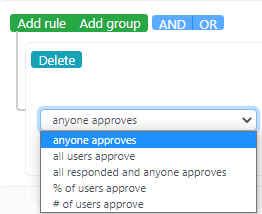
| Name | Description |
| anyone approves | any user or group chosen can approve the request |
| all users approve | all users chosen need to approve the request |
| all responded and anyone approves | |
| % of users approve | the chosen percentage of users need to approve the request |
| # of users approve | the chosen number of users need to approve the request |
In the “Reject Rule” section we can choose how the approval process can be refused and we choose to send the request to the Assigned Group assigned to the ticket (Operation).
Inside the query builder we can find some options:
| Name | Description |
| anyone rejects | any user or group chosen can reject the request |
| all users reject | all users chosen need to reject the request |
| all responded and anyone rejects | |
| % of users reject | the chosen percentage of users need to reject the request |
| # of users reject | the chosen number of users need to reject the request |
This configuration allows you to send the request through the Deepser portal.
If you want to send it by email, you need to enable the flag “Enable Email Approval”.
Log Action
If you want to display a message inside your workflow, all you need is the action “Log” inside your workflow.
After opening your workflow process inside the “Flow” module, to add the action “Log” inside the FLOW section:
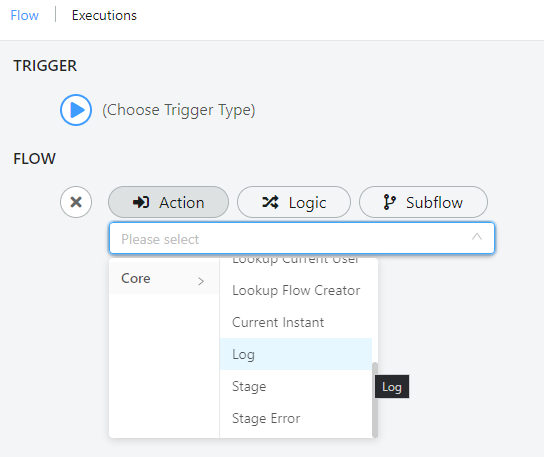
Then the following screen will open:

For example, inside our workflow we want to display the message:
“The status of the ticket with #ID was not modified”
In our example, we choose the Model Operation to get the entity ID of the ticket (variable dragged and dropped from the right section) and write some text to show our message.
This message will be visible after the execution of the workflow inside the “Execution” tab across the log section. The log file can be also downloaded.
Note: Logs will be visibile only if the flag “Enable Log” inside the Flow Properties is enabled (see article)
Stage Action
If you have divided your workflow into several steps with the module “Stage Set” and you want to add into your workflow the steps that you have created, all you need is the action “Stage” inside your workflow.
After opening your workflow process inside the “Flow” module, to add the action “Stage” inside the FLOW section:
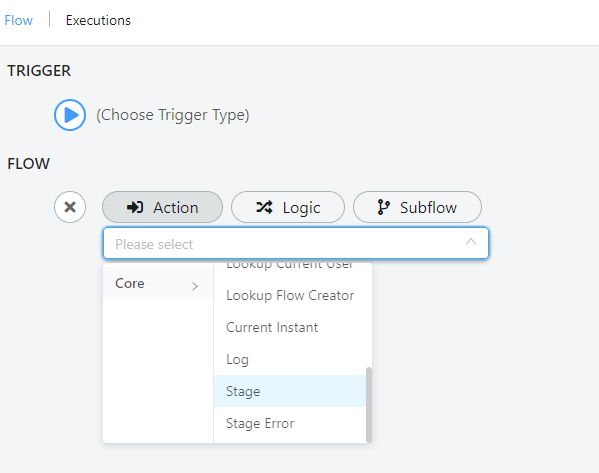
Then the following screen will open:
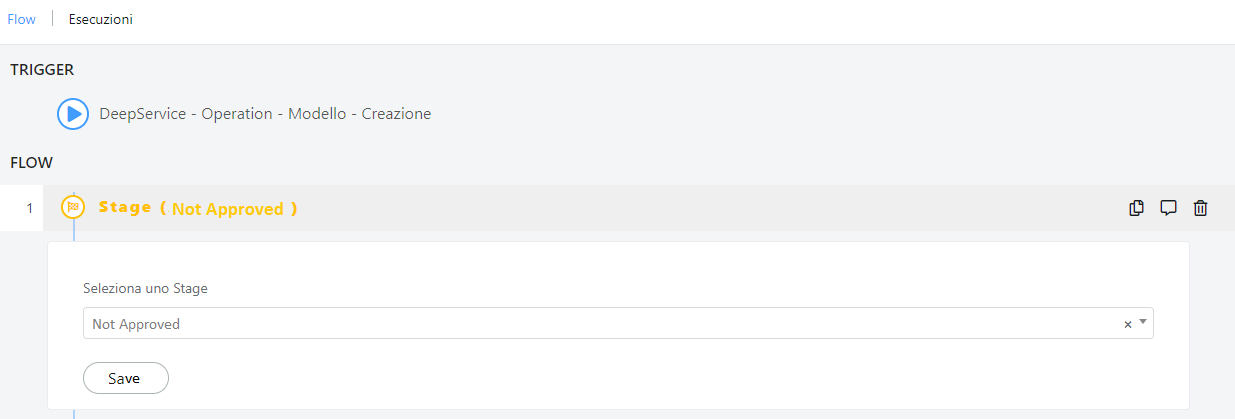
The final outcome will be:

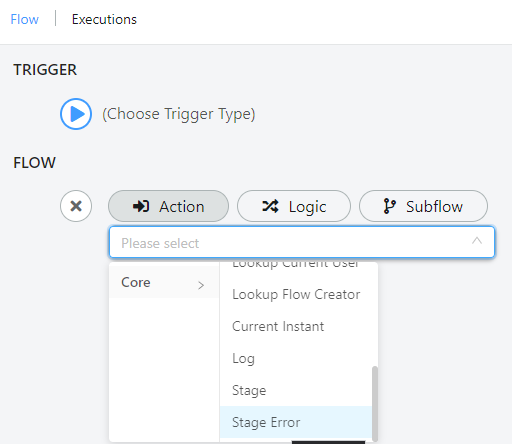
Stage Error
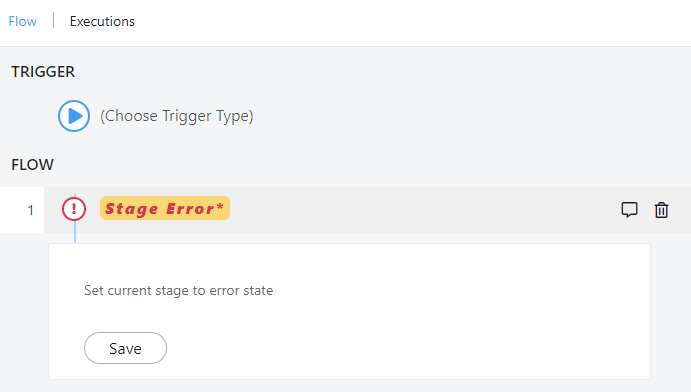
If you have divided your workflow into several steps with the module “Stage Set” and you want to add into your workflow another step where you want to display an error stage, all you need is the action “Stage Error” inside your workflow.
After opening your workflow process inside the “Flow” module, to add the action “Stage Error” inside the FLOW section:
Then the following screen will open: