

Configuring a Relation
In Deepser, you can configure an entity relationship.
To do this you will need to go to the menu: System->Relations.
In the screen that will open you will need to click on “Add Relation”.
At this point the following screen will open:
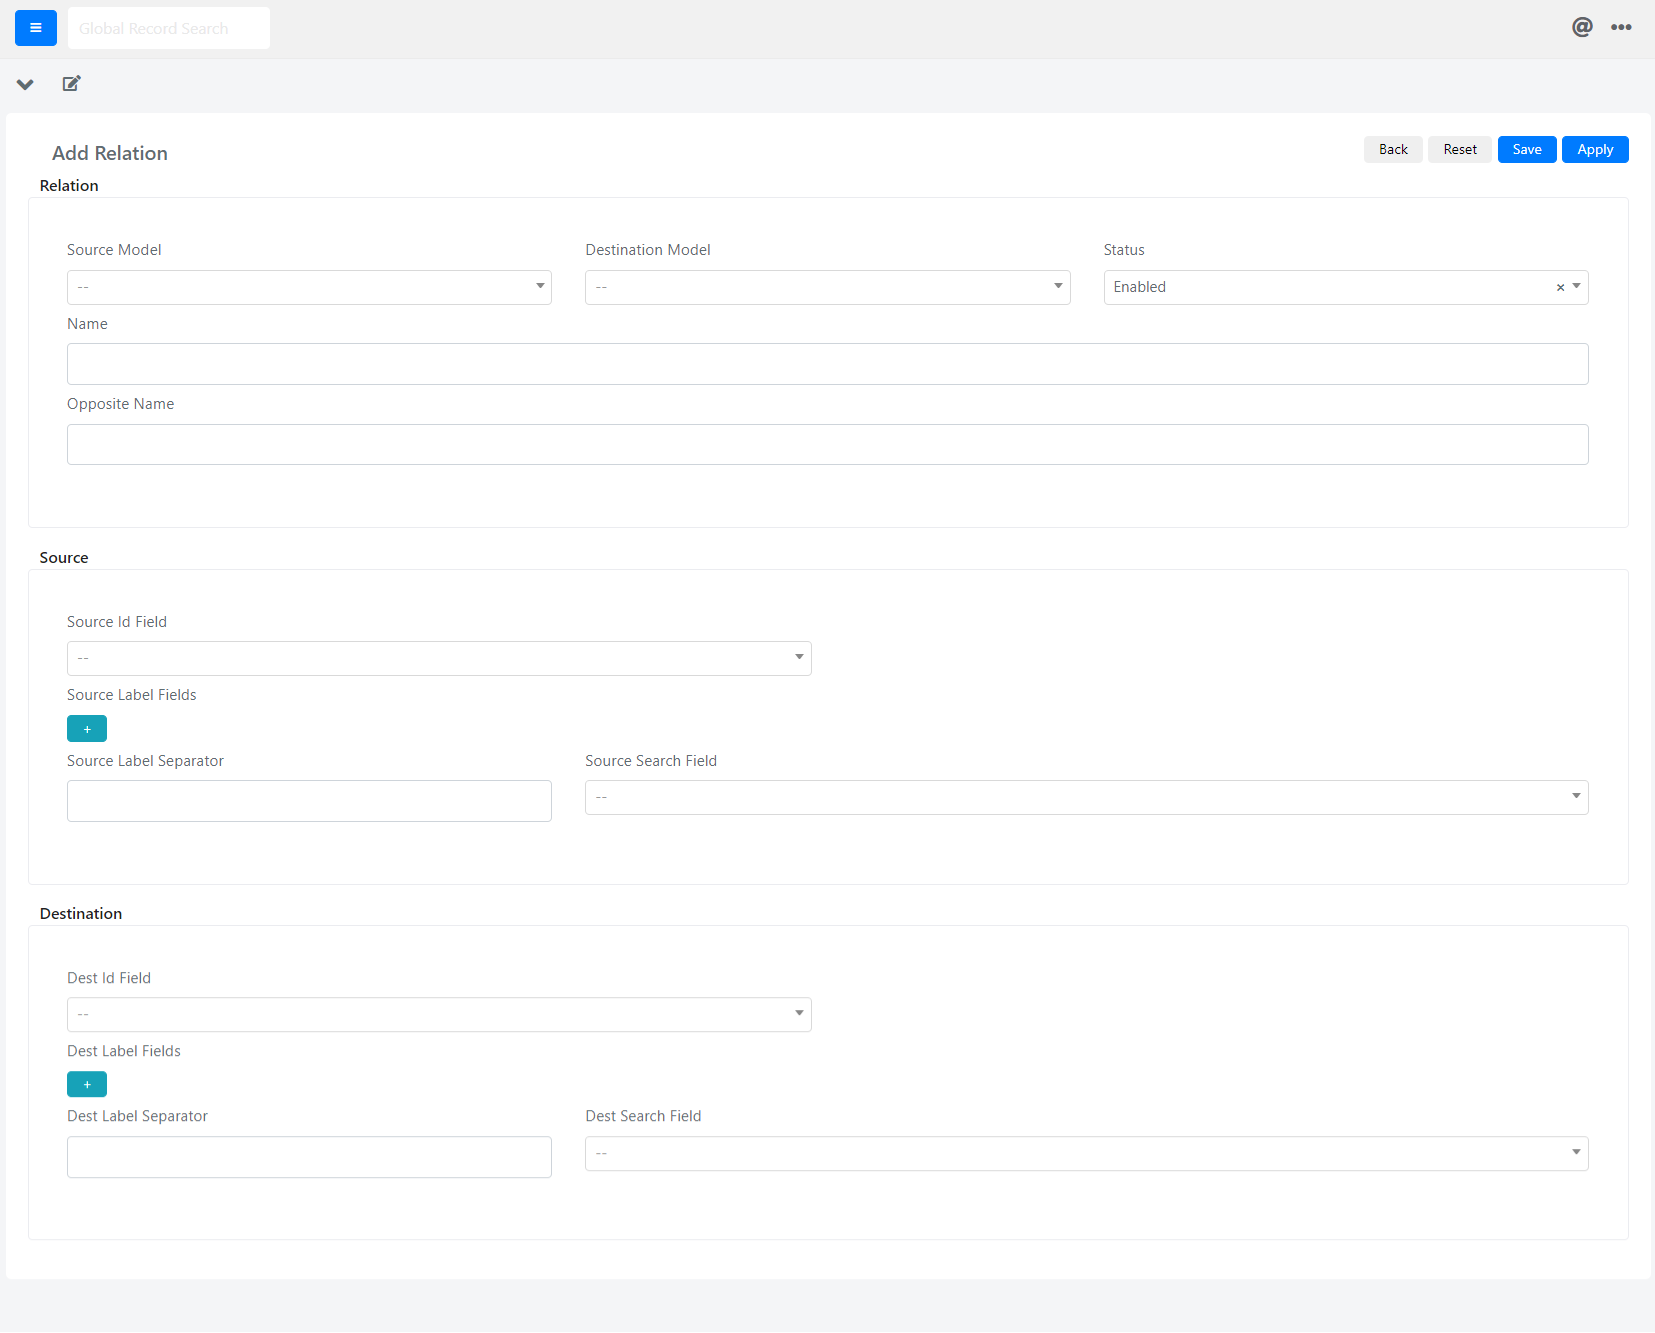
Below are the fields with their meaning:
| Field | Description |
| Source Model | Main model of the relation |
| Destination Model | The target (or related) model of the relation. |
| Status | Status of the relation. If “Enabled” then it will be visible and usable otherwise it will not be visible and usable. |
| Name | Relation name, from Destination to Source Model |
| Opposite Name | Inverse relation name, from Source to Destination Model |
| Source Id Field | Here we are setting which field must be used to identify the source model. For example, we can choose “entity_id”. |
| Source Label Fields | Here we are setting which fields we want to show up in the source relation grid. For example, we can choose “Name”. |
| Source Label Separator | Here we are setting the separator of the label fields in the source relation grid. |
| Source Search Field | Here we are setting which field must be used to search the source model. For example, we can choose “Name”. |
| Dest Id Field | Here we are setting which field must be used to identify the destination model. For example, we can choose “entity_id”. |
| Dest Label Fields | Here we are setting which fields we want to show up in the destination relation grid. For example, we can choose “Name”. |
| Dest Label Separator | Here we are setting the separator of the label fields in the destination relation grid. |
| Dest Search Field | Here we are setting which field must be used to search the destination model. For example, we can choose “Name”. |
EXAMPLE CONFIGURATION OF A RELATION
In this guide, we are going to configure a relationship between an operation and the Ci.
To do this, you will need to go to the System -> Relations menu.
At this, we click the “Add Relation” button.
In the screen that will open, we will set the field “Source Model”: “DeepCmdb – Ci” and in the field “Destination Model”: “DeepService – Operation”.
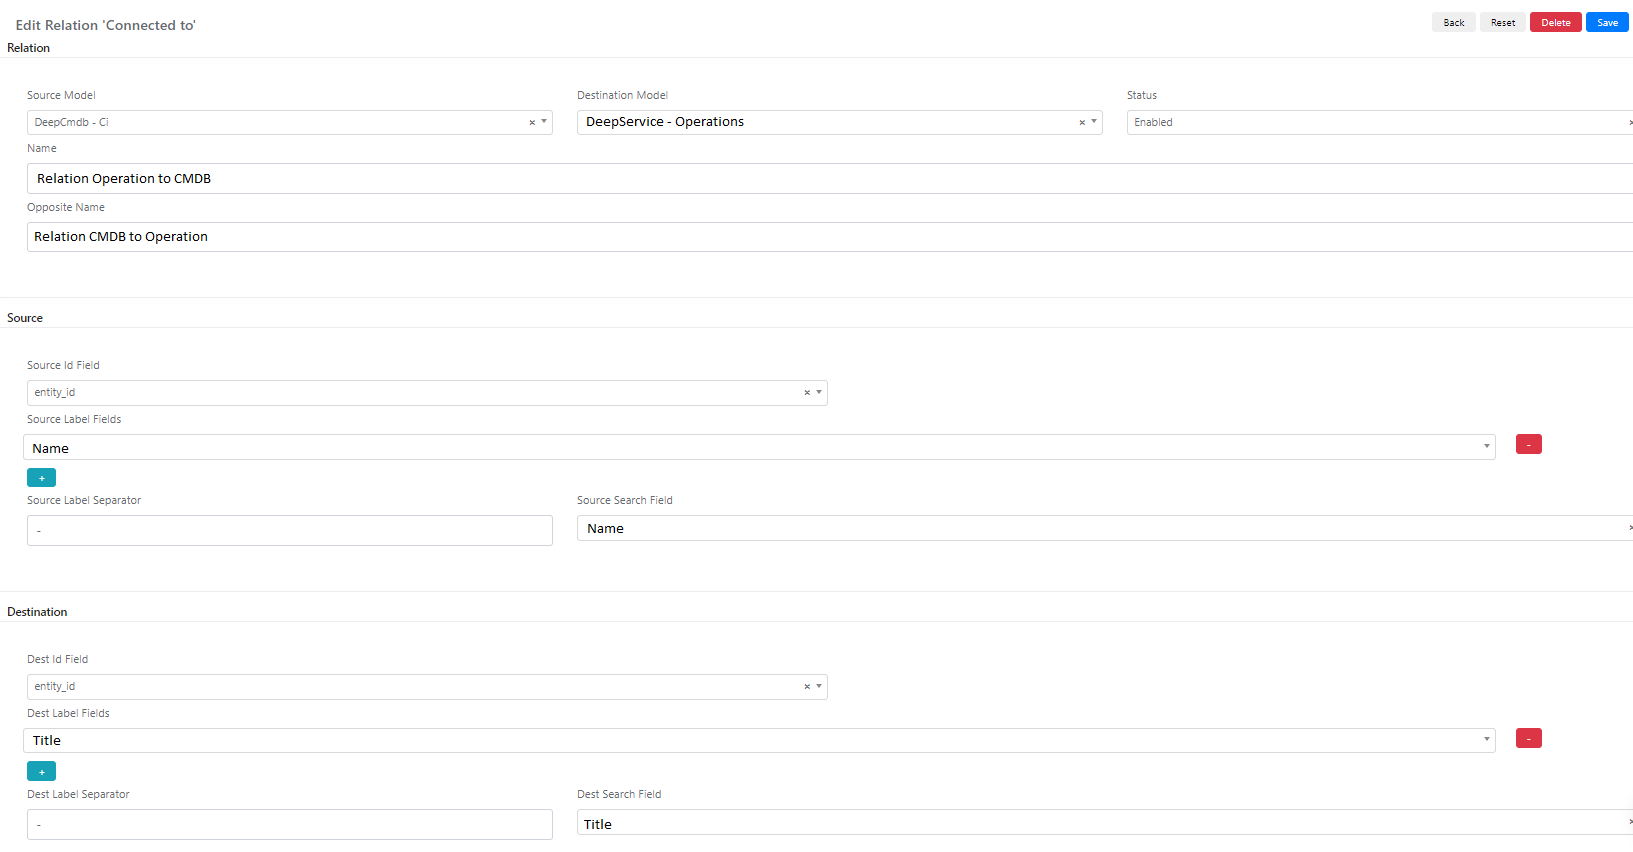
In the “Name” field we will enter the name we want to give to the relation.
In the “Opposite Name” field we set the name for the opposite relation. For example, if we want to link an element of the CMDB to a ticket, we need to use the opposite relation.
Now, in the “Source” section we configure the “Source Id Field” field with the value “entity_id” and “Source Search Field” and “Source Label Field” field with “Name”.
Finally, in the “Destination” section we set the “Dest Id Field” field with the value “entity_id” and “Dest Search Field” and “Dest Label Field” field with “Title”.
As a last step, we must click on the “Save” or “Apply” button.
Relation Grid Creation
To create a relation grid, we need to create a custom field that will allow us to interact with the created relation.
To create the custom field, you need to go to System -> Custom Fields.
Here we will have to choose the model “DeepService – Operation”, in which we want to add the custom field.
Now we will have to go to the “Fields” section, here we will have to click on “Add field”.
The following screen will appear:
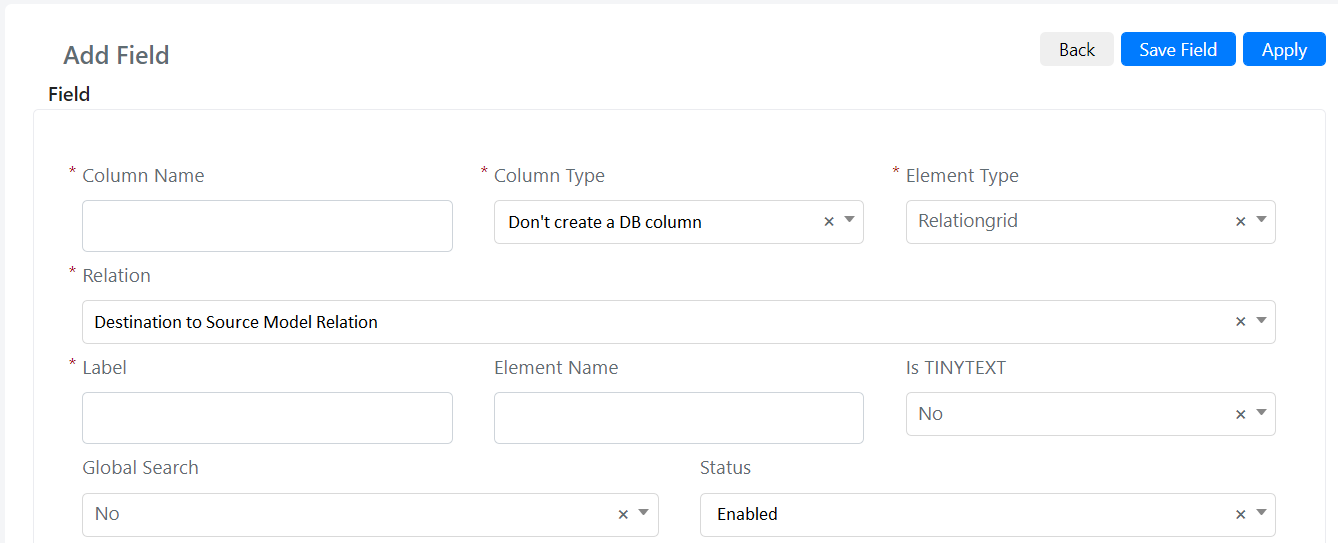
Inside “Column Name” field we set the field name we want to display. In this case “Relation Operation to CMDB “
In the “Column Type” field we set “Don’t Create DB Column”.
In the “Element Type” field we set “Relationgrid”, the type of element we want to create.
After these steps, in the “Relation” we select in the drop-down menu the relation that we have previously created.
Now you will have to click on the “Save” or “Apply” button.
Now, you can add this field called “Relation Operation to CMDB” to the form template of Operation.
For the configuration, see these article called “Form Template Configuration” and “Column Configuration“.
